本文主要是介绍PyTorch深度学习实践概论笔记9练习-使用kaggle的Otto数据集做多分类,希望对大家解决编程问题提供一定的参考价值,需要的开发者们随着小编来一起学习吧!
在文章PyTorch深度学习实践概论笔记9-SoftMax分类器中刘老师给了一个课后练习题,下载kaggle的Otto数据集做多分类。

0 Overview
先看看官网给的背景介绍。
The Otto Group is one of the world’s biggest e-commerce companies, with subsidiaries in more than 20 countries, including Crate & Barrel (USA), Otto.de (Germany) and 3 Suisses (France). We are selling millions of products worldwide every day, with several thousand products being added to our product line.
【奥托集团是世界上最大的电子商务公司之一,在20多个国家拥有子公司,包括美国的Crate & Barrel,德国的Otto.de和法国的3 Suisse。我们每天在全球销售数以百万计的产品,其中有几千种产品加入到我们的产品线中。】
A consistent analysis of the performance of our products is crucial. However, due to our diverse global infrastructure, many identical products get classified differently. Therefore, the quality of our product analysis depends heavily on the ability to accurately cluster similar products. The better the classification, the more insights we can generate about our product range.
【对我们产品性能的一致分析是至关重要的。然而,由于我们多元化的全球基础设施,许多相同的产品被分类不同。因此,我们产品分析的质量在很大程度上依赖于对相似产品进行准确聚类的能力。分类越好,我们对产品范围的了解就越多。】

For this competition, we have provided a dataset with 93 features for more than 200,000 products. The objective is to build a predictive model which is able to distinguish between our main product categories. The winning models will be open sourced.
【在这次竞赛中,我们为超过200,000个产品提供了包含93个特性的数据集。我们的目标是建立一个能够区分我们主要产品类别的预测模型。获奖的模型将是开源的。】
1 数据获取

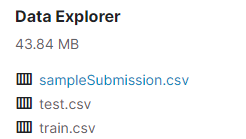
点击官网链接Otto Group Product Classification Challenge | Kaggle可以下载。
2 查看数据
先读取数据,然后查看一下数据情况。
import numpy as np
import pandas as pd
import matplotlib.pyplot as plt
#1.读取数据
otto_data = pd.read_csv("./otto/train.csv")
otto_data.describe()  #8 rows × 94 columns(id  feat_1 ... feat_93)otto_data.shape
train数据集一共61878行95列(包括上述特征和target),94个非字符型特征的简单描述统计结果如上图所示。
由于target是字符型变量,我们画图展示,代码如下:
import seaborn as sns
sns.countplot(otto_data["target"])
plt.show()
target一共9个类别。由于是字符型,定义一个函数将target的类别标签转为index表示,方便后面计算交叉熵,代码如下:
def target2idx(targets):target_idx = []target_labels = ['Class_1', 'Class_2', 'Class_3', 'Class_4', 'Class_5', 'Class_6', 'Class_7', 'Class_8', 'Class_9','Class_10']for target in targets:target_idx.append(target_labels.index(target))return target_idx3 构建模型
3.1 读取数据
import numpy as np
import pandas as pd
from torch.utils.data import Dataset, DataLoader
import torch
import torch.optim as optim#1.读取数据
class OttoDataset(Dataset):def __init__(self,filepath):data = pd.read_csv(filepath)labels = data['target']self.len = data.shape[0]self.X_data = torch.tensor(np.array(data)[:,1:-1].astype(float))self.y_data = target2idx(labels)def __getitem__(self, index):return self.X_data[index], self.y_data[index]def __len__(self):return self.lenotto_dataset1 = OttoDataset('./otto/train.csv')
otto_dataset2 = OttoDataset('./otto/testn.csv')
train_loader = DataLoader(dataset=otto_dataset1, batch_size=64, shuffle=True, num_workers=2)
test_loader = DataLoader(dataset=otto_dataset2, batch_size=64, shuffle=False, num_workers=2)
3.2 构建模型
#2.构建模型
class OttoNet(torch.nn.Module):def __init__(self):super(OttoNet, self).__init__()self.linear1 = torch.nn.Linear(93, 64)self.linear2 = torch.nn.Linear(64, 32)self.linear3 = torch.nn.Linear(32, 16)self.linear4 = torch.nn.Linear(16, 9)self.relu = torch.nn.ReLU()self.dropout = torch.nn.Dropout(p=0.1)self.softmax = torch.nn.Softmax(dim=1)def forward(self, x):x = x.view(-1,93)x = self.relu(self.linear1(x))x = self.relu(self.linear2(x))x = self.dropout(x)x = self.relu(self.linear3(x))x = self.linear4(x)x = self.softmax(x)return xottomodel = OttoNet()
ottomodel
输出:
OttoNet((linear1): Linear(in_features=93, out_features=64, bias=True)(linear2): Linear(in_features=64, out_features=32, bias=True)(linear3): Linear(in_features=32, out_features=16, bias=True)(linear4): Linear(in_features=16, out_features=9, bias=True)(relu): ReLU()(dropout): Dropout(p=0.1, inplace=False)(softmax): Softmax(dim=1)
)
3.3 构造loss和优化器
#3.loss和优化器
criterion = torch.nn.CrossEntropyLoss()
optimizer = optim.SGD(ottomodel.parameters(), lr=0.01, momentum=0.56)
3.4 训练模型
if __name__ == '__main__':for epoch in range(10):running_loss = 0.0for batch, data in enumerate(train_loader):inputs, target = dataoptimizer.zero_grad()outputs = ottomodel(inputs.float())loss = criterion(outputs, target)loss.backward()optimizer.step()running_loss += loss.item()if batch % 500 == 499:print('[%d, %5d] loss: %.3f' % (epoch+1, batch+1, running_loss/300))running_loss = 0.0输出:
[1,   500] loss: 3.591
[2,   500] loss: 3.011
[3,   500] loss: 2.957
[4,   500] loss: 2.940
[5,   500] loss: 2.902
[6,   500] loss: 2.881
[7,   500] loss: 2.873
[8,   500] loss: 2.800
[9,   500] loss: 2.789
[10,   500] loss: 2.779
3.5 预测
with torch.no_grad():output = []for data in test_loader:inputs,labels = dataoutputs = torch.max(ottomodel(inputs.float()),1)[1]output.extend(outputs.numpy().tolist())保存结果,并提交至kaggle。
submission = pd.read_csv('./otto/sampleSubmission.csv')#(144368, 10)
submission['target'] = output
submission.to_csv('./otto/submission_result1.csv', index=False)
提交失败,数据的格式不对,查看原因中,碰到相同问题的小伙伴可以告诉我,感谢。
说明:记录学习笔记,如果错误欢迎指正!写文章不易,转载请联系我。
这篇关于PyTorch深度学习实践概论笔记9练习-使用kaggle的Otto数据集做多分类的文章就介绍到这儿,希望我们推荐的文章对编程师们有所帮助!


