本文主要是介绍使用D3.js进行数据可视化,希望对大家解决编程问题提供一定的参考价值,需要的开发者们随着小编来一起学习吧!
D3.js介绍
D3.js是一个流行的JavaScript数据可视化库,全称为Data-Driven Documents,即数据驱动文档。它以数据为核心,通过数据来驱动文档的展示和操作。D3.js提供了丰富的API和工具,使得开发者能够创建出各种交互式和动态的数据可视化效果。
官方介绍网站:What is D3? | D3 by Observable
D3.js导入方式介绍
在JavaScript中导入D3.js通常使用ESM+CDN、UMD+CDN和UMD+local这三种方式,其中:ESM (ES Modules):ESM是ECMAScript模块(ECMAScript Modules)的缩写,也被称为ES6模块,是JavaScript官方的模块化方案。它使用import和export语句进行模块的导入和导出,支持静态导入和动态导入。
CDN (Content Delivery Network):CDN即内容分发网络,是一种通过分布在多个地理位置的服务器来快速、有效地向用户分发内容的网络服务。使用CDN可以加快资源的加载速度,提高用户体验。
UMD (Universal Module Definition):UMD是一种通用的模块定义方式,旨在使JavaScript库或模块能够在多种环境中使用,包括浏览器全局变量方式、AMD环境和CommonJS环境(如Node.js)。UMD允许库或模块在各种不同的JavaScript模块加载器和环境中运行。
local:将JavaScript库或模块直接保存在本地项目中,而不是从外部CDN或其他远程位置加载。
D3.js导入方式1:ESM+CDN
<!DOCTYPE html>
<div id="container"></div>
<script type="module">import * as d3 from "https://cdn.jsdelivr.net/npm/d3@7/+esm";// 一大堆代码</script>
D3.js导入方式2:UMD+CDN
<!DOCTYPE html>
<div id="container"></div>
<script src="https://cdn.jsdelivr.net/npm/d3@7"></script>
<script type="module">// 一大堆代码
</script>
D3.js导入方式3:UMD+local
<!DOCTYPE html>
<div id="container"></div>
<script src="/d3.v7.js"></script>
<script type="module">// 一大堆代码
</script>
D3.js文件官方下载地址:Getting started | D3 by Observable

使用D3.js绘制柱形图
<!DOCTYPE html>
<html>
<head>  <meta charset="utf-8">  <title>GGBoy</title>  <script src="/d3.v7.js"></script>
</head>
<body>  <script>  const width = 640;  const height = 400;  const marginTop = 20;  const marginRight = 20;  const marginBottom = 30;  const marginLeft = 40;  const innerWidth = width - marginLeft - marginRight;  const innerHeight = height - marginTop - marginBottom;  const svg = d3.select("body").append("svg")  .attr("width", width)  .attr("height", height);  const plotArea = svg.append("g")  .attr("transform", `translate(${marginLeft},${marginTop})`);  const x = d3.scaleBand()  .domain(["Category1", "Category2", "Category3"]) .padding(0.1);const y = d3.scaleLinear()  .domain([0, 100]) .range([innerHeight, 0]);  // Add the x-axis.  plotArea.append("g")  .attr("transform", `translate(0,${innerHeight})`)  .call(d3.axisBottom(x));  // Add the y-axis.  plotArea.append("g")  .call(d3.axisLeft(y));  const data = [  { category: "Category1", value: 50 },  { category: "Category2", value: 75 },  { category: "Category3", value: 30 }  ];  plotArea.selectAll(".bar")  .data(data)  .enter().append("rect")  .attr("class", "bar")  .attr("x", d => x(d.category))  .attr("width", x.bandwidth())  .attr("y", d => y(d.value))  .attr("height", d => innerHeight - y(d.value))  .attr("fill", "steelblue");  </script>
</body>
</html>
使用D3.js绘制曲线图
<!DOCTYPE html>
<html>
<head>  <title>GGBoy</title>
</head>
<body>  <div id="container" style="width: 600px; height: 400px;"></div>  <script type="module">  import * as d3 from "https://cdn.jsdelivr.net/npm/d3@7/+esm";  var data = [  {date: '2024-05-01', close: 100},  {date: '2024-05-02', close: 110},  {date: '2024-05-03', close: 95},  {date: '2024-05-04', close: 120},  {date: '2024-05-05', close: 105}  ];  var parseDate = d3.timeParse("%Y-%m-%d");  data.forEach(function(d) {  d.date = parseDate(d.date);  });  const width = 600;  const height = 400;  const marginTop = 20;  const marginRight = 20;  const marginBottom = 30;  const marginLeft = 40;  var x = d3.scaleTime()  .range([marginLeft, width - marginRight])  .domain(d3.extent(data, function(d) { return d.date; }));  var y = d3.scaleLinear()  .range([height - marginBottom, marginTop])  .domain(d3.extent(data, function(d) { return d.close; }));  var svg = d3.select("#container").append("svg")  .attr("width", width)  .attr("height", height);  svg.append("g")  .attr("transform", `translate(0,${height - marginBottom})`)  .call(d3.axisBottom(x));  svg.append("g")  .attr("transform", `translate(${marginLeft},0)`)  .call(d3.axisLeft(y));  var line = d3.line()  .x(function(d) { return x(d.date); })  .y(function(d) { return y(d.close); })  .curve(d3.curveBasis);  svg.append("path")  .datum(data)  .attr("class", "line")  .attr("d", line)  .attr("stroke", "blue")  .attr("stroke-width", 2)  .attr("fill", "none");   </script>
</body>
</html>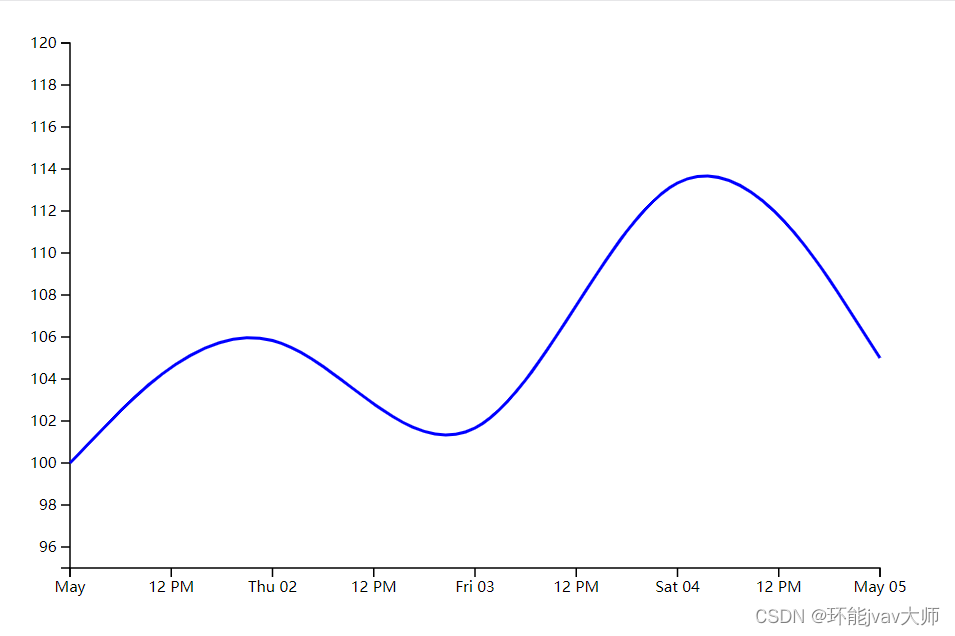
使用D3.js实现网页时钟
<!DOCTYPE html>
<html lang="zh">
<head>  <meta charset="UTF-8">  <meta name="viewport" content="width=device-width, initial-scale=1.0">  <title>GGBoy</title>  <script src="https://cdn.jsdelivr.net/npm/d3@7"></script>  <style>  .time {  font-family: Cursive;  font-size: 40px;  stroke: black;  stroke-width: 2;  fill: none; }  </style>
</head>
<body>  <svg width="600" height="400"></svg> <script>  function getTime() {  var time = new Date();  var hour = time.getHours();  var minute = time.getMinutes();  var second = time.getSeconds();  hour = hour < 10 ? '0' + hour : hour;minute = minute < 10 ? '0' + minute : minute;  second = second < 10 ? '0' + second : second;  return hour + ':' + minute + ':' + second;  }  var svg = d3.select("svg"); // 选择SVG元素  var timeText = svg.append("text")    .attr("x", 100)    .attr("y", 100)    .attr("class", "time")  .text(getTime());  function updateTime() {  timeText.text(getTime());  }  setInterval(updateTime, 1000);  </script>
</body>
</html>
这篇关于使用D3.js进行数据可视化的文章就介绍到这儿,希望我们推荐的文章对编程师们有所帮助!


