本文主要是介绍在 Vue.js 2.x 中使用 WebSocket 与 Spring Boot 2.7 实现通信,希望对大家解决编程问题提供一定的参考价值,需要的开发者们随着小编来一起学习吧!
前言:近期在研究远程遥控空调,需要通过接口记录前端的一些动作,那么前端需要实现主动通知接口,并接收来自接口的通知。
一、方案
通过在Vue.js 2.x 中使用 WebSocket 与 Spring Boot 2.7 实现通信,使用 STOMP(Simple Text Oriented Messaging Protocol)作为 WebSocket 子协议,并使用 vue-stomp 库来在 Vue.js 中管理 WebSocket 连接。
二、具体实现
1、 Spring Boot 设置 WebSocket 支持
1.1、添加依赖
在 Spring Boot 项目的 pom.xml 文件中添加 WebSocket 依赖。
<dependency><groupId>org.springframework.boot</groupId><artifactId>spring-boot-starter-websocket</artifactId><version>${spring-boot.version}</version>
</dependency>
1.2、配置 WebSocket
在 Spring Boot 应用程序中配置 WebSocket 支持,通常需要创建一个配置类并启用 WebSocket
package com.example.tool.config;import org.springframework.context.annotation.Configuration;
import org.springframework.messaging.simp.config.MessageBrokerRegistry;
import org.springframework.web.socket.config.annotation.*;@Configuration
@EnableWebSocketMessageBroker
public class WebSocketConfig implements WebSocketMessageBrokerConfigurer {@Overridepublic void registerStompEndpoints(StompEndpointRegistry registry) {registry.addEndpoint("/websocket")//允许websocket跨域.setAllowedOriginPatterns("*")//启用websocket备选方案(浏览器不支持的话就会启动).withSockJS();}@Overridepublic void configureMessageBroker(MessageBrokerRegistry registry) {registry.enableSimpleBroker("/topic"); // 订阅的消息前缀registry.setApplicationDestinationPrefixes("/app"); // 应用请求的前缀}
}
1.3、处理 WebSocket消息的类
package com.example.tool.controller;import org.springframework.messaging.handler.annotation.MessageMapping;
import org.springframework.messaging.handler.annotation.SendTo;
import org.springframework.stereotype.Controller;@Controller
public class MyWebSocketController {@MessageMapping("/sendMessage") // 处理客户端发送到 "/app/sendMessage" 的消息@SendTo("/topic/messages") // 将处理后的消息广播到 "/topic/messages"public String handleMessage(String message) {// 你可以在这里处理收到的消息,比如添加时间戳、记录日志等return "Received: " + message;}
}
2、Vue.js 使用 vue-stomp
2.1、添加依赖
npm install sockjs-client stompjs2.2、 代码示例
import SockJS from 'sockjs-client';
import Stomp from 'stompjs';// 在这里继续使用 SockJS 和 Stomp 来创建 WebSocket 连接和实现 STOMP 协议的功能
// 创建 SockJS 连接
const socket = new SockJS('http://localhost:8080/websocket');// 创建 Stomp 客户端
const stompClient = Stomp.over(socket);// 连接 Stomp 客户端
stompClient.connect({}, (frame) => {console.log('Connected: ' + frame);// 订阅消息stompClient.subscribe('/topic/messages', (message) => {console.log('Received message: ' + message.body);// 在这里处理接收到的消息,例如更新 UI});
}, (error) => {console.error('Error connecting to WebSocket: ' + error);
});// 发送消息
const sendMessage = (message) => {stompClient.send('/app/sendMessage', {}, JSON.stringify({ content: message }));
};// 断开连接
const disconnect = () => {if (stompClient !== null) {stompClient.disconnect();}console.log('Disconnected');
};
3、测试
在运行java项目后,直接访问:http://localhost:8088/websocket。应该是返回

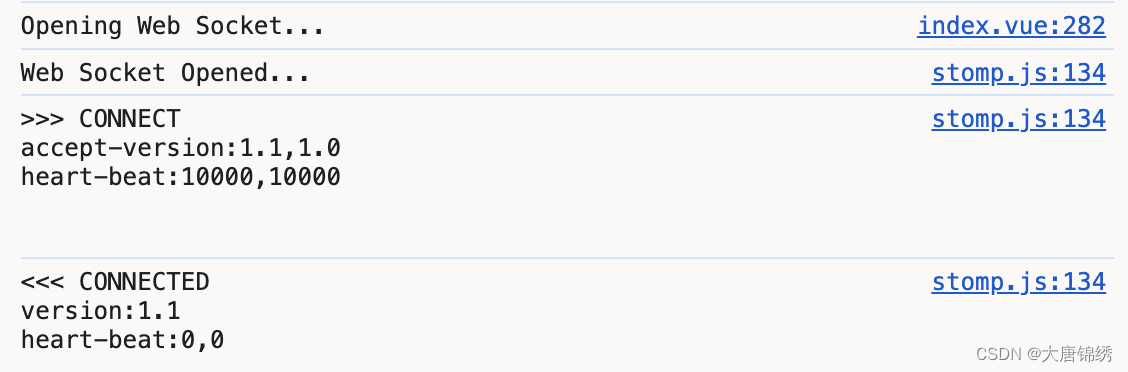
在前端访问vue项目,成功应该返回:
接口响应:
{"entropy":909984842,"origins":["*:*"],"cookie_needed":true,"websocket":true}

三、可能遇见的问题
1、没有开启websocket跨域
很多人会没有开启跨域会出现以下错误:Whoops! Lost connection to http://localhost:8088/websocket

我们要做的是在SpringBoot2.7中WebSocketConfig配置类中开启websocket跨域:
setAllowedOriginPatterns("*")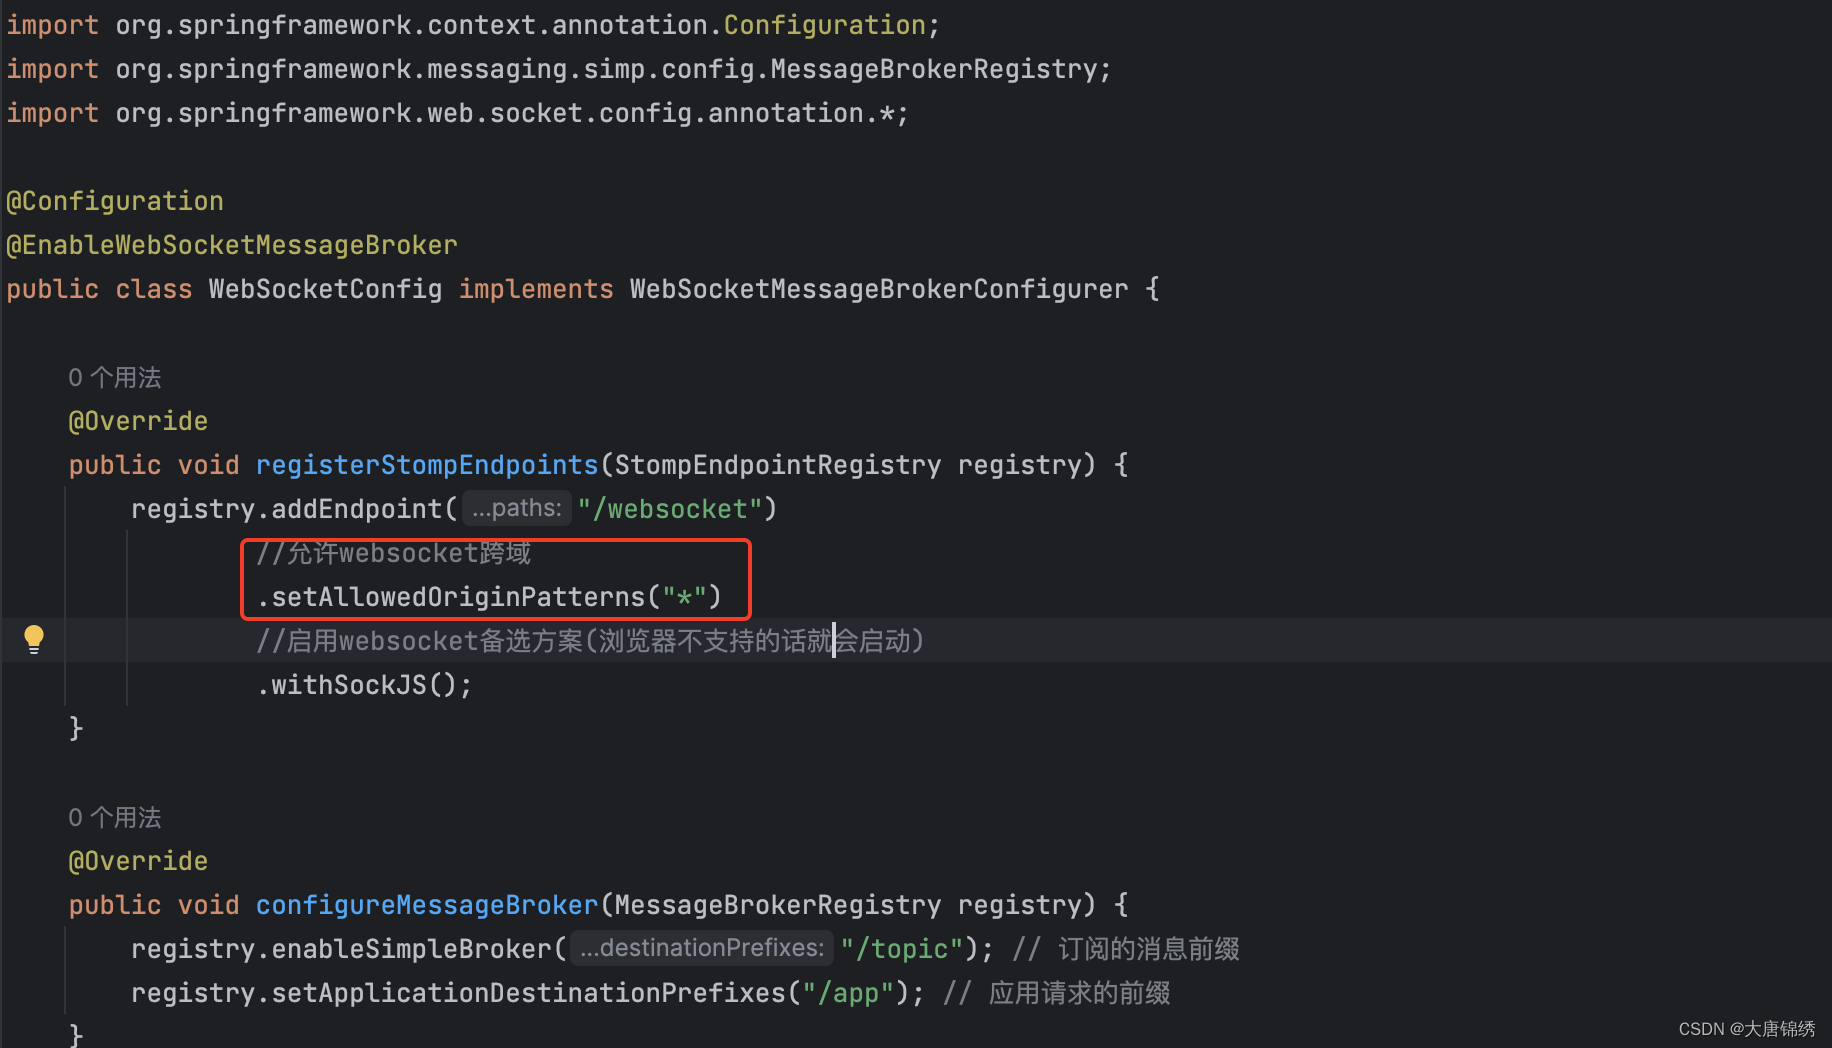
这篇关于在 Vue.js 2.x 中使用 WebSocket 与 Spring Boot 2.7 实现通信的文章就介绍到这儿,希望我们推荐的文章对编程师们有所帮助!


