本文主要是介绍OpenCV从入门到精通实战(五)——dnn加载深度学习模型,希望对大家解决编程问题提供一定的参考价值,需要的开发者们随着小编来一起学习吧!
从指定路径读取图像文件、利用OpenCV进行图像处理,以及使用Caffe框架进行深度学习预测的过程。
下面是程序的主要步骤和对应的实现代码总结:
1. 导入必要的工具包和模型
程序开始先导入需要的库os、numpy、cv2,同时导入utils_paths模块,后者用于处理图像路径。接着,读取Caffe模型和配置文件,这些文件提供了使用预训练深度学习模型进行图像分类的基础。
import utils_paths
import numpy as np
import cv2net = cv2.dnn.readNetFromCaffe("bvlc_googlenet.prototxt", "bvlc_googlenet.caffemodel")
2. 读取图像文件
使用utils_paths.list_images函数遍历指定目录,获取所有图像文件的路径。
imagePaths = sorted(list(utils_paths.list_images("images/")))
3. 图像预处理
选择路径列表中的第一个图像进行读取,调整其大小以符合模型输入需求,并通过cv2.dnn.blobFromImage创建适合Caffe模型的输入blob。
image = cv2.imread(imagePaths[0])
resized = cv2.resize(image, (224, 224))
blob = cv2.dnn.blobFromImage(resized, 1, (224, 224), (104, 117, 123))
4. 模型预测和结果展示
设定模型输入,执行前向传播获取预测结果,找出概率最高的类别,并在图像上显示预测标签和概率。
net.setInput(blob)
preds = net.forward()
idx = np.argsort(preds[0])[::-1][0]
text = "Label: {}, {:.2f}%".format(classes[idx], preds[0][idx] * 100)
cv2.putText(image, text, (5, 25),  cv2.FONT_HERSHEY_SIMPLEX, 0.7, (0, 0, 255), 2)
cv2.imshow("Image", image)
cv2.waitKey(0)
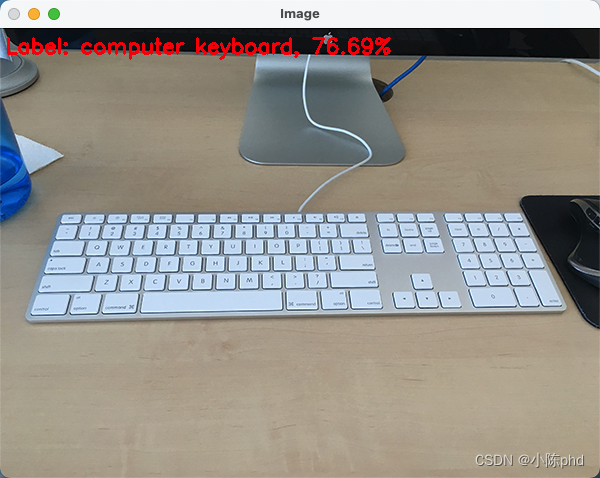
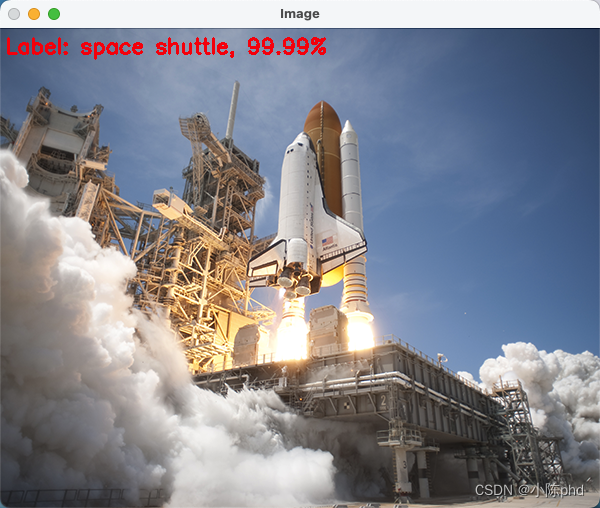
5. 批量图像处理
对多个图像执行上述步骤,生成多图像的输入blob,并对每个图像执行预测,展示结果。
images = []
for p in imagePaths[1:]:image = cv2.imread(p)image = cv2.resize(image, (224, 224))images.append(image)blob = cv2.dnn.blobFromImages(images, 1, (224, 224), (104, 117, 123))
net.setInput(blob)
preds = net.forward()for (i, p) in enumerate(imagePaths[1:]):image = cv2.imread(p)idx = np.argsort(preds[i])[::-1][0]text = "Label: {}, {:.2f}%".format(classes[idx], preds[i][idx] * 100)cv2.putText(image, text, (5, 25),  cv2.FONT_HERSHEY_SIMPLEX, 0.7, (0, 0, 255), 2)cv2.imshow("Image", image)cv2.waitKey(0)
完整代码
utils_paths.py
import osimage_types = (".jpg", ".jpeg", ".png", ".bmp", ".tif", ".tiff")def list_images(basePath, contains=None):# return the set of files that are validreturn list_files(basePath, validExts=image_types, contains=contains)def list_files(basePath, validExts=None, contains=None):# loop over the directory structurefor (rootDir, dirNames, filenames) in os.walk(basePath):# loop over the filenames in the current directoryfor filename in filenames:# if the contains string is not none and the filename does not contain# the supplied string, then ignore the fileif contains is not None and filename.find(contains) == -1:continue# determine the file extension of the current fileext = filename[filename.rfind("."):].lower()# check to see if the file is an image and should be processedif validExts is None or ext.endswith(validExts):# construct the path to the image and yield itimagePath = os.path.join(rootDir, filename)yield imagePathblob_from_images.py
# 导入工具包
import utils_paths
import numpy as np
import cv2# 标签文件处理
rows = open("synset_words.txt").read().strip().split("\n")
classes = [r[r.find(" ") + 1:].split(",")[0] for r in rows]# Caffe所需配置文件
net = cv2.dnn.readNetFromCaffe("bvlc_googlenet.prototxt","bvlc_googlenet.caffemodel")# 图像路径
imagePaths = sorted(list(utils_paths.list_images("images/")))# 图像数据预处理
image = cv2.imread(imagePaths[0])
resized = cv2.resize(image, (224, 224))
# image scalefactor size mean swapRB
blob = cv2.dnn.blobFromImage(resized, 1, (224, 224), (104, 117, 123))
print("First Blob: {}".format(blob.shape))# 得到预测结果
net.setInput(blob)
preds = net.forward()# 排序,取分类可能性最大的
idx = np.argsort(preds[0])[::-1][0]
text = "Label: {}, {:.2f}%".format(classes[idx],preds[0][idx] * 100)
cv2.putText(image, text, (5, 25),  cv2.FONT_HERSHEY_SIMPLEX,0.7, (0, 0, 255), 2)# 显示
cv2.imshow("Image", image)
cv2.waitKey(0)# Batch数据制作
images = []# 方法一样,数据是一个batch
for p in imagePaths[1:]:image = cv2.imread(p)image = cv2.resize(image, (224, 224))images.append(image)# blobFromImages函数,注意有s
blob = cv2.dnn.blobFromImages(images, 1, (224, 224), (104, 117, 123))
print("Second Blob: {}".format(blob.shape))# 获取预测结果
net.setInput(blob)
preds = net.forward()
for (i, p) in enumerate(imagePaths[1:]):image = cv2.imread(p)idx = np.argsort(preds[i])[::-1][0]text = "Label: {}, {:.2f}%".format(classes[idx],preds[i][idx] * 100)cv2.putText(image, text, (5, 25),  cv2.FONT_HERSHEY_SIMPLEX,0.7, (0, 0, 255), 2)cv2.imshow("Image", image)cv2.waitKey(0)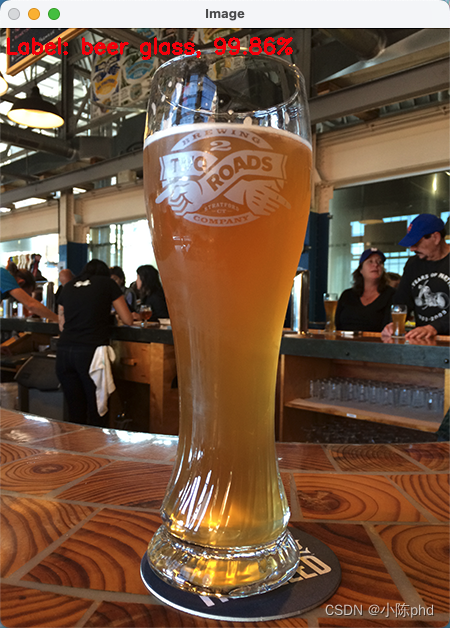

以下是后续代码的改进:
6. 异常处理和验证
在处理文件读取和图像处理时,加入异常处理可以避免在文件不存在或损坏时程序崩溃。
try:image = cv2.imread(imagePath)if image is None:raise ValueError("无法读取图像: {}".format(imagePath))resized = cv2.resize(image, (224, 224))
except Exception as e:print("处理图像时发生错误: ", e)
7. 性能优化
对于图像处理和预测,尤其是批量操作时,可以通过并行处理技术来加速这些操作。例如,使用Python的concurrent.futures模块进行并行读取和预处理图像。
from concurrent.futures import ThreadPoolExecutordef process_image(path):image = cv2.imread(path)image = cv2.resize(image, (224, 224))return imagewith ThreadPoolExecutor() as executor:images = list(executor.map(process_image, imagePaths))
8. 动态输入和命令行工具
将脚本转换为可接受命令行参数的形式,使其更灵活,能够通过命令行直接指定图片路径、模型文件等。
import argparseparser = argparse.ArgumentParser(description='图像分类预测')
parser.add_argument('--image_dir', type=str, required=True, help='图像目录路径')
parser.add_argument('--model', type=str, required=True, help='模型文件路径')
args = parser.parse_args()imagePaths = sorted(list(utils_paths.list_images(args.image_dir)))
net = cv2.dnn.readNetFromCaffe("bvlc_googlenet.prototxt", args.model)
9. GUI界面
为了使程序更友好,可以开发一个基于图形用户界面的应用,允许用户通过图形界面选择图像和观看结果,而不是仅限于命令行。
import tkinter as tk
from tkinter import filedialogdef load_image():path = filedialog.askopenfilename()return cv2.imread(path), pathroot = tk.Tk()
load_button = tk.Button(root, text='加载图像', command=load_image)
load_button.pack()
root.mainloop()
初始代码 下载地址 dnn加载深度学习模型
这篇关于OpenCV从入门到精通实战(五)——dnn加载深度学习模型的文章就介绍到这儿,希望我们推荐的文章对编程师们有所帮助!


