本文主要是介绍【Godot4.2】2D导航02 - AstarGrid2D及其使用方法,希望对大家解决编程问题提供一定的参考价值,需要的开发者们随着小编来一起学习吧!
概述
AstarGrid2D是Godot4.0新增的A*寻路辅助类型。可以看做是Astar2D的加强版。它允许你通过设置其size和cell_size属性来创建一个虚拟的网格。
并使用set_point_solid()这样的方法来在指定位置创建障碍物。
AstarGrid2D的好处是你不再需要手动的添加点以及点与点之间的连接,而是直接用get_point_path()这样的方法来获取最短路径(也就是一个包含了最短路径经过的点的数组)。
通过遍历这个数组,就可以实现路径移动了。
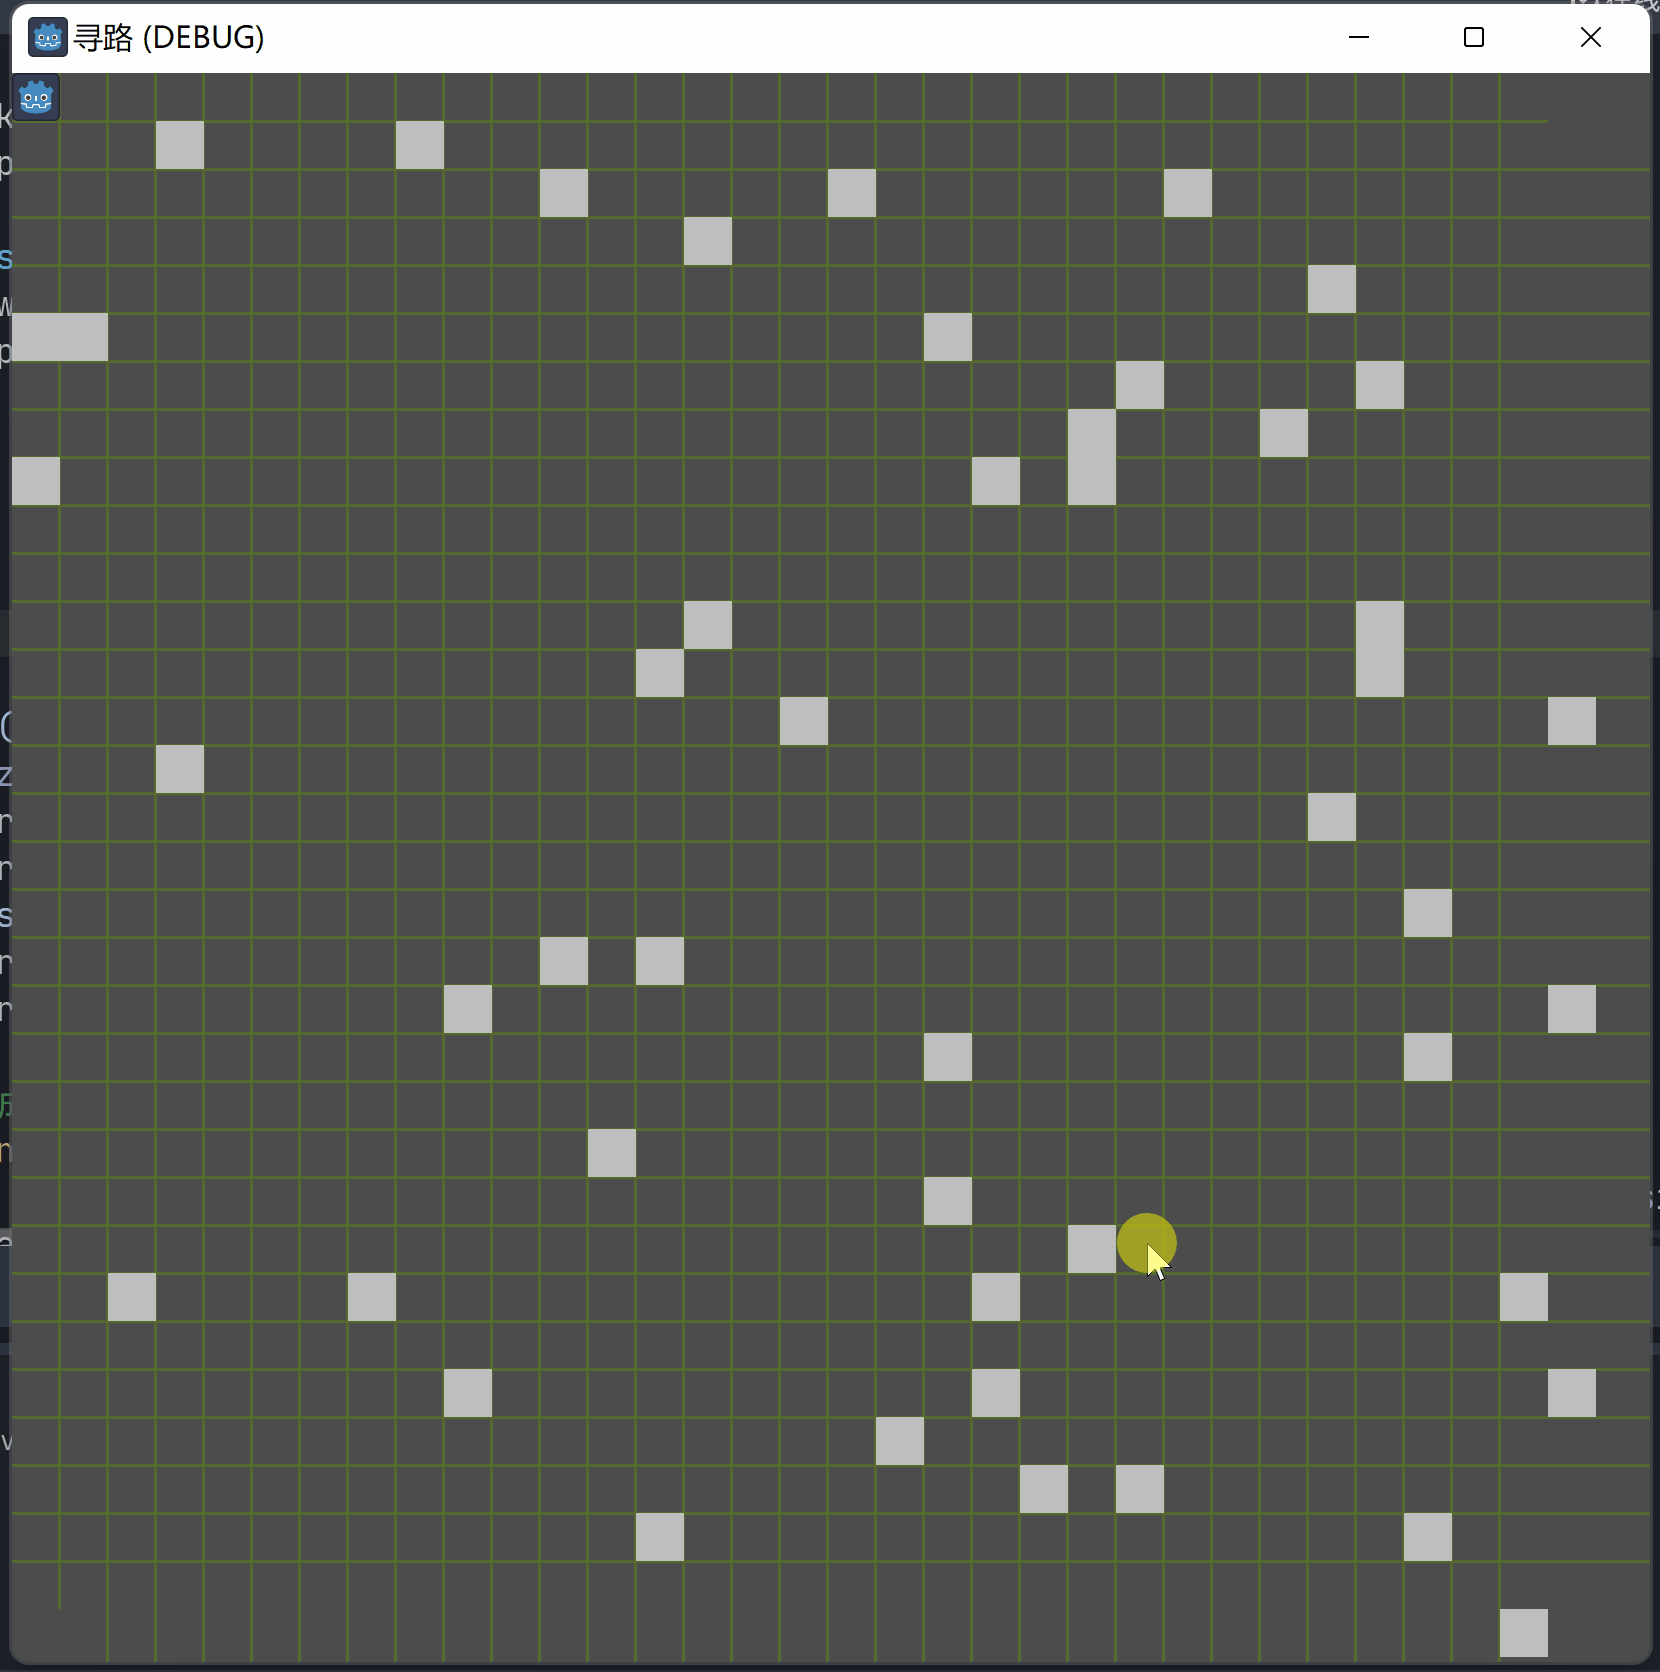
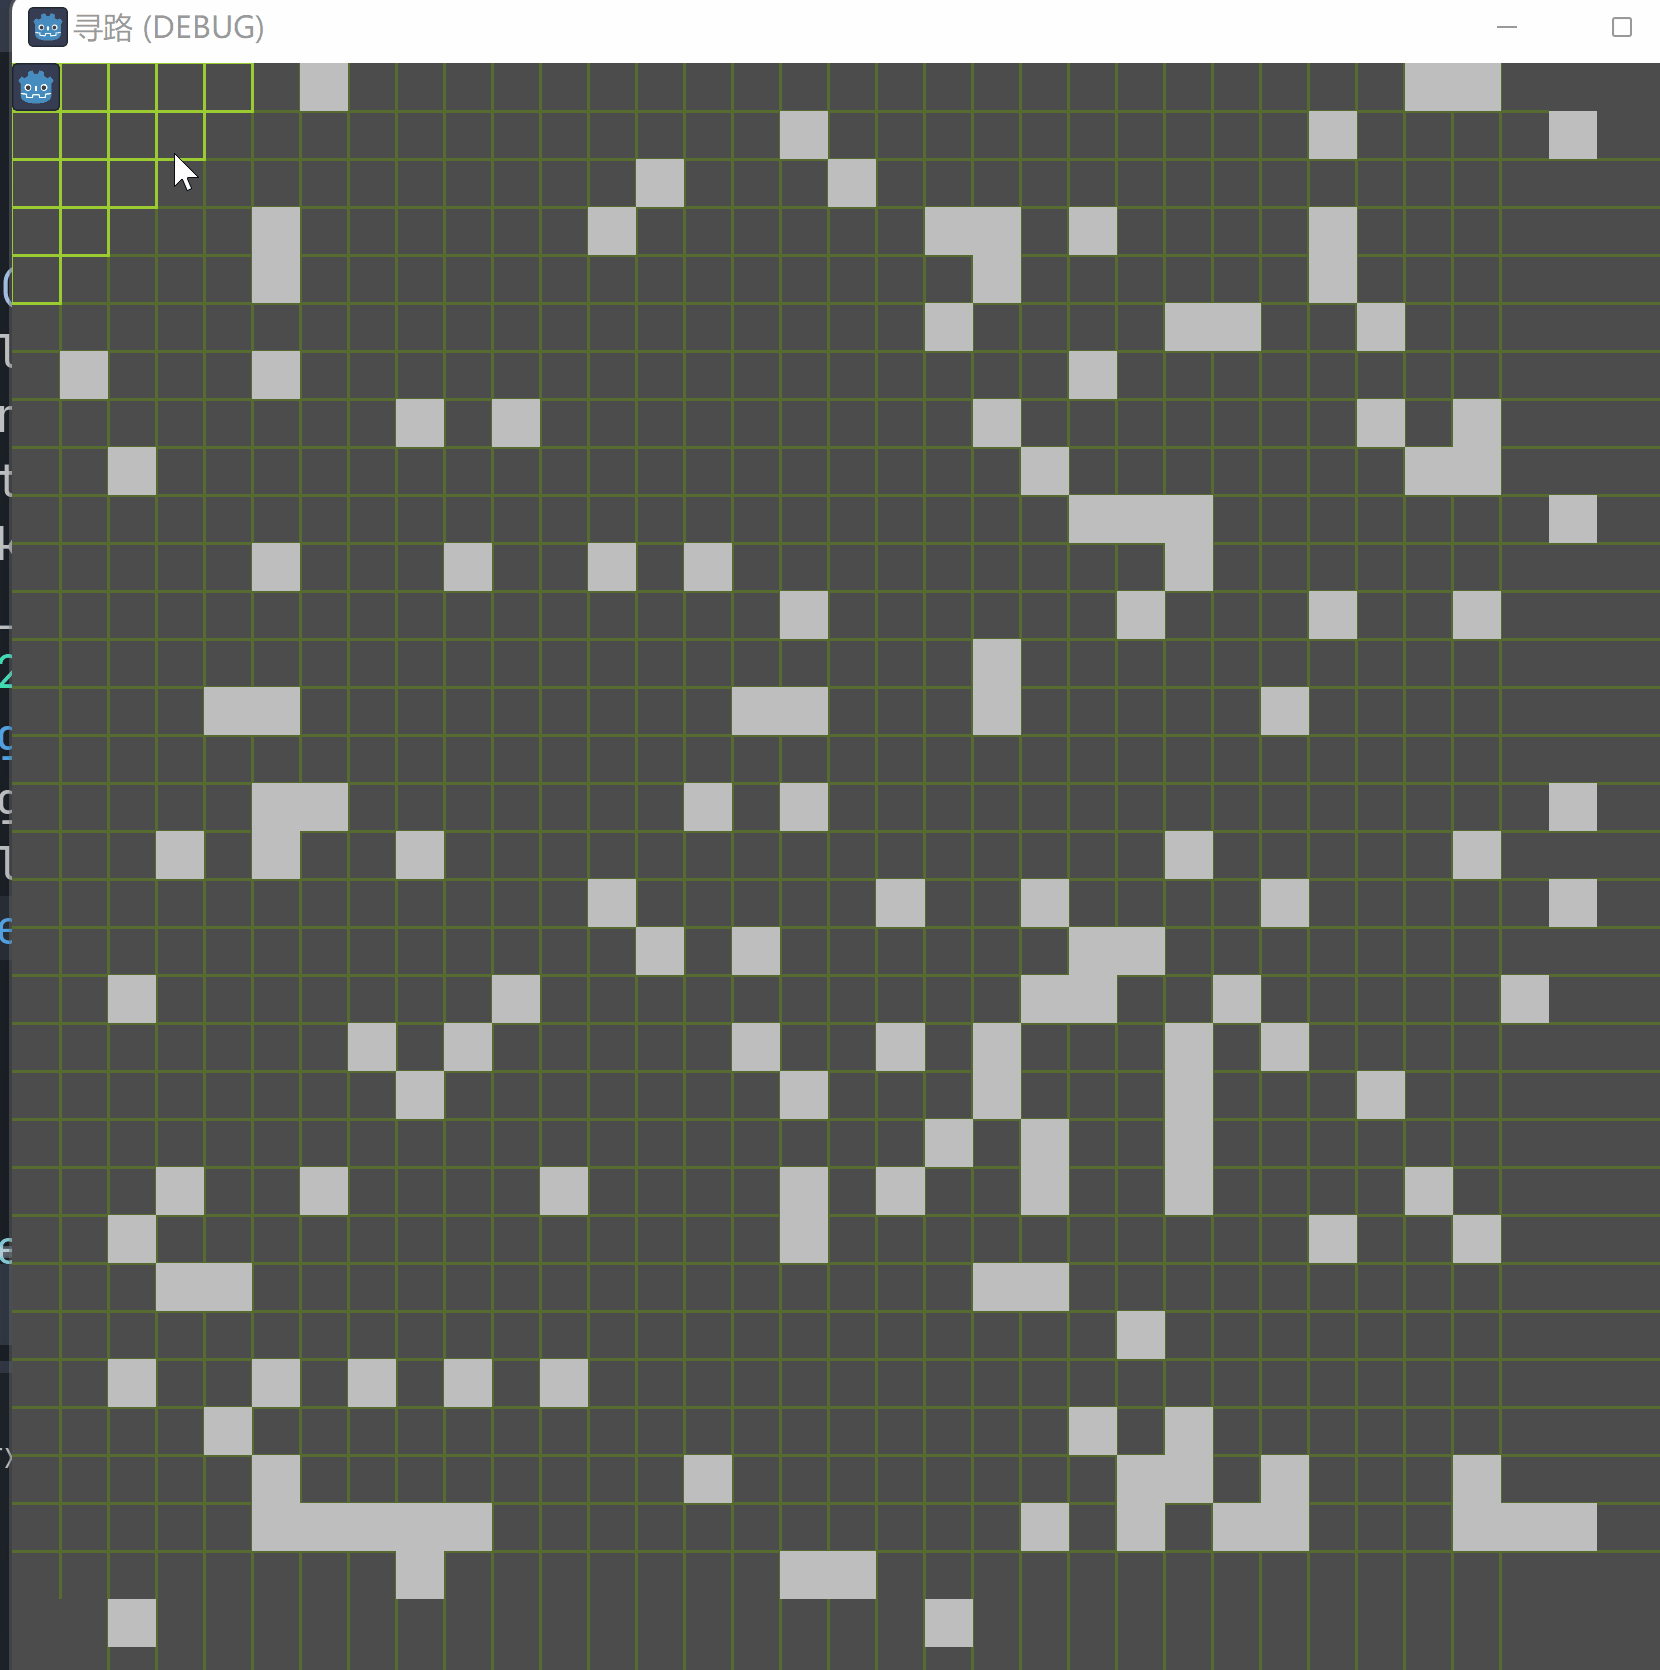
extends Controlvar astar_grid = AStarGrid2D.new()var cell_size = Vector2.ONE * 100func _ready():astar_grid.size = Vector2i.ONE * 32astar_grid.cell_size = Vector2i.ONE * 32astar_grid.update()func _draw():# 绘制网格var grid_width = astar_grid.size.x * astar_grid.cell_size.xvar cell_width = astar_grid.cell_size.xvar cell_height = astar_grid.cell_size.yfor i in range(astar_grid.size.x):draw_line(i * Vector2i(0,cell_height),i * Vector2i(grid_width,cell_height),Color.DARK_OLIVE_GREEN,2)for j in range(astar_grid.size.y):draw_line(j * Vector2i(cell_height,0),j * Vector2i(cell_height,grid_width),Color.DARK_OLIVE_GREEN,2)# 绘制路径和其上的点var path = astar_grid.get_point_path(Vector2i(0,0),Vector2i(10,10))for pot in path:draw_circle(pot,5,Color.YELLOW)draw_polyline(path,Color.YELLOW,2)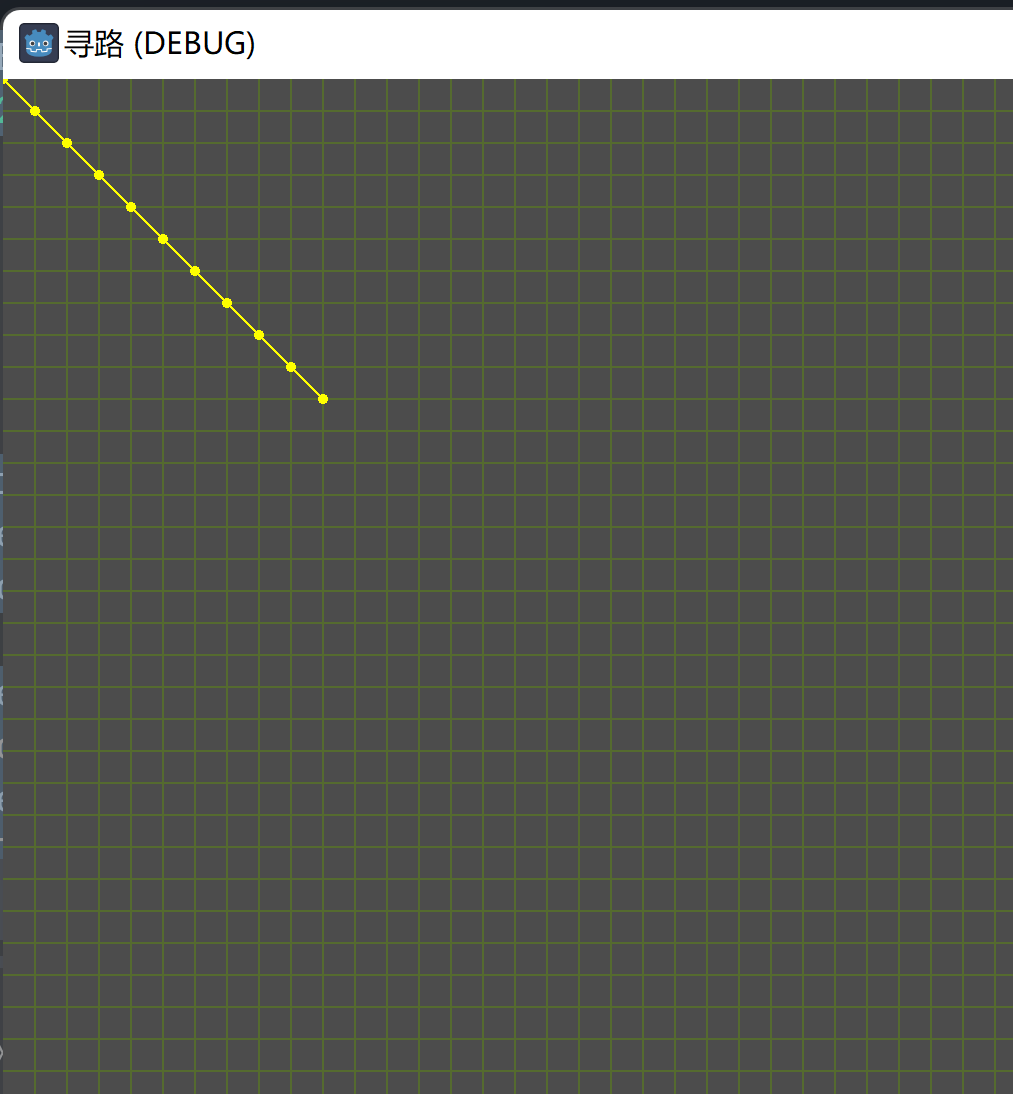
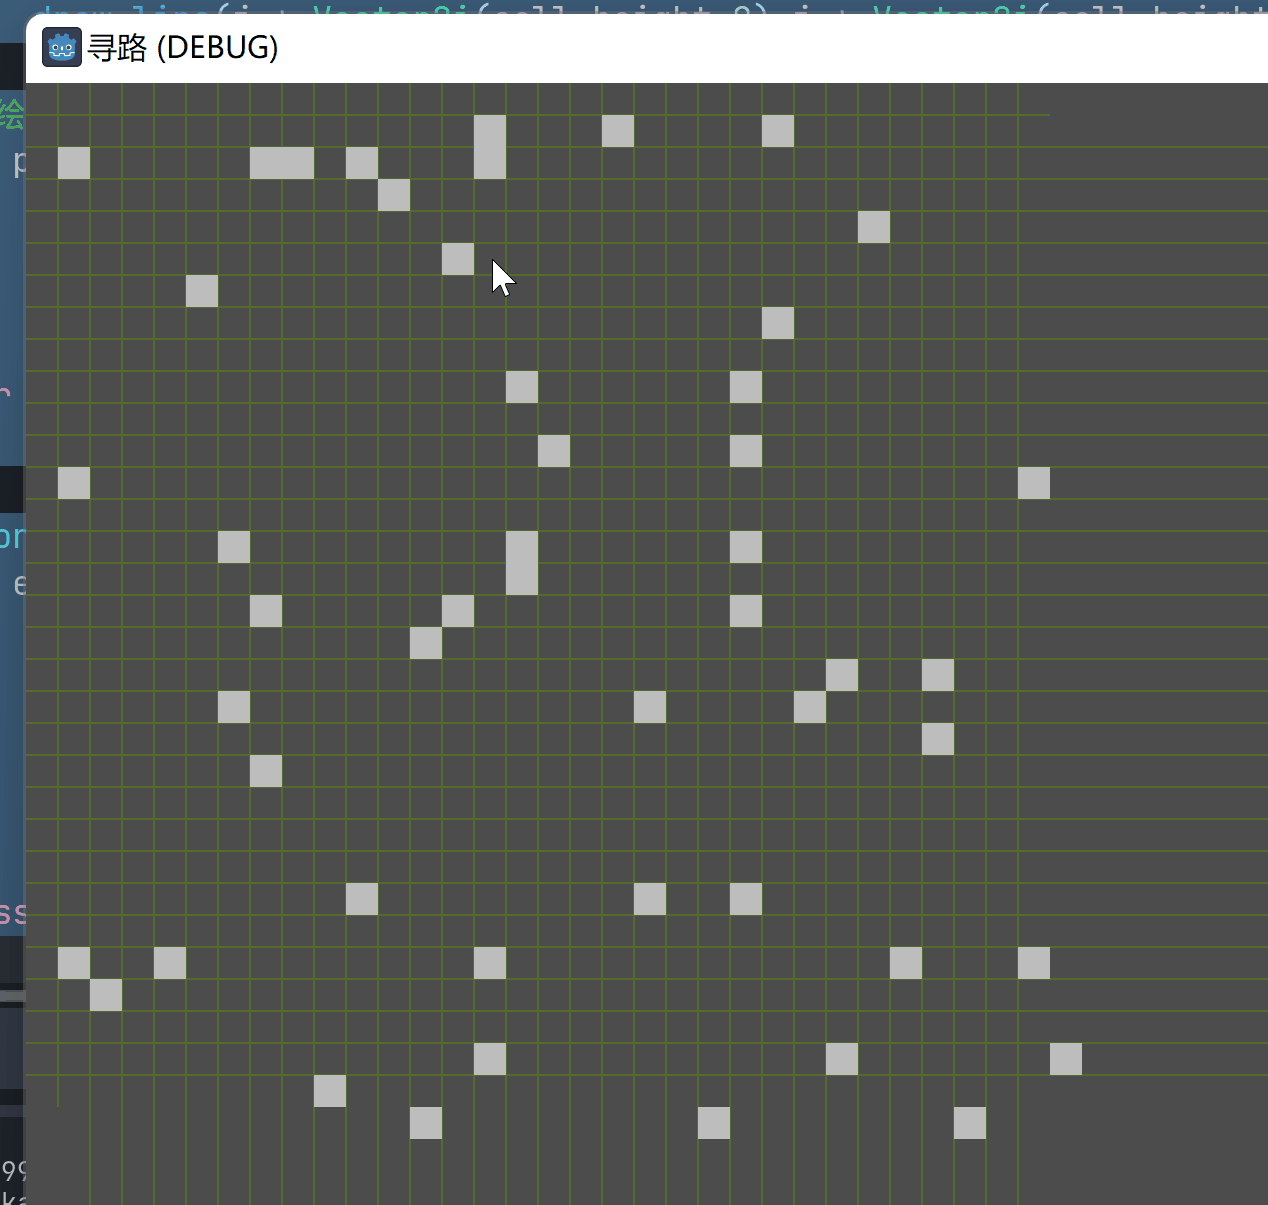
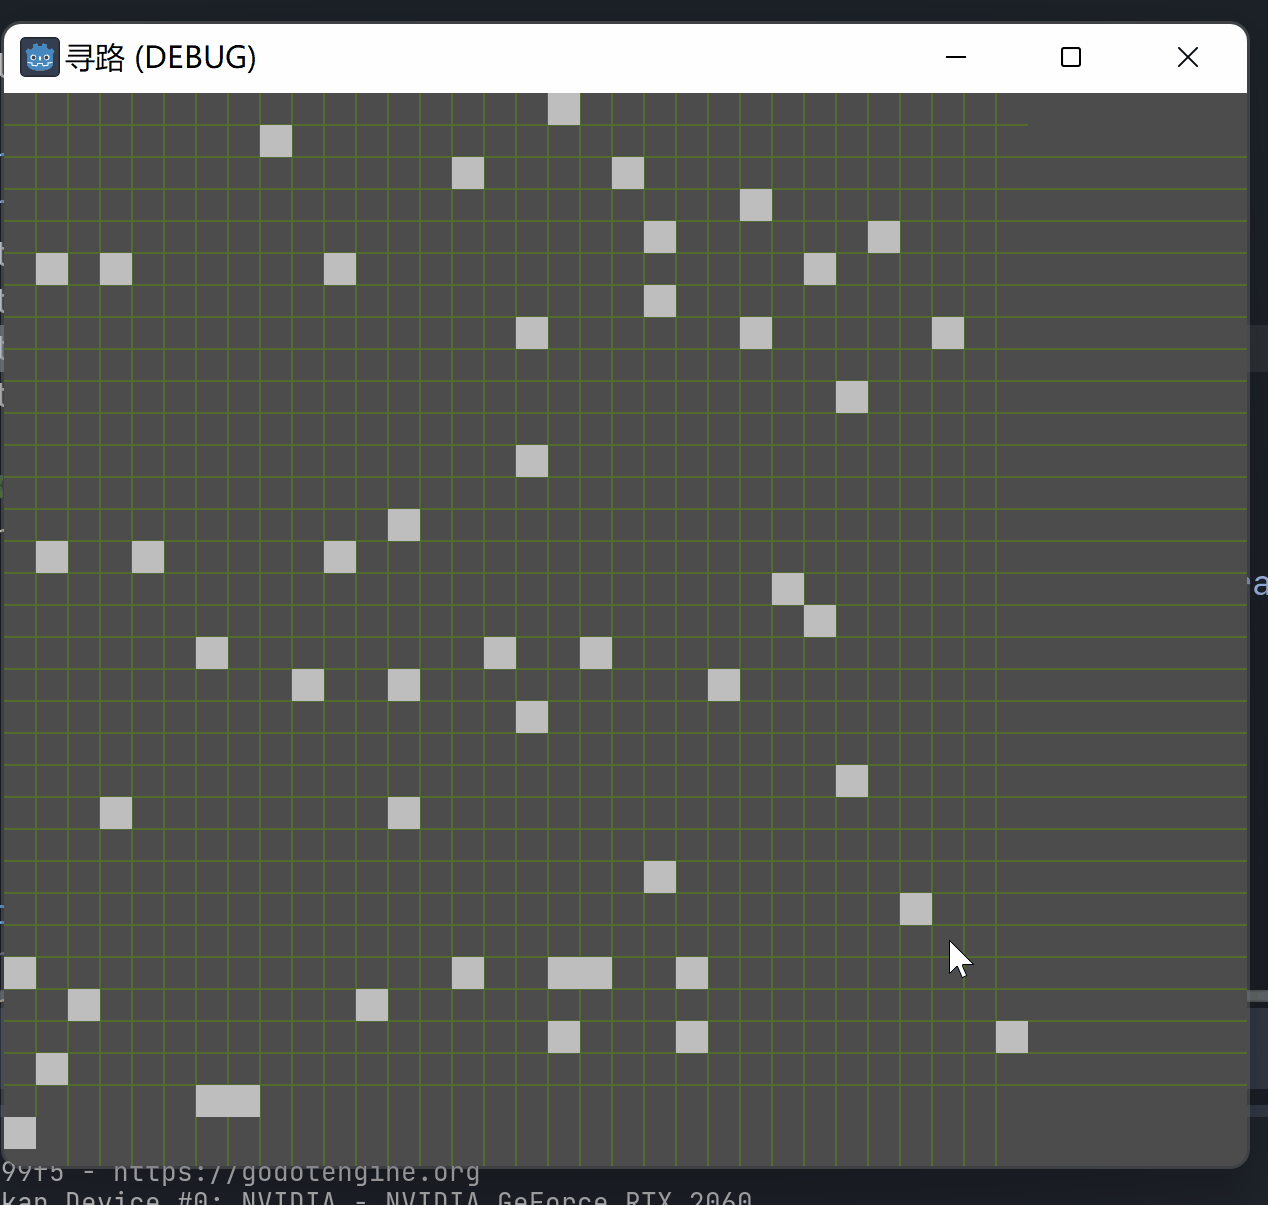
extends Controlvar astar_grid = AStarGrid2D.new()var path:PackedVector2Arrayvar solids = []func _ready():randomize()astar_grid.size = Vector2i.ONE * 32astar_grid.cell_size = Vector2i.ONE * 32astar_grid.offset = astar_grid.cell_size/2astar_grid.update()# 随机生成障碍for i in range(50):var solid_point = Vector2i(randi_range(0,astar_grid.size.x),randi_range(0,astar_grid.size.y))astar_grid.set_point_solid(solid_point,true)solids.append(solid_point)func _draw():var grid_width = astar_grid.size.x * astar_grid.cell_size.xvar cell_width = astar_grid.cell_size.xvar cell_height = astar_grid.cell_size.y# 绘制网格for i in range(astar_grid.size.x):draw_line(i * Vector2i(0,cell_height),i * Vector2i(grid_width,cell_height),Color.DARK_OLIVE_GREEN,2)for j in range(astar_grid.size.y):draw_line(j * Vector2i(cell_height,0),j * Vector2i(cell_height,grid_width),Color.DARK_OLIVE_GREEN,2)# 绘制路径和其上的点if path.size() > 0:for pot in path:draw_circle(pot,5,Color.YELLOW)draw_polyline(path,Color.YELLOW,2)for p in solids:draw_rect(Rect2(p * Vector2i(astar_grid.cell_size),astar_grid.cell_size),Color.GRAY)func _on_gui_input(event):if event is InputEventMouseButton:if event.button_index == MOUSE_BUTTON_LEFT:if event.is_pressed():path = astar_grid.get_point_path(Vector2i(0,0),floor(get_global_mouse_position()/astar_grid.cell_size))queue_redraw()- 13行:将
AstarGrid的offset设为astar_grid.cell_size/2,也就实现了整体的坐标偏移。 - 48行:
floor(get_global_mouse_position()/astar_grid.cell_size)获得的就是鼠标点击所在的单元格的坐标。
目前为止,AstarGrid显示对角线形式的连接。
如果我们需要设置其只显示横平竖直的连接,则可以设置AstarGrid的diagonal_mode为DIAGONAL_MODE_NEVER。
astar_grid.diagonal_mode = AStarGrid2D.DIAGONAL_MODE_NEVER
| DiagonalMode | 值 | 说明 |
|---|---|---|
| DIAGONAL_MODE_ALWAYS | 0 | 该寻路算法将忽略目标单元格周围的实体邻居,并允许沿对角线通过。 |
| DIAGONAL_MODE_NEVER | 1 | 该寻路算法将忽略所有对角线,并且路径始终是正交的。 |
| DIAGONAL_MODE_AT_LEAST_ONE_WALKABLE | 2 | 如果在特定路径段的相邻单元格周围放置了至少两个障碍物,则该寻路算法将避免使用对角线。 |
| DIAGONAL_MODE_ONLY_IF_NO_OBSTACLES | 3 | 如果在特定路径段的相邻单元格周围放置了任意障碍物,则该寻路算法将避免使用对角线。 |
| DIAGONAL_MODE_MAX | 4 | 代表 DiagonalMode 枚举的大小。 |
实现玩家基于AstarGrid2D的移动
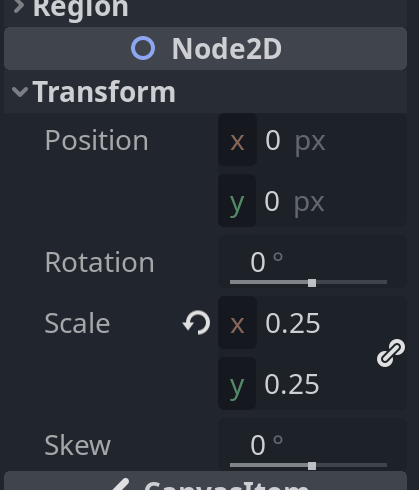
用一个简单Sprite2D作为玩家。将其缩放为原始尺寸128×128的四分之一,也就是32×32。刚好可以填入AstarGrid2D的单元格中。
extends Controlvar astar_grid = AStarGrid2D.new()
var path:PackedVector2Array
var solids = [] # 障碍物列表@onready var icon = $Icon
var speed = 200.0
var can_walk = false
var target_pos:Vector2func _process(delta):if can_walk:if path.size()>0:target_pos = path[0]if icon.position.distance_to(target_pos)>0:icon.position = icon.position.move_toward(target_pos,speed * delta)else:path.remove_at(0)queue_redraw()else:can_walk = falsefunc _ready():randomize()astar_grid.size = Vector2i.ONE * 32astar_grid.cell_size = Vector2i.ONE * 32astar_grid.offset = astar_grid.cell_size/2icon.position = astar_grid.cell_size/2astar_grid.diagonal_mode = AStarGrid2D.DIAGONAL_MODE_NEVERastar_grid.default_compute_heuristic  = AStarGrid2D.HEURISTIC_MANHATTANastar_grid.update()# 随机生成障碍for i in range(150):var solid_point = Vector2i(randi_range(0,astar_grid.size.x),randi_range(0,astar_grid.size.y))astar_grid.set_point_solid(solid_point,true)solids.append(solid_point)func _draw():var grid_width = astar_grid.size.x * astar_grid.cell_size.xvar cell_width = astar_grid.cell_size.xvar cell_height = astar_grid.cell_size.y# 绘制网格for i in range(astar_grid.size.x):draw_line(i * Vector2i(0,cell_height),i * Vector2i(grid_width,cell_height),Color.DARK_OLIVE_GREEN,2)for j in range(astar_grid.size.y):draw_line(j * Vector2i(cell_height,0),j * Vector2i(cell_height,grid_width),Color.DARK_OLIVE_GREEN,2)# 绘制路径和其上的点if path.size() > 0:for pot in path:draw_circle(pot,5,Color.YELLOW)draw_polyline(path,Color.YELLOW,2)for p in solids:draw_rect(Rect2(p * Vector2i(astar_grid.cell_size),astar_grid.cell_size),Color.GRAY)func _on_gui_input(event):if event is InputEventMouseButton:if event.button_index == MOUSE_BUTTON_LEFT:if event.is_pressed():can_walk = truepath = astar_grid.get_point_path(floor(icon.position/astar_grid.cell_size),floor(get_global_mouse_position()/astar_grid.cell_size))queue_redraw()
每次获取路径的第一个点,利用简单的距离判断和移动,到达后,从路径中删除该点。继续获取路径第一个,如此循环,知道路径中的点删除完毕。
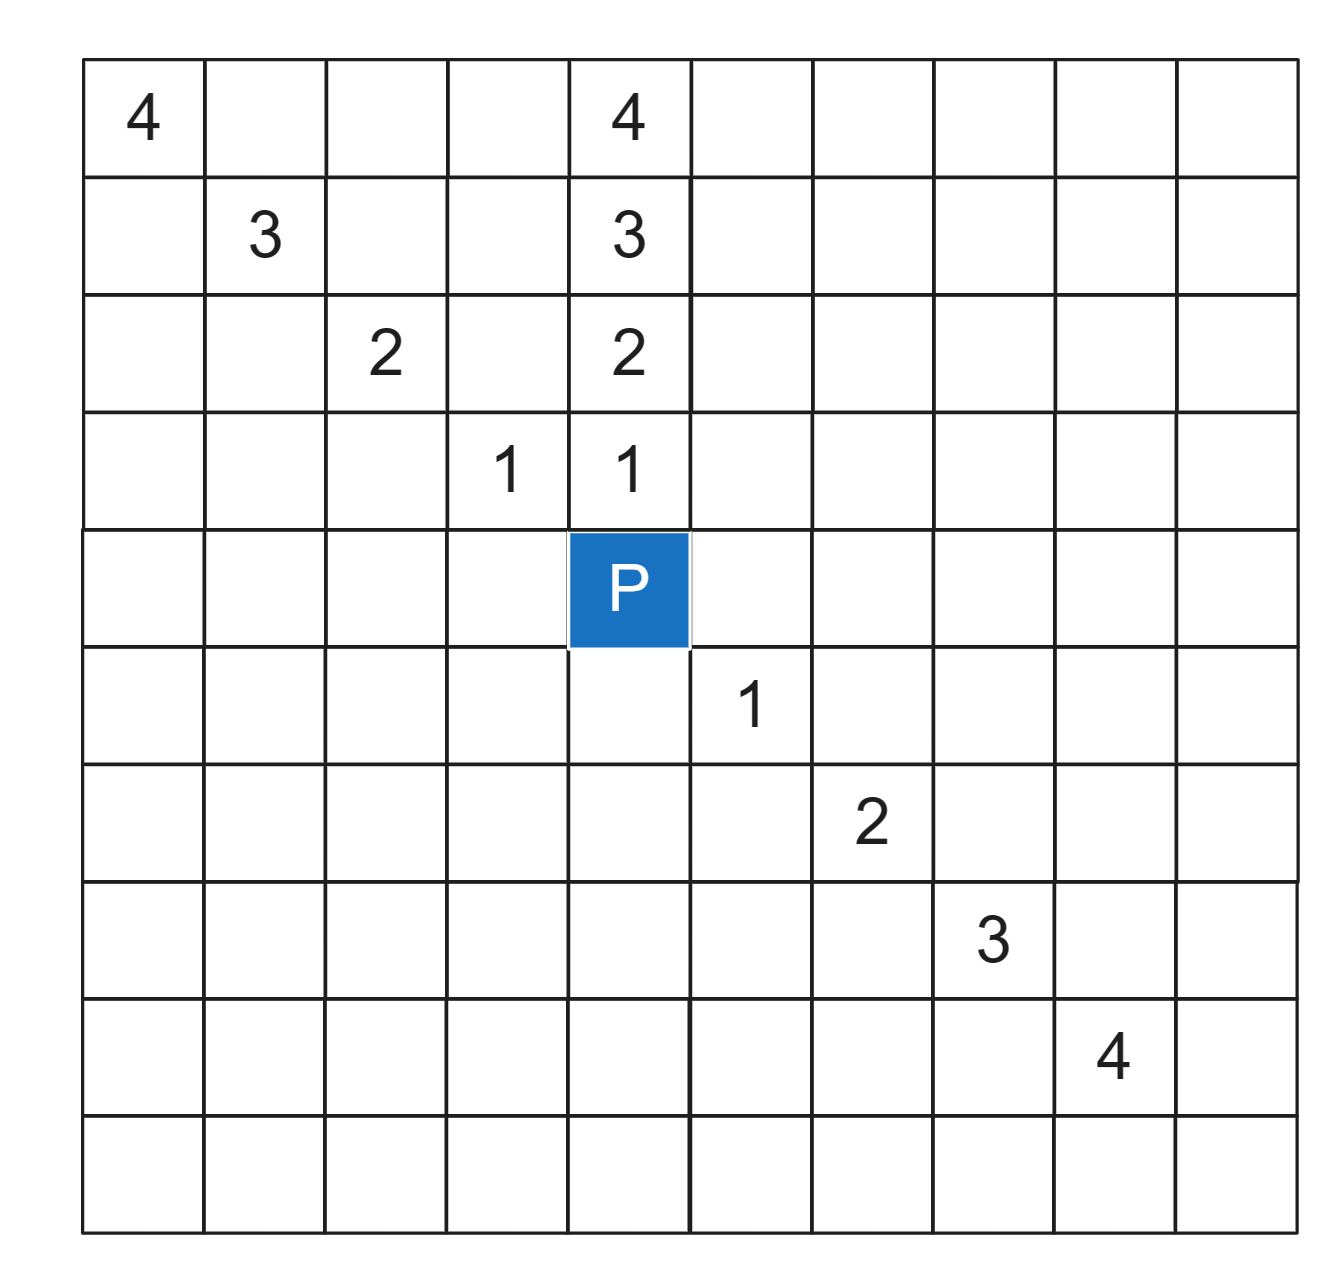
可行动范围的获取
矩形范围查找法:
先不考虑对角线移动的问题,我们假设玩家可行动点数是4,那么我们只需要遍历一个8×8矩阵的每个点到玩家的是否有可行走的路径,如果有且路径的点数<=4,则标记为可到达的点,否则,标记为不能到达的点。
extends Controlvar astar_grid = AStarGrid2D.new()
var path:PackedVector2Array
var solids = [] # 障碍物列表
var max_step:int = 4 # 玩家单次的最大行动点数
var can_walk_rect:Rect2i
var can_walk_points:PackedVector2Array @onready var icon = $Icon
var speed = 200.0
var can_walk = false
var target_pos:Vector2func _process(delta):if can_walk:if path.size()>0:target_pos = path[0]if icon.position.distance_to(target_pos)>0:icon.position = icon.position.move_toward(target_pos,speed * delta)else:path.remove_at(0)queue_redraw()else:can_walk = falsequeue_redraw()func _ready():randomize()astar_grid.size = Vector2i.ONE * 32astar_grid.cell_size = Vector2i.ONE * 32astar_grid.offset = astar_grid.cell_size/2icon.position = astar_grid.cell_size/2astar_grid.diagonal_mode = AStarGrid2D.DIAGONAL_MODE_NEVERastar_grid.update()# 随机生成障碍for i in range(150):var solid_point = Vector2i(randi_range(0,astar_grid.size.x),randi_range(0,astar_grid.size.y))astar_grid.set_point_solid(solid_point,true)solids.append(solid_point)func _draw():var grid_width = astar_grid.size.x * astar_grid.cell_size.xvar cell_width = astar_grid.cell_size.xvar cell_height = astar_grid.cell_size.y# 绘制网格for i in range(astar_grid.size.x):draw_line(i * Vector2i(0,cell_height),i * Vector2i(grid_width,cell_height),Color.DARK_OLIVE_GREEN,2)for j in range(astar_grid.size.y):draw_line(j * Vector2i(cell_height,0),j * Vector2i(cell_height,grid_width),Color.DARK_OLIVE_GREEN,2)# 绘制路径和其上的点if path.size() > 0:for pot in path:draw_circle(pot,5,Color.YELLOW)draw_polyline(path,Color.YELLOW,2)# 绘制障碍物for p in solids:draw_rect(Rect2(p * Vector2i(astar_grid.cell_size),astar_grid.cell_size),Color.GRAY)# 绘制可行走范围# 遍历矩形if !can_walk:var player_pos = floor(icon.position/astar_grid.cell_size)var top_left = clamp(player_pos - Vector2.ONE * max_step,Vector2.ZERO,player_pos)var end =  clamp(player_pos + Vector2.ONE * max_step,player_pos,Vector2(astar_grid.size))can_walk_rect = Rect2(top_left,end-top_left) # 获取矩形for i in range(can_walk_rect.position.x,can_walk_rect.end.x + 1):for j in range(can_walk_rect.position.y,can_walk_rect.end.y + 1):var v = Vector2(i,j)if astar_grid.get_point_path(player_pos,v).size() <= max_step+1:if !astar_grid.is_point_solid(v):can_walk_points.append(v)draw_rect(Rect2(v * astar_grid.cell_size,astar_grid.cell_size),Color.YELLOW_GREEN,false,2)func _on_gui_input(event):if event is InputEventMouseButton:if event.button_index == MOUSE_BUTTON_LEFT:if event.is_pressed():can_walk = truevar player_pos = floor(icon.position/astar_grid.cell_size)var targ_pos = floor(get_global_mouse_position()/astar_grid.cell_size)if targ_pos in can_walk_points: # 如果在可行走的范围内path = astar_grid.get_point_path(player_pos,targ_pos)can_walk_points.clear() # 清空原来的可行走范围queue_redraw()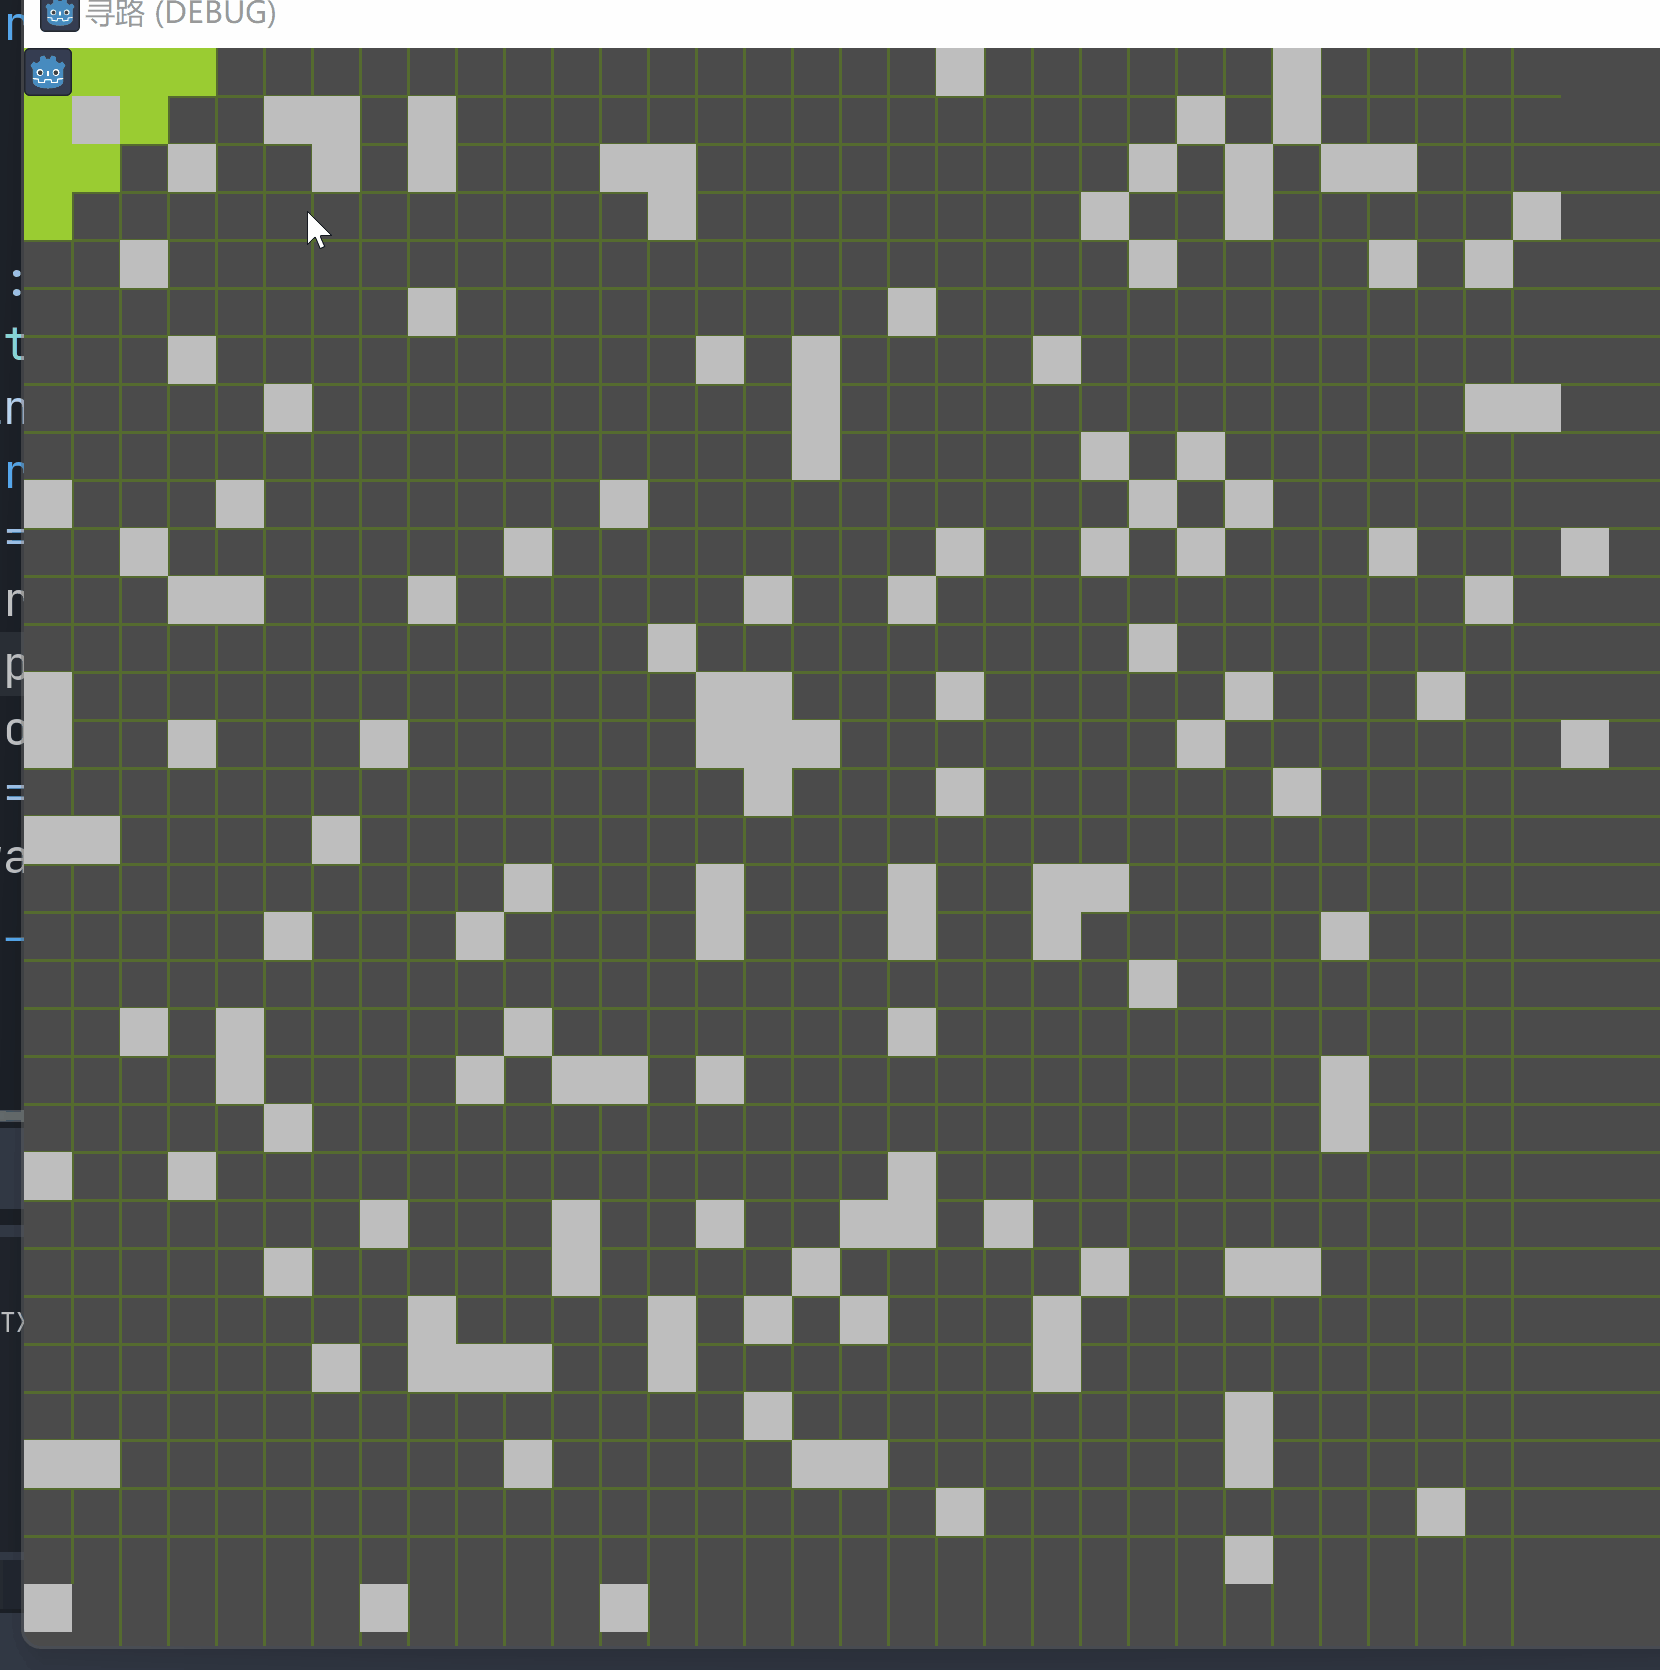
这篇关于【Godot4.2】2D导航02 - AstarGrid2D及其使用方法的文章就介绍到这儿,希望我们推荐的文章对编程师们有所帮助!


