本文主要是介绍IOS控件系列--Swift 滑动标签栏(支持底部下划线毛毛虫滑动效果Object-c实现),希望对大家解决编程问题提供一定的参考价值,需要的开发者们随着小编来一起学习吧!
这一编是之前OC版的翻译版本,不过做做了一些新功能的扩展,新功能如下:
1.标签支持自适应文本宽度
2.点击标签文本时,标签文本的滚动列表会跟着一起滑动
3.底部指示线宽度自适应上面标签文本宽度
4.将可滑动的标题栏与不可滑动的标题栏结合到一个接口中
设计思路与前一个版本一致,各位道友请移步查看详细的思路,
IOS 高仿boss直聘---优雅使用UIButton与UIScrollView打造滑动标签
这里只奉上源码与效果图:
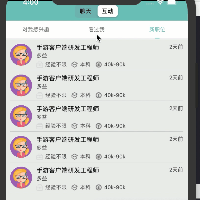
效果图如下:

源码部分:
import UIKitprotocol ScrollNavBarChangeListener {func onChangeListener(index : Int) -> Void
}/// 带标签滑动的滚动视图
class ScrollNavBar: UIView {var delegate : ScrollNavBarChangeListener?lazy var bottomLine : UIView = UIView.init()lazy var titleList : Array = Array<String>()lazy var btnList : Array = Array<UIButton>()lazy var titleScrollView : UIScrollView = UIScrollView.init()lazy var moveAnimation : CABasicAnimation = {(make) inlet tmpAnim = CABasicAnimation.init(keyPath: "position")return tmpAnim}()var nLastIndex : Int = 0lazy var segmentScroll : UIScrollView = UIScrollView.init()var finalPos : CGPoint = CGPoint.zerovar screenSize : CGRect = CGRect.zerovar bIsTitleScroll : Bool = falselazy var averageItemWidth : CGFloat = 0override init(frame: CGRect) {super.init(frame: frame)}required init?(coder aDecoder: NSCoder) {fatalError("init(coder:) has not been implemented")}/// 初始标题栏////// - Parameters:///   - titles: 标题列表///   - isScroll: 标题栏是否可滑动开关,这个开关在这里主要是控制底部下划线宽度与滚动列表横向滚动的尺寸func initTitle(titles : Array<String>,isScroll : Bool) {if titles.isEmpty {return}self.bIsTitleScroll = isScrollscreenSize = UIScreen.main.boundsself.titleList = titles//创建标题滚动视图titleScrollView.frame = CGRect.init(x: 0, y: 20, width: screenSize.width, height: 42)titleScrollView.alwaysBounceHorizontal = truetitleScrollView.showsHorizontalScrollIndicator = falsetitleScrollView.backgroundColor = UIColor.init(red: 66.0 / 255.0, green: 133.0 / 255.0, blue: 236.0 / 255.0, alpha: 1.0)self.addSubview(titleScrollView)if !isScroll{averageItemWidth = titleScrollView.frame.width / CGFloat(titles.count)}var offsetX : CGFloat = 0var contentSize : CGFloat = 0for (idx,title) in self.titleList.enumerated(){if isScroll{if idx == 0{offsetX = 0}else{offsetX = self.btnList[idx - 1].frame.size.width + self.btnList[idx - 1].frame.origin.x}}let button : UIButton = UIButton.init(frame:CGRect.init(x: CGFloat(idx) * averageItemWidth, y: 0, width: averageItemWidth, height: 40))button.tag = idxbutton.addTarget(self, action: #selector(onClickListener(btn:)), for:.touchUpInside)button.setTitle(title, for: UIControlState.normal)button.titleLabel?.font = UIFont.systemFont(ofSize: 12)button.setTitleColor(UIColor.white, for: .normal)if isScroll{let tmpWidth : CGFloat = UIButton.getWidthWithTitle(title: title, font: UIFont.systemFont(ofSize: 12)) + 20button.frame = CGRect.init(x: offsetX, y: 0, width: tmpWidth, height: 40)contentSize += tmpWidth}titleScrollView.addSubview(button)self.btnList.append(button)}if isScroll{titleScrollView.contentSize = CGSize.init(width:contentSize, height: 42)}else{titleScrollView.contentSize = CGSize.init(width:CGFloat(titles.count) * averageItemWidth, height: 42)}//创建底部线条let lineRect : CGRect = CGRect.init(x: 0,y: 40,width: isScroll == true ? self.btnList[0].frame.size.width : averageItemWidth,height: 1.5)bottomLine.frame = lineRectbottomLine.backgroundColor = UIColor.whitetitleScrollView.addSubview(bottomLine)}func initSegmentView(views : Array<Any>) {if views.count == 0 {return}self.segmentScroll = UIScrollView.init(frame:CGRect.init(x: 0, y: 62.5, width: screenSize.width, height: screenSize.height))self.segmentScroll.contentSize = CGSize.init(width: screenSize.width * CGFloat(views.count), height: screenSize.height)self.segmentScroll.alwaysBounceHorizontal = trueself.segmentScroll.isPagingEnabled = trueself.addSubview(self.segmentScroll)self.segmentScroll.addObserver(self, forKeyPath: "contentOffset", options: [.new,.old], context: nil)for (idx, layout) in views.enumerated(){if(idx > views.count){break}self.segmentScroll.addSubview(layout as! UIView)}}func onClickListener(btn : UIButton?)  {if (delegate != nil) {delegate?.onChangeListener(index: btn!.tag)}self.segmentScroll.scrollRectToVisible(CGRect.init(x: CGFloat(btn!.tag) * self.segmentScroll.frame.width,y: self.segmentScroll.frame.origin.y,width: self.segmentScroll.frame.width,height: self.segmentScroll.frame.height),animated: true)let lastItemWidth : CGFloat = self.btnList[self.nLastIndex].frame.widthlet curItemWidth : CGFloat = self.btnList[btn!.tag].frame.widthvar fromValue : NSValue?var toValue : NSValue?if self.bIsTitleScroll{fromValue = NSValue.init(cgPoint: CGPoint.init(x: self.btnList[self.nLastIndex].frame.origin.x + 0.5 * lastItemWidth,y: 40))toValue = NSValue.init(cgPoint: CGPoint.init(x: self.btnList[btn!.tag].frame.origin.x + 0.5 * curItemWidth,y: 40))}else{fromValue = NSValue.init(cgPoint: CGPoint.init(x: CGFloat(self.nLastIndex) * averageItemWidth + 0.5 * averageItemWidth,y: 40))toValue  = NSValue.init(cgPoint: CGPoint.init(x: CGFloat(btn!.tag) * averageItemWidth + 0.5 * averageItemWidth,y: 40))}startLineMoveAnimFromValue(fromValue: fromValue!, toValue: toValue!, duration: 0.3)titleLabelMoveLogic(curBtnIdx: btn!.tag)self.nLastIndex = btn!.tagupdateTitleBtnStatus(idx: btn!.tag)guard self.bIsTitleScroll == true else {self.finalPos = CGPoint.init(x : CGFloat(btn!.tag) * averageItemWidth + 0.5 * averageItemWidth, y : 40)return}self.finalPos = CGPoint.init(x:curItemWidth + 0.5 * curItemWidth, y: 40)}/// 处理标签滑动逻辑:/// - Parameters:///   - curBtnIdx: 点击的当前标签/// 对于可以滑动,需要重新调整可见视图func titleLabelMoveLogic(curBtnIdx : Int) {if !self.bIsTitleScroll {return}self.titleScrollView.scrollRectToVisible(CGRect.init(x: self.btnList[curBtnIdx].frame.origin.x,y: 0,width: self.titleScrollView.frame.size.width,height: self.titleScrollView.frame.size.height),animated: true)}func updateTitleBtnStatus(idx : Int){for(index, button) in self.btnList.enumerated(){if idx == index {button.setTitleColor(UIColor.init(red: 118 / 255, green: 198 / 255, blue: 192 / 255, alpha: 1.0), for: .normal)}else {button.setTitleColor(UIColor.white, for: .normal)}}if self.bIsTitleScroll {        //对于标题栏可以滑动,需要重新调整底部下划线的宽度resetBottomLineWidth(idx: idx)}}/// 调整顶部标签的宽度:主要根据点击的按钮宽度来更新标签的宽度////// - Parameter idx: 宽度id 因为按钮id与其在列表中索引一致,所以可以直接用id作索引func resetBottomLineWidth(idx : Int) {let btnWidth : CGFloat = self.btnList[idx].frame.widthbottomLine.frame = CGRect.init(x: bottomLine.frame.origin.x, y: bottomLine.frame.origin.y, width: btnWidth, height: bottomLine.frame.size.height)}func startLineMoveAnimFromValue(fromValue : Any, toValue : Any, duration:CFTimeInterval) {moveAnimation.fromValue = fromValuemoveAnimation.toValue = toValuemoveAnimation.delegate = self as CAAnimationDelegatemoveAnimation.isRemovedOnCompletion = falsemoveAnimation.fillMode = kCAFillModeForwardsmoveAnimation.duration = durationbottomLine.layer.removeAllAnimations()bottomLine.layer.add(moveAnimation, forKey: "onStart")}override func observeValue(forKeyPath keyPath: String?, of object: Any?, change: [NSKeyValueChangeKey : Any]?, context: UnsafeMutableRawPointer?) {let newPos : CGPoint = change?[NSKeyValueChangeKey.newKey] as! CGPointself.nLastIndex = Int(newPos.x / self.segmentScroll.frame.width);self.bottomLine.layer.removeAllAnimations()if self.bIsTitleScroll{self.bottomLine.frame = CGRect.init(x: self.btnList[self.nLastIndex].frame.origin.x,y: self.bottomLine.frame.origin.y,width: 0,height: 1.5)}else{var frame : CGRect = self.bottomLine.frameframe.origin.x = CGFloat(self.nLastIndex) * averageItemWidthself.bottomLine.frame = frame;}self.bottomLine.layoutIfNeeded()titleLabelMoveLogic(curBtnIdx: self.nLastIndex)updateTitleBtnStatus(idx: self.nLastIndex)}deinit{self.segmentScroll.removeObserver(self, forKeyPath: "contentOffset")}}extension ScrollNavBar : ScrollNavBarChangeListener,CAAnimationDelegate{func onChangeListener(index: Int) {}func animationDidStop(_ anim: CAAnimation, finished flag: Bool) {if bottomLine.layer.animationKeys()?.last == "onStart" {var frame : CGRect = bottomLine.frameframe.origin.x = finalPos.xbottomLine.frame = frame}}}
按钮自适应使用扩展的方式:
import UIKit// MARK: - 本类主要处理按钮随文本宽度自适应
extension UIButton{/**类方法,根据宽度,计算高度@param width 输入宽度@param title 文本内容@param font 字体属性@return 计算后的高度*/class func getHeightByWidth(width : CGFloat, title : String, font : UIFont) -> CGFloat{let button : UIButton = UIButton.init(frame: CGRect.init(x: 0, y: 0, width: width, height: 0))button.setTitle(title, for: .normal)button.titleLabel?.font = fontbutton.sizeToFit()button.titleLabel?.numberOfLines = 0return button.frame.size.height}/**根据文本内容计算宽度@param title 文本内容@param font 字体属性@return 计算后的宽度*/class func getWidthWithTitle(title : String, font : UIFont) -> CGFloat{//        UILabel *label = [[UILabel alloc] initWithFrame:CGRectMake(0, 0, SCREEN_WIDTH, 0)];
//        label.text = title;
//        label.font = font;
//        [label sizeToFit];
//        return label.frame.size.width;let button : UIButton = UIButton.init(frame: CGRect.init(x: 0, y: 0, width: 0, height: 0))button.setTitle(title, for: .normal)button.titleLabel?.font = fontbutton.sizeToFit()return button.frame.size.width}}
在vc中使用可滑动方式:
import UIKitclass WatchVC: BaseVC {lazy var topNavBar : ScrollNavBar = {[unowned self]() -> ScrollNavBar inlet tmpView : ScrollNavBar = ScrollNavBar.init(frame: CGRect.init(x : 0,y : 0,width : self.getScreenSize().size.width,height : self.getScreenSize().size.height))return tmpView}()override func viewDidLoad() {initView()}func initView(){let titles : [String] = ["视频","资讯","趣味图集","小说","娱乐","热点","体育","财经","军事","汽车","时尚"]topNavBar.initTitle(titles: titles,isScroll: true)self.view.addSubview(topNavBar)let view1 : UIView = UIView.init(frame: CGRect.init(x: 0, y: 0, width: self.getScreenSize().size.width, height: self.getScreenSize().size.height))view1.backgroundColor = UIColor.bluelet view2 : UIView = UIView.init(frame: CGRect.init(x: self.getScreenSize().size.width, y: 0, width: self.getScreenSize().size.width, height: self.getScreenSize().size.height))view2.backgroundColor = UIColor.orangelet view3 : UIView = UIView.init(frame: CGRect.init(x: self.getScreenSize().size.width * 2, y: 0, width: self.getScreenSize().size.width, height: self.getScreenSize().size.height))view3.backgroundColor = UIColor.yellowlet view4 : UIView = UIView.init(frame: CGRect.init(x: self.getScreenSize().size.width * 3, y: 0, width: self.getScreenSize().size.width, height: self.getScreenSize().size.height))view4.backgroundColor = UIColor.bluelet views : [UIView] = [view1,view2,view3,view4]topNavBar.initSegmentView(views: views)}
}
底部索引线毛毛虫实现效果图如下:
.h文件
//
//  ScrollNavBar.h
//  BossJob
//
//  Created by 刘小兵 on 2017/8/29.
//  Copyright © 2017年 刘小兵. All rights reserved.
//#import <UIKit/UIKit.h>/**滑动导航栏点击时切换页面监听协议接口*/
@protocol ScrollNavBarChangeListener <NSObject>@optional
-(void) onChangeListener:(NSInteger) index;@end/**滑动的导航条*/
@interface ScrollNavBar : UIView<CAAnimationDelegate>// 滑动导航栏点击时切换页面监听事件
@property(nonatomic,weak) id<ScrollNavBarChangeListener> delegate;@property(nonatomic,strong) UIView* bottomLine;@property(nonatomic,strong) NSMutableArray* titleList;
@property(nonatomic,strong) NSMutableArray* btnList;@property(nonatomic,assign) double itemWidth;@property(nonatomic,strong) CABasicAnimation *moveAnimation;@property(nonatomic,assign) NSInteger nCurIndex;@property(nonatomic,strong) UIScrollView* segmentScroll;@property(nonatomic,assign) CGPoint finalPos;    //点击滑动条的标签,最终的位置/**初始化标题@param titles 标题列表*/
-(void)iniTitles:(NSMutableArray*) titles;/**添加中间滚动视图到列表中,这个视图的个数应该与标题一一对应,超过的部分直接忽略@param views 中间视图容器*/
-(void)initSegmentView:(NSMutableArray*) views;/**更新标题栏状态@param idx 更新的索引*/
-(void)updateTitleBtnStatus:(NSInteger) idx;/**注册广播通知*/
-(void)registerBrodcast;@end
.m文件:
//
//  ScrollNavBar.m
//  BossJob
//
//  Created by 刘小兵 on 2017/8/29.
//  Copyright © 2017年 刘小兵. All rights reserved.
//#import "ScrollNavBar.h"
#import "Constants.h"#define   PageVCWidth   [UIScreen mainScreen].bounds.size.width@implementation ScrollNavBar-(instancetype) initWithFrame:(CGRect)frame{if(self = [super initWithFrame:frame]){[self initAttr];}return self;}-(void) initAttr{self.nCurIndex = 0;self.btnList = [NSMutableArray array];
}-(void)iniTitles:(NSMutableArray*) titles{self.titleList = titles;self.itemWidth = SCREEN_WIDTH / [self.titleList count];[self.titleList enumerateObjectsUsingBlock:^(NSString* title, NSUInteger idx, BOOL * _Nonnull stop) {UIButton* button = [[UIButton alloc] initWithFrame:CGRectMake(idx * self.itemWidth, 0, self.itemWidth, 40.0)];button.backgroundColor = [UIColor whiteColor];button.tag = idx;[button addTarget:self action:@selector(onClickListener:) forControlEvents:UIControlEventTouchUpInside];[button setTitle:title forState:UIControlStateNormal];button.titleLabel.font = [UIFont systemFontOfSize:12];[button setTitleColor:[UIColor colorWithRed:119.0 / 255.0 green:119.0 / 255.0 blue:119.0 / 255.0 alpha:1.0] forState:UIControlStateNormal];[self addSubview:button];[self.btnList  addObject:button];}];//创建底部线条UIView* lineView = [[UIView alloc] initWithFrame:CGRectMake(0.0f, 40.0, SCREEN_WIDTH, 0.5f)];lineView.backgroundColor = [UIColor colorWithRed:232.0 / 255.0 green:232.0 / 255.0 blue:233.0 / 255.0 alpha:1.0];[self addSubview:lineView];self.bottomLine = [[UIView alloc] initWithFrame:CGRectMake((SCREEN_WIDTH / 3 - 10) / 2, 40.0, 10, 1.5f)];self.bottomLine.backgroundColor = [UIColor colorWithRed:118.0f / 255.0 green:198.f / 255.0 blue:192.0f / 255.0 alpha:1.0];[self addSubview:self.bottomLine];//    //创建中间的滑动视图
//    self.segmentScroll = [[UIScrollView alloc] initWithFrame:CGRectMake(0.0, 42.5, SCREEN_WIDTH, SCREEN_HEIGHT)];
//    self.segmentScroll.contentSize = CGSizeMake(SCREEN_WIDTH * [self.titleList count], SCREEN_HEIGHT);
//    self.segmentScroll.alwaysBounceHorizontal = YES;
//    self.segmentScroll.pagingEnabled = YES;
//    [self addSubview:self.segmentScroll];
//
//    //使用kvo来监听uiscroll的滑动事件,代替它的协议接口
//    //添加注册实现contentOffset监听
//    [self.segmentScroll addObserver:self forKeyPath:@"contentOffset" options:NSKeyValueObservingOptionNew context:nil];
//
//
//    //测试视图
//    UIView* view1 = [[UIView alloc] initWithFrame:CGRectMake(0.0, 0.0, SCREEN_WIDTH, SCREEN_HEIGHT)];
//    view1.backgroundColor = [UIColor greenColor];
//    [self.segmentScroll addSubview:view1];
//
//    UIView* view2 = [[UIView alloc] initWithFrame:CGRectMake(SCREEN_WIDTH, 0.0, SCREEN_WIDTH, SCREEN_HEIGHT)];
//    view2.backgroundColor = [UIColor blueColor];
//    [self.segmentScroll addSubview:view2];
//
//    UIView* view3 = [[UIView alloc] initWithFrame:CGRectMake(SCREEN_WIDTH * 2, 0.0, SCREEN_WIDTH, SCREEN_HEIGHT)];
//    view3.backgroundColor = [UIColor greenColor];
//    [self.segmentScroll addSubview:view3];}//本接口主要,创建中间滚动视图
-(void)initSegmentView:(NSMutableArray*) views{if([views count] == 0 ) return;//创建中间的滑动视图self.segmentScroll = [[UIScrollView alloc] initWithFrame:CGRectMake(0.0, 42.5, SCREEN_WIDTH, SCREEN_HEIGHT)];self.segmentScroll.contentSize = CGSizeMake(SCREEN_WIDTH * [self.titleList count], SCREEN_HEIGHT);self.segmentScroll.alwaysBounceHorizontal = YES;self.segmentScroll.pagingEnabled = YES;[self addSubview:self.segmentScroll];//使用kvo来监听uiscroll的滑动事件,代替它的协议接口//添加注册实现contentOffset监听[self.segmentScroll addObserver:self forKeyPath:@"contentOffset" options:NSKeyValueObservingOptionNew context:nil];[views enumerateObjectsUsingBlock:^(UIView* layout, NSUInteger idx, BOOL * _Nonnull stop) {if(idx > [views count]) *stop = true;[self.segmentScroll addSubview:layout];}];}-(void)onClickListener:(UIButton*) button{if(self.delegate != nil){[self.delegate onChangeListener:button.tag];}[self.segmentScroll scrollRectToVisible:CGRectMake(SCREEN_WIDTH * button.tag, 42.5, SCREEN_WIDTH, SCREEN_HEIGHT) animated:NO];NSValue* fromValue = [NSValue valueWithCGPoint:CGPointMake(self.nCurIndex * self.itemWidth + 0.5 * self.itemWidth,40.0)];NSValue* toValue = [NSValue valueWithCGPoint:CGPointMake(button.tag * self.itemWidth + 0.5 * self.itemWidth, 40.0)];[self startLineMoveAnimFromValue:fromValue toValue:toValue duration:0.3];self.nCurIndex = button.tag;[self updateTitleBtnStatus:button.tag];self.finalPos = CGPointMake(button.tag * self.itemWidth + 0.5 * self.itemWidth, 40.0);
}-(void) updateTitleBtnStatus:(NSInteger)idx{[self.btnList enumerateObjectsUsingBlock:^(UIButton* button, NSUInteger index, BOOL * _Nonnull stop) {if(idx == index){[button setTitleColor:[UIColor colorWithRed:118.0f / 255.0 green:198.f / 255.0 blue:192.0f / 255.0 alpha:1.0] forState:UIControlStateNormal];}else{[button setTitleColor:[UIColor colorWithRed:119.0 / 255.0 green:119.0 / 255.0 blue:119.0 / 255.0 alpha:1.0] forState:UIControlStateNormal];}}];
}-(void) updateBottomLine:(CGFloat) scale{}//private method---线条移动启动动画
-(void) startLineMoveAnimFromValue:(id) fromValue toValue:(id) toValue  duration:(CFTimeInterval) time{self.moveAnimation = [CABasicAnimation animationWithKeyPath:@"position"];self.moveAnimation.fromValue = fromValue;self.moveAnimation.toValue = toValue;self.moveAnimation.delegate = self;self.moveAnimation.removedOnCompletion = NO;self.moveAnimation.fillMode = kCAFillModeForwards;self.moveAnimation.duration = time;[self.bottomLine.layer removeAllAnimations];[self.bottomLine.layer addAnimation:self.moveAnimation forKey:@"onStart"];}-(void) animationDidStop:(CAAnimation *)anim finished:(BOOL)flag{if([self.bottomLine.layer.animationKeys.lastObject isEqualToString:@"onStart"]){//           CGRect frame = self.bottomLine.frame;
//           frame.origin.x = self.finalPos.x;
//           self.bottomLine.frame = frame;}
}//-------------------kvo 实现观察主题 ----------------
//对于滑动翻页使用kvo监听机制
- (void)observeValueForKeyPath:(NSString *)keyPath ofObject:(id)object change:(NSDictionary *)change context:(void *)context{CGPoint offset = [change[NSKeyValueChangeNewKey] CGPointValue];CGPoint oldOffset = [change[NSKeyValueChangeOldKey] CGPointValue];CGFloat oldOffsetX = oldOffset.x;CGFloat deltaOfOffsetX = offset.x - oldOffsetX;self.nCurIndex = deltaOfOffsetX / SCREEN_WIDTH;[self updateTitleBtnStatus:self.nCurIndex];//下面为下划线跟随弹性  效果CGFloat contentOffsetX = offset.x;CGFloat sWidth =  SCREEN_WIDTH;CGFloat content_X = (offset.x / sWidth);NSArray *arr = [[NSString stringWithFormat:@"%f",content_X] componentsSeparatedByString:@"."];int num = [arr[0] intValue]; //找到滑动的索引CGFloat scale = content_X - num;int selectIndex = deltaOfOffsetX / SCREEN_WIDTH;UIButton*_btnRight;UIButton*_btnLeft;// 拖拽if (contentOffsetX <= oldOffsetX ){selectIndex++;if (selectIndex - 1 < 0 || selectIndex > self.btnList.count - 1) {return;}_btnRight = [self.btnList objectAtIndex:selectIndex];_btnLeft = [self.btnList objectAtIndex:selectIndex - 1];} else if (contentOffsetX > oldOffsetX ){if (selectIndex + 1 > self.btnList.count - 1) {return;}_btnRight = [self.btnList objectAtIndex:selectIndex + 1];_btnLeft = [self.btnList objectAtIndex:selectIndex];}if (!_btnRight || !_btnLeft) {return;}CGRect rect = self.bottomLine.frame;if (scale < 0.5 ) {rect.size.width = 10 + ( _btnRight.center.x-_btnLeft.center.x) * scale*2;rect.origin.x = _btnLeft.center.x -10/2;}else if(scale >= 0.5 ){rect.size.width =  10+(_btnRight.center.x-_btnLeft.center.x) * (1-scale)*2;rect.origin.x = _btnLeft.center.x +  2*(scale-0.5)*(_btnRight.center.x - _btnLeft.center.x)-10/2;}[self.bottomLine.layer removeAllAnimations];self.bottomLine.frame = rect;//    [self.bottomLine.layer removeAllAnimations];
//    CGRect frame = self.bottomLine.frame;
//    frame.origin.x = deltaOfOffsetX / SCREEN_WIDTH * self.itemWidth;
//    self.bottomLine.frame = frame;
//    [self.bottomLine layoutIfNeeded];
//
//    self.nCurIndex = deltaOfOffsetX / SCREEN_WIDTH;
//    [self updateTitleBtnStatus:self.nCurIndex];}-(void)dealloc{[self.segmentScroll removeObserver:self forKeyPath:@"contentOffset" context:nil];[[NSNotificationCenter defaultCenter] removeObserver:self name:@"updateLabelStatus" object:nil];}
//-------------------kvo 实现观察主题 end----------------//处理在其他页面不方便更新指示线与标签的状态
-(void)registerBrodcast{[[NSNotificationCenter defaultCenter] addObserver:self selector:@selector(updateLabelStatus:) name:@"updateLabelStatus" object:nil];
}-(void) updateLabelStatus:(NSNotification *)msg{NSDictionary* tmpInfo = [msg object];UIScrollView* scroll = (UIScrollView*)[tmpInfo objectForKey:@"scroll"];//    [self.bottomLine.layer removeAllAnimations];
//    CGRect frame = self.bottomLine.frame;
//    frame.origin.x = scroll.contentOffset.x / SCREEN_WIDTH * self.itemWidth;
//    self.bottomLine.frame = frame;
//    [self.bottomLine layoutIfNeeded];self.nCurIndex = scroll.contentOffset.x / SCREEN_WIDTH;[self updateTitleBtnStatus:self.nCurIndex];
}@end
使用方式:
//创建互动视图UIView* interactBgView = [[UIView alloc] initWithFrame:CGRectMake(SCREEN_WIDTH, 0.0, SCREEN_WIDTH, SCREEN_HEIGHT)];[self.segmentScroll addSubview:interactBgView];interactBgView.backgroundColor = [UIColor whiteColor];ScrollNavBar* scrollNavBarView = [[ScrollNavBar alloc] initWithFrame:CGRectMake(0.0f, 0.0, SCREEN_WIDTH, SCREEN_HEIGHT)];NSMutableArray* title = [NSMutableArray arrayWithObjects:@"对我感兴趣",@"看过我",@"新职位", nil];[scrollNavBarView iniTitles:title];//创建中间滚动视图InterestedInMeView* interestedView = [[InterestedInMeView alloc] initWithFrame:CGRectMake(0.0f, 0.0, SCREEN_WIDTH, SCREEN_HEIGHT)];interestedView.separatorStyle = UITableViewCellSeparatorStyleNone;//看过我的HasCheckMeView* chkMeView = [[HasCheckMeView alloc] initWithFrame:CGRectMake(SCREEN_WIDTH, 0.0, SCREEN_WIDTH, SCREEN_HEIGHT)];chkMeView.separatorInset = UIEdgeInsetsMake(0,10,0,10); //top left right downchkMeView.tableFooterView = [[UIView alloc] initWithFrame:CGRectZero]; //删除底部多余行,及分割线//新职位NewJobView* newJobView = [[NewJobView alloc] initWithFrame:CGRectMake(SCREEN_WIDTH * 2, 0.0, SCREEN_WIDTH, SCREEN_HEIGHT)];newJobView.separatorInset = UIEdgeInsetsMake(0,10,0,10); //top left right downnewJobView.tableFooterView = [[UIView alloc] initWithFrame:CGRectZero]; //删除底部多余行,及分割线NSMutableArray* layout = [NSMutableArray arrayWithObjects:interestedView,chkMeView,newJobView,nil];[scrollNavBarView initSegmentView:layout];[interactBgView addSubview:scrollNavBarView];
项目全部源码在项目中:模仿Boss直聘(github)
喜欢的给一个星星
这篇关于IOS控件系列--Swift 滑动标签栏(支持底部下划线毛毛虫滑动效果Object-c实现)的文章就介绍到这儿,希望我们推荐的文章对编程师们有所帮助!


