本文主要是介绍基于mmclassification框架,ResNeSt-50网络训练标牌细分类模型,希望对大家解决编程问题提供一定的参考价值,需要的开发者们随着小编来一起学习吧!
项目地址:https://github.com/open-mmlab/mmclassification
参考1:https://blog.csdn.net/weixin_34910922/article/details/107801656
参考2:https://blog.csdn.net/weixin_43216130/article/details/115312600
这两篇博文都写的很仔细,谢谢这两位同学
一、环境安装
1、首先查看python的版本
2、再查看cuda和pytorch的版本,是否对应

3、安装和cuda和pytorch对应版本的mmcv
pip install mmcv-full==1.3.10
pip uninstall mmcv
如果出现mmcv不能导入的库或者函数,一般是版本不对
4、测试一下环境是否正确
# single-gpu testing
python tools/test.py ${CONFIG_FILE} ${CHECKPOINT_FILE} [--out ${RESULT_FILE}]python tools/test.py configs/imagenet/resnet50_batch256.py checkpoints/xxx.pth --out result.pkl
测试时,需要提供config文件和权重,我选的是这两个,测试环境的时候最好不要选imagenet后缀的,会下载imagenet数据集很大,耗时,如果是离线,还得自己去下载
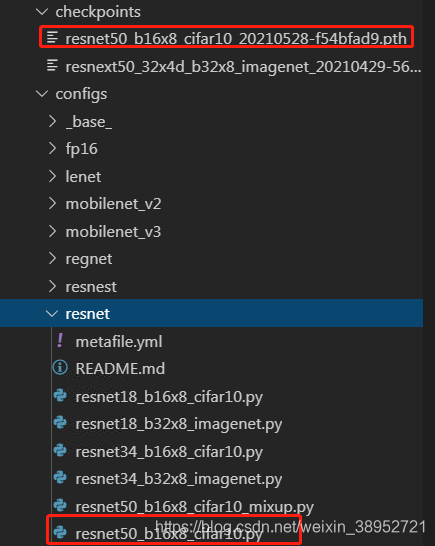
权重文件的下载地址:https://github.com/open-mmlab/mmclassification/blob/master/docs/model_zoo.md
二、数据集准备
1、从平台下载得到的初始数据集
2、初始数据集裁剪 step1_cropbyjson.py
# -*- coding: utf-8 -*-
import glob
import os
import base64
import cv2
import numpy as np
import json
import datetimedef print_log(info: str, var: object = None, log_filename: str = None):time_info = '{0}'.format(datetime.datetime.now().strftime('%Y-%m-%d %H:%M:%S'))if var is not None:print(time_info, info, var)else:print(time_info, info)if log_filename:with open(log_filename, 'a+', encoding='utf-8') as log_file:msg = time_info + ' ' + info + ' ' + str(var) if var else time_info + ' ' + infolog_file.write(msg + '\n')def get_info_from_json(fnm: str) -> list:"""get box_list from json file:param fnm: json file path:return: [int: x_min, int: y_min, int: x_max, int: y_max, str: f_code]"""json_file = open(fnm, 'r', encoding='utf-8')json_obj = json.load(json_file)try:objs, info_list = json_obj["objects"], []if not len(objs):return []for i in objs:bbox, f_code = i['obj_points'][0], i['f_code']info_list.append([round(bbox['x']), round(bbox['y']), round(bbox['x'] + bbox['w']), round(bbox['y'] + bbox['h']), f_code])except KeyError:print_log('{} has wrong(key error) json format.'.format(repr(fnm)))return []return info_listdef crop_image_func(json_file, exp_size, img_dir, img_crop_dir):box_list = get_info_from_json(json_file)_, fnm = os.path.split(json_file)img_file = os.path.join(img_dir, fnm[:-5] + '.jpg')# read imagetry:with open(img_file, 'rb') as f:base64_data = base64.b64encode(f.read())img_data = base64.b64decode(base64_data)img = cv2.imdecode(np.frombuffer(img_data, np.uint8), cv2.IMREAD_COLOR)img_h, img_w = img.shape[0], img.shape[1]except FileNotFoundError:print_log('{} is not found. please check.'.format(repr(img_file)))return Noneif img_h * img_w == 0:print_log('{} is broken. please check.'.format(repr(img_file)))return None# crop image and savefor inx, box_item in enumerate(box_list):# box item: [1027, 610, 1034, 616, '0DFFFF']crop_img_name = fnm[:-5] + '_' + str(inx) + '_' + box_item[-1] + '.jpg'xmin, ymin, xmax, ymax, f_code = box_itemcrop_img_dir = os.path.join(img_crop_dir, f_code)if not os.path.exists(crop_img_dir):os.makedirs(crop_img_dir, exist_ok=True)# expandexp_w, exp_h = int(exp_size[0]/2), int(exp_size[1]/2)xmin = xmin - exp_w if xmin - exp_w > 0 else 0ymin = ymin - exp_h if ymin - exp_h > 0 else 0xmax = xmax + exp_w if xmax + exp_w < img_w else img_wymax = ymax + exp_h if ymax + exp_h < img_h else img_hcrop_img = img[ymin:ymax, xmin:xmax]cv2.imwrite(os.path.join(crop_img_dir, crop_img_name), crop_img)def main():image_dir = '/root/data02/sign_mmtest/images'json_dir = '/root/data02/sign_mmtest/labels'image_crop_dir = '/root/data02/sign_mmtest/crop_image'expand_size = [10, 10] # [width, height]json_lst = glob.glob(os.path.join(json_dir, '*.json'))img_lst = glob.glob(os.path.join(image_dir, '*.jpg'))print_log('{} json files.'.format(len(json_lst)), '{} images.'.format(len(img_lst)))for i in json_lst:crop_image_func(i, expand_size, image_dir, image_crop_dir)if __name__ == '__main__':main()
3、将裁剪后的数据集分为train和val,step2_split_trainval.py
import os
from shutil import copyfileD_path = '/root/data02/sign_mmtest/crop_image'
classes = os.listdir(D_path)
trainfile = '/root/work/mmclassification/data/imagenet/train'
valfile = '/root/work/mmclassification/data/imagenet/val'for i in classes:items = os.listdir(os.path.join(D_path,i))total_num = len(items)item_path = os.path.join(D_path,i)for j in range(0,total_num):tmp_img_path = os.path.join(item_path,items[j])if j < total_num*0.8:#560dst_dir = os.path.join(trainfile,i)if not os.path.exists(dst_dir):os.mkdir(dst_dir)copyfile(tmp_img_path,os.path.join(dst_dir,items[j]))else:dst_dir = os.path.join(valfile,i)if not os.path.exists(dst_dir):os.mkdir(dst_dir)copyfile(tmp_img_path,os.path.join(dst_dir,items[j]))
记得把类别名字都改成class0,class2...
4、生成train.txt和val.txt,step3_gentxt.py
import os
import glob
import re# 生成train.txt和val.txt#需要改为您自己的路径
root_dir = "/root/work/mmclassification/data/imagenet"
#在该路径下有train,val,meta三个文件夹
train_dir = os.path.join(root_dir, "train")
val_dir = os.path.join(root_dir, "val")
meta_dir = os.path.join(root_dir, "meta")def generate_txt(images_dir,map_dict):# 读取所有文件名imgs_dirs = glob.glob(images_dir+"/*/*")# 打开写入文件typename = images_dir.split("/")[-1]target_txt_path = os.path.join(meta_dir,typename+".txt")f = open(target_txt_path,"w")# 遍历所有图片名for img_dir in imgs_dirs:# 获取第一级目录名称filename = img_dir.split("/")[-2]num = map_dict[filename]# 写入文件# relate_name = re.findall(typename+"/([\w / - .]*)",img_dir)# 数据名字格式不同,可能需要修改,检查下生成的txt格式对不对relate_name = img_dir.split("/")[-2:]# print("relate_name",relate_name)f.write(relate_name[0]+"/"+relate_name[1]+" "+num+"\n")def get_map_dict():# 读取所有类别映射关系class_map_dict = {}with open(os.path.join(meta_dir,"classmap.txt"),"r") as F:lines = F.readlines()for line in lines:line = line.split("\n")[0]filename,cls,num = line.split(" ")class_map_dict[filename] = numreturn class_map_dictif __name__ == '__main__':class_map_dict = get_map_dict()generate_txt(images_dir=train_dir,map_dict=class_map_dict)generate_txt(images_dir=val_dir,map_dict=class_map_dict)
train.txt和val.txt的内容如下:
class1/85_HDD15_2016-11-01125321_0_000005.jpg 0
class1/102_HDD14_2016-08-24095704_0_000005.jpg 0
其中classmap.txt需要写入如下内容:
class1 000005 0
class2 000010 1
最后的数据集格式如下:

5、step5_check32.py
如果遇到ValueError: Expected more than 1 value per channel when training, got input size
https://blog.csdn.net/u011622208/article/details/85230847

同时也要把val.txt的长度改成batch_size的倍数
三、配置文件修改
1、mmcls/datasets/mydataset.py
mmcls/datasets目录下新建py文件(名字自取,以mydataset.py为例),写入内容如下:(#****对应自己的类别)
第二次之后,就直接可以修改这脚本里面的类别名就可以了
import numpy as npfrom .builder import DATASETS
from .base_dataset import BaseDataset@DATASETS.register_module()
class MyDataset(BaseDataset):CLASSES = ["000005","000010"]#***********************************def load_annotations(self):assert isinstance(self.ann_file, str)data_infos = []with open(self.ann_file) as f:samples = [x.strip().split(' ') for x in f.readlines()]for filename, gt_label in samples:info = {'img_prefix': self.data_prefix}info['img_info'] = {'filename': filename}info['gt_label'] = np.array(gt_label, dtype=np.int64)data_infos.append(info)return data_infos2、mmcls/datasets/init.py
第二次之后,这个脚本就不用修改了
添加内容如下:
from .mydataset import MyDataset__all__ = [#增加MyDataset这一项'MyDataset'
]
添加后是这样的:

3、configs/base/datasets/mydataset.py
第二次之后,只要修改路径就行了
# dataset settings
dataset_type = 'MyDataset'#**************************************
img_norm_cfg = dict(mean=[123.675, 116.28, 103.53], std=[58.395, 57.12, 57.375], to_rgb=True)
train_pipeline = [dict(type='LoadImageFromFile'),dict(type='RandomResizedCrop', size=224),dict(type='RandomFlip', flip_prob=0.5, direction='horizontal'),dict(type='Normalize', **img_norm_cfg),dict(type='ImageToTensor', keys=['img']),dict(type='ToTensor', keys=['gt_label']),dict(type='Collect', keys=['img', 'gt_label'])
]
test_pipeline = [dict(type='LoadImageFromFile'),dict(type='Resize', size=(256, -1)),dict(type='CenterCrop', crop_size=224),dict(type='Normalize', **img_norm_cfg),dict(type='ImageToTensor', keys=['img']),dict(type='Collect', keys=['img'])
]
data = dict(samples_per_gpu=32,workers_per_gpu=2,train=dict(type=dataset_type,data_prefix='/root/work/mmclassification/data/imagenet/train',#***************ann_file='/root/work/mmclassification/data/imagenet/meta/train.txt',#****************pipeline=train_pipeline),val=dict(type=dataset_type,data_prefix='/root/work/mmclassification/data/imagenet/val',#******************ann_file='/root/work/mmclassification/data/imagenet/meta/val.txt',#***************pipeline=test_pipeline),test=dict(# replace `data/val` with `data/test` for standard testtype=dataset_type,data_prefix='/root/work/mmclassification/data/imagenet/val',#********************ann_file='/root/work/mmclassification/data/imagenet/meta/val.txt',#*******************pipeline=test_pipeline))
evaluation = dict(interval=1, metric='accuracy')
四、开始训练
第一种是要先修改选择的config文件的数据类型
dataset_type = 'MyDataset'
第二种是集成自己的数据集类
_base_ = ['../_base_/models/resnet18.py', '../_base_/datasets/mydataset.py','../_base_/default_runtime.py'
]
1、从零开始训练
python tools/train.py --config configs/resnet/resnet18_b32x8_imagenet.py
用哪个脚本就修改哪个脚本:当然也可以直接修改tools/train中的config配置的默认参数:
def parse_args():parser = argparse.ArgumentParser(description='Train a model')parser.add_argument('--config',default="../configs/resnet/resnet18_b32x8_imagenet.py", help='train config file path')parser.add_argument('--work-dir', help='the dir to save logs and models')parser.add_argument('--resume-from', help='the checkpoint file to resume from')
2、用预训练模型
从选择执行的config文件,比如我选的resnest_b64x32_imagenet.py,为了保留运行相关设置,继承了‘base/default_runtime.py’
每次预训练模型的位置参数,就在configs/_base_/dafault_runtime.py中修改load_from参数:
# checkpoint saving
checkpoint_config = dict(interval=1)
# yapf:disable
log_config = dict(interval=100,hooks=[dict(type='TextLoggerHook'),# dict(type='TensorboardLoggerHook')])
# yapf:enabledist_params = dict(backend='nccl')
log_level = 'INFO'
load_from =  '/root/work/mmclassification/checkpoints/resnest50_b64x32_imagenet.pth'
resume_from = None
workflow = [('train', 1)]
五、测试
# single-gpu testing# 查看测试的的类别预测矩阵等
python tools/test.py /root/work/mmclassification/work_dirs/resnet18_b32x8_imagenet/resnet18_b32x8_imagenet.py /root/work/mmclassification/work_dirs/resnet18_b32x8_imagenet/epoch_100.pth --out result_sign_test.pkl# 查看准确率,recall等
# 可选的metrics有:accuacy,precision,recall,f1_score,support
python tools/test.py /root/work/mmclassification/work_dirs/resnet18_b32x8_imagenet/resnet18_b32x8_imagenet.py /root/work/mmclassification/work_dirs/resnet18_b32x8_imagenet/epoch_100.pth --metrics accuracy
查看测试结果的pkl文件的代码如下:
#show_pkl.pyimport pickle
path='result_sign_test.pkl'   #path='/root/……/aus_openface.pkl'   pkl文件所在路径
f=open(path,'rb')
data=pickle.load(f)
print(data)
测试单张图片的分类结果
python demo/image_demo.py /root/work/mmclassification/demo/1.png /root/work/mmclassification/work_dirs/resnest50_b64x32_imagenet/resnest50_b64x32_imagenet.py /root/work/mmclassification/work_dirs/resnest50_b64x32_imagenet/epoch_2.pth
这篇关于基于mmclassification框架,ResNeSt-50网络训练标牌细分类模型的文章就介绍到这儿,希望我们推荐的文章对编程师们有所帮助!


