本文主要是介绍Waymo数据集介绍(部分下载,仅用于学习),希望对大家解决编程问题提供一定的参考价值,需要的开发者们随着小编来一起学习吧!
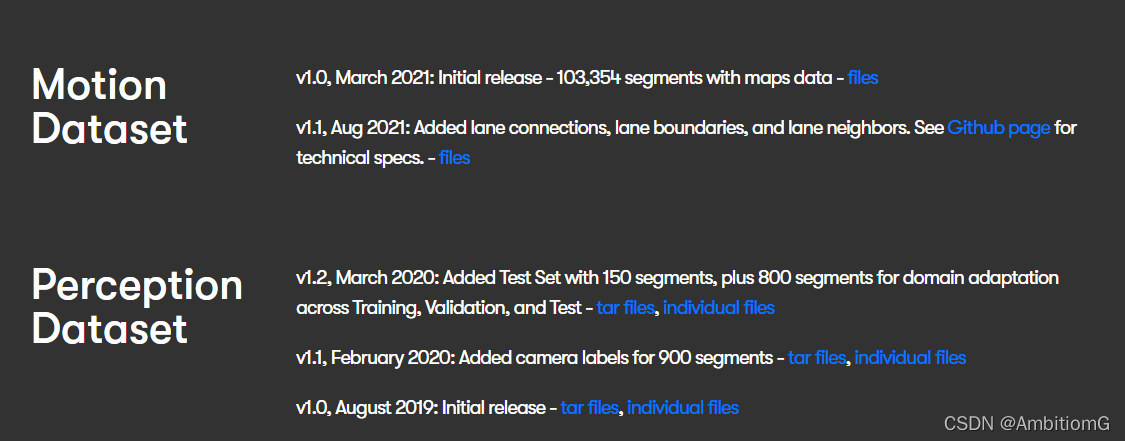
waymo提供了两种数据集,motion与perception两种,请注意,本篇为Perception Dataset v1.2与Motion Dataset v1.1版本
其中motion是鸟瞰图,官网中有介绍,主要用于轨迹预测之类的任务
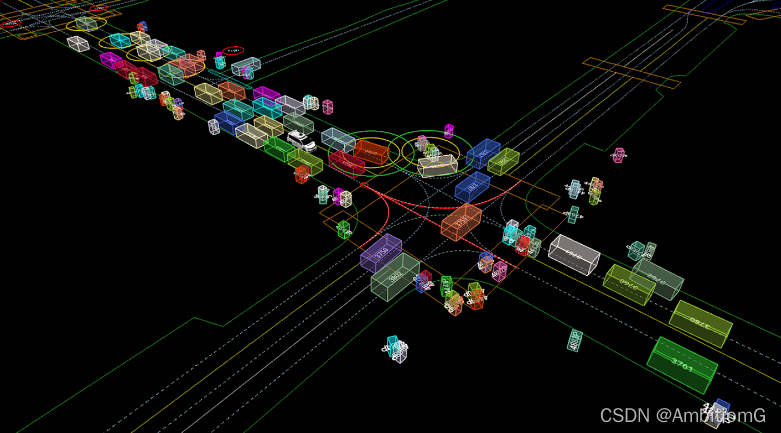
perception主要用于目标检测跟踪之类的任务,是第一视角,有相机和雷达信息,并且在github上有公开的读取数据方法,另外,在读取perception数据时需要安装waymo-open-dataset-tf这个库,安装不上请用清华源,具体请按照官方quick_start教程,另外github有许多已经集成许多功能的代码,搜索waymo就有。
quick_start:
waymo-open-dataset/quick_start.md at master · waymo-research/waymo-open-dataset · GitHub
而motion读取不需要这些,主只需要安装tensorflow以及一些必要的库就行即可
import math
import os
import uuid
import timefrom matplotlib import cm
import matplotlib.animation as animation
import matplotlib.pyplot as pltimport numpy as np
from IPython.display import HTML
import itertools
import tensorflow as tffrom google.protobuf import text_format
from waymo_open_dataset.metrics.ops import py_metrics_ops
from waymo_open_dataset.metrics.python import config_util_py as config_util
from waymo_open_dataset.protos import motion_metrics_pb2# Example field definition
roadgraph_features = {'roadgraph_samples/dir':tf.io.FixedLenFeature([20000, 3], tf.float32, default_value=None),'roadgraph_samples/id':tf.io.FixedLenFeature([20000, 1], tf.int64, default_value=None),'roadgraph_samples/type':tf.io.FixedLenFeature([20000, 1], tf.int64, default_value=None),'roadgraph_samples/valid':tf.io.FixedLenFeature([20000, 1], tf.int64, default_value=None),'roadgraph_samples/xyz':tf.io.FixedLenFeature([20000, 3], tf.float32, default_value=None),
}# Features of other agents.
state_features = {'state/id':tf.io.FixedLenFeature([128], tf.float32, default_value=None),'state/type':tf.io.FixedLenFeature([128], tf.float32, default_value=None),'state/is_sdc':tf.io.FixedLenFeature([128], tf.int64, default_value=None),'state/tracks_to_predict':tf.io.FixedLenFeature([128], tf.int64, default_value=None),'state/current/bbox_yaw':tf.io.FixedLenFeature([128, 1], tf.float32, default_value=None),'state/current/height':tf.io.FixedLenFeature([128, 1], tf.float32, default_value=None),'state/current/length':tf.io.FixedLenFeature([128, 1], tf.float32, default_value=None),'state/current/timestamp_micros':tf.io.FixedLenFeature([128, 1], tf.int64, default_value=None),'state/current/valid':tf.io.FixedLenFeature([128, 1], tf.int64, default_value=None),'state/current/vel_yaw':tf.io.FixedLenFeature([128, 1], tf.float32, default_value=None),'state/current/velocity_x':tf.io.FixedLenFeature([128, 1], tf.float32, default_value=None),'state/current/velocity_y':tf.io.FixedLenFeature([128, 1], tf.float32, default_value=None),'state/current/width':tf.io.FixedLenFeature([128, 1], tf.float32, default_value=None),'state/current/x':tf.io.FixedLenFeature([128, 1], tf.float32, default_value=None),'state/current/y':tf.io.FixedLenFeature([128, 1], tf.float32, default_value=None),'state/current/z':tf.io.FixedLenFeature([128, 1], tf.float32, default_value=None),'state/future/bbox_yaw':tf.io.FixedLenFeature([128, 80], tf.float32, default_value=None),'state/future/height':tf.io.FixedLenFeature([128, 80], tf.float32, default_value=None),'state/future/length':tf.io.FixedLenFeature([128, 80], tf.float32, default_value=None),'state/future/timestamp_micros':tf.io.FixedLenFeature([128, 80], tf.int64, default_value=None),'state/future/valid':tf.io.FixedLenFeature([128, 80], tf.int64, default_value=None),'state/future/vel_yaw':tf.io.FixedLenFeature([128, 80], tf.float32, default_value=None),'state/future/velocity_x':tf.io.FixedLenFeature([128, 80], tf.float32, default_value=None),'state/future/velocity_y':tf.io.FixedLenFeature([128, 80], tf.float32, default_value=None),'state/future/width':tf.io.FixedLenFeature([128, 80], tf.float32, default_value=None),'state/future/x':tf.io.FixedLenFeature([128, 80], tf.float32, default_value=None),'state/future/y':tf.io.FixedLenFeature([128, 80], tf.float32, default_value=None),'state/future/z':tf.io.FixedLenFeature([128, 80], tf.float32, default_value=None),'state/past/bbox_yaw':tf.io.FixedLenFeature([128, 10], tf.float32, default_value=None),'state/past/height':tf.io.FixedLenFeature([128, 10], tf.float32, default_value=None),'state/past/length':tf.io.FixedLenFeature([128, 10], tf.float32, default_value=None),'state/past/timestamp_micros':tf.io.FixedLenFeature([128, 10], tf.int64, default_value=None),'state/past/valid':tf.io.FixedLenFeature([128, 10], tf.int64, default_value=None),'state/past/vel_yaw':tf.io.FixedLenFeature([128, 10], tf.float32, default_value=None),'state/past/velocity_x':tf.io.FixedLenFeature([128, 10], tf.float32, default_value=None),'state/past/velocity_y':tf.io.FixedLenFeature([128, 10], tf.float32, default_value=None),'state/past/width':tf.io.FixedLenFeature([128, 10], tf.float32, default_value=None),'state/past/x':tf.io.FixedLenFeature([128, 10], tf.float32, default_value=None),'state/past/y':tf.io.FixedLenFeature([128, 10], tf.float32, default_value=None),'state/past/z':tf.io.FixedLenFeature([128, 10], tf.float32, default_value=None),
}traffic_light_features = {'traffic_light_state/current/state':tf.io.FixedLenFeature([1, 16], tf.int64, default_value=None),'traffic_light_state/current/valid':tf.io.FixedLenFeature([1, 16], tf.int64, default_value=None),'traffic_light_state/current/x':tf.io.FixedLenFeature([1, 16], tf.float32, default_value=None),'traffic_light_state/current/y':tf.io.FixedLenFeature([1, 16], tf.float32, default_value=None),'traffic_light_state/current/z':tf.io.FixedLenFeature([1, 16], tf.float32, default_value=None),'traffic_light_state/past/state':tf.io.FixedLenFeature([10, 16], tf.int64, default_value=None),'traffic_light_state/past/valid':tf.io.FixedLenFeature([10, 16], tf.int64, default_value=None),'traffic_light_state/past/x':tf.io.FixedLenFeature([10, 16], tf.float32, default_value=None),'traffic_light_state/past/y':tf.io.FixedLenFeature([10, 16], tf.float32, default_value=None),'traffic_light_state/past/z':tf.io.FixedLenFeature([10, 16], tf.float32, default_value=None),
}
dir = '文件位置'
features_description = {}
features_description.update(roadgraph_features)
features_description.update(state_features)
features_description.update(traffic_light_features)dataset = tf.data.TFRecordDataset(dir, compression_type='')
data = next(dataset.as_numpy_iterator())
parsed = tf.io.parse_single_example(data, features_description)def create_figure_and_axes(size_pixels):"""Initializes a unique figure and axes for plotting."""fig, ax = plt.subplots(1, 1, num=uuid.uuid4())# Sets output image to pixel resolution.dpi = 100size_inches = size_pixels / dpifig.set_size_inches([size_inches, size_inches])fig.set_dpi(dpi)fig.set_facecolor('white')ax.set_facecolor('white')ax.xaxis.label.set_color('black')ax.tick_params(axis='x', colors='black')ax.yaxis.label.set_color('black')ax.tick_params(axis='y', colors='black')fig.set_tight_layout(True)ax.grid(False)return fig, axdef fig_canvas_image(fig):"""Returns a [H, W, 3] uint8 np.array image from fig.canvas.tostring_rgb()."""# Just enough margin in the figure to display xticks and yticks.fig.subplots_adjust(left=0.08, bottom=0.08, right=0.98, top=0.98, wspace=0.0, hspace=0.0)fig.canvas.draw()data = np.frombuffer(fig.canvas.tostring_rgb(), dtype=np.uint8)return data.reshape(fig.canvas.get_width_height()[::-1] + (3,))def get_colormap(num_agents):"""Compute a color map array of shape [num_agents, 4]."""colors = cm.get_cmap('jet', num_agents)colors = colors(range(num_agents))np.random.shuffle(colors)return colorsdef get_viewport(all_states, all_states_mask):"""Gets the region containing the data.Args:all_states: states of agents as an array of shape [num_agents, num_steps,2].all_states_mask: binary mask of shape [num_agents, num_steps] for`all_states`.Returns:center_y: float. y coordinate for center of data.center_x: float. x coordinate for center of data.width: float. Width of data."""valid_states = all_states[all_states_mask]all_y = valid_states[..., 1]all_x = valid_states[..., 0]center_y = (np.max(all_y) + np.min(all_y)) / 2center_x = (np.max(all_x) + np.min(all_x)) / 2range_y = np.ptp(all_y)range_x = np.ptp(all_x)width = max(range_y, range_x)return center_y, center_x, widthdef visualize_one_step(states,mask,roadgraph,title,center_y,center_x,width,color_map,size_pixels=1000):"""Generate visualization for a single step."""# Create figure and axes.fig, ax = create_figure_and_axes(size_pixels=size_pixels)# Plot roadgraph.rg_pts = roadgraph[:, :2].Tax.plot(rg_pts[0, :], rg_pts[1, :], 'k.', alpha=1, ms=2)masked_x = states[:, 0][mask]masked_y = states[:, 1][mask]colors = color_map[mask]# Plot agent current position.ax.scatter(masked_x,masked_y,marker='o',linewidths=3,color=colors,)# Title.ax.set_title(title)# Set axes.  Should be at least 10m on a side and cover 160% of agents.size = max(10, width * 1.0)ax.axis([-size / 2 + center_x, size / 2 + center_x, -size / 2 + center_y,size / 2 + center_y])ax.set_aspect('equal')image = fig_canvas_image(fig)plt.close(fig)return imagedef visualize_all_agents_smooth(decoded_example,size_pixels=1000,
):"""Visualizes all agent predicted trajectories in a serie of images.Args:decoded_example: Dictionary containing agent info about all modeled agents.size_pixels: The size in pixels of the output image.Returns:T of [H, W, 3] uint8 np.arrays of the drawn matplotlib's figure canvas."""# [num_agents, num_past_steps, 2] float32.past_states = tf.stack([decoded_example['state/past/x'], decoded_example['state/past/y']],-1).numpy()past_states_mask = decoded_example['state/past/valid'].numpy() > 0.0# [num_agents, 1, 2] float32.current_states = tf.stack([decoded_example['state/current/x'], decoded_example['state/current/y']],-1).numpy()current_states_mask = decoded_example['state/current/valid'].numpy() > 0.0# [num_agents, num_future_steps, 2] float32.future_states = tf.stack([decoded_example['state/future/x'], decoded_example['state/future/y']],-1).numpy()future_states_mask = decoded_example['state/future/valid'].numpy() > 0.0# [num_points, 3] float32.roadgraph_xyz = decoded_example['roadgraph_samples/xyz'].numpy()num_agents, num_past_steps, _ = past_states.shapenum_future_steps = future_states.shape[1]color_map = get_colormap(num_agents)# [num_agens, num_past_steps + 1 + num_future_steps, depth] float32.all_states = np.concatenate([past_states, current_states, future_states], 1)# [num_agens, num_past_steps + 1 + num_future_steps] float32.all_states_mask = np.concatenate([past_states_mask, current_states_mask, future_states_mask], 1)center_y, center_x, width = get_viewport(all_states, all_states_mask)images = []# Generate images from past time steps.for i, (s, m) in enumerate(zip(np.split(past_states, num_past_steps, 1),np.split(past_states_mask, num_past_steps, 1))):im = visualize_one_step(s[:, 0], m[:, 0], roadgraph_xyz,'past: %d' % (num_past_steps - i), center_y,center_x, width, color_map, size_pixels)images.append(im)# Generate one image for the current time step.s = current_statesm = current_states_maskim = visualize_one_step(s[:, 0], m[:, 0], roadgraph_xyz, 'current', center_y,center_x, width, color_map, size_pixels)images.append(im)# Generate images from future time steps.for i, (s, m) in enumerate(zip(np.split(future_states, num_future_steps, 1),np.split(future_states_mask, num_future_steps, 1))):im = visualize_one_step(s[:, 0], m[:, 0], roadgraph_xyz,'future: %d' % (i + 1), center_y, center_x, width,color_map, size_pixels)images.append(im)return imagesimages = visualize_all_agents_smooth(parsed)def create_animation(images):""" Creates a Matplotlib animation of the given images.Args:images: A list of numpy arrays representing the images.Returns:A matplotlib.animation.Animation.Usage:anim = create_animation(images)anim.save('/tmp/animation.avi')HTML(anim.to_html5_video())"""plt.ioff()fig, ax = plt.subplots()dpi = 100size_inches = 1000 / dpifig.set_size_inches([size_inches, size_inches])plt.ion()def animate_func(i):ax.imshow(images[i])ax.set_xticks([])ax.set_yticks([])ax.grid('off')anim = animation.FuncAnimation(fig, animate_func, frames=len(images) // 2, interval=100)plt.close(fig)return animanim = create_animation(images[::5])
HTML(anim.to_html5_video())
官方给的教程,生成的是一个动画,当然,这些动画没什么用,只需要里面的数据。上面代码主要的读取数据就是这一句,它包含了一个文件的信息,可以debug看一下,包含了许多属性,具体参见此处https://waymo.com/open/data/motion/tfexample,数据中有许多标注的为-1,这些数据没什么用
parsed = tf.io.parse_single_example(data, features_description)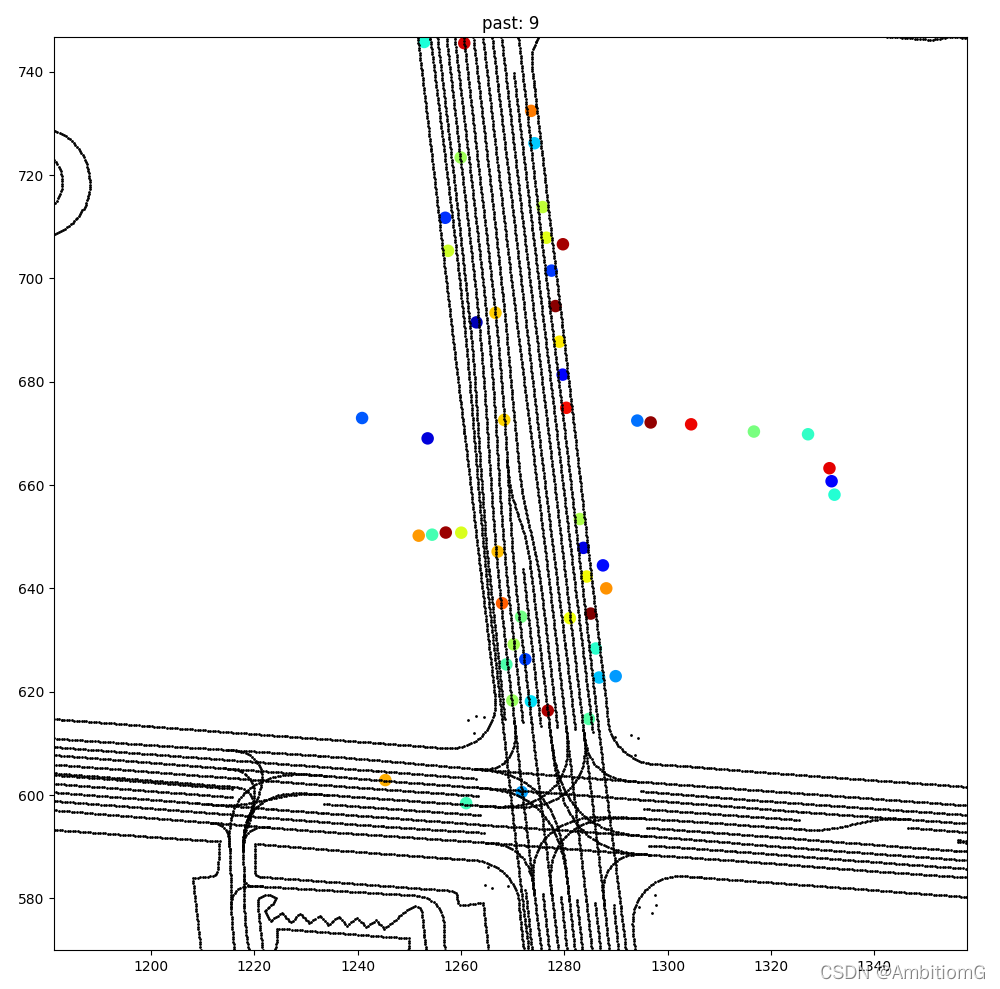
完整版数据集下载请前往官网下载 https://waymo.com/open/download/
此处只提供小部分用于学习,如有侵权,请及时联系删除
百度云链接:
perception(v1.2)里面只提供了train的第一个文件
链接:https://pan.baidu.com/s/1PfPnVsWs7H47fi015vKL-g
提取码:1lzk
motion(v1.1)提供train valid test里面的第一个文件
链接:https://pan.baidu.com/s/1RX4ISe23rkO-7OXM3imFpg
提取码:frb9
这篇关于Waymo数据集介绍(部分下载,仅用于学习)的文章就介绍到这儿,希望我们推荐的文章对编程师们有所帮助!


