本文主要是介绍arduino pro mini ATMEGA328P 连线和点亮第一盏LED(同时记录烧录失败的问题stk500_recv),希望对大家解决编程问题提供一定的参考价值,需要的开发者们随着小编来一起学习吧!
先说一句,买了这个片的最好使用avr编程器,或者用其他 arduino 烧写了 ISP下载程序作为编程器给 pro mini下载,或者用ch340引出DTR接到rst使用(前提是pro mini里面有bootloader 不是空白芯片)
正常avr芯片下载使用6线,vcc gnd sck mosi miso rst ,也就是 SPI 的5条线加上RST复位
我用ch340也是临时用法,当时手里没有avr下载器,板载按钮是RST复位按钮,忽略下面提到的镊子短接RST,下载提示的时候,需要按一下rst
或者参考我修改ch340引出DTR的方法,在文章最后有电路图,把DTR接到RST
PY32F003 入门-CSDN博客PY32F003https://blog.csdn.net/firseve/article/details/126661827
以前写的内容,这里作分隔符
还有一个就是你的 0和1 接了外设,这2个口是串口,下载程序的时候,不能接其他设备会造成串口干扰,拔了。
直接跟TB抓了张图作为开始
与其他arduino的开发板不同的是,这块板子没有USB接口,所以我们无法直接连接到电脑~
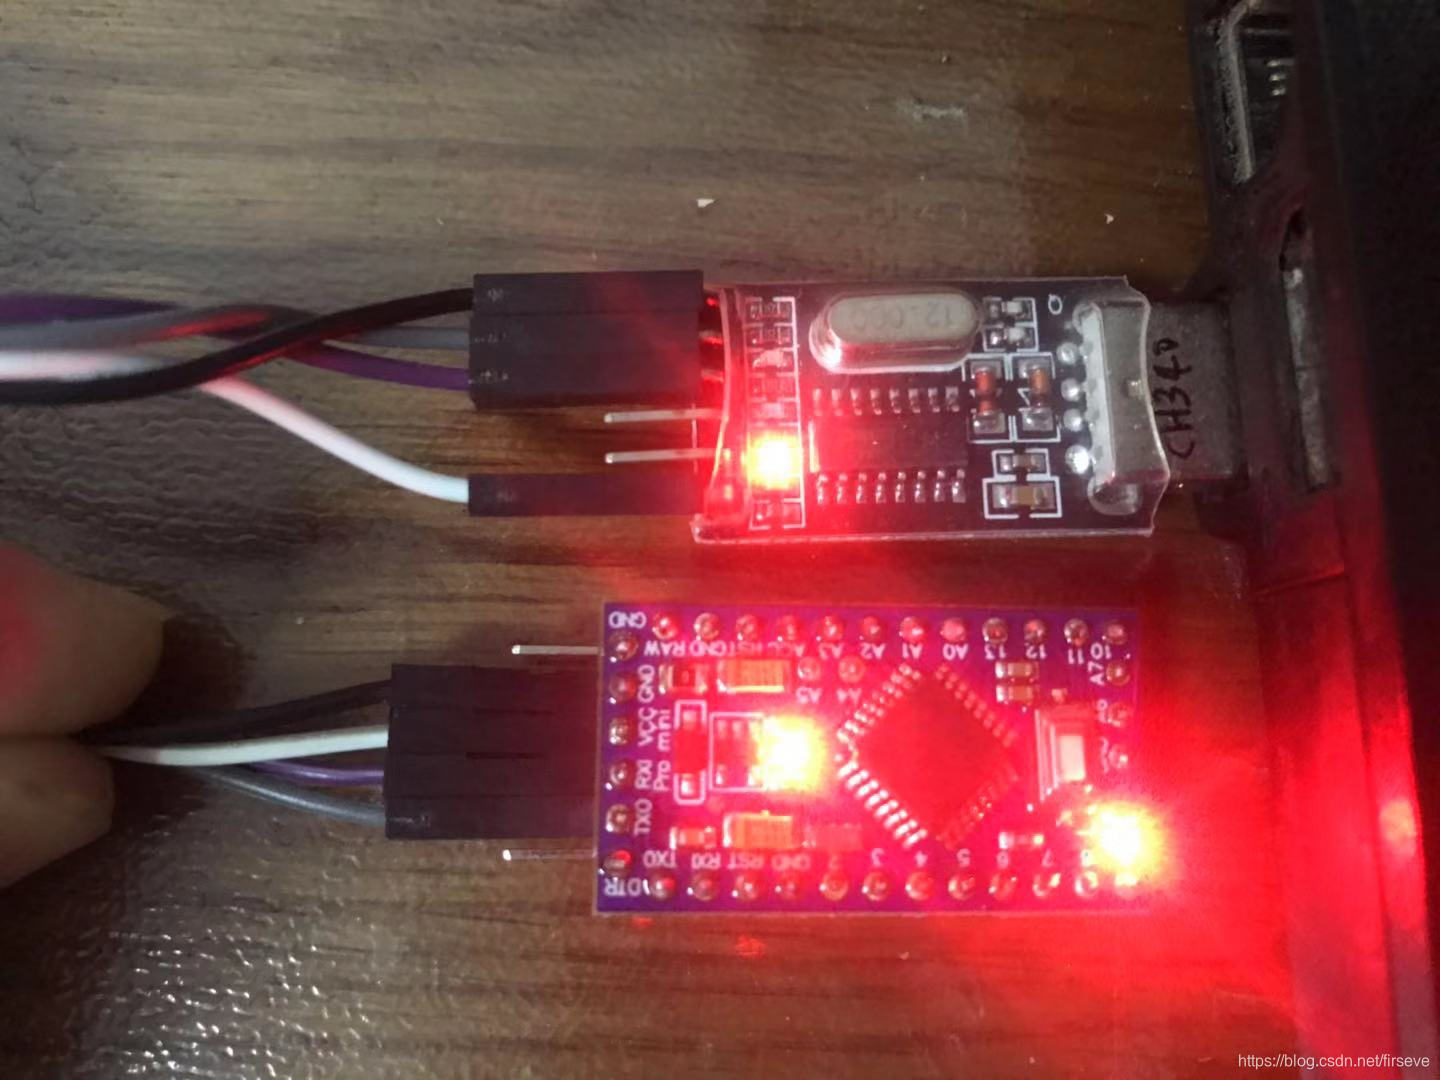
这时候我们需要的是通过TTL方式连接,使用 VCC GND TX RX

这里我们需要的是USB转TTL的转接板,我这个是 ch340g,也就是很多开发板上都会集成的廉价国产芯片,国外很多板子喜欢使用的是cp210x 系列的芯片,还有 pl230x 系列的(大锅盖中9升级更新用这个芯片)
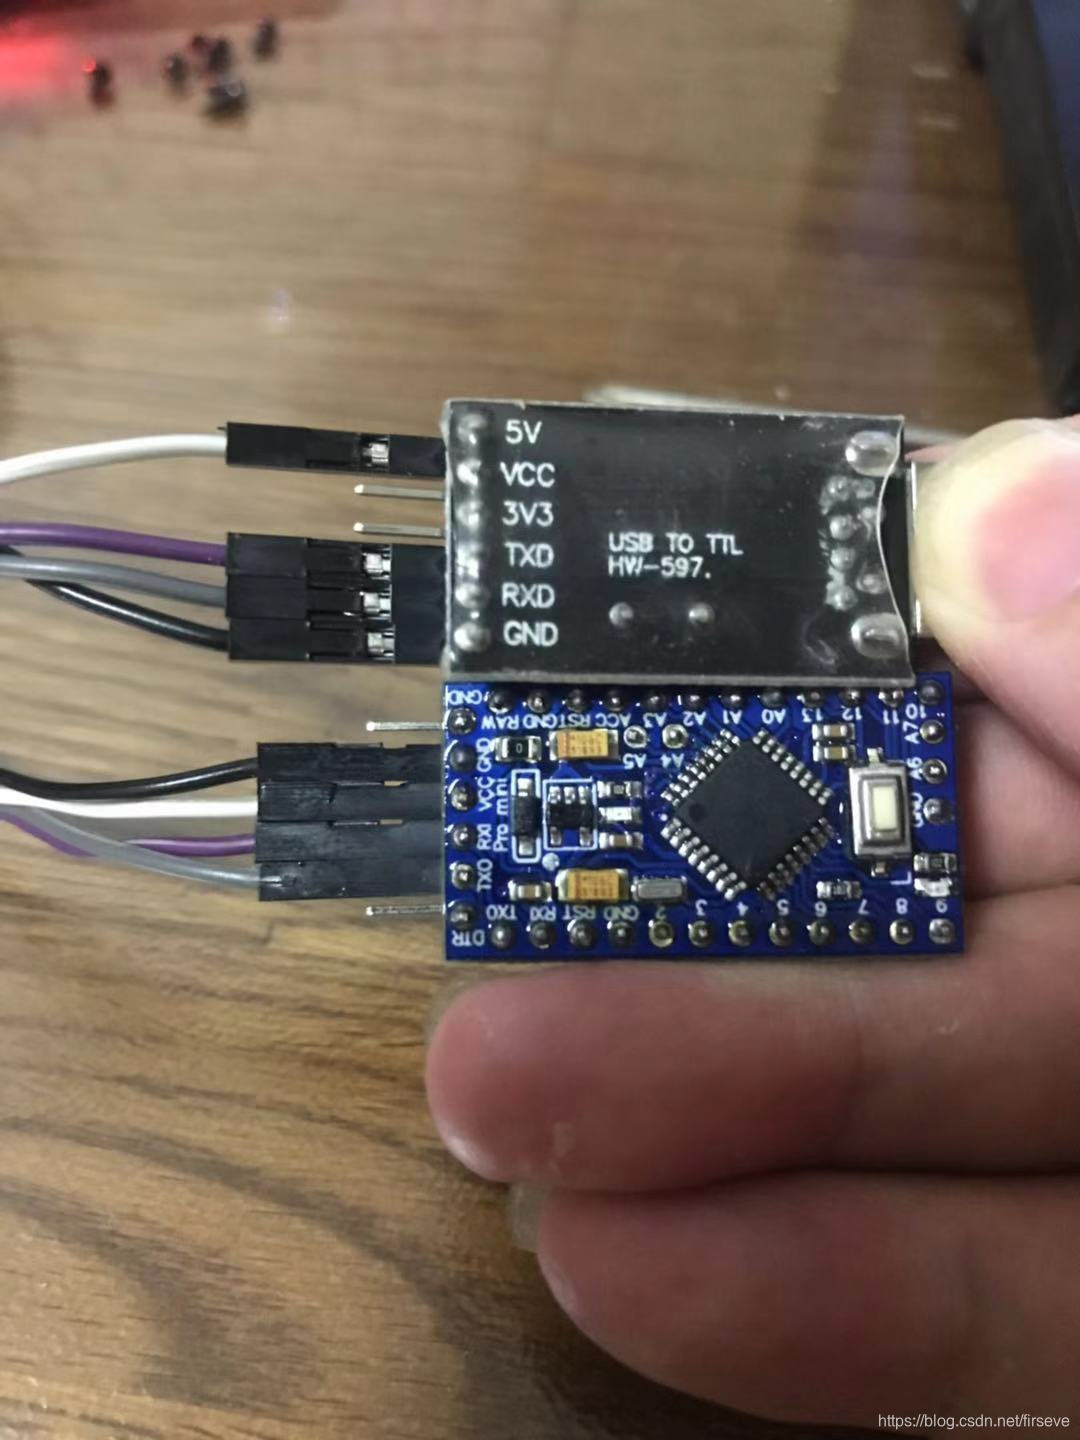
(上面的就是ch340g)
下面给张正面照
多手截图,选择开发板的位置,处理器注意选择对应的型号(看不清就点开或者另存为,都是大图)
这里需要注意的除了使用5v或者3.3v去接arduino的vcc,gnd接gnd,RX和TX是反接的(上面的RX接下面的TX)

敲黑板的重点!!!!!
提前看好了 arduino这块板子的供电是 5v 还是 3.3v,如果操作不当看错了参数小心冒烟,虽然短时间不会坏,但能活多久这是个问题)
然后是准备一个代码用来测试
void setup() {delay(2000);Serial.begin(115200);Serial.println("LED blink");// 这里会输出13,因为println后面要求是字符串,因此想要看东西要强转StringSerial.println(String(LED_BUILTIN)); // initialize digital pin LED_BUILTIN as an output.pinMode(LED_BUILTIN, OUTPUT); // 指定这个针脚是用来做输出使用的,对应的也就是高低电平 1和0
}// the loop function runs over and over again forever
void loop() {digitalWrite(LED_BUILTIN, HIGH);   // turn the LED on (HIGH is the voltage level)delay(100);                       // wait for a seconddigitalWrite(LED_BUILTIN, LOW);    // turn the LED off by making the voltage LOWdelay(100);                       // wait for a second
}
写在最后这里的另一个重点是!!!!
每次点右箭头→但是程序运行到上图位置之后会提示错误(后面还有重复10次都失败的提示)
avrdude: stk500_recv(): programmer is not responding因为程序运行到这个位置的时候需要你 手动RST 复位板子(pro mini 有一个板载按钮,作用虽然是复位,但是烧录的时候也需要你在程序停在上图位置的时候按一下。)
Using Programmer : arduino
Overriding Baud Rate : 57600
然后程序会继续写入,同样
avrdude: Version 6.3-20171130Copyright (c) 2000-2005 Brian Dean, http://www.bdmicro.com/Copyright (c) 2007-2014 Joerg WunschSystem wide configuration file is "C:\Users\Administrator.T420\AppData\Local\Arduino15\packages\arduino\tools\avrdude\6.3.0-arduino14/etc/avrdude.conf"Using Port                    : COM3Using Programmer              : arduinoOverriding Baud Rate          : 57600AVR Part                      : ATmega328PChip Erase delay              : 9000 usPAGEL                         : PD7BS2                           : PC2RESET disposition             : dedicatedRETRY pulse                   : SCKserial program mode           : yesparallel program mode         : yesTimeout                       : 200StabDelay                     : 100CmdexeDelay                   : 25SyncLoops                     : 32ByteDelay                     : 0PollIndex                     : 3PollValue                     : 0x53Memory Detail                 :Block Poll               Page                       PolledMemory Type Mode Delay Size  Indx Paged  Size   Size #Pages MinW  MaxW   ReadBack----------- ---- ----- ----- ---- ------ ------ ---- ------ ----- ----- ---------eeprom        65    20     4    0 no       1024    4      0  3600  3600 0xff 0xffflash         65     6   128    0 yes     32768  128    256  4500  4500 0xff 0xfflfuse          0     0     0    0 no          1    0      0  4500  4500 0x00 0x00hfuse          0     0     0    0 no          1    0      0  4500  4500 0x00 0x00efuse          0     0     0    0 no          1    0      0  4500  4500 0x00 0x00lock           0     0     0    0 no          1    0      0  4500  4500 0x00 0x00calibration    0     0     0    0 no          1    0      0     0     0 0x00 0x00signature      0     0     0    0 no          3    0      0     0     0 0x00 0x00Programmer Type : ArduinoDescription     : ArduinoHardware Version: 2Firmware Version: 1.16Vtarget         : 0.0 VVaref           : 0.0 VOscillator      : OffSCK period      : 0.1 usavrdude: AVR device initialized and ready to accept instructionsReading | ################################################## | 100% 0.00savrdude: Device signature = 0x1e950f (probably m328p)
avrdude: reading input file "C:\Users\ADMINI~1.T42\AppData\Local\Temp\arduino_build_450173/ProMini-Blink.ino.hex"
avrdude: writing flash (3350 bytes):Writing | ################################################## | 100% 1.00savrdude: 3350 bytes of flash written
avrdude: verifying flash memory against C:\Users\ADMINI~1.T42\AppData\Local\Temp\arduino_build_450173/ProMini-Blink.ino.hex:
avrdude: load data flash data from input file C:\Users\ADMINI~1.T42\AppData\Local\Temp\arduino_build_450173/ProMini-Blink.ino.hex:
avrdude: input file C:\Users\ADMINI~1.T42\AppData\Local\Temp\arduino_build_450173/ProMini-Blink.ino.hex contains 3350 bytes
avrdude: reading on-chip flash data:Reading | ################################################## | 100% 0.74savrdude: verifying ...
avrdude: 3350 bytes of flash verifiedavrdude done.  Thank you.
这篇关于arduino pro mini ATMEGA328P 连线和点亮第一盏LED(同时记录烧录失败的问题stk500_recv)的文章就介绍到这儿,希望我们推荐的文章对编程师们有所帮助!


