本文主要是介绍不使用ScrollRect 和 HorizontalLayoutGroup做的横向循环列表,希望对大家解决编程问题提供一定的参考价值,需要的开发者们随着小编来一起学习吧!
一、 版本一
1.前情提要
因为需要展示300多个相同的物体,但是如果全部放在场景内,运行起来会很卡,所以想到了用无限循环,然后动态填充不同的数据。
做的这个没有用HorizontalLayoutGroup 和 ScrollRect 。
1.没有使用HorizontalLayoutGroup,是因为运行后会在第一个放到后面后,自动给剩下的排序,然后排完发现第二个到了第一个的位置,然后,第二个自动符合排到最后的条件,然后第二个继续放到后面。。。
造成极短的时间内,所有东西都在不停向后排。
2.没有使用 ScrollRect是因为,它和IDragHandler接口都是滑动功能, 只需要一个就够了,而我使用IDragHandler更趁手。
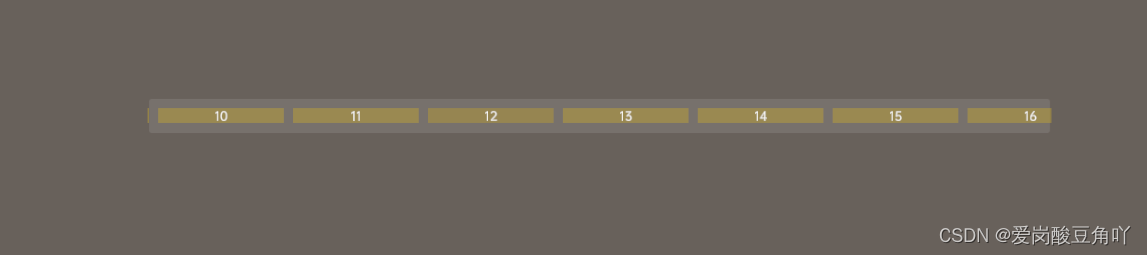
2.效果展示

3.原理讲解
我使用的IDragHandler和IBeginDragHandler两个接口,在开始和每次drag后都保存上次的鼠标位置,然后拖拽的时候,移动他们的父级content。然后比较上次滑动的鼠标位置,左移,和最小值比较超过,就把第一个排到最后。同样,如果右移,和最大值比较超过,就把最后一个拍到第一个。TimeDanyuan是为了辨认的自定义类。使用时,可以自己使用其他的代替。
后续会优化,继续尝试其他方式,找到最优解。
4.功能代码
版本V1.0
private List<RectTransform> danyuans=new List<RectTransform>();public Transform content;private Vector3 last_mousePos;private float minXPos = 470.7586f;//左滑范围private float maxXPos = 1639.109f;//右滑范围private Vector3 oldPos;private float interval = 146;//间隔// Start is called before the first frame updatevoid Start(){var danyuans01=GetComponentsInChildren<TimeDanyuan>();foreach (var danyuan in danyuans01){var rect=danyuan.GetComponent<RectTransform>();danyuans.Add(rect);}}public void OnDrag(PointerEventData eventData){Vector3 mousepos = Input.mousePosition - last_mousePos;content.position = oldPos+ new Vector3(mousepos.x, 0,0);if (mousepos.x> 0)//右滑{//右滑超出边界 var first = content.transform.GetChild(0).GetComponent<RectTransform>();var last = content.transform.GetChild(content.childCount - 1).GetComponent<RectTransform>();if (last.position.x > maxXPos){last.anchoredPosition = new Vector2(first.anchoredPosition.x - interval, last.anchoredPosition.y);last.SetAsFirstSibling();}}else if(mousepos.x < 0) //左滑{//左滑超出边界var first = content.transform.GetChild(0).GetComponent<RectTransform>();var last = content.transform.GetChild(content.childCount - 1).GetComponent<RectTransform>();if (first.position.x < minXPos){first.anchoredPosition = new Vector2(last.anchoredPosition.x+ interval, first.anchoredPosition.y);first.SetAsLastSibling();}}last_mousePos = Input.mousePosition;oldPos = content.position;}public void OnBeginDrag(PointerEventData eventData){last_mousePos =Input.mousePosition;oldPos = content.position;}
二、 版本二,增加新的功能,可以根据左右滑动,里面的内容会不同。
1.效果截图
右滑 里面的数值会变大
左滑里面的数值会变小
2.具体增加的内容
具体只增加了一个next_index 属性来标记序号,OnChange事件用来相应左右滑动时的事件,给里面的内容赋值。OnChange需要一个要赋值的值(这里是个int类型的值)和具体需要改的物体。
3…代码
private List<RectTransform> danyuans=new List<RectTransform>();public Transform content;private Vector3 last_mousePos;private float minXPos = 470.7586f;//左滑范围private float maxXPos = 1639.109f;//右滑范围private Vector3 oldPos;private float interval = 146;//间隔public Action<int, RectTransform> OnChange;private int next_index;// Start is called before the first frame updatevoid Start(){foreach (Transform danyuan in content){var rect=danyuan.GetComponent<RectTransform>();danyuans.Add(rect);}OnChange += ChangeIndex;}public void OnDrag(PointerEventData eventData){Vector3 mousepos = Input.mousePosition - last_mousePos;content.position = oldPos+ new Vector3(mousepos.x, 0,0);if (mousepos.x> 0)//右滑{//右滑超出边界 var first = content.transform.GetChild(0).GetComponent<RectTransform>();var last = content.transform.GetChild(content.childCount - 1).GetComponent<RectTransform>();if (last.position.x > maxXPos){last.anchoredPosition = new Vector2(first.anchoredPosition.x - interval, last.anchoredPosition.y);last.SetAsFirstSibling();int index=int.Parse(first.GetComponentInChildren<TextMeshProUGUI>().text);next_index = index - 1;OnChange(next_index,last);}}else if(mousepos.x < 0) //左滑{//左滑超出边界var first = content.transform.GetChild(0).GetComponent<RectTransform>();var last = content.transform.GetChild(content.childCount - 1).GetComponent<RectTransform>();if (first.position.x < minXPos){first.anchoredPosition = new Vector2(last.anchoredPosition.x+ interval, first.anchoredPosition.y);first.SetAsLastSibling();int index = int.Parse(last.GetComponentInChildren<TextMeshProUGUI>().text);next_index = index + 1;OnChange(next_index,first);}}last_mousePos = Input.mousePosition;oldPos = content.position;}public void OnBeginDrag(PointerEventData eventData){last_mousePos =Input.mousePosition;oldPos = content.position;}private void ChangeIndex(int index, RectTransform c_item){var text= c_item.GetComponentInChildren<TextMeshProUGUI>();text.text = index.ToString();}
版本三 时间显示无限滚动进度条
这个版本改成了,时间的以前和未来。随着滚动,可以无限滚动到以前,也可以无限滚动到未来。
没有显示最大最小日期。
using System;
using System.Collections.Generic;
using TMPro;
using UnityEngine;
using UnityEngine.UI;
using UnityEngine.EventSystems;
/// <summary>
/// 时间显示进度条
/// </summary>
public class InfiniteTimeline : MonoBehaviour, IDragHandler, IBeginDragHandler
{private List<RectTransform> danyuans = new List<RectTransform>();public Transform content;private Vector3 last_mousePos;private float minXPos = 470.7586f;//左滑范围private float maxXPos = 1639.109f;//右滑范围private Vector3 oldPos;private float interval = 146;//间隔public Action<DateTime, RectTransform> OnChange;private DateTime next_index;/// <summary>/// 初始化时间/// </summary>/// <param name="start"></param>/// <param name="end"></param>public void Onchushihua(){#region 旧代码//startTime=start;//endTime=end;//shijian_refab =transform.XuYiFindChild("时间条").GetComponentInChildren<TimeDanyuan>();//var dur = end.Subtract(start).Days;//mytexts = new List<TimeDanyuan>();//var prefabRect = shijian_refab.transform.parent.GetComponent<RectTransform>();//prefabRect.anchoredPosition = Vector2.zero;//for (int i = 0; i <= dur; i++)//{//    var obj = Instantiate(shijian_refab.gameObject, shijian_refab.transform.parent);//    //if (start.AddDays(i)==DateTime.Today)//    //{//    //    var toggle = obj.GetComponent<Toggle>();//    //    toggle.isOn = true;//    //}//    var objTime = obj.GetComponent<TimeDanyuan>();//    objTime.OnChushihua(start.AddDays(i));//    obj.SetActive(true);//    mytexts.Add(objTime);//}var shijian_rect=shijian_refab.GetComponent<RectTransform>();//scro_efab = GetComponent<ScrollRect>();//float temp = (float)(DateTime.Today-start).TotalDays-3;//LayoutRebuilder.ForceRebuildLayoutImmediate(scro_efab.content);scro_efab.horizontalScrollbar.value = 0.5f;//var shijRect = shijian_refab.transform.GetComponent<RectTransform>();//scro_efab.content.anchoredPosition = new Vector2(-temp * shijRect.sizeDelta.x, 0);#endregionint index = -3;foreach (Transform danyuan in content){var rect = danyuan.GetComponent<RectTransform>();var mytext= danyuan.GetComponentInChildren<TextMeshProUGUI>();if (mytext != null)mytext.text = DateTime.Today.AddDays(index).ToString("yyyy.M.d");danyuans.Add(rect);index++;}OnChange += ChangeIndex;}/// <summary>/// 跳转到指定时间/// </summary>/// <param name="mid"></param>public void SetScrollRect(DateTime mid){#region 旧代码//if (mid>=startTime && mid <= endTime)//{//    TimeSpan x = mid - startTime;//    float result = (float)x.TotalDays-3;//    var shijRect = shijian_refab.transform.GetComponent<RectTransform>();//    scro_efab.content.anchoredPosition = new Vector2(-result * shijRect.sizeDelta.x, 0);//}#endregion}// Start is called before the first frame updatevoid Start(){Onchushihua();}public void OnDrag(PointerEventData eventData){Vector3 mousepos = Input.mousePosition - last_mousePos;content.position = oldPos + new Vector3(mousepos.x, 0, 0);if (mousepos.x > 0)//右滑{//右滑超出边界 var first = content.transform.GetChild(0).GetComponent<RectTransform>();var last = content.transform.GetChild(content.childCount - 1).GetComponent<RectTransform>();if (last.position.x > maxXPos){last.anchoredPosition = new Vector2(first.anchoredPosition.x - interval, last.anchoredPosition.y);last.SetAsFirstSibling();DateTime index = DateTime.Parse(first.GetComponentInChildren<TextMeshProUGUI>().text);next_index = index.AddDays(-1);OnChange(next_index, last);}}else if (mousepos.x < 0) //左滑{//左滑超出边界var first = content.transform.GetChild(0).GetComponent<RectTransform>();var last = content.transform.GetChild(content.childCount - 1).GetComponent<RectTransform>();if (first.position.x < minXPos){first.anchoredPosition = new Vector2(last.anchoredPosition.x + interval, first.anchoredPosition.y);first.SetAsLastSibling();DateTime index = DateTime.Parse(last.GetComponentInChildren<TextMeshProUGUI>().text);next_index = index.AddDays(1);OnChange(next_index, first);}}last_mousePos = Input.mousePosition;oldPos = content.position;}public void OnBeginDrag(PointerEventData eventData){last_mousePos = Input.mousePosition;oldPos = content.position;}private void ChangeIndex(DateTime index, RectTransform c_item){var text = c_item.GetComponentInChildren<TextMeshProUGUI>();text.text = index.ToString("yyyy.M.d");}
}
这篇关于不使用ScrollRect 和 HorizontalLayoutGroup做的横向循环列表的文章就介绍到这儿,希望我们推荐的文章对编程师们有所帮助!


