本文主要是介绍Android学习笔记之使用意图打开内置应用程序组件,希望对大家解决编程问题提供一定的参考价值,需要的开发者们随着小编来一起学习吧!
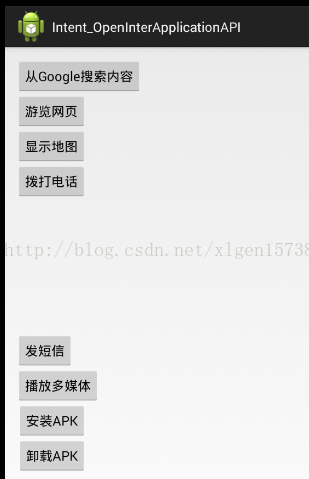
(1)布局文件如下:
<RelativeLayout xmlns:android="http://schemas.android.com/apk/res/android"xmlns:tools="http://schemas.android.com/tools"android:layout_width="match_parent"android:layout_height="match_parent"android:paddingBottom="@dimen/activity_vertical_margin"android:paddingLeft="@dimen/activity_horizontal_margin"android:paddingRight="@dimen/activity_horizontal_margin"android:paddingTop="@dimen/activity_vertical_margin"tools:context=".MainActivity" ><Buttonandroid:id="@+id/button1"android:layout_width="wrap_content"android:layout_height="wrap_content"android:layout_alignParentLeft="true"android:layout_alignParentTop="true"android:onClick="IntentTest"android:text="从Google搜索内容" /><Buttonandroid:id="@+id/button2"android:layout_width="wrap_content"android:layout_height="wrap_content"android:layout_alignLeft="@+id/button1"android:layout_below="@+id/button1"android:onClick="IntentTest"android:text="游览网页" /><Buttonandroid:id="@+id/button3"android:layout_width="wrap_content"android:layout_height="wrap_content"android:layout_alignLeft="@+id/button2"android:layout_below="@+id/button2"android:onClick="IntentTest"android:text="显示地图" /><Buttonandroid:id="@+id/button4"android:layout_width="wrap_content"android:layout_height="wrap_content"android:layout_alignLeft="@+id/button3"android:layout_below="@+id/button3"android:onClick="IntentTest"android:text="拨打电话" /><Buttonandroid:id="@+id/button5"android:layout_width="wrap_content"android:layout_height="wrap_content"android:layout_alignLeft="@+id/button4"android:layout_centerVertical="true"android:onClick="IntentTest"android:text="发短信" /><Buttonandroid:id="@+id/button6"android:layout_width="wrap_content"android:layout_height="wrap_content"android:layout_alignLeft="@+id/button5"android:layout_below="@+id/button5"android:onClick="IntentTest"android:text="播放多媒体" /><Buttonandroid:id="@+id/button7"android:layout_width="wrap_content"android:layout_height="wrap_content"android:layout_alignRight="@+id/button4"android:layout_below="@+id/button6"android:onClick="IntentTest"android:text="安装APK" /><Buttonandroid:id="@+id/button8"android:layout_width="wrap_content"android:layout_height="wrap_content"android:layout_alignLeft="@+id/button7"android:layout_below="@+id/button7"android:onClick="IntentTest"android:text="卸载APK" /></RelativeLayout>(2)MainActivity.java
package com.example.intent_openinterapplicationapi;import android.app.Activity;
import android.app.SearchManager;
import android.content.Intent;
import android.net.Uri;
import android.os.Bundle;
import android.view.Menu;
import android.view.View;
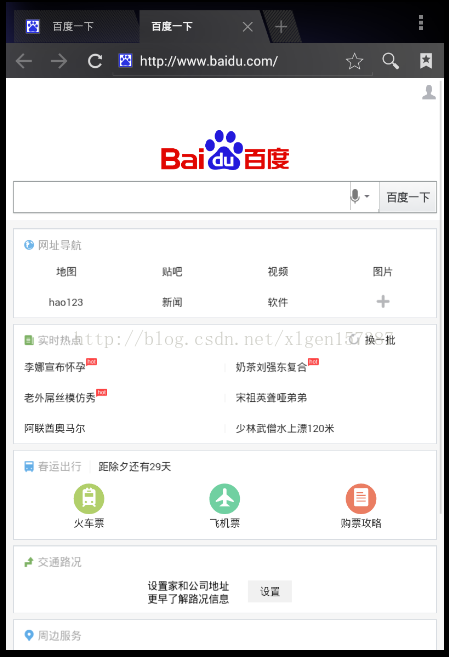
import android.widget.Button;public class MainActivity extends Activity {private Button button1;private Button button2;private Button button3;private Button button4;private Button button5;private Button button6;private Button button7;private Button button8;@Overrideprotected void onCreate(Bundle savedInstanceState) {super.onCreate(savedInstanceState);setContentView(R.layout.activity_main);button1 = (Button) this.findViewById(R.id.button1);button2 = (Button) this.findViewById(R.id.button2);button3 = (Button) this.findViewById(R.id.button3);button4 = (Button) this.findViewById(R.id.button4);button5 = (Button) this.findViewById(R.id.button5);button6 = (Button) this.findViewById(R.id.button6);button7 = (Button) this.findViewById(R.id.button7);button8 = (Button) this.findViewById(R.id.button8);}public void IntentTest(View v) {switch (v.getId()) {case R.id.button1:Intent intent = new Intent();intent.setAction(Intent.ACTION_WEB_SEARCH);intent.putExtra(SearchManager.QUERY, "searchString");startActivity(intent);break;case R.id.button2:Uri uri = Uri.parse("http://www.baidu.com");Intent intent2 = new Intent(Intent.ACTION_VIEW, uri);startActivity(intent2);break;case R.id.button3:Uri uri1 = Uri.parse("geo:38.899533,77.036476");Intent intent3 = new Intent(Intent.ACTION_VIEW, uri1);startActivity(intent3);break;case R.id.button4:Uri uri2 = Uri.parse("tel:18080808080");Intent intent4 = new Intent(Intent.ACTION_DIAL, uri2);startActivity(intent4);break;case R.id.button5:Intent intent5 = new Intent(Intent.ACTION_VIEW);intent5.putExtra("sms_body", "The SMS TEXT!");intent5.setType("vnd.android-dir/mms-sms");startActivity(intent5);break;case R.id.button6:Intent intent6 = new Intent(Intent.ACTION_VIEW);Uri uri3 = Uri.parse("file:///sdcard/song.mp3");intent6.setDataAndType(uri3, "audio/mp3");startActivity(intent6);break;case R.id.button7:Uri installUri = Uri.fromParts("package", "xxx", null);Intent intent7 = new Intent(Intent.ACTION_PACKAGE_ADDED);startActivity(intent7);break;case R.id.button8:Uri deletellUri = Uri.fromParts("package", "strPackageName", null);Intent intent8 = new Intent(Intent.ACTION_DELETE, deletellUri);startActivity(intent8);break;default:break;}}@Overridepublic boolean onCreateOptionsMenu(Menu menu) {// Inflate the menu; this adds items to the action bar if it is present.getMenuInflater().inflate(R.menu.main, menu);return true;}}
这篇关于Android学习笔记之使用意图打开内置应用程序组件的文章就介绍到这儿,希望我们推荐的文章对编程师们有所帮助!


