本文主要是介绍windows部署腾讯tmagic-editor03-DSL 解析渲染,希望对大家解决编程问题提供一定的参考价值,需要的开发者们随着小编来一起学习吧!
创建项目
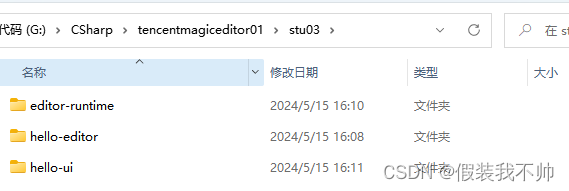
将上一教程中的editor-runtime和hello-editor复制过来
概念
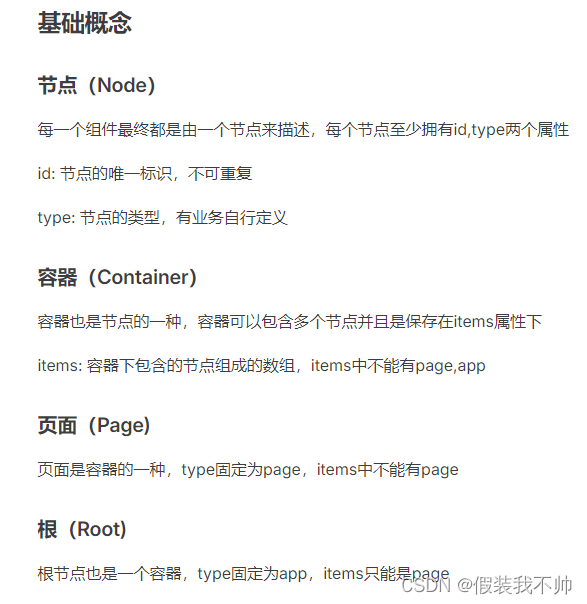
实现
创建hello-ui目录
渲染节点
在hello-ui下创建 Component.vue 文件
由于节点的type是由业务自行定义的,所以需要使用动态组件渲染,在vue下可以使用component组件来实现
component 是通过is参数来决定哪个组件被渲染,所以将type与组件做绑定
例如有组件 HelloWorld,可以将组件全局注册
app.component('hello-world', HelloWorld);
然后将’hello-world’作为type,那么is="hello-world"就会渲染 HelloWorld 组件
为了让组件渲染出来的dom能被编辑器识别到,还需要将节点的id作为dom的id
<template><component v-if="config" :is="type" :id="`${id}`" :style="style" :config="config"><slot></slot></component>
</template><script lang=ts setup>
import { computed } from 'vue';import type { MNode } from '@tmagic/schema';// 将节点作品参数传入组件中
const props = defineProps<{config: MNode;
}>();const type = computed(() => {if (!props.config.type || ['page', 'container'].includes(props.config.type)) return 'div';return props.config.type;
});const id = computed(() => props.config.id);const fillBackgroundImage = (value: string) => {if (value && !/^url/.test(value) && !/^linear-gradient/.test(value)) {return `url(${value})`;}return value;
};const style = computed(() => {if (!props.config.style) {return {};}const results: Record<string, any> = {};const whiteList = ['zIndex', 'opacity', 'fontWeight'];Object.entries(props.config.style).forEach(([key, value]) => {if (key === 'backgroundImage') {value && (results[key] = fillBackgroundImage(value));} else if (key === 'transform' && typeof value !== 'string') {results[key] = Object.entries(value as Record<string, string>).map(([transformKey, transformValue]) => {let defaultValue = 0;if (transformKey === 'scale') {defaultValue = 1;}return `${transformKey}(${transformValue || defaultValue})`;}).join(' ');} else if (!whiteList.includes(key) && value && /^[-]?[0-9]*[.]?[0-9]*$/.test(value)) {results[key] = `${value}px`;} else {results[key] = value;}});return results;
});
</script>
接下来就需要解析节点的样式,在tmagic/editor中默认会将样式配置保存到节点的style属性中,如果自行定义到了其他属性,则已实际为准
解析style需要注意几个地方
数字
css中的数值有些是需要单位的,例如px,有些是不需要的,例如opacity
在tmagic/editor中,默认都是不带单位的,所以需要将需要单位的地方补齐单位
这里做补齐px处理,如果需要做屏幕大小适应, 可以使用rem或者vw,这个可以根据自身需求处理。
url
css中的url需要是用url(),所以当值为url时,需要转为url(xxx)
transform
transform属性可以指定为关键字值none 或一个或多个transform-function值。
渲染容器
容器与普通节点的区别,就是需要多一个items的解析
新增Container.vue文件
<template><Component :config="config"><Component v-for="item in config.items" :key="item.id" :config="item"></Component></Component>
</template><script lang="ts" setup>
import type { MContainer } from '@tmagic/schema';import Component from './Component.vue';defineProps<{config: MContainer;
}>();
</script>
渲染页面
页面就是容器,之所以单独存在,是页面会自己的方法,例如reload等
Page.vue文件
<template><Container :config="config"></Container>
</template><script lang="ts" setup>
import type { MPage } from '@tmagic/schema';import Container from './Container.vue';defineProps<{config: MPage;
}>();defineExpose({reload() {window.location.reload();}
});
</script>
在runtime中使用 hello-ui
删除editor-runtime/src/ui-page.vue
将App.vue中的ui-page改成hello-ui中的Page
<template><Page v-if="page" :config="page" ref="pageComp"></Page>
</template><script lang="ts" setup>
import type { RemoveData, UpdateData } from '@tmagic/stage';
import type { Id, MApp, MNode } from '@tmagic/schema';
import { ref,reactive,watch,nextTick } from 'vue';
import { Page } from 'hello-ui';
const pageComp = ref<InstanceType<typeof Page>>();
const root = ref<MApp>();const page = ref<any>();window.magic?.onRuntimeReady({/** 当编辑器的dsl对象变化时会调用 */updateRootConfig(config: MApp) {root.value = config;},/** 当编辑器的切换页面时会调用 */updatePageId(id: Id) {page.value = root.value?.items?.find((item) => item.id === id);},/** 新增组件时调用 */add({ config }: UpdateData) {const parent = config.type === 'page' ? root.value : page.value;parent.items?.push(config);},/** 更新组件时调用 */update({ config }: UpdateData) {const index = page.value.items?.findIndex((child: MNode) => child.id === config.id);page.value.items.splice(index, 1, reactive(config));},/** 删除组件时调用 */remove({ id }: RemoveData) {const index = page.value.items?.findIndex((child: MNode) => child.id === id);page.value.items.splice(index, 1);},
});
watch(page, async () => {// page配置变化后,需要等dom更新await nextTick();window?.magic?.onPageElUpdate(pageComp.value?.$el);
});
</script>
在editor-runtime/vue.config.js中加上配置
configureWebpack: {resolve: {alias: {'hello-ui': path.resolve(__dirname, '../hello-ui'),vue$: path.resolve(__dirname, './node_modules/vue'),},},},
添加HelloWorld组件
在hello-ui下新增HelloWorld.vue
<template><div>hollo-world</div>
</template><script lang="ts" setup>
import type { MNode } from '@tmagic/schema';defineProps<{config: MNode;
}>();
</script>
在editor-runtime main.ts中注册HelloWorld
import { createApp } from 'vue'
import type { Magic } from '@tmagic/stage';
import './style.css';
import App from './App.vue';
// eslint-disable-next-line
import { HelloWorld } from 'hello-ui';declare global {interface Window {magic?: Magic;}
}
const app = createApp(App)
app.component('hello-world', HelloWorld);
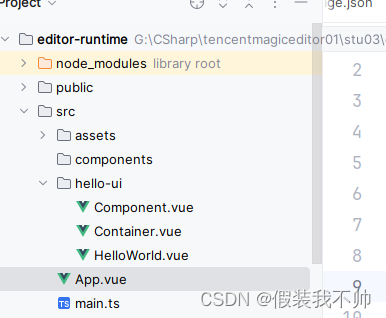
app.mount('#app')放在外层不好使,需要将hello-ui放到src

这样就实现了组件的渲染展示
这篇关于windows部署腾讯tmagic-editor03-DSL 解析渲染的文章就介绍到这儿,希望我们推荐的文章对编程师们有所帮助!


