本文主要是介绍Python爬虫实战:爬取【某旅游交通出行类网站中国内热门景点】的评论数据,使用Re、BeautifulSoup与Xpath三种方式解析数据,代码完整,希望对大家解决编程问题提供一定的参考价值,需要的开发者们随着小编来一起学习吧!
一、分析爬取网页:
1、网址
https://travel.qunar.com/
2、 打开网站,找到要爬取的网页
https://travel.qunar.com/p-cs299979-chongqing
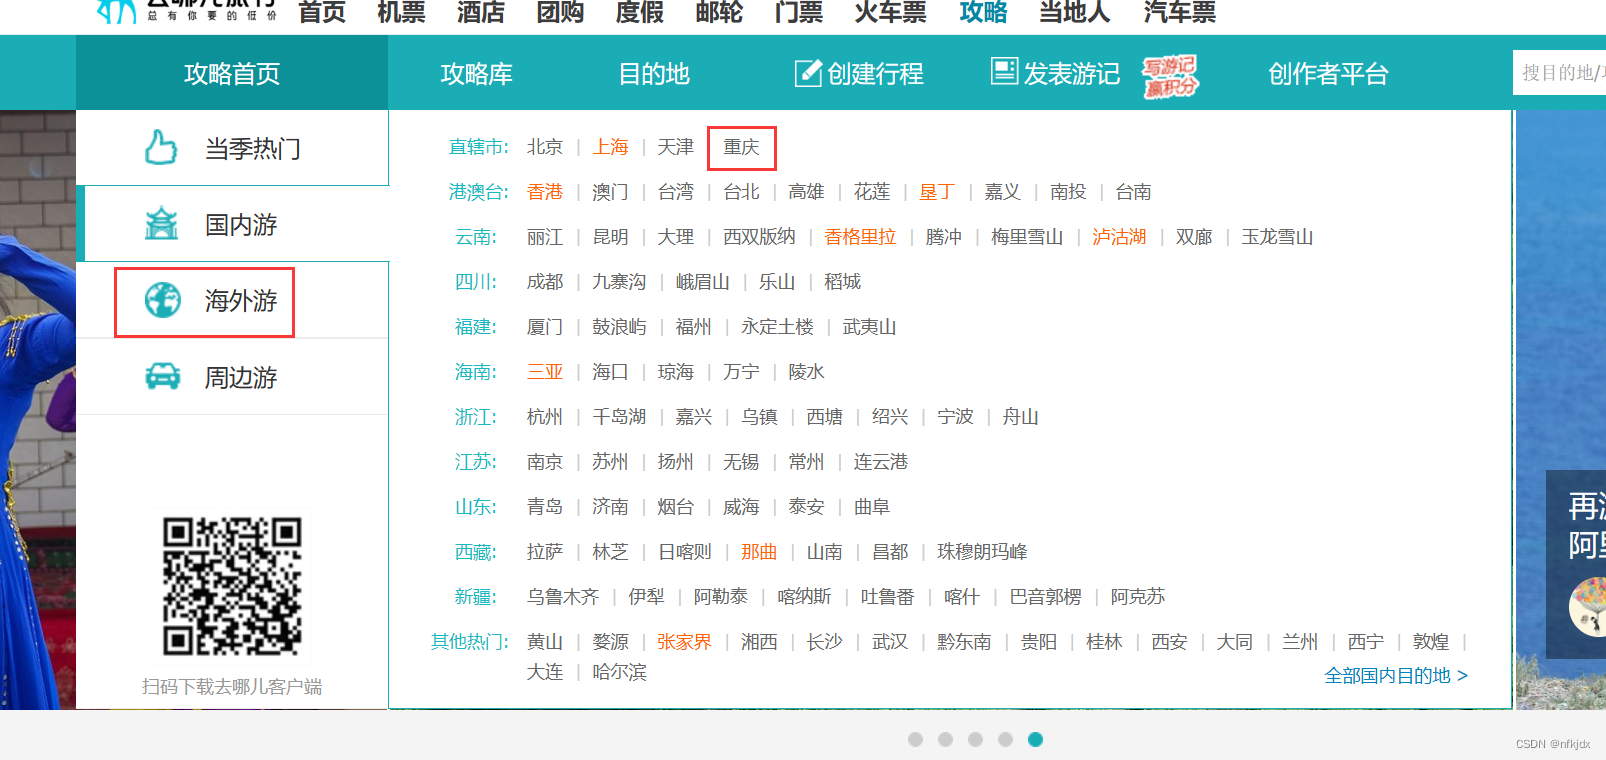
进来之后,找到评论界面,如下所示:在这里我选择驴友点评数据爬取
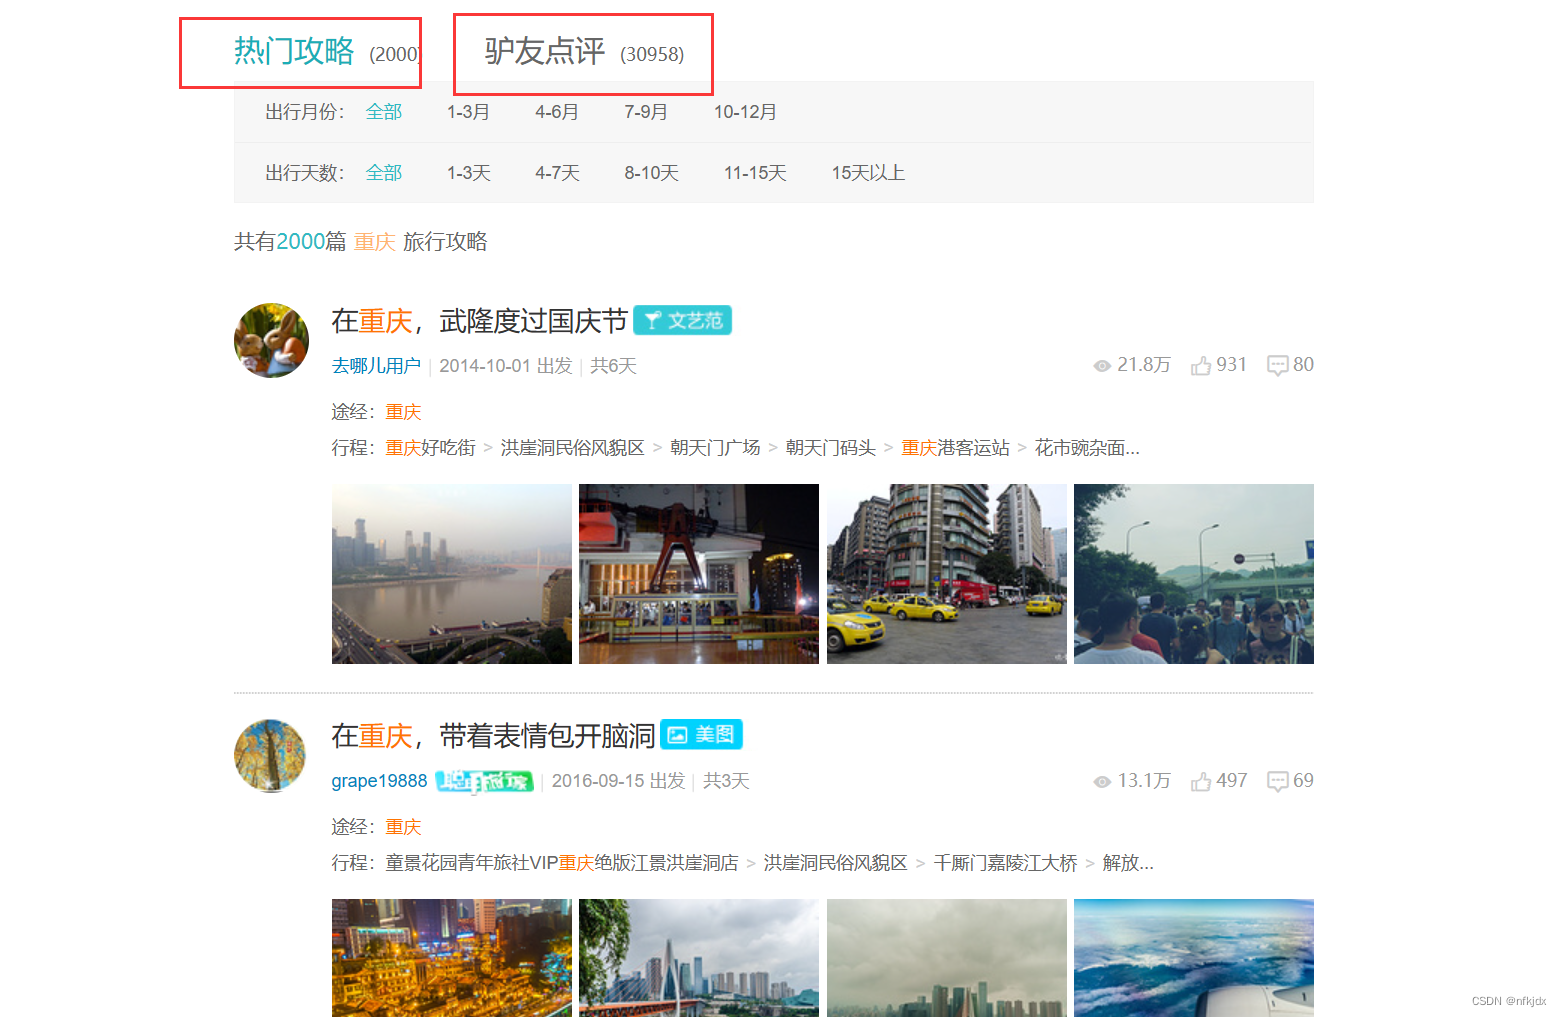
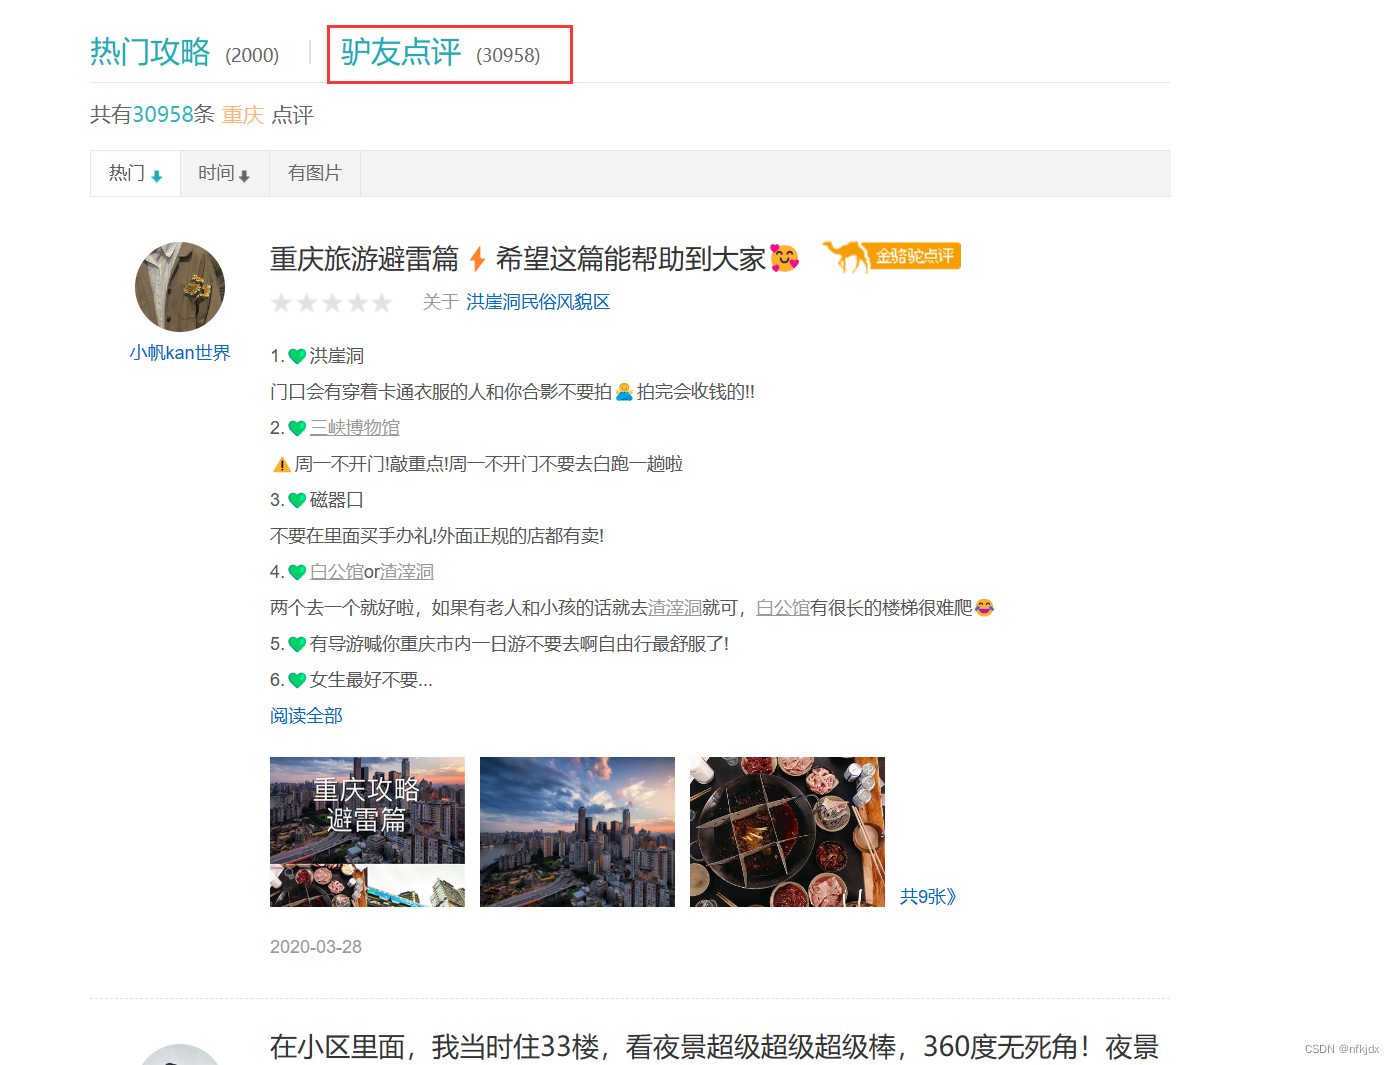
点击【驴友点评】,进入最终爬取的网址:https://travel.qunar.com/p-cs299979-chongqing-gaikuang-2-1-1#lydp
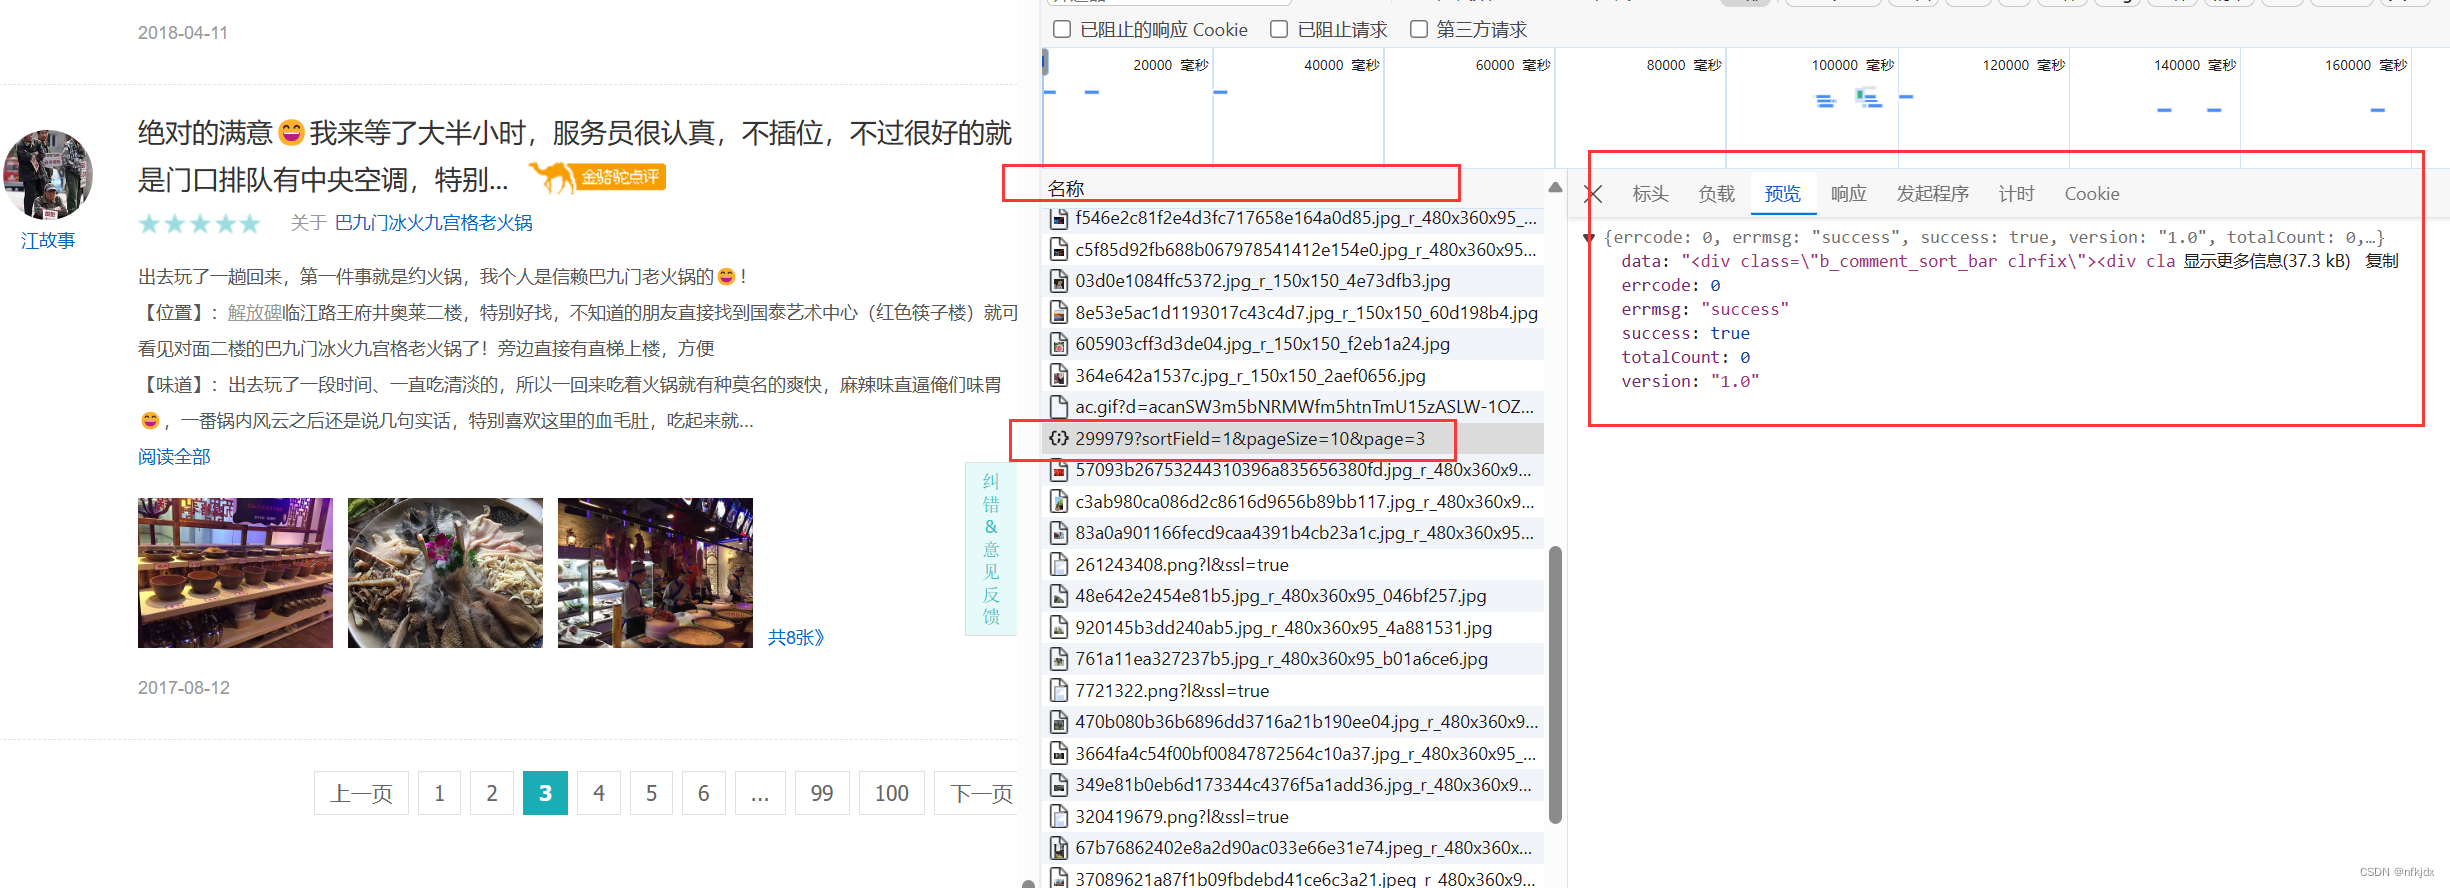
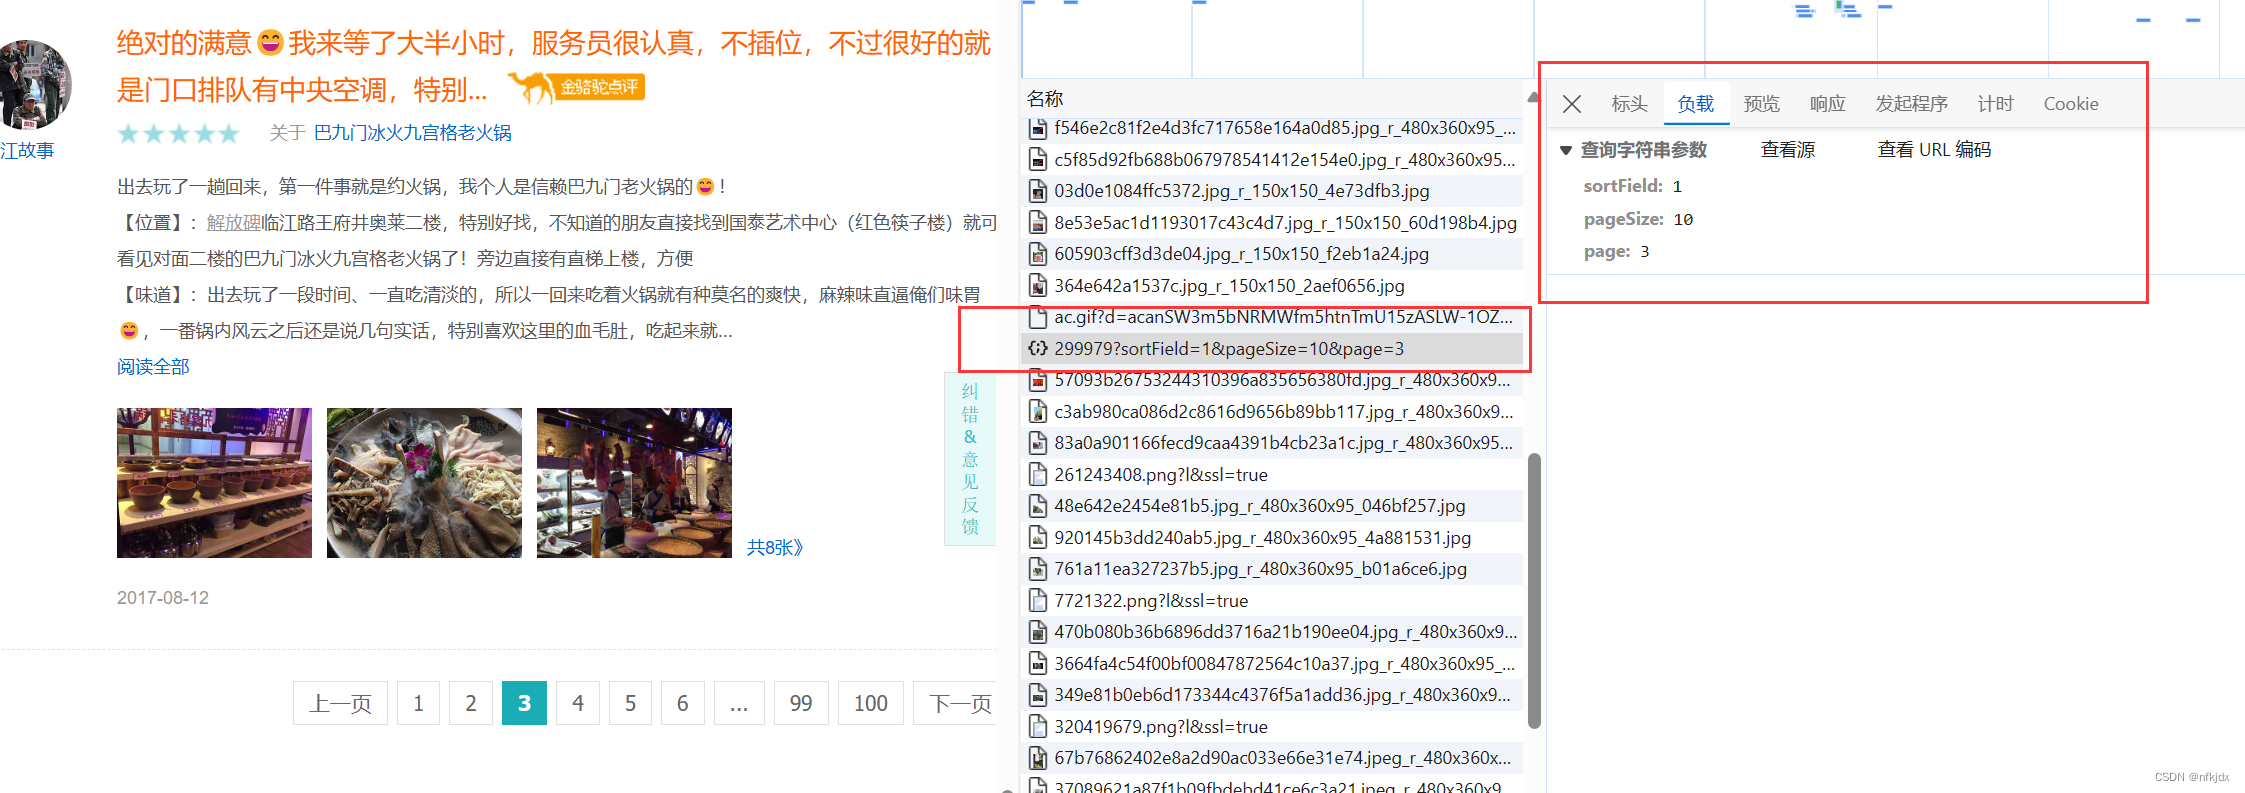
3、 进入开发者模型(F12),分析网页,找到数据接口
(1)点击网络

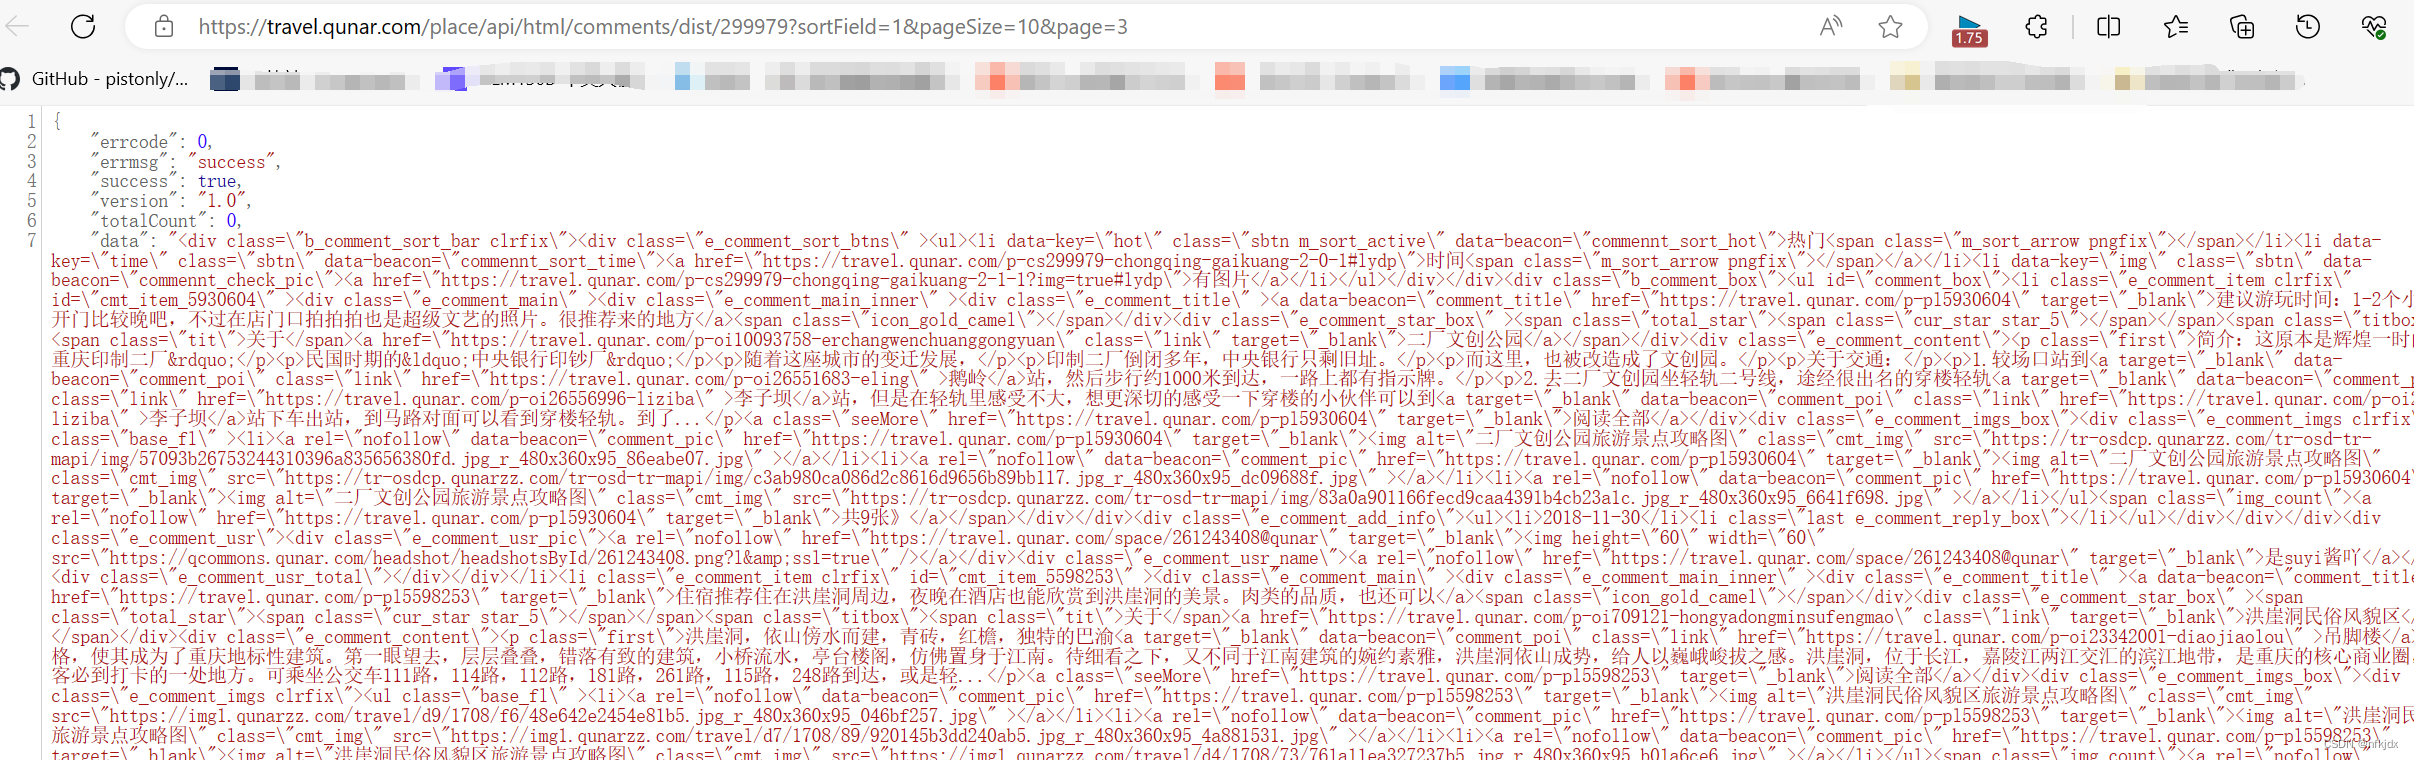
(2)点击左边网页中的第二、第三、第四…页,观察右边的变化:发现右边有一地址带有页数和每页数据量,因此点击该地址在网页中打开发现带有json格式的数据并且数据对应就是该页的内容,如下所示:
接口地址:https://travel.qunar.com/place/api/html/comments/dist/299979?sortField=1&pageSize=10&page=1
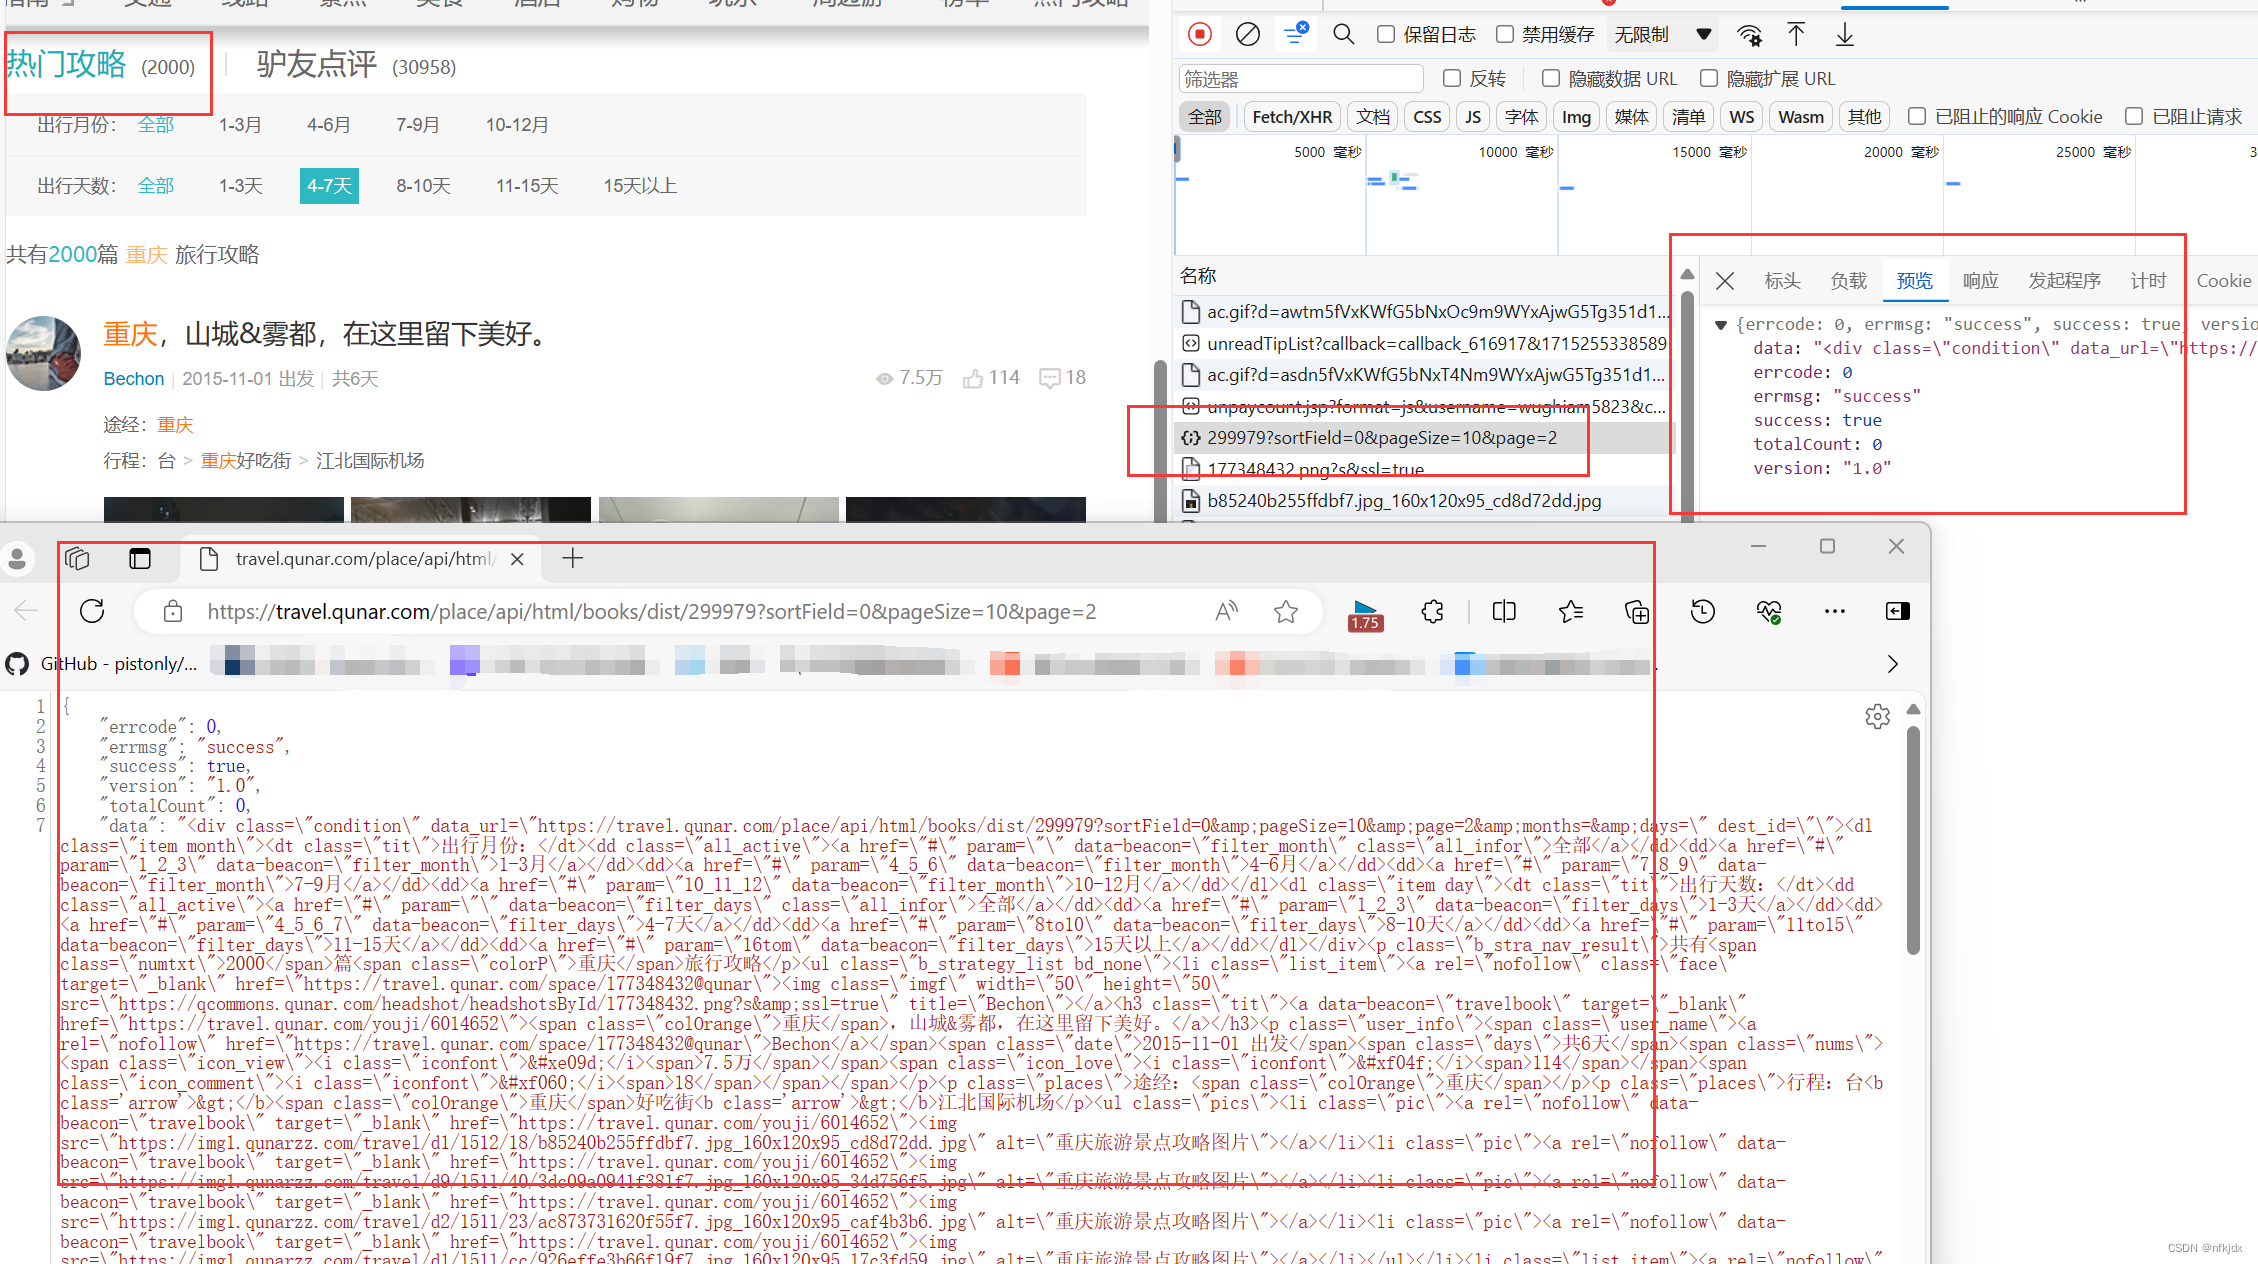
并且只要变换接口地址后面的page就可以获取不同页数的数据。同理,我们发现【热门攻略】也是如此,因此将其顺带也爬取出来,数据接口地址:https://travel.qunar.com/place/api/html/books/dist/299979?sortField=0&pageSize=10&page=2
三、请求网页数据并将数据进行保存
当我们确定了真实数据的URL后,这里便可以用requests的get或post方法进行请求网页数据。关于requests库的更多使用方式,大家可以前往(https://requests.readthedocs.io/zh_CN/latest/ 或 https://www.cnblogs.com/aaronthon/p/9332757.html)查看。
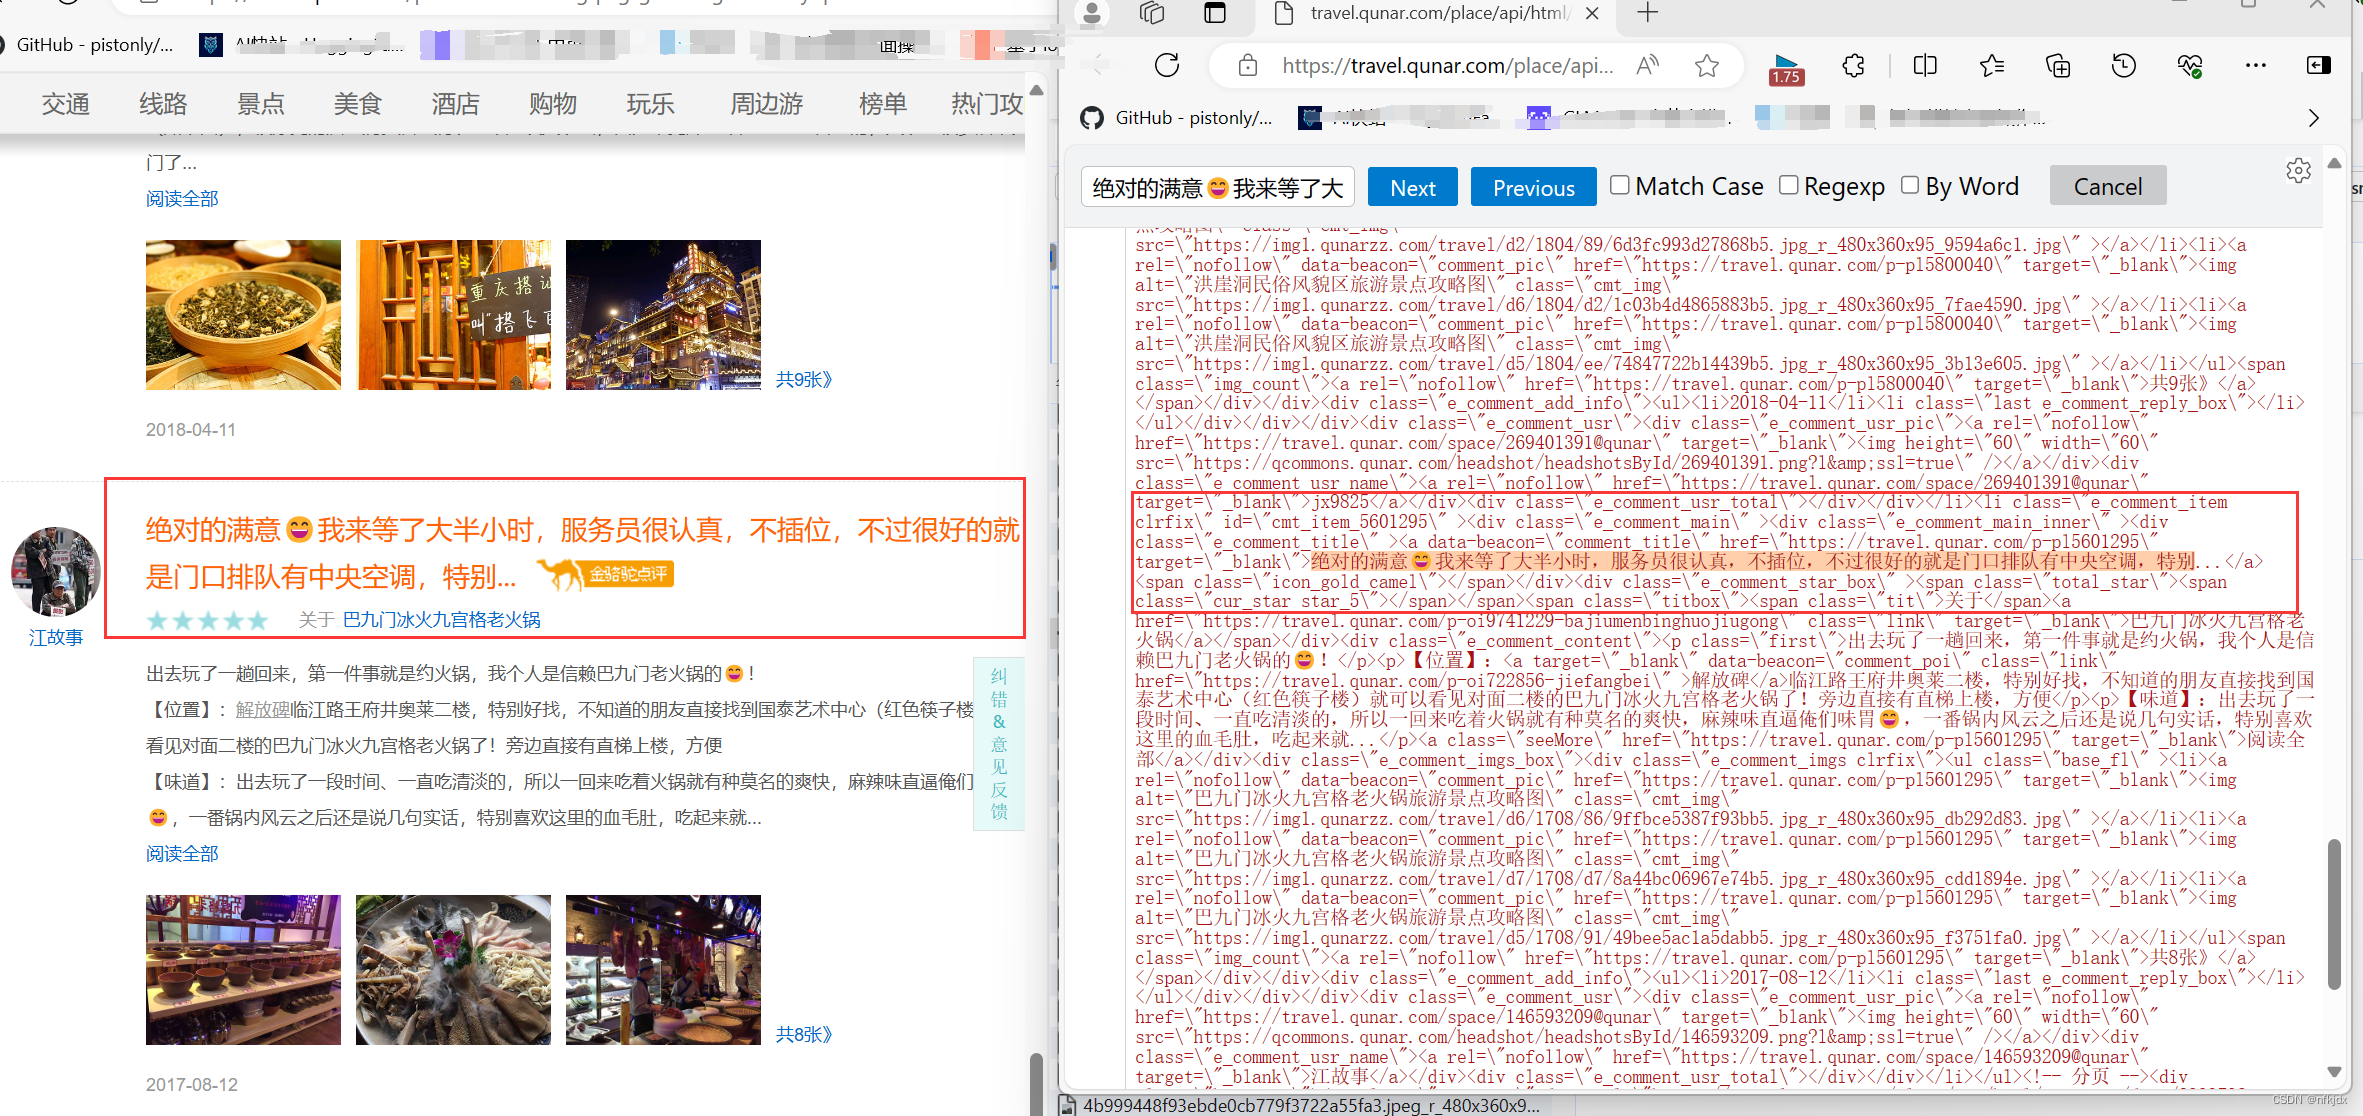
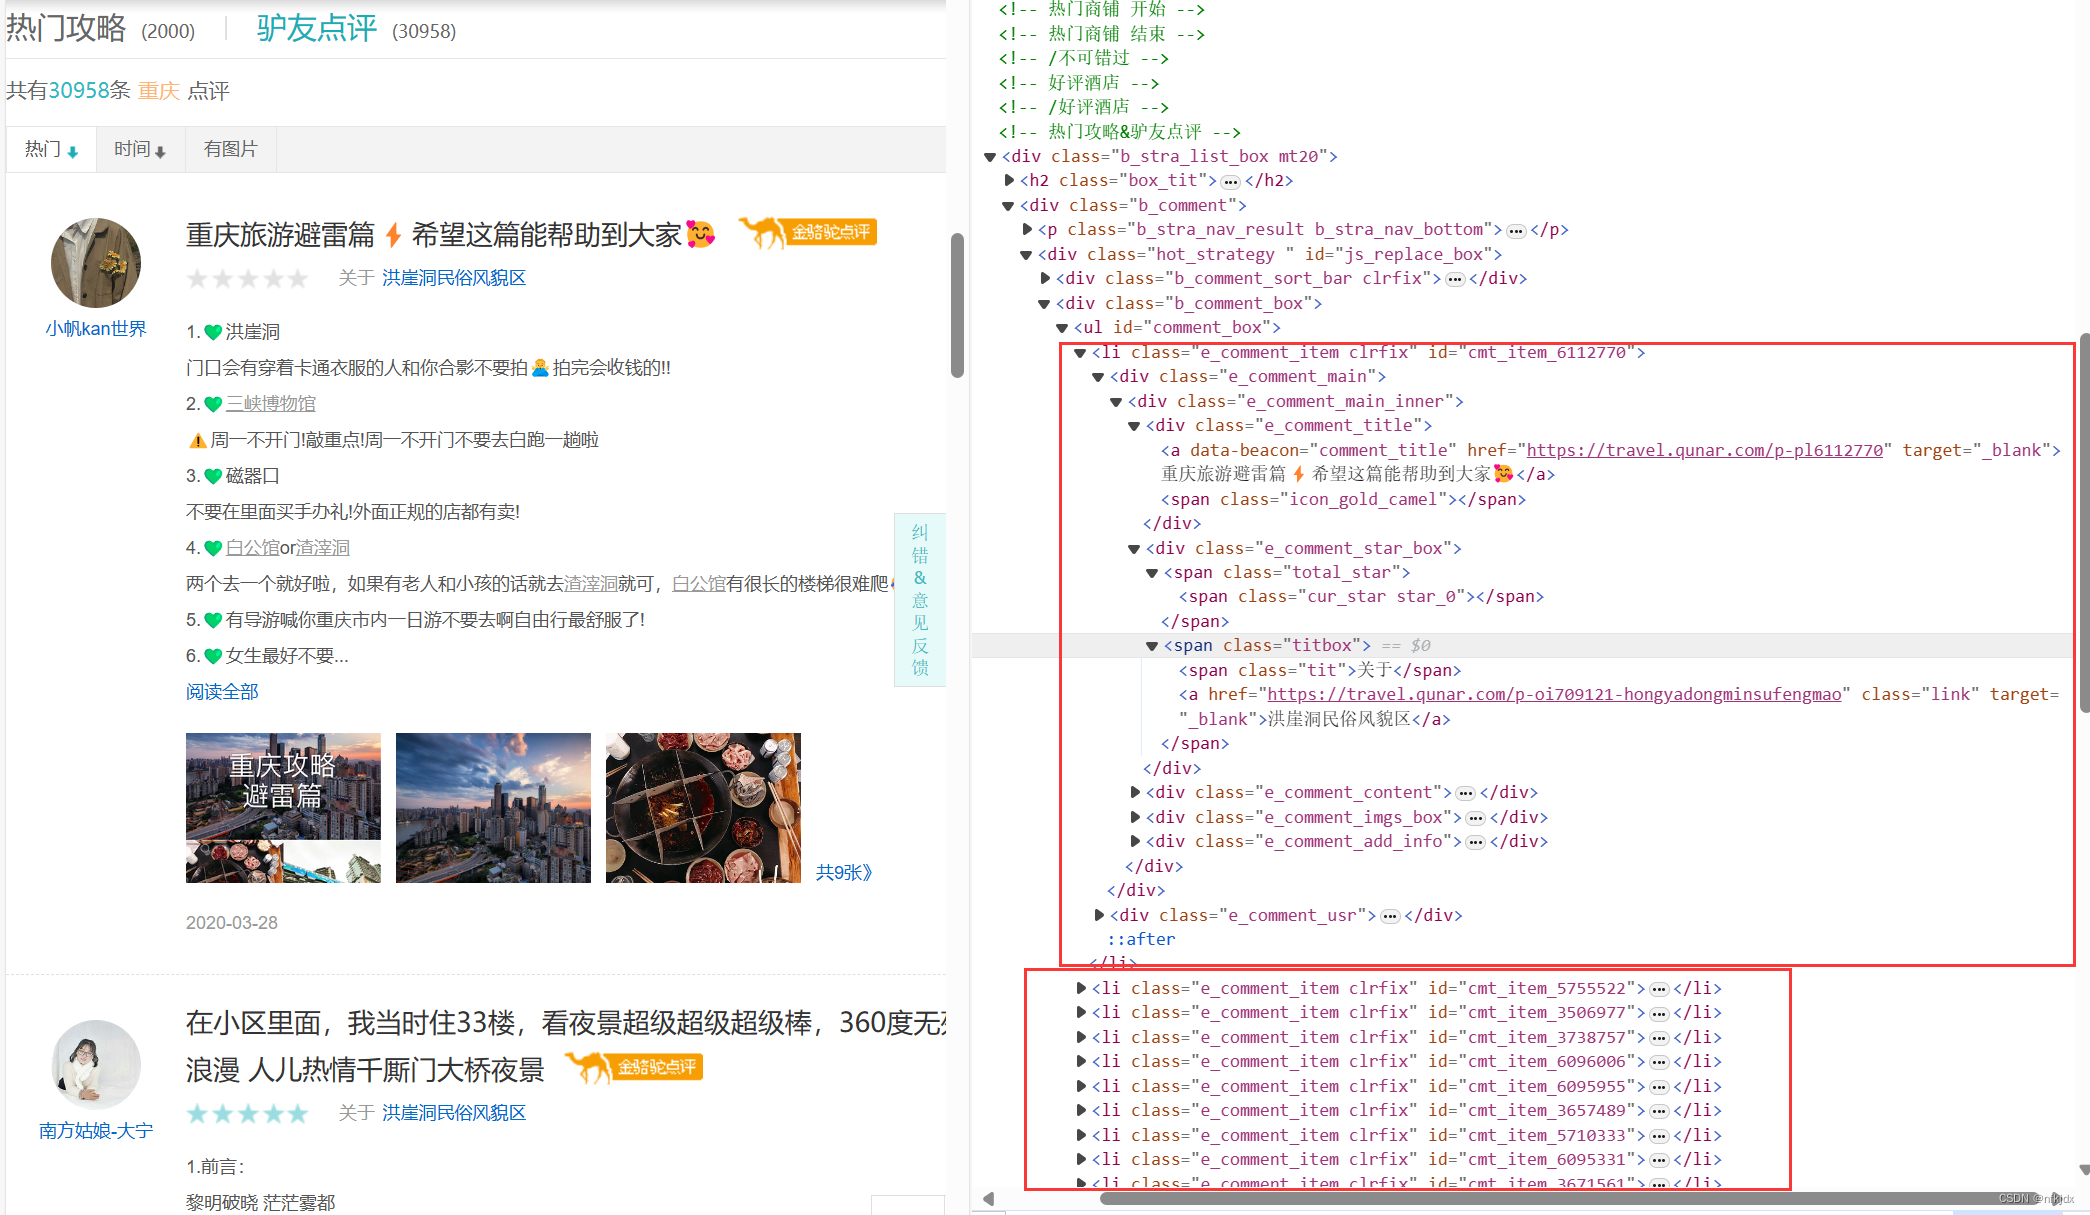
1、分析爬取的json数据,为提取数据做准备,如下图所示:json数据里提取的data数据是我们所需要的数据,而data数据就是html形式的字符串,打开网页与其对比,发现最后需要获取的数据在li标签里面,因此我们选择对其进行提取:采用正则与Beautiful Soup、xpath来解析数据

2、正则re提取数据,完整代码如下:
# coding:utf-8
import requests,time,os,openpyxl,re
from openpyxl import Workbook
import mysql.connectorclass RenrenLogin(object):def __init__(self):# 设置存储数据文件路径self.excellj = ''self.excellj1 = r"C:\XXXXXXXXXXXX\qne1.xlsx"self.excellj2 = r"C:\XXXXXXXXXXXX\qne2.xlsx"def get_html(self, url,names):# 因此f12查看时,数据为json格式data1 = requests.get(url=url).json()self.parse_html(data1,names)def parse_html(self, data,names):L1,L2,L3,L4,L5,L6,L7,L8 = [],[],[],[],[],[],[],[]if(names == "热门攻略"):userurl = re.findall(r'<a rel="nofollow" class="face" target="_blank" href="(.*?)".*?</a>', data["data"],re.S) # 用户url地址userpicture = re.findall(r'<img class="imgf" width="50" height="50" src="(.*?)"', data["data"], re.S) # 用户头像usertitle = re.findall(r'<img class="imgf".*?title="(.*?)"', data["data"], re.S) # 用户昵称L1 = re.findall(r'<h3 class="tit"><a data-beacon="travelbook" target="_blank" href=".*?">(.*?)</h3>',data["data"], re.S) # 用户发表标题for i in L1:L2.append(''.join(re.findall('[\u4e00-\u9fa5]', i)))usersubject = L2userinfourl = re.findall(r'<a data-beacon="travelbook" target="_blank" href="(.*?)"', data["data"], re.S) # 用户详情L3 = re.findall(r'<p class="places">(.*?)<span class="colOrange">(.*?)</span></p><p class="places">',data["data"], re.S) # 用户途径for i in L3:L4.append(i[1])useraddress = L4L5 = re.findall(r'<p class="places">途经:(.*?)</p><ul class="pics">', data["data"], re.S) # 用户行程for i in L5:L6.append(''.join(re.findall('[\u4e00-\u9fa5: ]',i)))userstroke = L6L7 = re.findall(r'<ul class="pics">(.*?)</li></ul>', data["data"], re.S) # 用户发表图片for i in L7:L8.append(re.findall(r'src="(.*?)"', i, re.S))userimages = L8userdz = re.findall(r'<i class="iconfont"></i><span>(.*?)</span>', data["data"], re.S) # 用户点赞数量userpl = re.findall(r'<i class="iconfont"></i><span>(.*?)</span>', data["data"], re.S) # 用户评论数量for i in range(len(usertitle)):alldata = []alldata.append(usertitle[i])alldata.append(usersubject[i])alldata.append(useraddress[i])alldata.append(userstroke[i])alldata.append(userdz[i])alldata.append(userpl[i])alldata.append(userpicture[i])alldata.append(userurl[i])alldata.append(userinfourl[i])alldata.append(str(userimages[i]))self.parse_excel(alldata,names)else:usertitle = re.findall(r'<div class="e_comment_usr_name"><a rel="nofollow" href=".*?" target="_blank">(.*?)</a></div>',data["data"], re.S)userurl = re.findall(r'<div class="e_comment_usr_name"><a rel="nofollow" href="(.*?)" target="_blank">.*?</a></div>',data["data"], re.S)usercomtit = re.findall(r'<a data-beacon="comment_title" href=".*?" target="_blank">(.*?)</a><span class="icon_gold_camel">',data["data"], re.S)L1 = re.findall(r'<div class="e_comment_content">(.*?)阅读全部</a></div>', data["data"], re.S)for i in L1:L2.append(''.join(re.findall('[\u4e00-\u9fa5 ]',i)))usercomment = L2L3 = re.findall(r'<ul class="base_fl" ><li><a rel="nofollow" data-beacon="comment_pic" href=".*?" target="_blank">共.*?张》',data["data"], re.S)for i in L3:L4.append(re.findall(r'src="(.*?)"', i, re.S))if(len(L4) < 10 ):for i in range(10-len(L4)):L4.append('空')userimages = L4else:userimages = L4userpicture = re.findall(r'<div class="e_comment_usr_pic"><a rel="nofollow" href=".*?" target="_blank"><img .*? src="(.*?)" /></a></div>',data["data"], re.S)for i in range(len(usertitle)):alldata = []alldata.append(usertitle[i])alldata.append(usercomtit[i])alldata.append(usercomment[i])alldata.append(userurl[i])alldata.append(str(userimages[i]))alldata.append(userpicture[i])self.parse_excel(alldata, names)return Truedef parse_excel(self, alldata,names):if(names == "热门攻略"):self.excellj = self.excellj1filetitle = ["用户昵称","用户发表主题","用户途径","用户路径","用户点赞数","用户评论数","用户头像","用户主页地址","用户详情地址","用户发布图片"]else:self.excellj = self.excellj2filetitle = ["用户昵称","用户发表主题","用户评论","用户主页地址","用户发布图片","用户头像"]if not os.path.exists(self.excellj):workbook = Workbook()workbook.save(self.excellj)wb = openpyxl.load_workbook(self.excellj)wa = wb.activewa.append(filetitle)wa.append(alldata)wb.save(self.excellj)else:wb = openpyxl.load_workbook(self.excellj)wa = wb.activewa.append(alldata)wb.save(self.excellj)return Truedef main(self, ):UrlList = ["https://travel.qunar.com/place/api/html/books/dist/299979?sortField=0&pageSize=10&page=","https://travel.qunar.com/place/api/html/comments/dist/299979?sortField=1&pageSize=10&page="]names = ["热门攻略","驴友点评"]for i in range(len(UrlList)):for j in range(1,3):url = UrlList[i] + str(j)self.get_html(url,names[i])print(f"重庆地区【{names[i]}】第{j}页数据爬取结束!!!")time.sleep(10)if __name__ == '__main__':spider = RenrenLogin()spider.main()
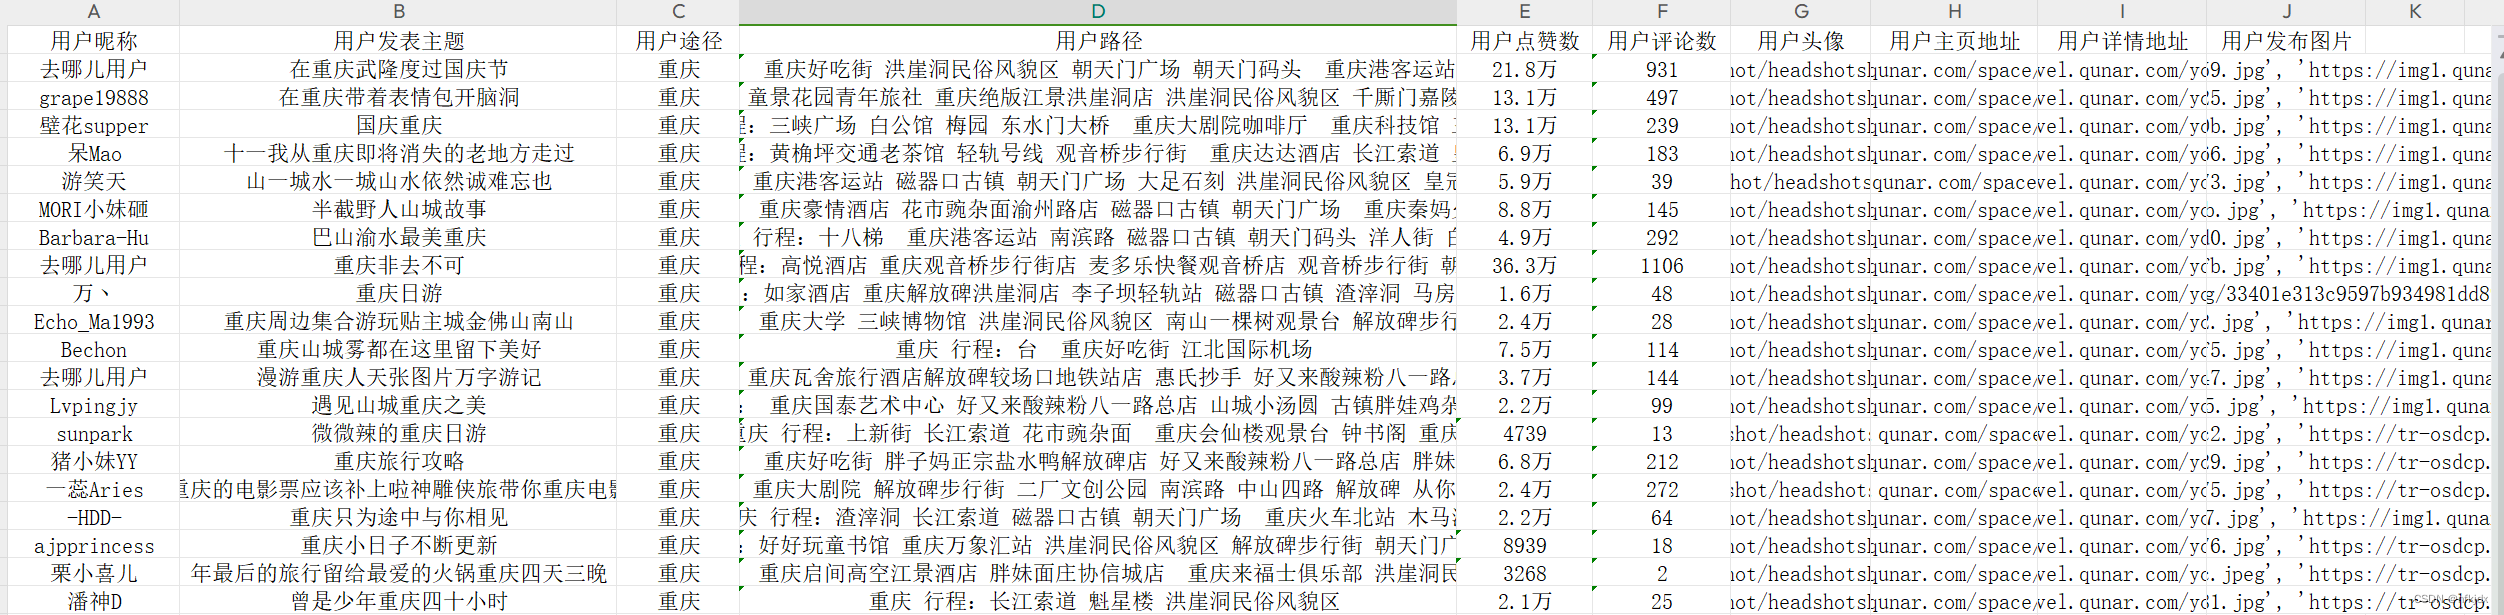
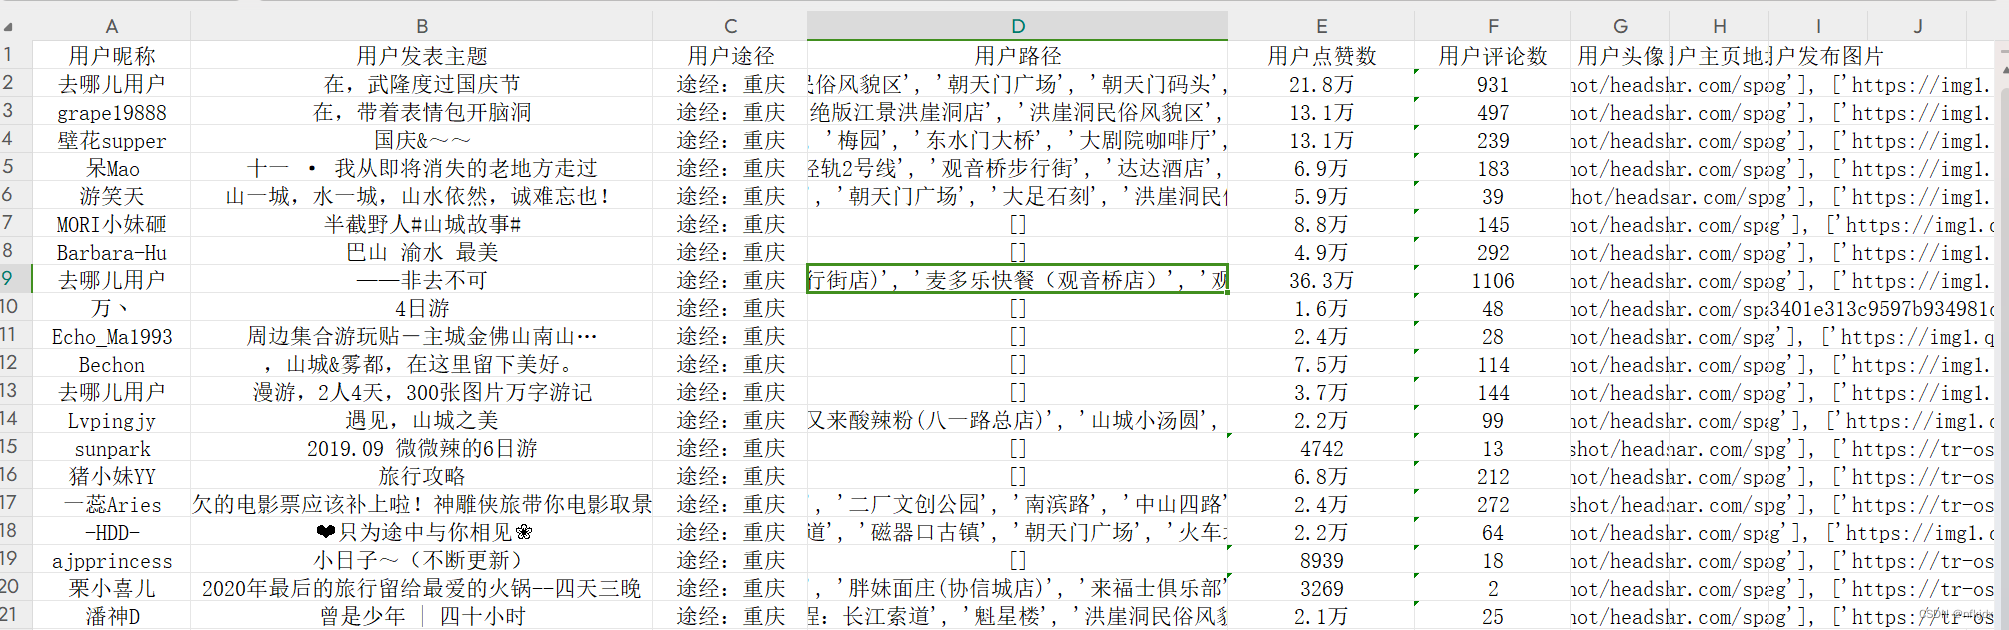
结果如下所示:
【热门攻略】:
【驴友点评】:
3、BeautifulSoup提取数据,完整代码如下:这里只爬取了驴友点评,热门攻略也是一样方法
# coding:utf-8
import requests,time,os,openpyxl,re
from openpyxl import Workbook
from bs4 import BeautifulSoupclass RenrenLogin(object):def __init__(self):self.excellj = r"C:\XXXXXXXXXXXX\qne1.xlsx"def get_html(self, url):data1 = requests.get(url=url).json()self.parse_html(data1)def parse_html(self, data):soup = BeautifulSoup(data["data"], 'lxml')L1,L2,L3,L4,L5,L6,L7,L8 = [],[],[],[],[],[],[],[]sellList1 = soup.find_all('div',class_="e_comment_usr_name")for i in sellList1:soup1 = BeautifulSoup(str(i), 'lxml')div_tag = soup1.find('div')a_tags = div_tag.find('a')userhref = a_tags.get('href')L1.append(userhref)L2.append(a_tags.text)usertitle = L2userurl = L1sellList2 = soup.find_all('div',class_="e_comment_title")for i in sellList2:soup1 = BeautifulSoup(str(i), 'lxml')div_tag = soup1.find('div')a_tags = div_tag.find('a')L3.append(a_tags.text)usercomtit = L3sellList3 = soup.find_all('div',class_="e_comment_content")for i in sellList3:str1 = ''soup1 = BeautifulSoup(str(i), 'lxml')div_tag = soup1.find('div')a_tags = div_tag.find_all('p')for tag in a_tags:str1 = str1 + tag.text +' 'L4.append(str1)usercomment = L4sellList4 = soup.find_all('div', class_="e_comment_imgs clrfix")L1 = []for i in sellList4:str1 = ''soup1 = BeautifulSoup(str(i), 'lxml')div_tag = soup1.find('div')a_tags = div_tag.find_all('img')for j in a_tags:str1 = str1 + j.get("src") + ' , 'L5.append(str1)if (len(L5) < 10):for i in range(10 - len(L4)):L5.append('空')userimages = L5else:userimages = L5sellList5 = soup.find_all('div',class_="e_comment_usr_pic")for i in sellList5:soup1 = BeautifulSoup(str(i), 'lxml')div_tag = soup1.find('div')a_tags = div_tag.find('a')userhref = a_tags.get('href')L6.append(userhref)userpicture = L6for i in range(len(usertitle)):alldata = []alldata.append(usertitle[i])alldata.append(usercomtit[i])alldata.append(usercomment[i])alldata.append(userurl[i])alldata.append(str(userimages[i]))alldata.append(userpicture[i])self.parse_excel(alldata)return Truedef parse_excel(self, alldata):filetitle = ["用户昵称","用户发表主题","用户评论","用户主页地址","用户发布图片","用户头像"]if not os.path.exists(self.excellj):workbook = Workbook()workbook.save(self.excellj)wb = openpyxl.load_workbook(self.excellj)wa = wb.activewa.append(filetitle)wa.append(alldata)wb.save(self.excellj)else:wb = openpyxl.load_workbook(self.excellj)wa = wb.activewa.append(alldata)wb.save(self.excellj)return Truedef main(self, ):UrlList = ["https://travel.qunar.com/place/api/html/comments/dist/299979?sortField=1&pageSize=10&page="]names = ["驴友点评"]for i in range(len(UrlList)):for j in range(1,3):url = UrlList[i] + str(j)self.get_html(url)print(f"重庆地区【{names[i]}】第{j}页数据爬取结束!!!")time.sleep(10)if __name__ == '__main__':spider = RenrenLogin()spider.main()
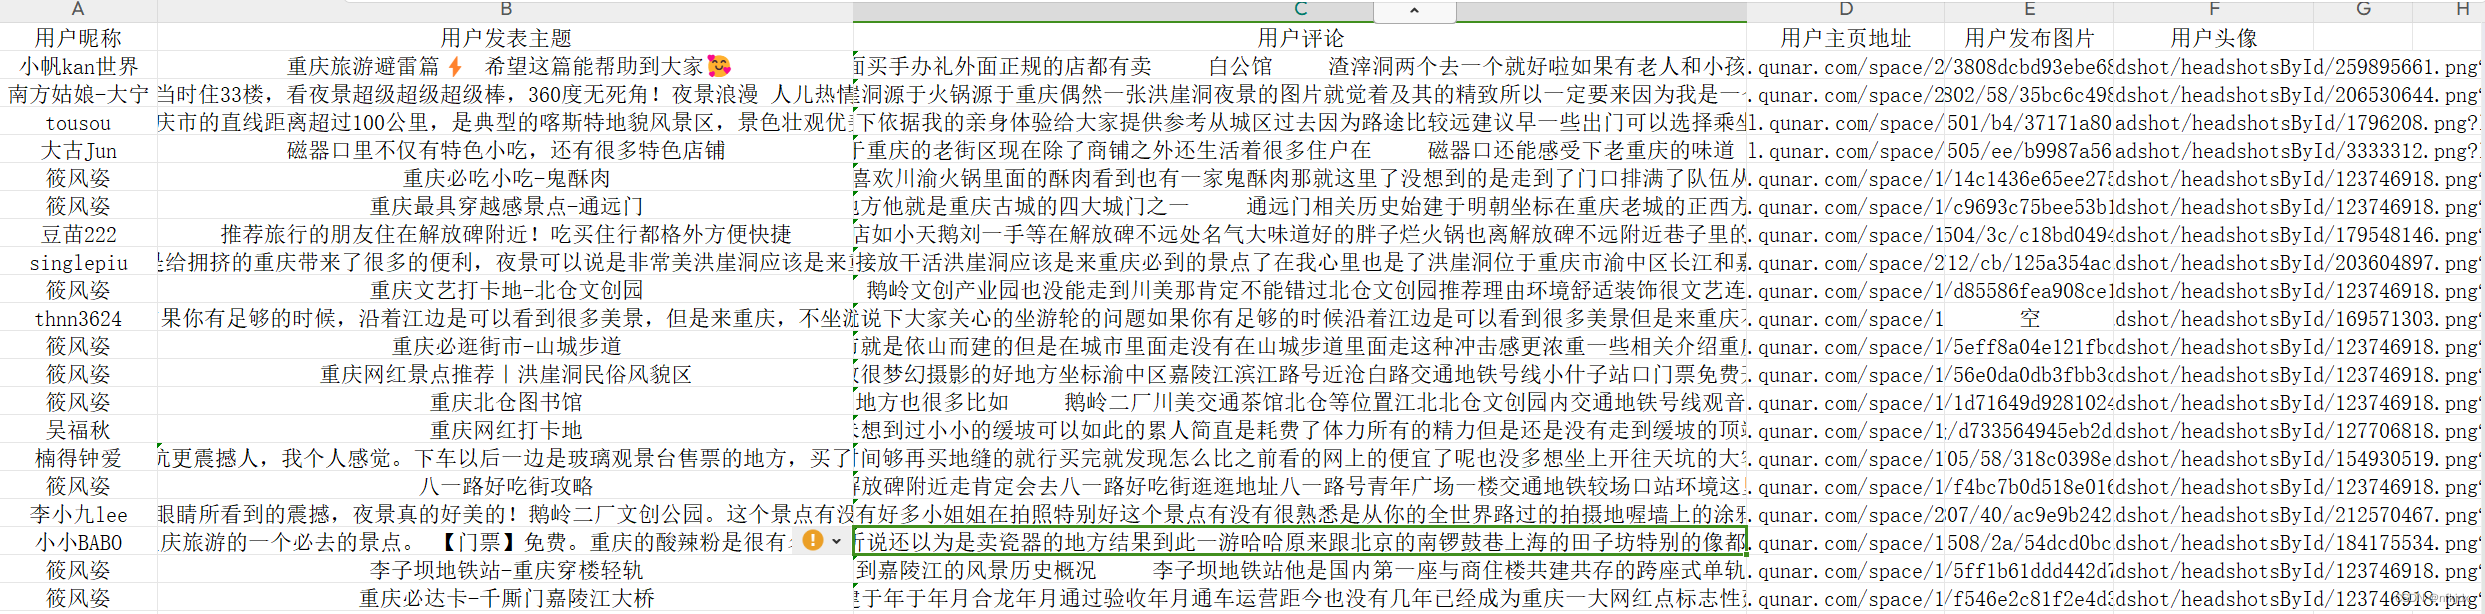
【驴友点评】:
4、Xpath提取数据,完整代码如下:这里只爬取了热门攻略,驴友点评也是一样方法
# coding:utf-8
import requests,time,os,openpyxl,re
from openpyxl import Workbook
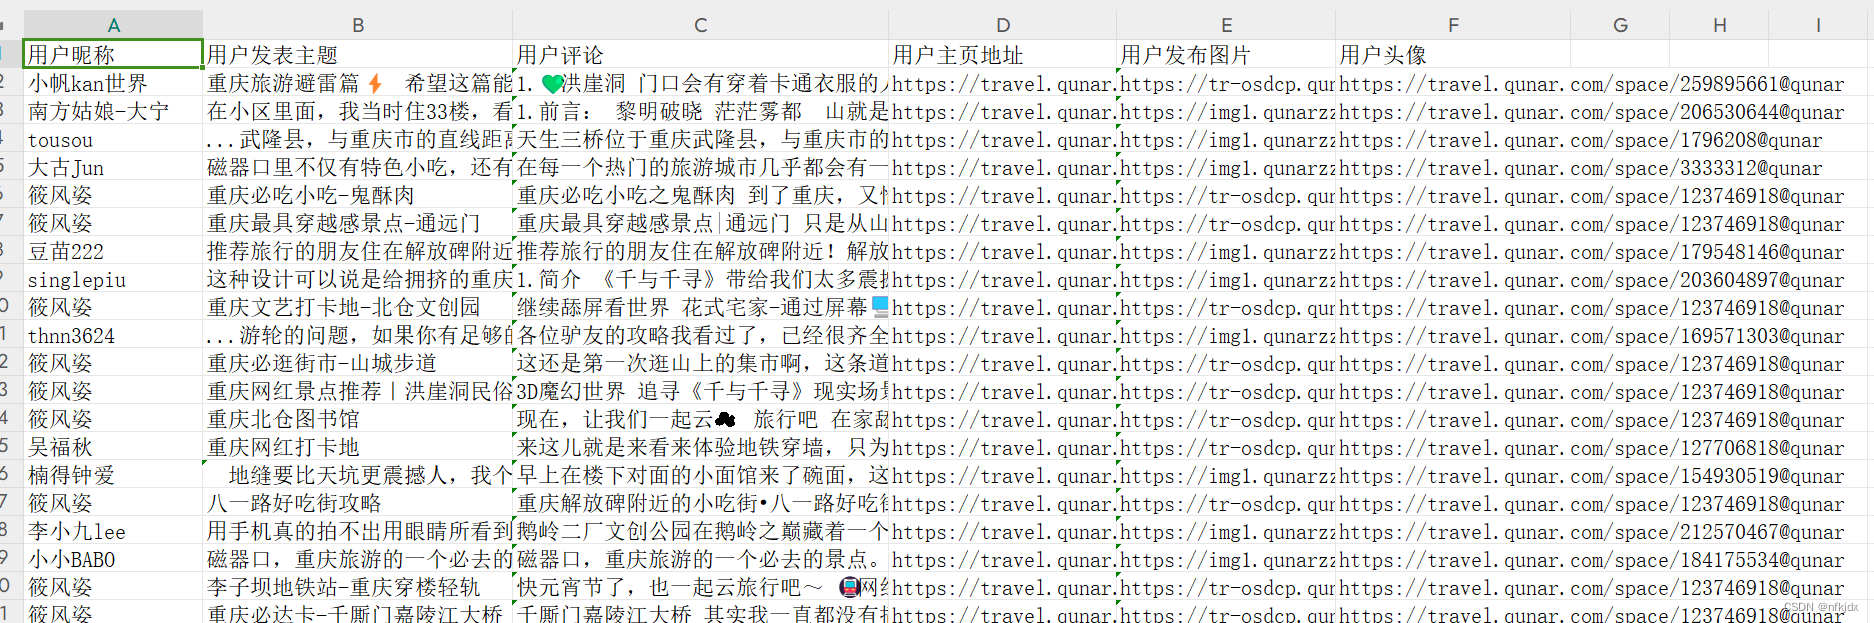
from lxml import etreeclass RenrenLogin(object):def __init__(self):self.excellj = r"C:\XXXXXXXXXX\qne1.xlsx"def get_html(self, url):data1 = requests.get(url=url).json()self.parse_html(data1)def parse_html(self, data):L1,L2,L3,L4,L6 = [],[],[],[],[]html = etree.HTML(data["data"])usertitle = html.xpath('//span[@class="user_name"]/a/text()')userurl = html.xpath('//span[@class="user_name"]/a/@href')userpicture = html.xpath('//img[@class="imgf"]/@src')for i in range(10):userzt1 = html.xpath('//h3[@class="tit"]')[i]userzt2 = userzt1.xpath('./a/text()')str1 = ''for j in range(len(userzt2)):str1 = str1 + userzt2[j]L1.append(str1)usersubject = L1for i in range(10):useraddres1 = html.xpath('//li[@class="list_item"]')[i]useraddres2 = useraddres1.xpath('p/text()')[0]useraddres3 = html.xpath('//span[@class="colOrange"]')[i]useraddres4 = useraddres3.xpath('./text()')[0]L2.append(useraddres2 + useraddres4)useraddress = L2for i in range(10):userstroke1 = html.xpath('//li[@class="list_item"]')[i]userstroke2 = userstroke1.xpath('p[4]/text()')L3.append(userstroke2)userstroke = L3for i in range(10):userimages = html.xpath('//ul[@class="pics"]')[i]L5 = []for j in range(1, len(userimages) + 1):L5.append(userimages.xpath(f'li[{j}]/a/img/@src'))L4.append(L5)userimages = L4userdz = html.xpath('//span[@class="icon_view"]/span/text()')userpl = html.xpath('//span[@class="icon_love"]/span/text()')for i in range(len(usertitle)):alldata = []alldata.append(usertitle[i])alldata.append(usersubject[i])alldata.append(useraddress[i])alldata.append(str(userstroke[i]))alldata.append(userdz[i])alldata.append(userpl[i])alldata.append(userpicture[i])alldata.append(userurl[i])alldata.append(str(userimages[i]))self.parse_excel(alldata)return Truedef parse_excel(self, alldata):filetitle = ["用户昵称","用户发表主题","用户途径","用户路径","用户点赞数","用户评论数","用户头像","用户主页地址","用户发布图片"]if not os.path.exists(self.excellj):workbook = Workbook()workbook.save(self.excellj)wb = openpyxl.load_workbook(self.excellj)wa = wb.activewa.append(filetitle)wa.append(alldata)wb.save(self.excellj)else:wb = openpyxl.load_workbook(self.excellj)wa = wb.activewa.append(alldata)wb.save(self.excellj)return Truedef main(self, ):UrlList = ["https://travel.qunar.com/place/api/html/books/dist/299979?sortField=0&pageSize=10&page="]names = ["热门攻略"]for i in range(len(UrlList)):for j in range(1,3):url = UrlList[i] + str(j)self.get_html(url)print(f"重庆地区【{names[i]}】第{j}页数据爬取结束!!!")time.sleep(10)if __name__ == '__main__':spider = RenrenLogin()spider.main()结果如下:
这篇关于Python爬虫实战:爬取【某旅游交通出行类网站中国内热门景点】的评论数据,使用Re、BeautifulSoup与Xpath三种方式解析数据,代码完整的文章就介绍到这儿,希望我们推荐的文章对编程师们有所帮助!


