本文主要是介绍小程序 卡片式动效实现,希望对大家解决编程问题提供一定的参考价值,需要的开发者们随着小编来一起学习吧!
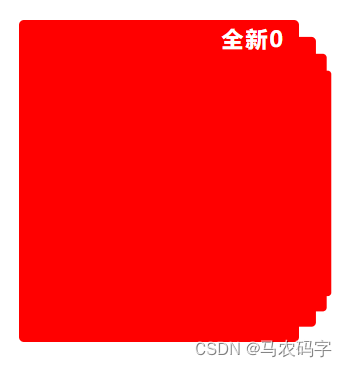
效果如下:

demo:
<!-- 折叠轮播图 组件-->
<template><view class="swpbig"><viewref="swiperPanel"class="swiperPanel"@touchstart="startMove"@touchend="endMove"><viewv-for="(item, index) in swiperList":key="index"class="swiperItem":style="{transform: itemStyle[index].transform, zIndex: itemStyle[index].zIndex, opacity: itemStyle[index].opacity}"><view class="children"><view class="pic"><!-- <span>{{ index }}</span> --><imageclass="pici":src="item.url"/><!--  <imageclass="banner_signal"src="../../static/banner_signal.png"mode=""/> --><view class="swpnew">全新{{ index }}</view></view></view></view></view></view>
</template><script>
var timer
export default {props: {swiperList: {type: Array,default: () => [{type: 'Array'// url: '../../static/banone.png'}, {type: 'Array'// url: '../../static/bantwo.png'}, {type: 'Array'// url: '../../static/banthree.png'}, {type: 'Array'// url: '../../static/banthree.png'}, {type: 'Array'// url: '../../static/banthree.png'}]}},data() {return {slideNote: {x: 0,y: 0},screenWidth: 0,itemStyle: [],active: 0}},created() {var macInfo = uni.getSystemInfoSync()this.screenWidth = macInfo.screenWidth// 计算swiper样式this.swiperList.forEach((item, index) => {this.itemStyle.push(this.getStyle(index))})// timer = setInterval(() => {// this.rightSlider()// }, 3000)},methods: {rightSlider() {var newList = JSON.parse(JSON.stringify(this.itemStyle))var last = [newList.pop()]newList = last.concat(newList)this.itemStyle = newList},getStyle(e, style) {// if (e > this.swiperList.length / 2) {//   console.log(e)//   var right = this.swiperList.length - e//   return {//     transform: 'scale(' + (1 - right / 10) + ') translate(-' + (right * 9) + '%,0px)',//     zIndex: 9999 - right//     // opacity: 0.5 / right//   }// } else {return {transform: 'scale(' + (1 - e / 10) + ') translate(' + (e * 9) + '%,0px)',zIndex: 9999 - e// opacity: 0.5 / e}// }},startMove(e) {clearInterval(timer)this.slideNote.x = e.changedTouches[0] ? e.changedTouches[0].pageX : 0this.slideNote.y = e.changedTouches[0] ? e.changedTouches[0].pageY : 0},endMove(e) {// timer = setInterval(() => {//   this.rightSlider()// }, 3000)let staticTransform = ''let staticActive = ''var newList = JSON.parse(JSON.stringify(this.itemStyle))if ((e.changedTouches[0].pageX - this.slideNote.x) < 0) {staticActive = this.active// 向左滑动var last = [newList.pop()]// console.log('左滑', last)newList = last.concat(newList)const item = newList[staticActive]staticTransform = item.transformitem.transform = 'translateX(-110%) rotate(-10deg)'if (this.active <= this.itemStyle.length - 2) {this.active++} else {this.active = 0}} else if ((e.changedTouches[0].pageX - this.slideNote.x) > 0) {if (this.active === 0) {this.active = this.itemStyle.length - 1} else {this.active--}staticActive = this.active// 向右滑动newList.push(newList[0])newList.splice(0, 1)const item = newList[staticActive]staticTransform = item.transform// item.transform = 'translateX(-110%) rotate(-5deg)'} else {// 点击}this.itemStyle = newListsetTimeout(() => {const item = this.itemStyle[staticActive]item.transform = staticTransform}, 500)}}
}
</script><style lang="scss">.swpbig{overflow: hidden;margin-top: 100px;}.swiperPanel {margin-top: 50upx;height: 680upx;width: 686upx;overflow: hidden;position: relative;margin-left:80upx;.swiperItem {height: 100%;width: 100%;position: absolute;top: 0;left: 0upx;transition: all .5s;.children {// height: 100%;width: 570upx;margin: 2upx 160upx 2upx 0;position: relative;.pic {position: relative;height: 645rpx;width: 560rpx;border-radius: 10upx;}.pici{position: absolute;height: 645rpx;width: 560rpx;border-radius: 10upx;	background: red;}.banner_signal{position: absolute;height: 645rpx;width: 560rpx;top: 0;}.swpnew{position: absolute;height: 63rpx;font-size: 45rpx;font-weight: bold;color: #FFF;line-height: 53rpx;right: 28rpx;margin-top: 12rpx;letter-spacing: 5rpx;}}}}
</style>
这篇关于小程序 卡片式动效实现的文章就介绍到这儿,希望我们推荐的文章对编程师们有所帮助!


