本文主要是介绍Xadmin + Django 整合指南,希望对大家解决编程问题提供一定的参考价值,需要的开发者们随着小编来一起学习吧!
首先说下本文的开发环境 :
Django 2.2.3
xadmin 2.0.1
本文基于的 Python 是 3.7.3
为了方便版本控制,不污染系统的 python 环境,我们采用了 virtualenv 对环境进行了管理。
本文主要分为以下几个部分 :
0.背景介绍
xadmin 是一个开源项目。 针对于 django admin ,页面美化程度,功能不完善 等问题 , 额外开发的一个模块。目前 xadmin 的最新版本已经是 xadmin 3.0 ,但是 xadmin 3.0 已经变成了一个纯前端项目,有兴趣的同学可以自己研究下。目前 作者已经不对 xadmin 2.0 做版本维护了,所以社区并不是很好,建议选择 其他的持续维护的开源项目。
我们这里使用的是 django 版本是 2.2.3,xadmin 的 github 地址是 https://github.com/sshwsfc/xadmin 。注意 :django 2.0 + 对应的xadmin 版本是 2.0.1 ,master 分支的 xadmin 是 0.6.1 版本 !!! django 2.0 + 一定要选用 xadmin 2.0 + 版本,不然会有各种各样的问题。!!!
如何解决 请继续阅读。
1. 构建 python 虚拟化环境
我这里采用的是 virtualenv 构建的虚拟化环境。
如果没有安装 virtualenv , 我们可以通过以下指令安装:
pip install virtualenv
进入一个项目目录,执行初始化
virtualenv venv
2. 安装必要依赖
安装以下依赖:
pip install https://codeload.github.com/sshwsfc/xadmin/zip/django2
pip install pymysql
注意 : 安装 xadmin 一定要执行以下命令,直接安装的是 xadmin 0.6.1
pip install https://codeload.github.com/sshwsfc/xadmin/zip/django2
我们看一下已经安装的包:
(venv) [root@dev-109-kvm superset_dev]# pip list
Package Version
---------------------- ---------
alembic 1.0.11
amqp 2.5.0
apispec 2.0.2
asn1crypto 0.24.0
attrs 19.1.0
Babel 2.7.0
billiard 3.6.0.0
bleach 3.1.0
boto3 1.4.7
botocore 1.7.48
cchardet 2.1.4
celery 4.3.0
certifi 2019.6.16
cffi 1.12.3
chardet 3.0.4
click 6.7
colorama 0.3.9
contextlib2 0.5.5
cryptography 2.7
defusedxml 0.6.0
docutils 0.14
et-xmlfile 1.0.1
Flask 0.12.4
Flask-AppBuilder 2.1.6
Flask-Babel 0.12.2
Flask-Caching 1.7.2
Flask-Compress 1.4.0
Flask-JWT-Extended 3.20.0
Flask-Login 0.4.1
Flask-Migrate 2.5.2
Flask-OpenID 1.2.5
Flask-SQLAlchemy 2.4.0
Flask-WTF 0.14.2
flower 0.9.3
future 0.16.0
geographiclib 1.49
geopy 1.20.0
gunicorn 19.9.0
humanize 0.5.1
idna 2.8
ijson 2.4
isodate 0.6.0
itsdangerous 1.1.0
jdcal 1.4.1
Jinja2 2.10.1
jmespath 0.9.4
jsonlines 1.2.0
jsonschema 3.0.1
kombu 4.6.3
linear-tsv 1.1.0
Mako 1.0.13
Markdown 3.1.1
MarkupSafe 1.1.1
marshmallow 2.19.5
marshmallow-enum 1.4.1
marshmallow-sqlalchemy 0.17.0
numpy 1.16.4
openpyxl 2.4.11
pandas 0.23.4
parsedatetime 2.4
pathlib2 2.3.4
pip 19.1.1
polyline 1.4.0
prison 0.1.2
pycparser 2.19
pydruid 0.5.6
PyHive 0.6.1
PyJWT 1.7.1
pyrsistent 0.15.3
python-dateutil 2.8.0
python-editor 1.0.4
python-geohash 0.8.5
python3-openid 3.1.0
pytz 2019.1
PyYAML 5.1.1
requests 2.22.0
rfc3986 1.3.2
s3transfer 0.1.13
sasl 0.2.1
setuptools 41.0.1
simplejson 3.16.0
six 1.12.0
SQLAlchemy 1.2.18
SQLAlchemy-Utils 0.34.0
sqlparse 0.3.0
superset 0.28.1
tableschema 1.6.0
tabulator 1.23.0
thrift 0.11.0
thrift-sasl 0.3.0
tornado 5.1.1
unicodecsv 0.14.1
Unidecode 1.1.1
urllib3 1.25.3
vine 1.3.0
webencodings 0.5.1
Werkzeug 0.15.4
wheel 0.33.4
WTForms 2.2.1
xlrd 1.2.0
3. django , xadmin 初始化
由于 django 是一个 web 框架,整合了 xadmin 后,我们需要进行毕竟的配置 与代码 编写。
首先创建一个 django 项目,然后将之前的项目依赖目录 venv 移动到新项目文件目录 中。
django-admin startproject Django_xadmin_demo
mv venv/ Django_xadmin_demo/
构建一个新模块
manage.py startapp demo
修改项目的路由配置 Django_xadmin_demo/urls.py
"""Django_xadmin_demo URL ConfigurationThe `urlpatterns` list routes URLs to views. For more information please see:https://docs.djangoproject.com/en/2.2/topics/http/urls/
Examples:
Function views1. Add an import:  from my_app import views2. Add a URL to urlpatterns:  path('', views.home, name='home')
Class-based views1. Add an import:  from other_app.views import Home2. Add a URL to urlpatterns:  path('', Home.as_view(), name='home')
Including another URLconf1. Import the include() function: from django.urls import include, path2. Add a URL to urlpatterns:  path('blog/', include('blog.urls'))
"""
from django.contrib import admin
from django.urls import path
import xadminurlpatterns = [#path('admin/', admin.site.urls),path('xadmin/', xadmin.site.urls),
]
修改项目的全局设置 Django_xadmin_demo/settings.py ,将 demo, xadmin相关模块 加入到 应用目录中 :
INSTALLED_APPS = ['django.contrib.admin','django.contrib.auth','django.contrib.contenttypes','django.contrib.sessions','django.contrib.messages','django.contrib.staticfiles',# xadmin 模块'xadmin','crispy_forms','reversion',# 用户自定义模块'demo',
]
配置汉化
# LANGUAGE_CODE = 'en-us'
# TIME_ZONE = 'UTC'
# USE_I18N = True
# USE_L10N = True
# USE_TZ = TrueLANGUAGE_CODE = 'zh-hans'
TIME_ZONE = 'Asia/Shanghai'
USE_I18N = True
USE_L10N = True
USE_TZ = False
配置路由
ALLOWED_HOSTS = ['*']
编写模块测试代码, 修改 demo 的 models.py 文件:
from django.db import models# Create your models here.class CityList(models.Model):id = models.IntegerField(primary_key=True)city_code = models.IntegerField(blank=True, null=True)class Meta:# managed = Falsedb_table = 'city_list'class UserTest(models.Model):id = models.IntegerField(primary_key=True)name = models.CharField(max_length=255, blank=True, null=True)age = models.IntegerField(blank=True, null=True)class Meta:# managed = Falsedb_table = 'user_test'
新增 adminx.py 文件,配置可显示的模型
import xadminfrom demo.models import *class UserTestAdmin(object):list_display = ['id', 'name', 'age']search_fields = ['name', 'age']list_filter = ['id']xadmin.site.register(UserTest, UserTestAdmin)
数据库 demo 文件
/*
Navicat MySQL Data TransferSource Server         : localhost_mysql
Source Server Version : 50528
Source Host           : localhost:3306
Source Database       : django_xadminTarget Server Type    : MYSQL
Target Server Version : 50528
File Encoding         : 65001Date: 2019-07-15 15:42:20
*/SET FOREIGN_KEY_CHECKS=0;-- ----------------------------
-- Table structure for city_list
-- ----------------------------
DROP TABLE IF EXISTS `city_list`;
CREATE TABLE `city_list` (`id` int(11) NOT NULL AUTO_INCREMENT,`city_code` int(11) DEFAULT NULL,PRIMARY KEY (`id`)
) ENGINE=InnoDB AUTO_INCREMENT=4 DEFAULT CHARSET=utf8;-- ----------------------------
-- Records of city_list
-- ----------------------------
INSERT INTO `city_list` VALUES ('1', '1');
INSERT INTO `city_list` VALUES ('2', '2');
INSERT INTO `city_list` VALUES ('3', '3');-- ----------------------------
-- Table structure for user_test
-- ----------------------------
DROP TABLE IF EXISTS `user_test`;
CREATE TABLE `user_test` (`id` int(11) NOT NULL AUTO_INCREMENT,`name` varchar(255) DEFAULT NULL,`tel` varchar(255) DEFAULT NULL,`age` int(11) DEFAULT NULL,`gmt_create` datetime DEFAULT NULL,PRIMARY KEY (`id`),KEY `xx` (`age`)
) ENGINE=InnoDB AUTO_INCREMENT=23 DEFAULT CHARSET=utf8;-- ----------------------------
-- Records of user_test
-- ----------------------------
INSERT INTO `user_test` VALUES ('1', 'ss', '1233232', '12', '2019-07-11 16:03:10');
INSERT INTO `user_test` VALUES ('2', 'cc', '22323', '22', '2019-07-11 16:03:25');
INSERT INTO `user_test` VALUES ('3', 'sp', null, '23', '2019-07-25 16:03:37');
INSERT INTO `user_test` VALUES ('4', '2x', null, '21', '2019-07-11 16:08:48');
INSERT INTO `user_test` VALUES ('5', 'xx', '12', '2', '2019-07-23 16:56:21');
INSERT INTO `user_test` VALUES ('6', 'xs', '22', '2', '2019-07-11 17:11:54');
INSERT INTO `user_test` VALUES ('7', 'ssdsd', null, '2', '2019-07-11 17:11:56');
INSERT INTO `user_test` VALUES ('8', 'ss', '123221424123', null, '2019-07-11 17:11:59');
INSERT INTO `user_test` VALUES ('9', 'ss', '123214345', '22', '2019-07-11 17:12:02');
INSERT INTO `user_test` VALUES ('10', 'ss', '1', '22', '2019-07-11 16:57:36');
INSERT INTO `user_test` VALUES ('11', 'sw', '2', '22', '2019-07-11 16:57:33');
INSERT INTO `user_test` VALUES ('12', 'sq', '12', '22', '2019-07-11 16:57:46');
INSERT INTO `user_test` VALUES ('13', '2w', '2', '1', '2019-07-11 16:57:52');
INSERT INTO `user_test` VALUES ('14', '24', '2', '4', '2019-07-11 16:57:59');
INSERT INTO `user_test` VALUES ('15', '2wewe', '2', '1', '2019-07-11 17:12:06');
INSERT INTO `user_test` VALUES ('16', '24', '22', '2', '2019-07-11 17:12:09');
INSERT INTO `user_test` VALUES ('17', '23', '22', '1', '2019-07-11 17:12:12');
INSERT INTO `user_test` VALUES ('18', 'w', '23', '7', '2019-07-11 16:58:38');
INSERT INTO `user_test` VALUES ('19', '2', '2', '2', '2019-07-11 16:58:47');
INSERT INTO `user_test` VALUES ('20', '3', '4', '4', '2019-07-11 16:58:57');
INSERT INTO `user_test` VALUES ('21', '2', '4', '5', '2019-07-11 16:59:15');
INSERT INTO `user_test` VALUES ('22', '1', '2', '4', '2019-07-11 16:59:24');
4.编写运行脚本 并启动服务
为了启动服务方便,我写了一个Linux 下的启动脚本 :
#!/bin/bashBASE_DIR=$(dirname $(readlink -f $0))/../
DATE=$(date +'%Y%m%d')source /etc/profile
# 进入python virtualenv 环境
source ${BASE_DIR}/venv/bin/activatenohup ${BASE_DIR}/manage.py runserver 0.0.0.0:8001 >> ${BASE_DIR}/logs/${DATE}_run.log 2>&1 &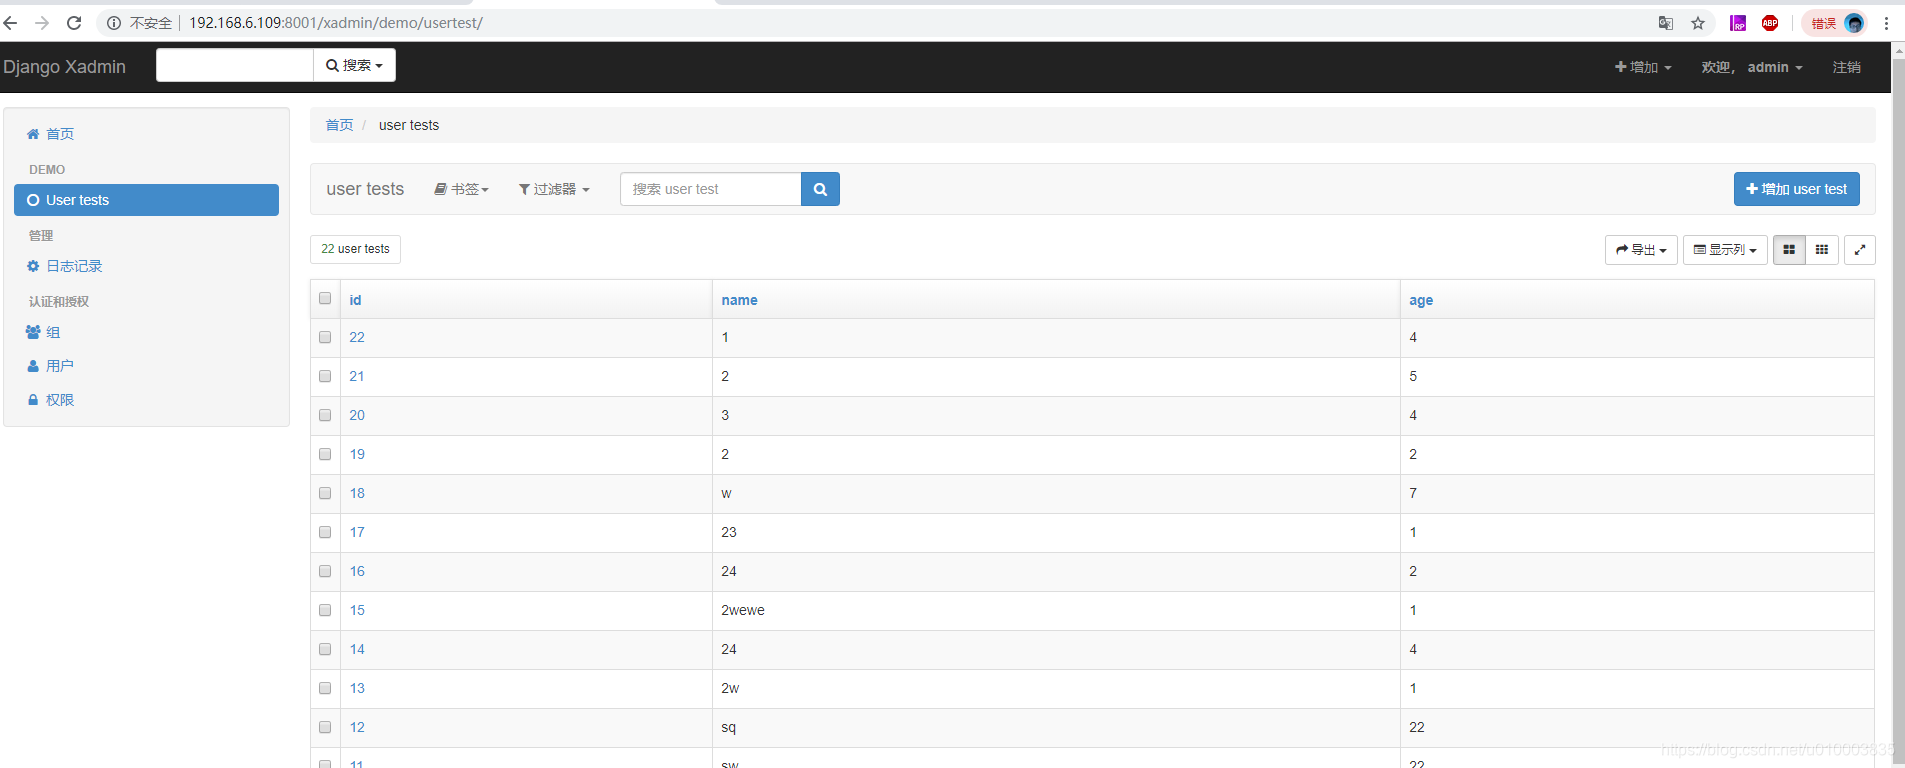
5. 常见问题
问题 1 . django 项目启动报错 :
django.core.exceptions.ImproperlyConfigured: mysqlclient 1.3.13 or newer is required; you have 0.9.3.
  File "E:\Django_xadmin_demo\venv\lib\site-packages\django\db\utils.py", line 201, in __getitem__backend = load_backend(db['ENGINE'])File "E:\Django_xadmin_demo\venv\lib\site-packages\django\db\utils.py", line 110, in load_backendreturn import_module('%s.base' % backend_name)File "E:\PYTHON_HOME\Python37\lib\importlib\__init__.py", line 127, in import_modulereturn _bootstrap._gcd_import(name[level:], package, level)File "E:\Django_xadmin_demo\venv\lib\site-packages\django\db\backends\mysql\base.py", line 36, in <module>raise ImproperlyConfigured('mysqlclient 1.3.13 or newer is required; you have %s.' % Database.__version__)
django.core.exceptions.ImproperlyConfigured: mysqlclient 1.3.13 or newer is required; you have 0.9.3.
解决方案 :
找到 venv/lib/python3.7/site-packages/django/db/backends/mysql/base.py, 将如下代码注释 :
if version < (1, 3, 3):raise ImproperlyConfigured("mysqlclient 1.3.3 or newer is required; you have %s" % Database.__version__)
问题 2 . django 项目启动报错 :
AttributeError: 'str' object has no attribute 'decode'
    if self.features.is_sql_auto_is_null_enabled:File "E:\Django_xadmin_demo\venv\lib\site-packages\django\utils\functional.py", line 80, in __get__res = instance.__dict__[self.name] = self.func(instance)File "E:\Django_xadmin_demo\venv\lib\site-packages\django\db\backends\mysql\features.py", line 82, in is_sql_auto_is_null_enabledcursor.execute('SELECT @@SQL_AUTO_IS_NULL')File "E:\Django_xadmin_demo\venv\lib\site-packages\django\db\backends\utils.py", line 103, in executesql = self.db.ops.last_executed_query(self.cursor, sql, params)File "E:\Django_xadmin_demo\venv\lib\site-packages\django\db\backends\mysql\operations.py", line 146, in last_executed_queryquery = query.decode(errors='replace')
AttributeError: 'str' object has no attribute 'decode'
找到以下文件 venv/lib/python3.7/site-packages/django/db/backends/mysql/operations.py, 将如下代码替换
def last_executed_query(self, cursor, sql, params):# With MySQLdb, cursor objects have an (undocumented) "_executed"# attribute where the exact query sent to the database is saved.# See MySQLdb/cursors.py in the source distribution.query = getattr(cursor, '_executed', None)if query is not None:# query = query.decode(errors='replace')query = query.encode(errors='replace')return query
query = query.decode(errors='replace')
换为
query = query.encode(errors='replace')
======================================================
问题 3 . django 项目启动报错 :
django.core.exceptions.ImproperlyConfigured: SQLite 3.8.3 or later is required (found 3.7.17).
  File "/usr/local/django_xadmin_dev/venv/lib/python3.7/site-packages/django/db/utils.py", line 110, in load_backendreturn import_module('%s.base' % backend_name)File "/usr/local/django_xadmin_dev/venv/lib/python3.7/importlib/__init__.py", line 127, in import_modulereturn _bootstrap._gcd_import(name[level:], package, level)File "<frozen importlib._bootstrap>", line 1006, in _gcd_importFile "<frozen importlib._bootstrap>", line 983, in _find_and_loadFile "<frozen importlib._bootstrap>", line 967, in _find_and_load_unlockedFile "<frozen importlib._bootstrap>", line 677, in _load_unlockedFile "<frozen importlib._bootstrap_external>", line 728, in exec_moduleFile "<frozen importlib._bootstrap>", line 219, in _call_with_frames_removedFile "/usr/local/django_xadmin_dev/venv/lib/python3.7/site-packages/django/db/backends/sqlite3/base.py", line 66, in <module>check_sqlite_version()File "/usr/local/django_xadmin_dev/venv/lib/python3.7/site-packages/django/db/backends/sqlite3/base.py", line 63, in check_sqlite_versionraise ImproperlyConfigured('SQLite 3.8.3 or later is required (found %s).' % Database.sqlite_version)
django.core.exceptions.ImproperlyConfigured: SQLite 3.8.3 or later is required (found 3.7.17).
解决方案 :
https://www.jianshu.com/p/cdacf4b74646
查看系统的sqlte3的版本
[root@djangoServer work]# sqlite3 --version
3.7.17 2013-05-20 00:56:22 118a3b35693b134d56ebd780123b7fd6f1497668
[root@djangoServer work]#
果然Centos系统自带的sqlite3版本偏低,在上面的错误提示中要求需要SQLite 3.8.3 or later,那么就需要去升级 SQlite 的版本了。
Centos7安装最新的sqlite3并设置更新python库版本
#更新SQLite 3
#获取源代码(在主目录中运行)
[root@djangoServer ~]# cd ~
[root@djangoServer ~]# wget https://www.sqlite.org/2019/sqlite-autoconf-3270200.tar.gz
[root@djangoServer ~]# tar -zxvf sqlite-autoconf-3270200.tar.gz#构建并安装
[root@djangoServer ~]# cd sqlite-autoconf-3270200
[root@djangoServer sqlite-autoconf-3270200]# ./configure --prefix=/usr/local
[root@djangoServer sqlite-autoconf-3270200]# make && make install
[root@djangoServer sqlite-autoconf-3270200]# find /usr/ -name sqlite3
/usr/bin/sqlite3
/usr/lib64/python2.7/sqlite3
/usr/local/bin/sqlite3
/usr/local/python3/lib/python3.7/site-packages/django/db/backends/sqlite3
/usr/local/python3/lib/python3.7/sqlite3
[root@djangoServer sqlite-autoconf-3270200]# #不必要的文件,目录删除
[root@djangoServer sqlite-autoconf-3270200]# cd ~
[root@djangoServer ~]# ls
anaconda-ks.cfg  sqlite-autoconf-3270200  sqlite-autoconf-3270200.tar.gz
[root@djangoServer ~]#
[root@djangoServer ~]# rm -rf sqlite-autoconf-3270200.tar.gz
[root@djangoServer ~]# rm -rf sqlite-autoconf-3270200#检查版本
## 最新安装的sqlite3版本
[root@djangoServer ~]# /usr/local/bin/sqlite3 --version
3.27.2 2019-02-25 16:06:06 bd49a8271d650fa89e446b42e513b595a717b9212c91dd384aab871fc1d0f6d7
[root@djangoServer ~]# ## Centos7自带的sqlite3版本
[root@djangoServer ~]# /usr/bin/sqlite3 --version
3.7.17 2013-05-20 00:56:22 118a3b35693b134d56ebd780123b7fd6f1497668
[root@djangoServer ~]# ## 可以看到sqlite3的版本还是旧版本,那么需要更新一下。
[root@djangoServer ~]# sqlite3 --version
3.7.17 2013-05-20 00:56:22 118a3b35693b134d56ebd780123b7fd6f1497668
[root@djangoServer ~]# ## 更改旧的sqlite3
[root@djangoServer ~]# mv /usr/bin/sqlite3  /usr/bin/sqlite3_old## 软链接将新的sqlite3设置到/usr/bin目录下
[root@djangoServer ~]# ln -s /usr/local/bin/sqlite3   /usr/bin/sqlite3## 查看当前全局sqlite3的版本
[root@djangoServer ~]# sqlite3 --version
3.27.2 2019-02-25 16:06:06 bd49a8271d650fa89e446b42e513b595a717b9212c91dd384aab871fc1d0f6d7
[root@djangoServer ~]# #将路径传递给共享库
# 设置开机自启动执行,可以将下面的export语句写入 ~/.bashrc 文件中,如果如果你想立即生效,可以执行source 〜/.bashrc 将在每次启动终端时执行
[root@djangoServer ~]# export LD_LIBRARY_PATH="/usr/local/lib"#检查Python的SQLite3版本
[root@djangoServer ~]# ipython3
Python 3.7.1 (default, May  3 2019, 09:55:04)
Type 'copyright', 'credits' or 'license' for more information
IPython 7.5.0 -- An enhanced Interactive Python. Type '?' for help.In [1]: import sqlite3                                                     In [2]: sqlite3.sqlite_version
Out[2]: '3.27.2'In [3]: exit
[root@djangoServer ~]# #启动开发服务器
[root@djangoServer ~]# cd /work/
[root@djangoServer work]# ls
db.sqlite3  manage.py  polls  test_django
[root@djangoServer work]# python3 manage.py runserver
Watching for file changes with StatReloader
Performing system checks...System check identified no issues (0 silenced).
May 03, 2019 - 21:32:28
Django version 2.2.1, using settings 'test_django.settings'
Starting development server at http://127.0.0.1:8000/
Quit the server with CONTROL-C.
这篇关于Xadmin + Django 整合指南的文章就介绍到这儿,希望我们推荐的文章对编程师们有所帮助!


