本文主要是介绍【项目实战经验】DataKit迁移MySQL到openGauss(上),希望对大家解决编程问题提供一定的参考价值,需要的开发者们随着小编来一起学习吧!
前言
本文将分享DataKit迁移MySQL到openGauss的项目实战,供广大openGauss爱好者参考。
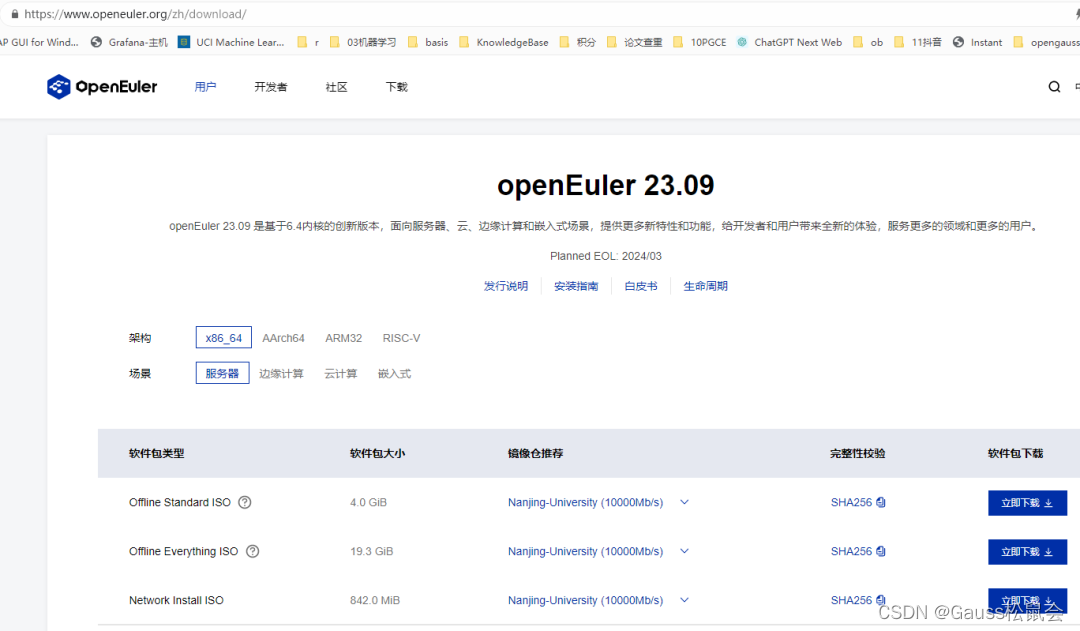
1. 下载操作系统
https://www.openeuler.org/zh/download
https://support.huawei.com/enterprise/zh/doc/EDOC1100332931/1a643956
https://support.huawei.com/enterprise/zh/doc/EDOC1100332931/fddc1451
1.1. 关闭selinux
[root@olnode01 tmp]# cat /etc/selinux/config # This file controls the state of SELinux on the system.
# SELINUX= can take one of these three values:
#     enforcing - SELinux security policy is enforced.
#     permissive - SELinux prints warnings instead of enforcing.
#     disabled - No SELinux policy is loaded.
SELINUX=disabled
# SELINUXTYPE= can take one of these three values:
#     targeted - Targeted processes are protected,
#     minimum - Modification of targeted policy. Only selected processes are protected.
#     mls - Multi Level Security protection.
SELINUXTYPE=targeted
1.2. 关闭防火墙
[root@olnode01 tmp]# systemctl status firewalld
● firewalld.service - firewalld - dynamic firewall daemonLoaded: loaded (/usr/lib/systemd/system/firewalld.service; enabled; vendor preset: enabled)Active: active (running) since Thu 2023-12-07 20:57:23 CST; 40min agoDocs: man:firewalld(1)Main PID: 1013 (firewalld)Tasks: 2Memory: 33.2MCGroup: /system.slice/firewalld.service└─1013 /usr/bin/python3 /usr/sbin/firewalld --nofork --nopidDec 07 20:57:23 olnode01.bluemoon.ltd systemd[1]: Starting firewalld - dynamic firewall daemon...
Dec 07 20:57:23 olnode01.bluemoon.ltd systemd[1]: Started firewalld - dynamic firewall daemon.
[root@olnode01 tmp]# systemctl disable firewalld
Removed /etc/systemd/system/multi-user.target.wants/firewalld.service.
Removed /etc/systemd/system/dbus-org.fedoraproject.FirewallD1.service.
[root@olnode01 tmp]# systemctl stop firewalld
[root@olnode01 tmp]# systemctl status firewalld
● firewalld.service - firewalld - dynamic firewall daemonLoaded: loaded (/usr/lib/systemd/system/firewalld.service; disabled; vendor preset: enabled)Active: inactive (dead)Docs: man:firewalld(1)Dec 07 20:57:23 olnode01.bluemoon.ltd systemd[1]: Starting firewalld - dynamic firewall daemon...
Dec 07 20:57:23 olnode01.bluemoon.ltd systemd[1]: Started firewalld - dynamic firewall daemon.
Dec 07 21:37:57 olnode01.bluemoon.ltd systemd[1]: Stopping firewalld - dynamic firewall daemon...
Dec 07 21:37:58 olnode01.bluemoon.ltd systemd[1]: firewalld.service: Succeeded.
Dec 07 21:37:58 olnode01.bluemoon.ltd systemd[1]: Stopped firewalld - dynamic firewall daemon.
1.3. 修改字符集
echo export LANG=en_US.UTF-8 >> /etc/profile1.4. 关闭RemoveIPC
默认RemoveIPC=yes,表示当用户退出时,会删除该用户的共享内存段和信号量。
1.5. 刷新服务
systemctl daemon-reload
systemctl restart systemd-logind
loginctl show-session | grep RemoveIPC
systemctl show systemd-logind | grep RemoveIPC
1.6. 关闭透明大页
echo never >> /sys/kernel/mm/transparent_hugepage/defrag
echo never >> /sys/kernel/mm/transparent_hugepage/enabled
echo 'echo never >> /sys/kernel/mm/transparent_hugepage/defrag' >> /etc/rc.d/rc.local
echo 'echo never >> /sys/kernel/mm/transparent_hugepage/enabled' >> /etc/rc.d/rc.local
sh /etc/rc.d/rc.local
1.7. 安装软件依赖和工具
yum install libaio-devel flex bison ncurses-devel glibc-devel patch readline-devel libnsl -y
yum install tar vim java sysstat -y
# yum remove java-1.8* yum remove java-1.7*
yum install -y java-11-openjdk.x86_64  ava-11-openjdk-devel.x86_64  java-11-openjdk-headless.x86_64  java-11-openjdk-devel.x86_64
1.8. 修改资源使用限制
omm soft nproc 16384
omm hard nproc 16384
omm soft nofile 65536
omm hard nofile 65536
omm soft memlock 4000000
omm hard memlock 4000000
sysctl -p1.9. 软链接readline
[omm@olnode01 simpleInstall]$ rpm -qa|grep readline
readline-8.0-4.oe1.x86_64
readline-devel-8.0-4.oe1.x86_64
[omm@olnode01 simpleInstall]$ ldconfig -p|grep readlinelibreadline.so.8 (libc6,x86-64) => /lib64/libreadline.so.8libreadline.so (libc6,x86-64) => /lib64/libreadline.solibguilereadline-v-18.so.18 (libc6,x86-64) => /lib64/libguilereadline-v-18.so.18libguilereadline-v-18.so (libc6,x86-64) => /lib64/libguilereadline-v-18.so
cd /lib64
ln -s libreadline.so.8 libreadline.so.72. 下载openGauss安装包
https://opengauss.obs.cn-south-1.myhuaweicloud.com/5.0.0/x86_openEuler/openGauss-5.0.0-openEuler-64bit-all.tar.gz
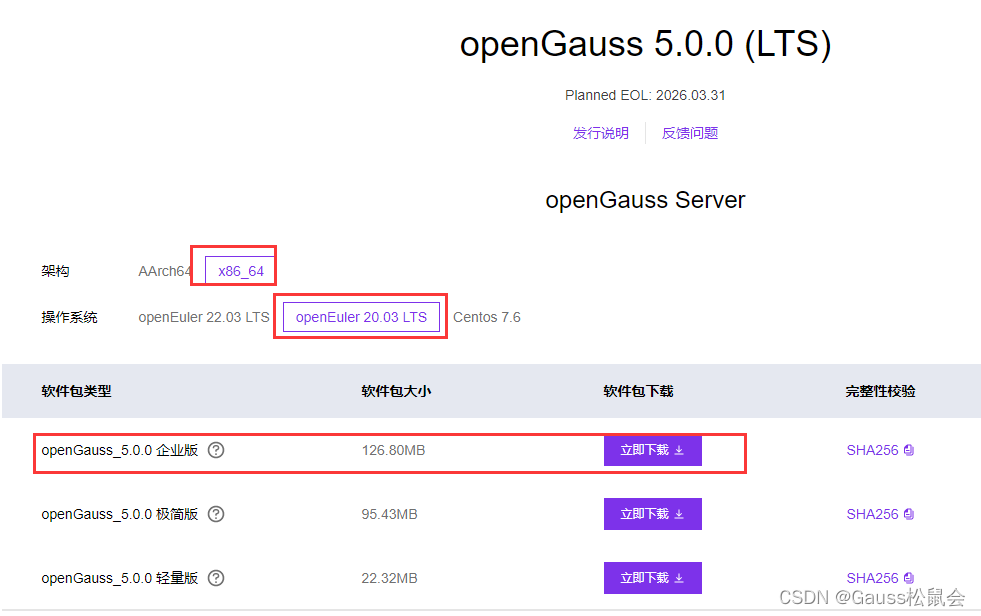
下面这个要注意了,一定要下载5.1版本的,5.0版本的运维插件要自己安装。
3.创建用户并安装openGauss
3.1. 创建用户组dbgroup。
groupadd dbgroup3.2. 创建用户组dbgroup下的普通用户omm,并设置普通用户omm的密码,密码建议设置为omm@123。
useradd -g dbgroup omm
passwd omm
3.3. 使用omm用户登录到openGauss包安装的主机,解压openGauss压缩包到安装目录(假定安装目录为/opt/software/openGauss,请用实际值替换)。
# tar -jxf openGauss-x.x.x-操作系统-64bit.tar.bz2 -C /opt/software/openGauss
gzip -d openGauss-5.0.0-openEuler-64bit-all.tar.gz
tar -xvf openGauss-5.0.0-openEuler-64bit-all.tar -C /opt/software/openGauss/
tar -jxvf openGauss-5.0.0-openEuler-64bit.tar.bz2
3.4. 假定解压包的路径为/opt/software/openGauss,进入解压后目录下的simpleInstall。
cd /opt/software/openGauss/simpleInstall3.5. 执行install.sh脚本安装openGauss。
# 修改目录权限后,切换到普通用户,否则会提示:Error: can not install openGauss with root
sh install.sh  -w omm@1234
上述命令中,-w是指初始化数据库密码(gs_initdb指定),安全需要必须设置。
centos7.8报sem不足:
sysctl -w kernel.sem="250 85000 250 330" 3.6. 安装后会自动配置环境变量
vi /home/omm/.bashrc
# User specific aliases and functions
export GAUSSHOME=/opt/software/openGauss
export PATH=$GAUSSHOME/bin:$PATH
export LD_LIBRARY_PATH=$GAUSSHOME/lib:$LD_LIBRARY_PATH
export GS_CLUSTER_NAME=dbCluster
ulimit -n 1000000
3.7. 安装执行完成后,使用ps和gs_ctl查看进程是否正常。
ps ux | grep gaussdb
gs_ctl query -D /opt/software/openGauss/data/single_node
3.8. 执行ps命令,显示类似如下信息:
omm      24209 11.9  1.0 1852000 355816 pts/0  Sl   01:54   0:33 /opt/software/openGauss/bin/gaussdb -D /opt/software/openGauss/single_node
omm      20377  0.0  0.0 119880  1216 pts/0    S+   15:37   0:00 grep --color=auto gaussdb
3.9. 执行gs_ctl命令,显示类似如下信息:
gs_ctl query ,datadir is /opt/software/openGauss/data/single_node
HA state:local_role                     : Normalstatic_connections             : 0db_state                       : Normaldetail_information             : NormalSenders info:No informationReceiver info:
No information
3.10. 执行安装脚本
[omm@olnode01 simpleInstall]$ sh install.sh  -w omm@1234
[step 1]: check parameter
[step 2]: check install env and os setting
install.sh: line 91: netstat: command not found
[step 3]: change_gausshome_owner
[step 4]: set environment variables/etc/profile.d/system-info.sh: line 26: bc: command not found
/etc/profile.d/system-info.sh: line 35: bc: command not found
/home/omm/.bashrc: line 11: ulimit: open files: cannot modify limit: Operation not permitted
[step 6]: init datanode
The files belonging to this database system will be owned by user "omm".
This user must also own the server process.The database cluster will be initialized with locale "en_US.UTF-8".
The default database encoding has accordingly been set to "UTF8".
The default text search configuration will be set to "english".creating directory /opt/software/openGauss/data/single_node ... ok
creating subdirectories ... in ordinary occasionok
creating configuration files ... ok
selecting default max_connections ... 100
selecting default shared_buffers ... 1024MB
Begin init undo subsystem meta.
[INIT UNDO] Init undo subsystem meta successfully.
creating template1 database in /opt/software/openGauss/data/single_node/base/1 ... The core dump path is an invalid directory
2023-12-07 22:12:02.098 [unknown] [unknown] localhost 139730482409408 0[0:0#0]  [BACKEND] WARNING:  macAddr is 12/699528221, sysidentifier is 797105/4095585850, randomNum is 4069764666
ok
initializing pg_authid ... ok
setting password ... ok
initializing dependencies ... ok
loading PL/pgSQL server-side language ... ok
creating system views ... ok
creating performance views ... ok
loading system objects' descriptions ... ok
creating collations ... ok
creating conversions ... ok
creating dictionaries ... ok
setting privileges on built-in objects ... ok
initialize global configure for bucketmap length ... ok
creating information schema ... ok
loading foreign-data wrapper for distfs access ... ok
loading foreign-data wrapper for log access ... ok
loading hstore extension ... ok
loading foreign-data wrapper for MOT access ... ok
loading security plugin ... ok
update system tables ... ok
creating snapshots catalog ... ok
vacuuming database template1 ... ok
copying template1 to template0 ... ok
copying template1 to postgres ... ok
freezing database template0 ... ok
freezing database template1 ... ok
freezing database postgres ... okWARNING: enabling "trust" authentication for local connections
You can change this by editing pg_hba.conf or using the option -A, or
--auth-local and --auth-host, the next time you run gs_initdb.Success. You can now start the database server of single node using:gaussdb -D /opt/software/openGauss/data/single_node --single_node
orgs_ctl start -D /opt/software/openGauss/data/single_node -Z single_node -l logfile[step 7]: start datanode
.....ECUTOR] ACTION:  Please refer to backend log for more details.[2023-12-07 22:12:16.581][18900][][gs_ctl]:  done
[2023-12-07 22:12:16.581][18900][][gs_ctl]: server started (/opt/software/openGauss/data/single_node)
import sql file
Would you like to create a demo database (yes/no)? yes
Load demoDB [school,finance] success.
[complete successfully]: You can start or stop the database server using:gs_ctl start|stop|restart -D $GAUSSHOME/data/single_node -Z single_node
3.11. 设置opengauss开机启动
3.11.1. 写配置
vi /usr/lib/systemd/system/opengauss.service [Unit]
Description=openGauss #当前服务的简单描述
Documentation=openGauss Server #服务配置文件的位置
After=syslog.target #在某服务之后启动
After=network.target [Service]
Type=forking #ExecStart字段将以fork()方式启动,后台运行#服务运行的用户
User=omm
#服务运行的用户组
Group=omm Environment=PGDATA=/opt/software/openGauss/data
Environment=GAUSSHOME=/opt/software/openGauss
Environment=LD_LIBRARY_PATH=/opt/software/openGauss/lib#启动服务的命令,可以是可执行程序、系统命令或shell脚本,必须是绝对路径。
ExecStart=/opt/software/openGauss/bin/gs_ctl start -D /opt/software/openGauss/data/single_node #重启服务的命令,可以是可执行程序、系统命令或shell脚本,必须是绝对路径。
ExecReload=/opt/software/openGauss/bin/gs_ctl restart -D /opt/software/openGauss/data/single_node#停止服务的命令,可以是可执行程序、系统命令或shell脚本,必须是绝对路径。
ExecStop=/opt/software/openGauss/bin/gs_ctl stop -D /opt/software/openGauss/data/single_node#Systemd停止sshd服务方式 mixed:主进程将收到SIGTERM信号,子进程收到SIGKILL信号
KillMode=mixedKillSignal=SIGINT
TimeoutSec=0[Install]
WantedBy=multi-user.target[Unit]Description=openGaussDocumentation=openGauss ServerAfter=syslog.targetAfter=network.target[Service]Type=forkingUser=ommGroup=dbgroupEnvironment=PGDATA=/opt/software/openGauss/dataEnvironment=GAUSSHOME=/opt/software/openGaussEnvironment=LD_LIBRARY_PATH=/opt/software/openGauss/libExecStart=/opt/software/openGauss/bin/gs_ctl start -D /opt/software/openGauss/data/single_nodeExecReload=/opt/software/openGauss/bin/gs_ctl restart -D /opt/software/openGauss/data/single_nodeExecStop=/opt/software/openGauss/bin/gs_ctl stop -D /opt/software/openGauss/data/single_nodeKillMode=mixedKillSignal=SIGINTTimeoutSec=0[Install]WantedBy=multi-user.target3.11.2. 配启动
#重新加载配置文件
systemctl daemon-reload #启用opengauss服务
systemctl enable opengauss#执行opengauss服务
systemctl start opengauss#查看opengauss服务的状态
systemctl status opengauss#停止openGauss服务
systemctl stop opengauss
3.12. 配置PG监听和连接权限
3.12.1. pg_hba.conf
3.12.1.1. 写配置
gs_guc set -D /opt/software/openGauss/data/single_node -h "host all all 0.0.0.0/0 sha256"
gs_guc set -D /opt/software/openGauss/data/single_node -h "host replication all 0.0.0.0/0 sha256"
3.12.1.2. 确认配置是否写入
[omm@hp400 single_node]$ cat pg_hba.conf|egrep -v "^#|^$"
local   all             all                                     trust
host    all             all             127.0.0.1/32            trust
host all all 0.0.0.0/0 sha256
host    all             all             ::1/128                 trust
host replication all 0.0.0.0/0 sha256
3.12.2. postgresql.conf
3.12.2.1. 写配置
gs_guc set -D /opt/software/openGauss/data/single_node -c "listen_addresses = '*'"
gs_guc set -D /opt/software/openGauss/data/single_node -c "wal_level = logical"
3.12.2.2. 确认配置是否写入
[omm@hp400 single_node]$ egrep "listen_address|wal_level" postgresql.conf
listen_addresses = '*'    # what IP address(es) to listen on;
wal_level = logical      # minimal, archive, hot_standby or logical
3.13. 启动数据库
systemctl start opengauss4. 连接数据库并创建datakit用户
4.1. 连接数据库
gsql -d postgres -p 5432 -r
openGauss=# \lList of databases
Name    | Owner | Encoding |   Collate   |    Ctype    | Access privileges
-----------+-------+----------+-------------+-------------+-------------------finance   | omm   | UTF8     | en_US.UTF-8 | en_US.UTF-8 | postgres  | omm   | UTF8     | en_US.UTF-8 | en_US.UTF-8 | school    | omm   | UTF8     | en_US.UTF-8 | en_US.UTF-8 | template0 | omm   | UTF8     | en_US.UTF-8 | en_US.UTF-8 | =c/omm           +|       |          |             |             | omm=CTc/ommtemplate1 | omm   | UTF8     | en_US.UTF-8 | en_US.UTF-8 | =c/omm           +|       |          |             |             | omm=CTc/omm
(5 rows)
4.2. 创建数据库
4.2.1. datakit使用的数据库
create user datakit identified by 'datakit@1234';
grant all privilege to datakit;
-- alter user datakit sysadmin
create database datakit;
4.2.2. 待写入数据的数据库(mysql 2 pg)
create database world with dbcompatibility='b';4.2.3. 连接目标数据库world
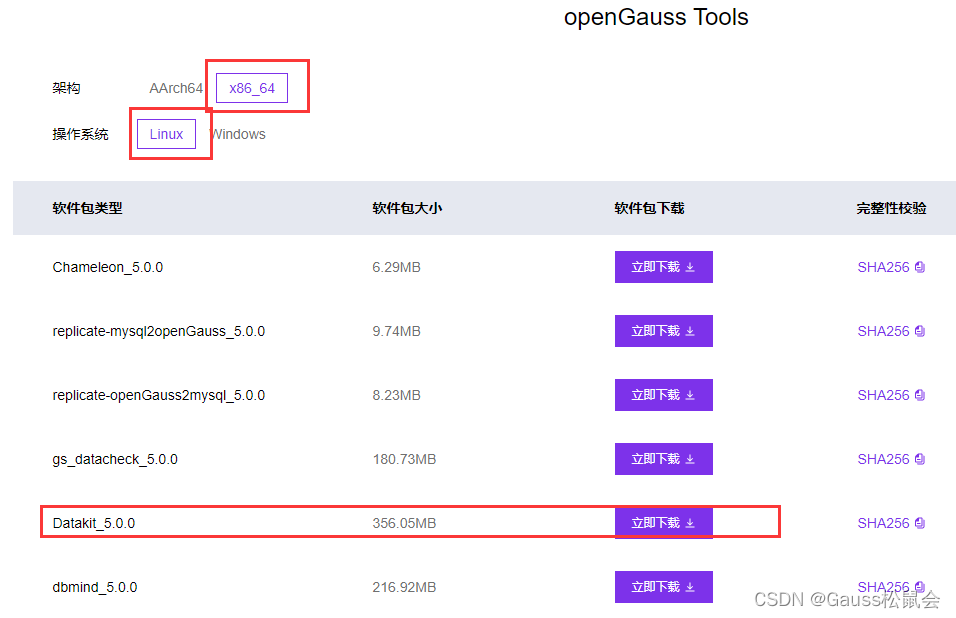
gsql -d world -p 5432 -r5. 安装datakit
5.1. 创建目录
mkdir -p /opt/datakit/datakit5.1/{logs,config,ssl,files}5.2. 解压文件到目录
tar -zxvf Datakit-5.1.0.tar.gz -C /opt/datakit/datakit5.15.3. 将配置文件application-temp.yml传至config下。
修改文件目录以及连接信息
url: jdbc:opengauss://ip:port/database?currentSchema=public
username: dbuser
password: dbpassword修改为:jdbc:opengauss://127.0.0.1:5432/datakitdb?currentSchema=public
username: datakit
password: datakit@1234
system:# File storage pathdefaultStoragePath: /opt/datakit/datakit5.1/files# Whitelist control switchwhitelist:enabled: false
server:port: 9494ssl:key-store: /opt/datakit/datakit5.1/ssl/keystore.p12key-store-password: 123456key-store-type: PKCS12enabled: trueservlet:context-path: /
logging:file:path: /opt/datakit/datakit5.1/logs/
spring:datasource:type: com.alibaba.druid.pool.DruidDataSourcedriver-class-name: org.opengauss.Driverurl: jdbc:opengauss://127.0.0.1:5432/datakit?currentSchema=public&batchMode=offusername: datakitpassword: datakit@1234druid:test-while-idle: truetest-on-borrow: truevalidation-query: "select 1"validation-query-timeout: 10000connection-error-retry-attempts: 0break-after-acquire-failure: truemax-wait: 6000keep-alive: truemax-active: 30min-evictable-idle-time-millis: 600000
management:server:port: 94945.4. 生成证书
5.4.1. 生成ssl的java必须跟运行DataKit是一个java版本
密码要和上面的配置文件一致
keytool -genkey -noprompt \-dname "CN=opengauss, OU=opengauss, O=opengauss, L=Beijing, S=Beijing, C=CN"\-alias opengauss\-storetype PKCS12 \-keyalg RSA \-keysize 2048 \-keystore /opt/datakit/datakit5.1/ssl/keystore.p12 \-validity 3650 \-storepass 1234565.5. 创建datakit运行用户并修改权限
useradd ops
chown -R ops:ops /opt/datakit
5.6. 切换到ops用户启动
cd /opt/datakit/datakit5.1 && nohup java -Xms2048m -Xmx4096m -jar /opt/datakit/datakit5.1/openGauss-datakit-5.1.0.jar --spring.profiles.active=temp > /opt/datakit/datakit5.1/logs/datakit.out 2>&1 &6. 准备mysql数据库
6.1. yum安装mysql
wget http://repo.mysql.com/mysql57-community-release-el7-10.noarch.rpm
rpm -Uvh mysql57-community-release-el7-10.noarch.rpm
yum install -y mysql-community-server --nogpgcheck
6.2. 启动mysql
systemctl start mysqld.service6.3. 检查是否启动成功
systemctl status mysqld.service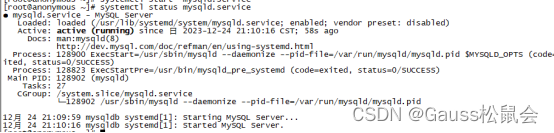
6.4. 导入实例数据
6.4.1. 创建用户
[root@mysqldb log]# cat mysqld.log |grep pass
2023-12-24T13:10:12.643017Z 1 [Note] A temporary password is generated for root@localhost: j8T(quBRT.K2
[root@mysqldb mysqld]# mysql -uroot -p
mysql> set global validate_password_policy=0;
Query OK, 0 rows affected (0.00 sec)mysql> set global validate_password_length=1;
Query OK, 0 rows affected (0.00 sec)mysql> ALTER USER 'root'@'localhost' IDENTIFIED BY 'datakit@1234';
Query OK, 0 rows affected (0.00 sec)
6.4.2. 下载样例数据库
wget https://downloads.mysql.com/docs/world-db.tar.gz6.4.3. 导入
source /tmp/world-db/world.sql6.5. 创建远程登录用户
grant all on *.* to root@'%' identified by 'datakit@1234';6.6. 配置binlog日志
tid_mode = ON
enforce_gtid_consistency = ON
character_set_server = UTF8MB4
server-id = 170
log-bin=on
log_bin_basename=/var/lib/mysql/mysql-bin
log_bin_index=/var/lib/mysql/mysql-bin.index
6.7. 安装java
yum install -y java-11-openjdk.x86_64 ava-11-openjdk-devel.x86_64 java-11-openjdk-headless.x86_64 java-11-openjdk-devel.x86_647. datakit修改密码
默认登陆账号密码:admin/admin123
https://cloud.tencent.com/developer/article/2368209
8. 创建主机和实例
8.1. 创建主机
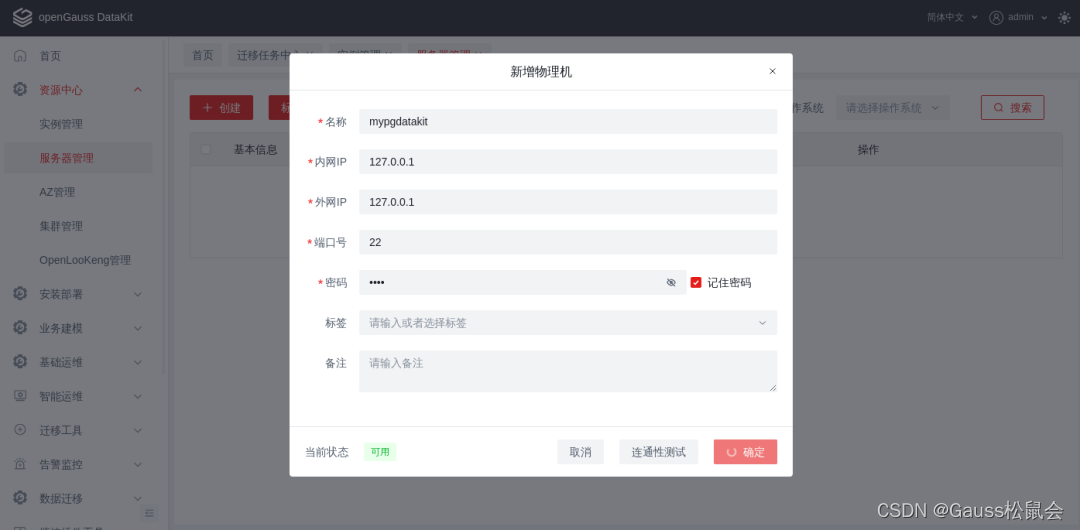
8.2. 给主机创建一个普通用户(操作PG数据库)

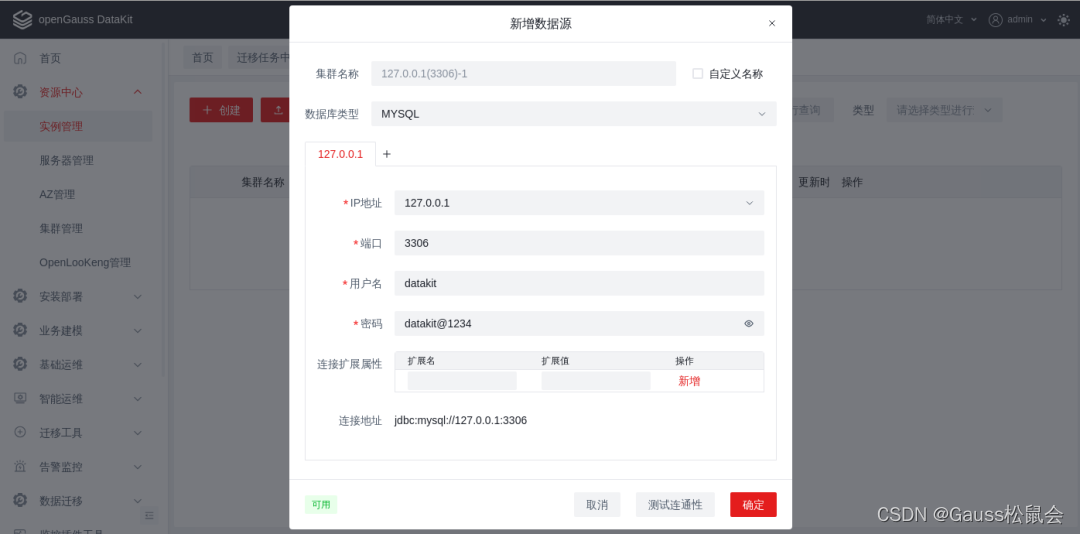
8.3. 创建mysql实例
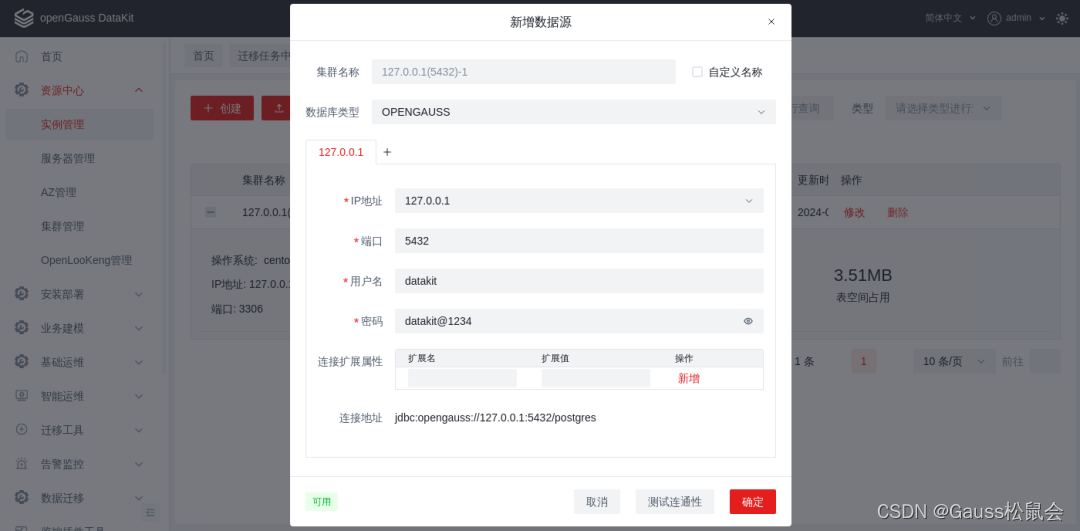
8.4. 创建openGauss实例
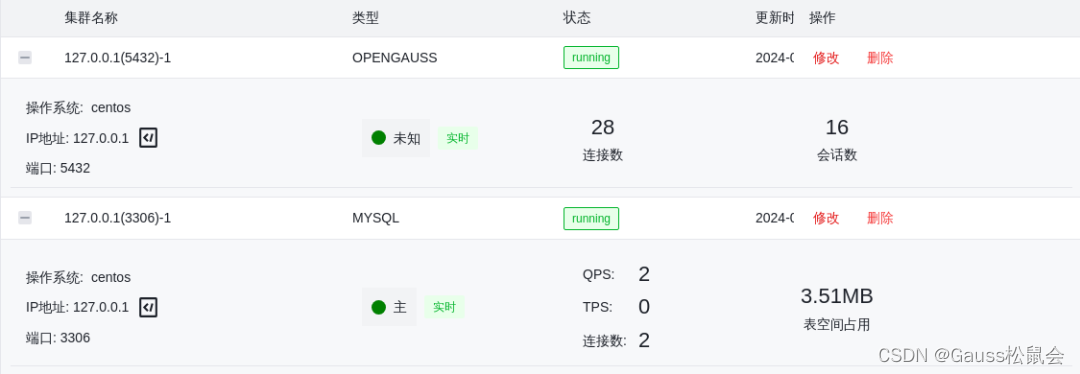
 8.5. 创建后如下
这篇关于【项目实战经验】DataKit迁移MySQL到openGauss(上)的文章就介绍到这儿,希望我们推荐的文章对编程师们有所帮助!


