本文主要是介绍使用StaticLayout实现文字转化为图片的效果(类似发送长微博),希望对大家解决编程问题提供一定的参考价值,需要的开发者们随着小编来一起学习吧!
使用Canvas的drawText绘制文本是不会自动换行的,即使一个很长很长的字符串,drawText也只显示一行,超出部分被隐藏在屏幕之外。可以逐个计算每个字符的宽度,通过一定的算法将字符串分割成多个部分,然后分别调用drawText一部分一部分的显示, 但是这种显示效率会很低。
StaticLayout是android中处理文字换行的一个工具类,StaticLayout已经实现了文本绘制换行处理,下面是如何使用StaticLayout的例子:
public class MainActivity extends AppCompatActivity implements View.OnClickListener {private EditText textView;
    private ImageView imageView;
    private Button btn;
    private String content;

    @Override
    protected void onCreate(Bundle savedInstanceState) {super.onCreate(savedInstanceState);
        setContentView(R.layout.activity_main);

        textView = (EditText) findViewById(R.id.input_text);
        imageView = (ImageView) findViewById(R.id.input_image);
        imageView.setVisibility(View.INVISIBLE);
        btn = (Button) findViewById(R.id.btn_close);
        btn.setOnClickListener(this);
//

    }public static Bitmap textAsBitmap(String text, float textSize) {TextPaint textPaint = new TextPaint();

        // textPaint.setARGB(0x31, 0x31, 0x31, 0);
        textPaint.setColor(Color.BLACK);
        textPaint.setAntiAlias(true);
        textPaint.setTextSize(textSize);

        StaticLayout layout = new StaticLayout(text, textPaint, 450,
                Layout.Alignment.ALIGN_NORMAL, 1.3f, 0.0f, true);
        Bitmap bitmap = Bitmap.createBitmap(layout.getWidth() + 20,
                layout.getHeight() + 20, Bitmap.Config.ARGB_8888);
        Canvas canvas = new Canvas(bitmap);
        canvas.translate(10, 10);
       // canvas.drawColor(Color.GRAY);
        canvas.drawColor(Color.TRANSPARENT, PorterDuff.Mode.CLEAR);//绘制透明色
        layout.draw(canvas);
        Log.d("textAsBitmap",
                String.format("1:%d %d", layout.getWidth(), layout.getHeight()));
        return bitmap;
    }@Override
    public void onClick(View v) {switch (v.getId()) {case R.id.btn_close:content = textView.getText().toString().trim();
                if (content != null &&  content != "") {Bitmap bitmap = textAsBitmap(content, 28);
                    imageView.setVisibility(View.VISIBLE);
                    imageView.setBackgroundResource(R.mipmap.liaotian);
                    imageView.setImageBitmap(bitmap);
                }else{Toast.makeText(MainActivity.this,"输入内容不能为空",Toast.LENGTH_SHORT);
                }}}
}
布局文件
<?xml version="1.0" encoding="utf-8"?>
<LinearLayout xmlns:android="http://schemas.android.com/apk/res/android"
    xmlns:tools="http://schemas.android.com/tools"
    android:id="@+id/activity_main"
    android:layout_width="match_parent"
    android:layout_height="match_parent"
    android:paddingBottom="@dimen/activity_vertical_margin"
    android:paddingLeft="@dimen/activity_horizontal_margin"
    android:paddingRight="@dimen/activity_horizontal_margin"
    android:paddingTop="@dimen/activity_vertical_margin"
    android:orientation="vertical"
    tools:context="com.example.admin.enjoytalk.MainActivity">

    <TextView

        android:id="@+id/tv_text"
        android:layout_width="wrap_content"
        android:layout_height="wrap_content"
        android:text="Hello World!" />

    <!--<android.support.v7.widget.RecyclerView-->
        <!--android:layout_centerInParent="true"-->
        <!--android:layout_width="match_parent"-->
        <!--android:layout_height="wrap_content"-->
        <!--/>-->
    <EditText
        android:id="@+id/input_text"
        android:layout_width="match_parent"
        android:layout_height="wrap_content" />
    <Button
        android:id="@+id/btn_close"
        android:layout_width="match_parent"
        android:text="输入完成"
        android:layout_height="wrap_content" />
    <ImageView
        android:id="@+id/input_image"
        android:layout_width="match_parent"
        android:layout_height="wrap_content" />
</LinearLayout>
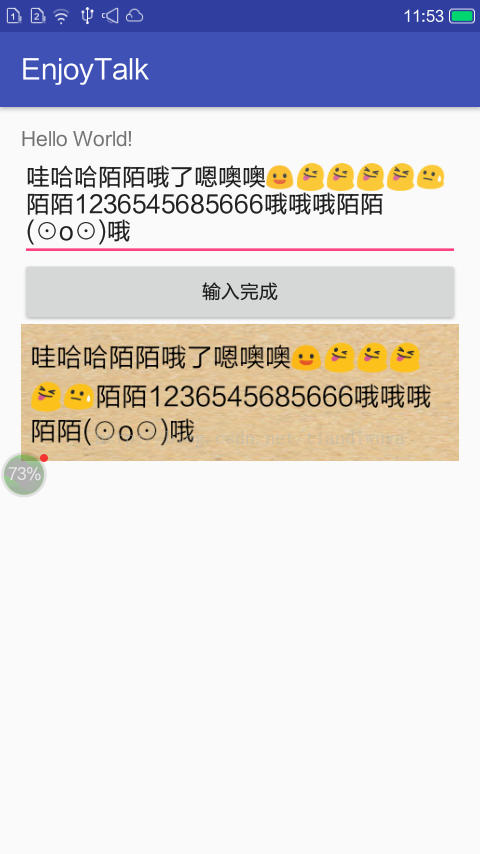
这跟TextView的效果是一样的,其实TextView也是调用StaticLayout来实现换行的。
StaticLayout的构造函数有三个:
public StaticLayout(CharSequence source,
TextPaint paint,
int width,
Layout.Alignment align,
float spacingmult,
float spacingadd,
boolean includepad)
public StaticLayout(CharSequence source,
int bufstart,
int bufend,
TextPaint paint,
int outerwidth,
Layout.Alignment align,
float spacingmult,
float spacingadd,
boolean includepad)
public StaticLayout(CharSequence source,
int bufstart,
int bufend,
TextPaint paint,
int outerwidth,
Layout.Alignment align,
float spacingmult,
float spacingadd,
boolean includepad,
TextUtils.TruncateAt ellipsize,
int ellipsizedWidth)
android StaticLayout参数解释
StaticLayout(CharSequence source, int bufstart, int bufend,
TextPaint paint, int outerwidth,
Alignment align,
float spacingmult, float spacingadd,
boolean includepad,
TextUtils.TruncateAt ellipsize, int ellipsizedWidth)
1.需要分行的字符串
2.需要分行的字符串从第几的位置开始
3.需要分行的字符串到哪里结束
4.画笔对象
5.layout的宽度,字符串超出宽度时自动换行。
6.layout的对其方式,有ALIGN_CENTER, ALIGN_NORMAL, ALIGN_OPPOSITE 三种。
7.相对行间距,相对字体大小,1.5f表示行间距为1.5倍的字体高度。
8.在基础行距上添加多少
实际行间距等于这两者的和。
9.参数未知
10.从什么位置开始省略
11.超过多少开始省略
需要指出的是这个layout是默认画在Canvas的(0,0)点的,如果需要调整位置只能在draw之前移Canvas的起始坐标
canvas.translate(x,y);
这篇关于使用StaticLayout实现文字转化为图片的效果(类似发送长微博)的文章就介绍到这儿,希望我们推荐的文章对编程师们有所帮助!


