本文主要是介绍流控神器Sentinel指南:深入分析流控原理(下),希望对大家解决编程问题提供一定的参考价值,需要的开发者们随着小编来一起学习吧!
文章目录
- 1. 数据统计中心
- 2. 滑动窗口
- 2.1 ArrayMetric
- 2.2 LeapArray
- 2.3 统计核心
- 3. 三种流控方式
- 3.1 Default
- 3.2 Warm Up
- 3.3 匀速器
- 4. 退出的流程
- 4.1 StatisticSlot#exit
- 4.2 ContextUtil#exit
- 下期预告:
上篇文章中从规则的定义开始说起,再到调用树,Context、slotChain等,详细的介绍了访问资源,到FlowSlot的entry方法为止。
本文将继续上篇文章的主线,阐述流量控制的实现原理。在介绍之前我们需要对滑动窗口实时指标统计进行分析。
1. 数据统计中心
上篇文章中提到过StatisticSlot的作用是统计资源的实时数据,请求经过这里,然后FlowSlot根据规则进行匹配对比,决定是放行还是限制。当返回之后,StatisticSlot统计请求的信息。当然逻辑的实现是在entry方法中。
@Override
public void entry(Context context, ResourceWrapper resourceWrapper, DefaultNode node, int count, Object... args)throws Throwable {try {// 直接触发下游slot的entry操作fireEntry(context, resourceWrapper, node, count, args);// 如果到达这里说明获取token成功//增加并发线程数,node是DefaultNodenode.increaseThreadNum();// 增加每秒的请求数node.addPassRequest();if (context.getCurEntry().getOriginNode() != null) {// 如果OriginNod(调用方)不为空,同样增加线程数和请求数,没有调用ContextUtil.enter,OriginNode为空context.getCurEntry().getOriginNode().increaseThreadNum();context.getCurEntry().getOriginNode().addPassRequest();}// 这里是全局的统计if (resourceWrapper.getType() == EntryType.IN) {Constants.ENTRY_NODE.increaseThreadNum();Constants.ENTRY_NODE.addPassRequest();}// 关于做参数限流的,暂时不考虑for (ProcessorSlotEntryCallback<DefaultNode> handler : StatisticSlotCallbackRegistry.getEntryCallbacks()) {handler.onPass(context, resourceWrapper, node, count, args);}} catch (BlockException e) {context.getCurEntry().setError(e);// 增加阻塞数node.increaseBlockedQps();if (context.getCurEntry().getOriginNode() != null) {// 增加调用方node的阻塞数context.getCurEntry().getOriginNode().increaseBlockedQps();}if (resourceWrapper.getType() == EntryType.IN) {// 全局阻塞数Constants.ENTRY_NODE.increaseBlockedQps();}for (ProcessorSlotEntryCallback<DefaultNode> handler : StatisticSlotCallbackRegistry.getEntryCallbacks()) {handler.onBlocked(e, context, resourceWrapper, node, count, args);}throw e;}
}
StatisticSlot的实现比较直观,触发下游的Slot entry方法,根据是否抛出BlockException来进行指标统计。似乎更神秘的逻辑是在Node中的。
进入到DefaultNode的addPassRequest:
@Override
public void addPassRequest() {super.addPassRequest();this.clusterNode.addPassRequest();
}
这里做了两件事,增加自身保存请求数。增加关联的clusterNode的请求数,这里就体现出clusterNode保存一个资源的指标数据作用了。注意clusterNode 是StatisticNode 类型的,因此不会存在无限递归的情况。父类StatisticNode addPassRequest的方法如下:
@Override
public void addPassRequest() {rollingCounterInSecond.addPass();rollingCounterInMinute.addPass();
}
Metric rollingCounterInSecond是统计一秒内的指标数据数据的,rollingCounterInMinute是统计一分钟的数据。这两个成员变量在StatisticNode定义如下:
private transient volatile Metric rollingCounterInSecond = new ArrayMetric(SampleCountProperty.SAMPLE_COUNT,IntervalProperty.INTERVAL);
private transient Metric rollingCounterInMinute = new ArrayMetric(60, 60 * 1000, false);
下面结合滑动窗口来深入分析这两个数据结构。
2. 滑动窗口
2.1 ArrayMetric
在StatisticNode中有两个ArrayMetric类型的属性。ArrayMetric实现了Metric接口,Metric是度量指标的抽象。ArrayMetric是它的实现类。它相当于是对底层指标的代理封装。ArrayMetric的构造方法
public ArrayMetric(int sampleCount, int intervalInMs) {this.data = new OccupiableBucketLeapArray(sampleCount, intervalInMs);
}
public ArrayMetric(int sampleCount, int intervalInMs, boolean enableOccupy) {if (enableOccupy) {this.data = new OccupiableBucketLeapArray(sampleCount, intervalInMs);} else {this.data = new BucketLeapArray(sampleCount, intervalInMs);}
}
其中OccupiableBucketLeapArray和BucketLeapArray数据结构保存了实时的指标数据,简单的说是一个数组,数组元素是WindowWrap(窗口桶)。这两个类都继承自LeapArray类。
2.2 LeapArray
LeapArray为保存数据的基类,先看它的构造方法:
//LeapArray#LeapArray
public LeapArray(int sampleCount, int intervalInMs) {// 单个窗口桶的时间长度(以毫秒为单位)this.windowLengthInMs = intervalInMs / sampleCount;// LeapArray的总时间跨度,以秒为单位this.intervalInMs = intervalInMs;// 数组长度,即窗口的个数this.sampleCount = sampleCount;// 数组元素为WindowWrap,WindowWrap保存了MetricBucket,在它内部才保存真正的指标数据this.array = new AtomicReferenceArray<WindowWrap<T>>(sampleCount);
}
WindowWrap封装了表示一个时间窗口,它有三个重要的属性:
public class WindowWrap<T> {// 窗口的长度private final long windowLengthInMs;// 起始毫秒数private long windowStart;// 指标数据,一般是MetricBucket,private T value;
}
MetricBucket代表了在某一个时间窗口内的所有数据,如RT、Success、Pass、Block等等。
public class MetricBucket {private final LongAdder[] counters;
}
这里用到LongAdder,JDK1.8中新添加的一种原子类,对于数据统计场景比Atomic原子类具有更好的并发性。所有的数据都是保存在LongAdder数组中。
2.3 统计核心
回到rollingCounterInSecond.addPass()方法
@Override
public void addPass() {// 获取当前窗口WindowWrap<MetricBucket> wrap = data.currentWindow();//对MetricBucket +1 操作wrap.value().addPass();
}
继续跟进currentWindow方法:
public WindowWrap<T> currentWindow(long time) {// 到目前为止总共窗口的数量long timeId = time / windowLengthInMs;// 当前时间滑动出口数组的下标int idx = (int)(timeId % array.length());// 计算出当前窗口的起始时间time = time - time % windowLengthInMs;while (true) {WindowWrap<T> old = array.get(idx);if (old == null) {// 如果获取到的WindowWrap为空,则新创建一个,第三个参数是创建一个空的BucketWindowWrap<T> window = new WindowWrap<T>(windowLengthInMs, time, newEmptyBucket());if (array.compareAndSet(idx, null, window)) // 将WindowWrap置入数组中return window;} else {// 设置失败,当前线程让出时间片等待Thread.yield();}// 如果当前窗口的开始时间与old的开始时间相等,则直接返回old窗口} else if (time == old.windowStart()) {return old;// 如果当前时间窗口的开始时间已经超过了old窗口的开始时间,则放弃old窗口// 并将time设置为新的时间窗口的开始时间,此时窗口向前滑动} else if (time > old.windowStart()) {if (updateLock.tryLock()) {try {return resetWindowTo(old, time);} finally {updateLock.unlock();}} else {Thread.yield();}// 这个条件不可能存在} else if (time < old.windowStart()) {// Cannot go through here.return new WindowWrap<T>(windowLengthInMs, time, newEmptyBucket());}}
}
过程有些复杂,终极技能看图:

初始的时候arrays数组中只有两个窗口,每个时间窗口的长度是500ms,当前时间走到1000或者1499时,时间窗口是第一个,同理时间走到1500至1999时,是第二个窗口。当时间主线走到2000时,会替换数组第一个start time,并且初始化指标数据(置0),当时间主线走到2500时,会替换数组第二个start time,以此一直循环。
这个数组就像一个窗口在时间主线上滑动。从而我们可以获取到每秒的指标数据。
回到rollingCounterInSecond.addPass(),当我们获取到了当前的滑动窗口,对它持有的MetricBucket进行加1操作。
3. 三种流控方式
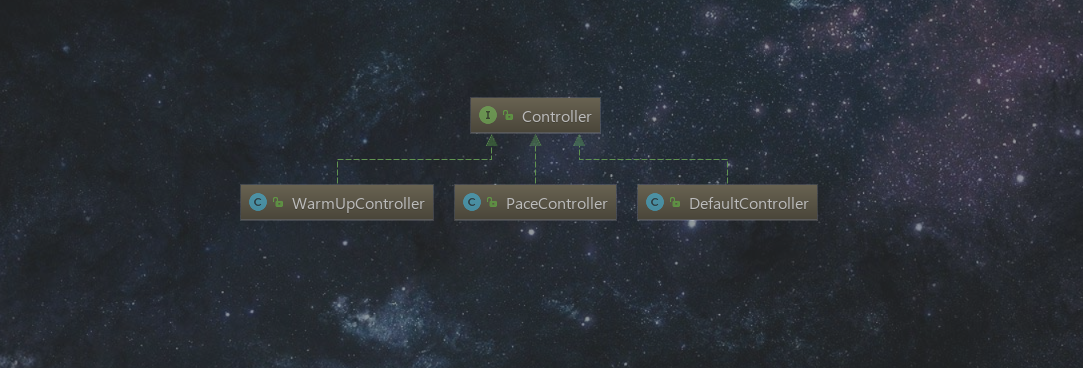
继续上篇文章结束的地方,FlotSlot通过三种策略进行流量控制,分别为Default、warm up、rate limiter。在创建规则时通过不同的设置创建对应的Controller。
下面逐个分析。
3.1 Default
默认的流控方式,如果达到阈值直接拒绝请求。下面是它的实现逻辑。
 @Override
public boolean canPass(Node node, int acquireCount) {// 获取当前请求数量int curCount = avgUsedTokens(node);// 如果当前数量加上本次请求的个数大于阈值,返回falseif (curCount + acquireCount > count) {return false;}return true;
}private int avgUsedTokens(Node node) {if (node == null) {return -1;}// 如果根据QPS进行限流,调用clusterNode的passQpsreturn grade == RuleConstant.FLOW_GRADE_THREAD ? node.curThreadNum() : (int)node.passQps();
}
继续进入passQps方法,实现在StatisticNode类中。
public long passQps() {// INTERVAL为1return rollingCounterInSecond.pass() / IntervalProperty.INTERVAL;
}
rollingCounterInSecond 在前面说过了,它持有滑动窗口leapArray的引用。保存了一秒内的指标数据。数组长度为2。对StatisticNode暴露出查询指标数据的接口。继续跟进pass方法
@Override
public long pass() {data.currentWindow();// 这里的作用是刷新窗口long pass = 0;// 获取数组中所有WindoWrap关联的MetricBucketList<MetricBucket> list = data.values();// 遍历所有MetricBucket,获取pass数量for (MetricBucket window : list) {pass += window.pass();}return pass;
}
整体流程比较直观简单,注意一个细节就是代码第一行,作用是刷新当前窗口,避免获取过期的数据。
3.2 Warm Up
3.3 匀速器
匀速器模式是让所有的请求匀速的通过,请求进入后可能需要等待,因此如果等待时间超过设置的阈值,那么该请求以拒绝而结束。看它的实现
@Overridepublic boolean canPass(Node node, int acquireCount) {long currentTime = TimeUtil.currentTimeMillis();// count即设置规则时QPS数,costTime 指获取信号所需要的时间long costTime = Math.round(1.0 * (acquireCount) / count* 1000);//预期通过的时间,latestPassedTime是前一个请求通过的时间long expectedTime = costTime + latestPassedTime.get();// 第一个请求必定进入该分支,还有一种情况 当count值设置的过大,导致costTime 为0,那么后面的// 绝大部分请求都会进入此分支if (expectedTime <= currentTime) {latestPassedTime.set(currentTime);return true;} else {// 计算需要的等待时间,即costTime + 上一个请求的通过的时间 - 当前时间long waitTime = costTime + latestPassedTime.get() - TimeUtil.currentTimeMillis();// 如果等待时间大于阈值,pass 失败if (waitTime >= maxQueueingTimeMs) {return false;} else {// 尝试通过,设置上一次请求通过时间long oldTime = latestPassedTime.addAndGet(costTime);try {// 在次获取等待时间waitTime = oldTime - TimeUtil.currentTimeMillis();if (waitTime >= maxQueueingTimeMs) {latestPassedTime.addAndGet(-costTime);return false;}Thread.sleep(waitTime);return true;} catch (InterruptedException e) {}}}return false;}
整体过程比较清晰,但是存在一个问题,就是当count值设置过大,或者maxQueueingTimeMs设置过小可能会导致匀速器失效。建议count设置小于1000,maxQueueingTimeMs大于1。
4. 退出的流程
一般在入口处的finally语句块中会有entry.exit的调用,该方法会调用Entry的tureExit方法:
@Override
protected Entry trueExit(int count, Object... args) throws ErrorEntryFreeException {exitForContext(context, count, args);return parent;
}
显然更多的逻辑是在exitForContext方法的内部
protected void exitForContext(Context context, int count, Object... args) throws ErrorEntryFreeException {if (context != null) {if (context instanceof NullContext) {return;}if (context.getCurEntry() != this) {String curEntryNameInContext = context.getCurEntry() == null ? null : context.getCurEntry().getResourceWrapper().getName();// Clean previous call stack.CtEntry e = (CtEntry)context.getCurEntry();while (e != null) {e.exit(count, args);e = (CtEntry)e.parent;}String errorMessage = String.format("The order of entry exit can't be paired with the order of entry"+ ", current entry in context: <%s>, but expected: <%s>", curEntryNameInContext, resourceWrapper.getName());throw new ErrorEntryFreeException(errorMessage);} else {if (chain != null) {chain.exit(context, resourceWrapper, count, args);}// 设置CurEntry为Eenry的父亲context.setCurEntry(parent);if (parent != null) {((CtEntry)parent).child = null;// 将父Entry节点的child 置为null}if (parent == null) {//当前Entry的父Entry为null时,此时说明该Entry已经是最顶层的根节点了,可以清除context(ThreadLocal中)if (ContextUtil.isDefaultContext(context)) {ContextUtil.exit();}}// Clean the reference of context in current entry to avoid duplicate exit.clearEntryContext();}}
}
这里有两个重点:
- 通知slotChain,Entry退出了,其中重点是在StatisticSlot#exit方法中。
- 如果当前Entry的父Entry为null时,删除context
下面逐个分析
4.1 StatisticSlot#exit
StatisticSlot#exit中主要是对正常通过的请求数据进行一个统计,没能成功的请求在StatisticSlot#entry方法中的catch块中已经进行统计。所以这里是对通过的请求做一个指标统计。
public void exit(Context context, ResourceWrapper resourceWrapper, int count, Object... args) {DefaultNode node = (DefaultNode)context.getCurNode();if (context.getCurEntry().getError() == null) {long rt = TimeUtil.currentTimeMillis() - context.getCurEntry().getCreateTime();if (rt > Constants.TIME_DROP_VALVE) {rt = Constants.TIME_DROP_VALVE;}// 统计rtnode.rt(rt);if (context.getCurEntry().getOriginNode() != null) {context.getCurEntry().getOriginNode().rt(rt);}// 减少线程数node.decreaseThreadNum();if (context.getCurEntry().getOriginNode() != null) {context.getCurEntry().getOriginNode().decreaseThreadNum();}// 全局统计if (resourceWrapper.getType() == EntryType.IN) {Constants.ENTRY_NODE.rt(rt);Constants.ENTRY_NODE.decreaseThreadNum();}} else {// Error may happen.}Collection<ProcessorSlotExitCallback> exitCallbacks = StatisticSlotCallbackRegistry.getExitCallbacks();for (ProcessorSlotExitCallback handler : exitCallbacks) {handler.onExit(context, resourceWrapper, count, args);}fireExit(context, resourceWrapper, count);}
4.2 ContextUtil#exit
ContextUtil#exit很明确,从ThreadLocal中将Context置为null
public static void exit() {Context context = contextHolder.get();if (context != null && context.getCurEntry() == null) {contextHolder.set(null);}
}
下期预告:
熔断降级源码分析
Sentinel基于Netty的实时数据的传输实现细节
这篇关于流控神器Sentinel指南:深入分析流控原理(下)的文章就介绍到这儿,希望我们推荐的文章对编程师们有所帮助!


