本文主要是介绍uniapp(vue3) H5页面连接打印机并打印,希望对大家解决编程问题提供一定的参考价值,需要的开发者们随着小编来一起学习吧!
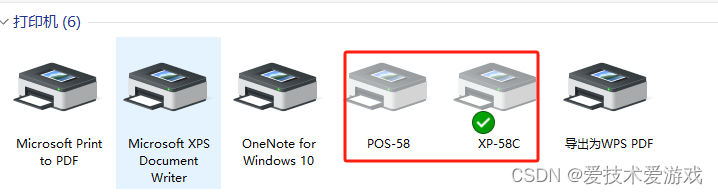
一、找到对应厂商打印机的驱动并在windows上面安装。查看是否安装完成可以在:控制面板->查看设备和打印机,找到对应打印机驱动是否安装完成
二、打印机USB连接电脑
三、运行代码调用浏览器打印,主要使用的是window.print()功能。下面使用的是基于ifream的,这样可以控制到具体打印范围,全屏打印可以考虑不用。(原理应该就是打印机打印PDF)
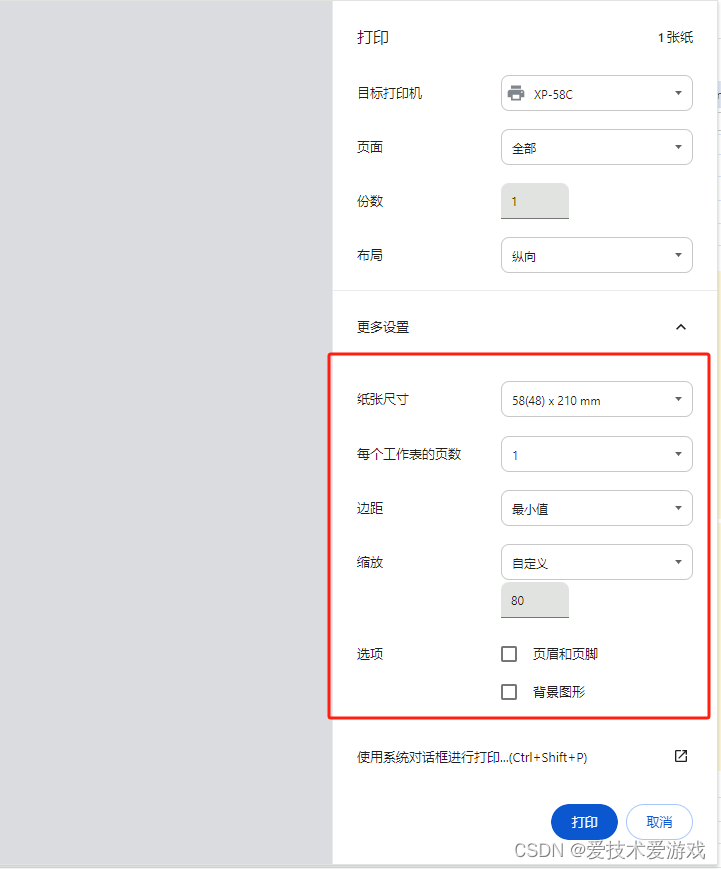
四、打印样式不全或者其他,可以考虑设置打印格式 或者 代码样式调整
五、demo 代码
(1) 核心代码
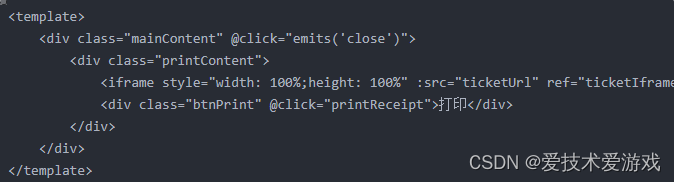


(2) 完整代码
<template><div class="mainContent" @click="emits('close')"><div class="printContent"><iframe style="width: 100%;height: 100%" :src="ticketUrl" ref="ticketIframe" @load="onIframeLoad"></iframe><div class="btnPrint" @click="printReceipt">打印</div></div></div>
</template><script setup>
import {forDate} from "@/utlis/uni_api";
import {ref, onMounted, getCurrentInstance, toRefs} from 'vue';let {proxy} = getCurrentInstance();
let emits = defineEmits(["print", "close"])
let props = defineProps(["data"])
const ticketIframe = ref(null);
const ticketUrl = '../static/print.html';
let {data} = toRefs(props)
let merOrderList = {}
let originalPrice = ""
let sendTxt = ""
let goodsDetails = ""// 确保iframe加载完成
onMounted(async () => {await proxy.$nextTick();ticketIframe.value.contentWindow.focus();merOrderList = data.value.merOrderListlet proList = data.value.goodListfor (let i = 0; i < proList.length; i++) {let goodsName = proList[i].goodsNamelet goodsNum = proList[i].goodsNumlet realPrice = proList[i].realPricelet spec = proList[i].goodsSpecification//商品信息goodsDetails += goodsName + "[" + spec + "]" + " X " + goodsNum + " ¥" + realPrice + "</br>"}//原价originalPrice = merOrderList.price + merOrderList.discountsPrice//配送时间sendTxt = data.value.isIm ? "立即配送" : data.value.predictTime
});function onIframeLoad() {console.log("data = ", data.value)let printerName = uni.getStorageSync("printerName")let iframe = ticketIframe.valuelet iframeDocument = iframe.contentWindow ? iframe.contentWindow.document : iframe.contentDocument;// 对于跨域限制不适用的情况,可以直接操作DOMif (iframeDocument) {if (printerName == "XP58C" || printerName == "POS58") {iframeDocument.body.innerHTML = ticketXP58C()}}
}function ticketXP58C() {return `<img style="width: 160px;height: 70px;margin: 0 0 30px 20px;" src="../static/image/public/print_logo.png"><div style="font-size: 20px;font-weight: bold;margin-bottom: 20px;">#${data.value.dayNum} *外卖狮配送*</div><div style="font-size: 10px;margin-bottom: 4px;">-----------------------------------------------</div><div style="display: flex;justify-content: space-between;font-size: 11px;margin-bottom: 4px;"><div>送达时间:</div><div>${sendTxt}</div></div><div style="display: flex;justify-content: space-between;font-size: 11px;margin-bottom: 4px;"><span>下单时间:</span><span>${forDate(merOrderList.createTime)}</span></div><div style="display: flex;justify-content: space-between;font-size: 11px;margin-bottom: 4px;"><div>订单编号:</div><div>${merOrderList.orderSn}</div></div><div style="font-size: 10px;margin-bottom: 4px;">-----------------------------------------------</div><div style="display: flex;font-size: 18px;font-weight:bold;margin-bottom: 4px;"><span>备注:</span><span>${data.value.remark ? data.value.remark : "无"}</span></div><div style="font-size: 12px;margin-bottom: 4px;">*************************************</div><div style="font-size: 11px;margin-bottom: 4px;">---------------------餐品------------------</div><div style="font-size: 11px;margin-bottom: 4px;">${goodsDetails}</div><div style="font-size: 11px;margin-bottom: 4px;">---------------------其他------------------</div><div style="display: flex;justify-content: space-between;font-size: 11px;margin-bottom: 4px;"><span>打包费:</span><span>¥${merOrderList.packPrice}</span></div><div style="display: flex;justify-content: space-between;font-size: 11px;margin-bottom: 4px;"><span>配送费:</span><span>¥${merOrderList.distributionPrice}</span></div><div style="display: flex;justify-content: space-between;font-size: 11px;margin-bottom: 4px;"><span>优惠价格:</span><span>-¥${merOrderList.discountsPrice}</span></div><div style="font-size: 12px;margin-bottom: 4px;">*************************************</div><div style="display: flex;justify-content: space-between;font-size: 11px;margin-bottom: 4px;">${merOrderList.payType == "alipay" ? "支付宝支付" : "微信支付"}</div><div style="display: flex;justify-content: space-between;font-size: 11px;margin-bottom: 4px;">原价:¥${originalPrice}</div><div style="display: flex;justify-content: right;font-size: 18px;font-weight: bold;margin-bottom: 4px;">实付:¥${merOrderList.price}</div><div style="font-size: 10px;margin-bottom: 30px;">------------------------------------------------</div><div style="display: flex;font-size: 18px;font-weight: bold;margin-bottom: 20px;">${data.value.name} ${data.value.phone.substr(0, 3) + "****" + data.value.phone.substr(data.value.phone.length - 4, data.value.phone.length)}</div><div style="font-size: 12px;margin-bottom: 60px;">*************************************</div><div style="font-size: 1px;">-</div>`//地址// < div style = "display: flex;font-size: 18px;font-weight: bold;margin-bottom: 15px;" >// ${merOrderList.address}// < /div>
}function printReceipt() {emits("close")ticketIframe.value.contentWindow.print(); // 调用iframe内部的window.print()proxy.$refs.ticketIframe.contentWindow.location.reload(true);
}
</script><style scoped>
.mainContent {position: fixed;top: 0;left: 0;width: 100%;height: 100%;min-height: 100vh;background-color: rgba(0, 0, 0, 0.5);z-index: 999999;display: flex;align-items: center;justify-content: center;
}.printContent {width: 70%;height: 50vh;background-color: #FFFFFF;box-sizing: border-box;display: flex;flex-direction: column;align-items: center;border-radius: 10rpx;padding: 20rpx;
}.btnPrint {width: 50%;margin: 80rpx auto 20rpx;font-size: 26rpx;color: #FFFFFF;background-color: #FF0000;text-align: center;padding: 10rpx 0;border-radius: 10rpx;
}iframe {border: none;
}
</style>这篇关于uniapp(vue3) H5页面连接打印机并打印的文章就介绍到这儿,希望我们推荐的文章对编程师们有所帮助!


