本文主要是介绍K8S POD 启动探针 startupProbe 的使用,希望对大家解决编程问题提供一定的参考价值,需要的开发者们随着小编来一起学习吧!
当我们启动一个POD 时, 当k8s detect 里面的容器启动成功时, 就会认为这个POD 启动完成了, 通常就会在状态里表示 ready 1/1 …
例如
root@k8s-master:~# kubectl get pods
NAME          READY   STATUS    RESTARTS   AGE
bq-api-demo   1/1     Running   0          34m
至于K8S 是怎么判断pod 是否启动完成的:
对于容器内没有设置探测规则的情况,默认的探测规则如下:
启动完成检测:Kubernetes将监视容器的启动状态。如果容器的进程启动并且不处于终止状态(例如,未崩溃),Kubernetes将认为该容器已启动完成。
就绪状态检测:在没有设置就绪探针的情况下,默认情况下,Kubernetes将假定容器处于就绪状态。这意味着在Pod调度到节点后,Kubernetes将立即将流量转发到该容器。
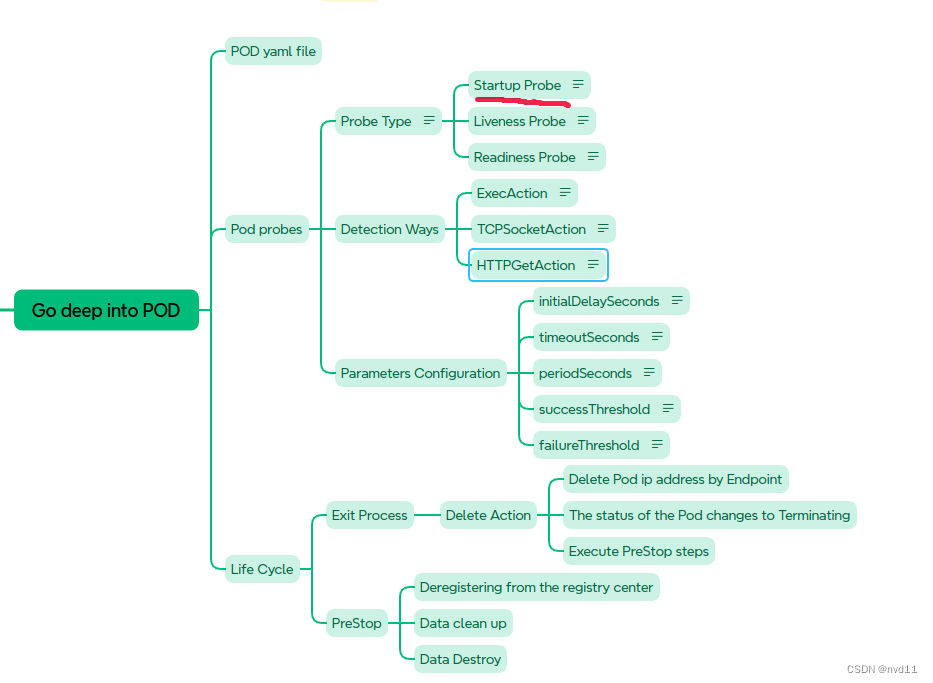
需要注意的是,这些默认规则可能不足以确保应用程序完全启动和可用。因此,强烈建议在Pod的配置文件(YAML)中设置适当的启动探针(startupProbe)和就绪探针(readinessProbe),以便更精确地确定Pod是否已启动完成和就绪,从而确保应用程序的可靠性和稳定性。
所以在生产环境上 我们有必要设置 startupProbe 来让k8s 正确判断pod 已经启动完成, 置于readinessProbe 不在本文讨论范围内。
构建2个api 判断程序是否启动完成
这里作为例子, 我们创建了两个api, 1个模拟成功, 1个模拟失败
模拟成功的api 我们直接用 /actuator/info
@Component
@Slf4j
public class AppVersionInfo implements InfoContributor {@Autowiredprivate Environment environment;@Value("${pom.version}") // https://stackoverflow.com/questions/3697449/retrieve-version-from-maven-pom-xml-in-codeprivate String appVersion;@Overridepublic void contribute(Info.Builder builder) {log.info("AppVersionInfo: contribute ...");builder.withDetail("app", "Sales API").withDetail("version", appVersion).withDetail("description", "This is a simple Spring Boot application to demonstrate the use of BigQuery in GCP.");}
}
模拟失败的api 我们自己写1个 /test/hello/fail
@Slf4j
@RestController
@RequestMapping("/test")
public class TestController {@GetMapping("/hello/fail")public ResponseEntity<ApiResponse<String>> getSalesDetails() {log.error("/test/hello/fail ... this api will already return 500 error");ApiResponse<String> response = new ApiResponse<>();response.setReturnCode(-1);response.setReturnMsg("this api will already return 500 error");return ResponseEntity.status(500).body(response);}
}
编辑pod yaml file
请留意startupProde 那一段的具体解释
apiVersion: v1 # api version
kind: Pod # type of this resource e.g. Pod/Deployment ..
metadata: name: bq-api-demolabels: pod-type: app # custom key valuepod-version: v1.0.1namespace: 'default'
spec: # detail descriptioncontainers: # key point- name: bq-api-service # custom nameimage: europe-west2-docker.pkg.dev/jason-hsbc/my-docker-repo/bq-api-service:1.1.1imagePullPolicy: IfNotPresent # try to use local image first, if no, then pull image from remotestartupProbe:httpGet: # Responses within the range of 200 to 399 code will be considered successfulpath: /actuator/infoport: 8080initialDelaySeconds: 20 # prode 20 seconds to the service before check the statup statusfailureThreshold: 3 # Only when there are three consecutive failed attempts, it is considered a startup failureperiodSeconds: 5 # Retry every 5 seconds (after a failure).timeoutSeconds: 5 # If the API does not return within 5 seconds, it is considered a failureports:- name: http8080containerPort: 8080 # the port used by the container serviceprotocol: TCPenv:- name: JVM_OPTSvalue: '-Xms128m -Xmx2048m'resources:requests: # at least need cpu: 1000m # 1000m = 1 corememory: 1000Mi limits: # at max can usecpu: 2000m memory: 2000MirestartPolicy: OnFailure
重新部署
pod_name=bq-api-demo
yaml_filename=bq-api-service-startup-probe.yaml
namespace=default# 删除指定 Pod
kubectl delete pod $pod_name -n $namespace# 等待 Pod 被删除并重新创建
echo "Waiting for the pod to be deleted..."
kubectl wait pod $pod_name --for=delete -n $namespace# 使用指定的 YAML 文件重新创建 Pod
kubectl create -f $yaml_filename -n $namespace
可以见到K8s 仍然可以detect pod 启动成功
root@k8s-master:~# kubectl get pods
NAME          READY   STATUS    RESTARTS   AGE
bq-api-demo   1/1     Running   0          34m
describe 一下:
的确描述了启动规则
root@k8s-master:~# kubectl describe pod bq-api-demo
...
Containers:bq-api-service:Container ID:   docker://15c666bd6e22e174d54ccf8757838a26d89a26562a21edca9174f8bcdb03fa90Image:          europe-west2-docker.pkg.dev/jason-hsbc/my-docker-repo/bq-api-service:1.1.1Image ID:       docker-pullable://europe-west2-docker.pkg.dev/jason-hsbc/my-docker-repo/bq-api-service@sha256:30fb2cebd2bf82863608037ce41048114c061acbf1182261a748dadefff2372fPort:           8080/TCPHost Port:      0/TCPState:          RunningStarted:      Sun, 17 Mar 2024 19:00:14 +0000Ready:          TrueRestart Count:  0Limits:cpu:     2memory:  2000MiRequests:cpu:     1memory:  1000MiStartup:   http-get http://:8080/actuator/info delay=20s timeout=5s period=5s #success=1 #failure=3Environment:JVM_OPTS:  -Xms128m -Xmx2048mMounts:/var/run/secrets/kubernetes.io/serviceaccount from kube-api-access-j2bpc (ro)
...
看下log, 的确可以看出appVersionInfo的接口被调用了
root@k8s-master:~# kubectl logs bq-api-demo.   ____          _            __ _ _/\\ / ___'_ __ _ _(_)_ __  __ _ \ \ \ \
( ( )\___ | '_ | '_| | '_ \/ _` | \ \ \ \\\/  ___)| |_)| | | | | || (_| |  ) ) ) )'  |____| .__|_| |_|_| |_\__, | / / / /=========|_|==============|___/=/_/_/_/:: Spring Boot ::               (v2.7.18)2024-03-17 19:00:15.371  INFO 1 --- [           main] com.home.Application                     : Starting Application v1.1.1 using Java 11.0.16 on bq-api-demo with PID 1 (/app/app.jar started by root in /app)
2024-03-17 19:00:15.375  INFO 1 --- [           main] com.home.Application                     : No active profile set, falling back to 1 default profile: "default"
2024-03-17 19:00:16.601  INFO 1 --- [           main] faultConfiguringBeanFactoryPostProcessor : No bean named 'errorChannel' has been explicitly defined. Therefore, a default PublishSubscribeChannel will be created.
2024-03-17 19:00:16.618  INFO 1 --- [           main] faultConfiguringBeanFactoryPostProcessor : No bean named 'integrationHeaderChannelRegistry' has been explicitly defined. Therefore, a default DefaultHeaderChannelRegistry will be created.
2024-03-17 19:00:17.151  INFO 1 --- [           main] o.s.b.w.embedded.tomcat.TomcatWebServer  : Tomcat initialized with port(s): 8080 (http)
2024-03-17 19:00:17.160  INFO 1 --- [           main] o.apache.catalina.core.StandardService   : Starting service [Tomcat]
2024-03-17 19:00:17.160  INFO 1 --- [           main] org.apache.catalina.core.StandardEngine  : Starting Servlet engine: [Apache Tomcat/9.0.83]
2024-03-17 19:00:17.238  INFO 1 --- [           main] o.a.c.c.C.[Tomcat].[localhost].[/]       : Initializing Spring embedded WebApplicationContext
2024-03-17 19:00:17.238  INFO 1 --- [           main] w.s.c.ServletWebServerApplicationContext : Root WebApplicationContext: initialization completed in 1759 ms
2024-03-17 19:00:17.587  INFO 1 --- [           main] o.s.c.g.a.c.GcpContextAutoConfiguration  : The default project ID is jason-hsbc
2024-03-17 19:00:17.609  INFO 1 --- [           main] o.s.c.g.core.DefaultCredentialsProvider  : Default credentials provider for Google Compute Engine.
2024-03-17 19:00:17.609  INFO 1 --- [           main] o.s.c.g.core.DefaultCredentialsProvider  : Scopes in use by default credentials: [https://www.googleapis.com/auth/pubsub, https://www.googleapis.com/auth/spanner.admin, https://www.googleapis.com/auth/spanner.data, https://www.googleapis.com/auth/datastore, https://www.googleapis.com/auth/sqlservice.admin, https://www.googleapis.com/auth/devstorage.read_only, https://www.googleapis.com/auth/devstorage.read_write, https://www.googleapis.com/auth/cloudruntimeconfig, https://www.googleapis.com/auth/trace.append, https://www.googleapis.com/auth/cloud-platform, https://www.googleapis.com/auth/cloud-vision, https://www.googleapis.com/auth/bigquery, https://www.googleapis.com/auth/monitoring.write]
2024-03-17 19:00:17.704  INFO 1 --- [           main] com.home.api.config.MyInitializer        : Application started...
2024-03-17 19:00:17.705  INFO 1 --- [           main] com.home.api.config.MyInitializer        : https.proxyHost: null
2024-03-17 19:00:17.705  INFO 1 --- [           main] com.home.api.config.MyInitializer        : https.proxyPort: null
2024-03-17 19:00:18.370  INFO 1 --- [           main] o.s.b.a.e.web.EndpointLinksResolver      : Exposing 4 endpoint(s) beneath base path '/actuator'
2024-03-17 19:00:18.510  INFO 1 --- [           main] o.s.i.endpoint.EventDrivenConsumer       : Adding {logging-channel-adapter:_org.springframework.integration.errorLogger} as a subscriber to the 'errorChannel' channel
2024-03-17 19:00:18.510  INFO 1 --- [           main] o.s.i.channel.PublishSubscribeChannel    : Channel 'application.errorChannel' has 1 subscriber(s).
2024-03-17 19:00:18.511  INFO 1 --- [           main] o.s.i.endpoint.EventDrivenConsumer       : started bean '_org.springframework.integration.errorLogger'
2024-03-17 19:00:18.547  INFO 1 --- [           main] o.s.b.w.embedded.tomcat.TomcatWebServer  : Tomcat started on port(s): 8080 (http) with context path ''
2024-03-17 19:00:18.562  INFO 1 --- [           main] com.home.Application                     : Started Application in 3.869 seconds (JVM running for 4.353)
2024-03-17 19:00:18.598  INFO 1 --- [           main] com.home.Application                     : customParam: null
2024-03-17 19:00:38.644  INFO 1 --- [nio-8080-exec-1] o.a.c.c.C.[Tomcat].[localhost].[/]       : Initializing Spring DispatcherServlet 'dispatcherServlet'
2024-03-17 19:00:38.644  INFO 1 --- [nio-8080-exec-1] o.s.web.servlet.DispatcherServlet        : Initializing Servlet 'dispatcherServlet'
2024-03-17 19:00:38.646  INFO 1 --- [nio-8080-exec-1] o.s.web.servlet.DispatcherServlet        : Completed initialization in 2 ms
2024-03-17 19:00:38.681  INFO 1 --- [nio-8080-exec-1] c.h.api.monitor.endpoint.AppVersionInfo  : AppVersionInfo: contribute ...
模拟失败的case
首先创建1个新的yaml file, 规则接口选择/test/hello/fail 这个接口的return code 永远是500
startupProbe:httpGet: # Responses within the range of 200 to 399 code will be considered successfulpath: /test/hello/fail # alway return 500..port: 8080initialDelaySeconds: 20 # prode 20 seconds to the service before check the statup statusfailureThreshold: 3 # Only when there are three consecutive failed attempts, it is considered a startup failureperiodSeconds: 5 # Retry every 5 seconds (after a failure).timeoutSeconds: 5 # If the API does not return within 5 seconds, it is considered a failure
然后重新部署
root@k8s-master:~/k8s-s/pods# bash redeployPod.sh bq-api-demo bq-api-service-startup-probe-fail.yaml
pod "bq-api-demo" deleted
Waiting for the pod to be deleted...
pod/bq-api-demo created
这次启动失败了 , 重试了3次
root@k8s-master:~# kubectl get pods -o wide
NAME          READY   STATUS    RESTARTS     AGE   IP            NODE        NOMINATED NODE   READINESS GATES
bq-api-demo   0/1     Running   3 (1s ago)   96s   10.244.3.16   k8s-node3   <none>           <none>
从下面的信息也知道是因为startup 接口return 了500
root@k8s-master:~# kubectl describe pod bq-api-demo
Name:         bq-api-demo
Namespace:    default
Priority:     0
Node:         k8s-node3/192.168.0.45
Start Time:   Sun, 17 Mar 2024 20:11:49 +0000
Labels:       pod-type=apppod-version=v1.0.1
Annotations:  <none>
Status:       Running
IP:           10.244.3.16
IPs:IP:  10.244.3.16
Containers:bq-api-service:Container ID:   docker://9a95ed5837917f3b527c8f65ec85cec17661ffa5e4ef4e4a6161b2c4cc2dc329Image:          europe-west2-docker.pkg.dev/jason-hsbc/my-docker-repo/bq-api-service:1.1.1Image ID:       docker-pullable://europe-west2-docker.pkg.dev/jason-hsbc/my-docker-repo/bq-api-service@sha256:30fb2cebd2bf82863608037ce41048114c061acbf1182261a748dadefff2372fPort:           8080/TCPHost Port:      0/TCPState:          RunningStarted:      Sun, 17 Mar 2024 20:11:50 +0000Ready:          FalseRestart Count:  0Limits:cpu:     2memory:  2000MiRequests:cpu:     1memory:  1000MiStartup:   http-get http://:8080/test/hello/fail delay=20s timeout=5s period=5s #success=1 #failure=3Environment:JVM_OPTS:  -Xms128m -Xmx2048mMounts:/var/run/secrets/kubernetes.io/serviceaccount from kube-api-access-xf7gx (ro)
Conditions:Type              StatusInitialized       True Ready             False ContainersReady   False PodScheduled      True
Volumes:kube-api-access-xf7gx:Type:                    Projected (a volume that contains injected data from multiple sources)TokenExpirationSeconds:  3607ConfigMapName:           kube-root-ca.crtConfigMapOptional:       <nil>DownwardAPI:             true
QoS Class:                   Burstable
Node-Selectors:              <none>
Tolerations:                 node.kubernetes.io/not-ready:NoExecute op=Exists for 300snode.kubernetes.io/unreachable:NoExecute op=Exists for 300s
Events:Type     Reason     Age               From               Message----     ------     ----              ----               -------Normal   Scheduled  35s               default-scheduler  Successfully assigned default/bq-api-demo to k8s-node3Normal   Pulled     34s               kubelet            Container image "europe-west2-docker.pkg.dev/jason-hsbc/my-docker-repo/bq-api-service:1.1.1" already present on machineNormal   Created    34s               kubelet            Created container bq-api-serviceNormal   Started    34s               kubelet            Started container bq-api-serviceWarning  Unhealthy  5s (x2 over 10s)  kubelet            Startup probe failed: HTTP probe failed with statuscode: 500
这篇关于K8S POD 启动探针 startupProbe 的使用的文章就介绍到这儿,希望我们推荐的文章对编程师们有所帮助!


