本文主要是介绍(四)Android布局类型(线性布局LinearLayout),希望对大家解决编程问题提供一定的参考价值,需要的开发者们随着小编来一起学习吧!
线性布局(LinearLayout):按照一定的方向排列组件,方向主要分为水平方向和垂直方向。方向的设置通过属性android:orientation设置
android:orientation其取值有两种
水平方向:android:orientation="horizontal"
垂直方向:android:orientation="vertical"
使用案例1:按照水平方向排列组件
<?xml version="1.0" encoding="utf-8"?>
<LinearLayout xmlns:android="http://schemas.android.com/apk/res/android"xmlns:tools="http://schemas.android.com/tools"android:layout_width="match_parent"android:layout_height="match_parent"android:orientation="horizontal"tools:context=".MainActivity"><Buttonandroid:id="@+id/button"android:layout_width="wrap_content"android:layout_height="wrap_content"android:text="水平按钮1" /><Buttonandroid:id="@+id/button2"android:layout_width="wrap_content"android:layout_height="wrap_content"android:text="水平按钮2" /><Buttonandroid:id="@+id/button3"android:layout_width="wrap_content"android:layout_height="wrap_content"android:text="水平按钮3" />
</LinearLayout>核心代码:设置方向为水平方向,这也是LinearLayout默认的方向。
android:orientation="horizontal"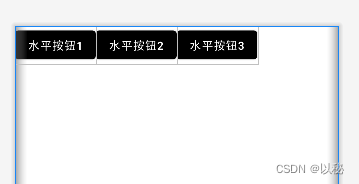
如果再增加两个按钮,则效果如下:
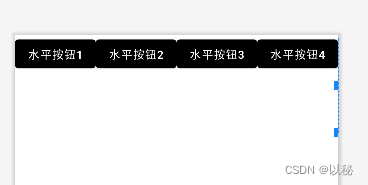
也就是说,排满后,不会自动换行。
使用案例2:按照垂直方向排列组件
在上述代码中,更改核心代码为下列代码
android:orientation="vertical"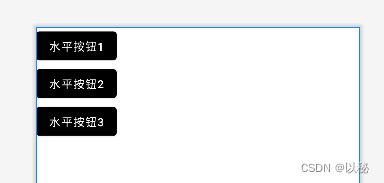
更常见的使用方法是:组件在布局中均分,均分情况主要有两种,分别是水平方向均分、垂直方向均分
使用案例3:水平方向均分
思路:首先使用水平方向排列,将三个组件放入布局中;然后设置三个按钮的宽度均为0dp、占比相等(相等指的是,可以同时为1,也可以同时为2,数字相同就是相等)
<?xml version="1.0" encoding="utf-8"?>
<LinearLayout xmlns:android="http://schemas.android.com/apk/res/android"android:layout_width="match_parent"android:layout_height="match_parent"><Buttonandroid:id="@+id/button"android:layout_width="0dp"android:layout_height="wrap_content"android:layout_weight="1"android:text="水平按钮1" /><Buttonandroid:id="@+id/button2"android:layout_width="0dp"android:layout_height="wrap_content"android:layout_weight="1"android:text="水平按钮2" /><Buttonandroid:id="@+id/button3"android:layout_width="0dp"android:layout_height="wrap_content"android:layout_weight="1"android:text="水平按钮3" />
</LinearLayout>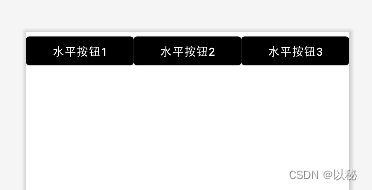
核心代码1:线性布局上添加属性,使得排列方向设置为水平方向(由于默认是水平方向,你也可以不设置)
android:orientation="horizontal" 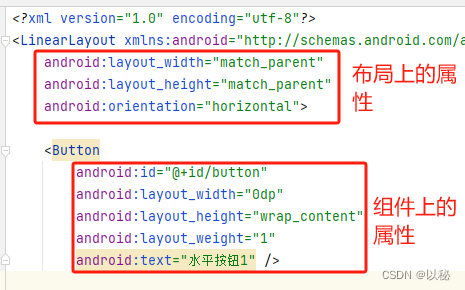
核心代码2:每个组件中,添加上两个属性;
android:layout_width="0dp"
android:layout_weight="1"
使用案例4:垂直方向均分
思路:思路:首先使用垂直方向排列,将三个组件放入布局中;然后设置三个按钮的高度均为0dp、占比相等(相等指的是,可以同时为1,也可以同时为2,数字相同就是相等)
<?xml version="1.0" encoding="utf-8"?>
<LinearLayout xmlns:android="http://schemas.android.com/apk/res/android"android:layout_width="match_parent"android:layout_height="match_parent"android:orientation="vertical"><Buttonandroid:id="@+id/button"android:layout_width="wrap_content"android:layout_height="0dp"android:layout_weight="1"android:text="水平按钮1" /><Buttonandroid:id="@+id/button2"android:layout_height="0dp"android:layout_width="wrap_content"android:layout_weight="1"android:text="水平按钮2" /><Buttonandroid:id="@+id/button3"android:layout_width="wrap_content"android:layout_height="0dp"android:layout_weight="1"android:text="水平按钮3" />
</LinearLayout> 
核心代码1:整体线性布局设置为垂直方向
android:orientation="vertical"核心代码2:由于在垂直方向均分,所有高度具体为多少不知道,将其设置为0dp,根据占比系统进行计算所得
android:layout_height="0dp"android:layout_weight="1"检测自己是否领会到该布局的使用方法
实现如下布局
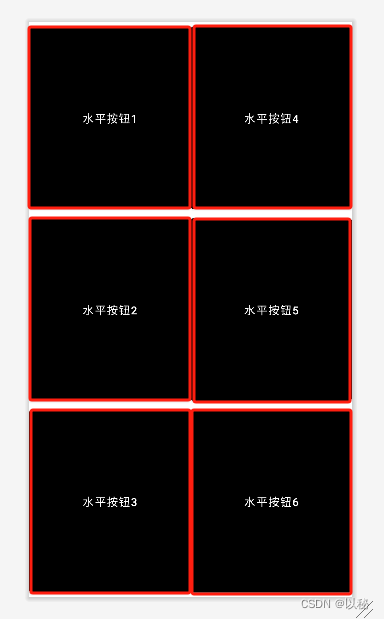
观察特点:3行2列。
方法1:整体采用线性布局,设置方向为水平方向,嵌套两个线性布局,两个布局的宽度设置为0dp、占比为相等,实现水平均分。
第一个线性布局中,设置方向为垂直方向;放入三个组件,每个组件设置属性(宽度占满父容器、高度设置为0dp、占比设置为1);第二个线性布局也是同样的设置。

完整代码:
<?xml version="1.0" encoding="utf-8"?>
<LinearLayout xmlns:android="http://schemas.android.com/apk/res/android"android:layout_width="match_parent"android:layout_height="match_parent"android:orientation="horizontal"><LinearLayoutandroid:layout_width="0dp"android:layout_height="match_parent"android:layout_weight="1"android:orientation="vertical"><Buttonandroid:id="@+id/button"android:layout_width="match_parent"android:layout_height="0dp"android:layout_weight="1"android:text="水平按钮1" /><Buttonandroid:id="@+id/button2"android:layout_width="match_parent"android:layout_height="0dp"android:layout_weight="1"android:text="水平按钮2" /><Buttonandroid:id="@+id/button3"android:layout_width="match_parent"android:layout_height="0dp"android:layout_weight="1"android:text="水平按钮3" /></LinearLayout><LinearLayoutandroid:layout_width="0dp"android:layout_height="match_parent"android:layout_weight="1"android:orientation="vertical"><Buttonandroid:id="@+id/button4"android:layout_width="match_parent"android:layout_height="0dp"android:layout_weight="1"android:text="水平按钮4" /><Buttonandroid:id="@+id/button5"android:layout_width="match_parent"android:layout_height="0dp"android:layout_weight="1"android:text="水平按钮5" /><Buttonandroid:id="@+id/button6"android:layout_width="match_parent"android:layout_height="0dp"android:layout_weight="1"android:text="水平按钮6" /></LinearLayout>
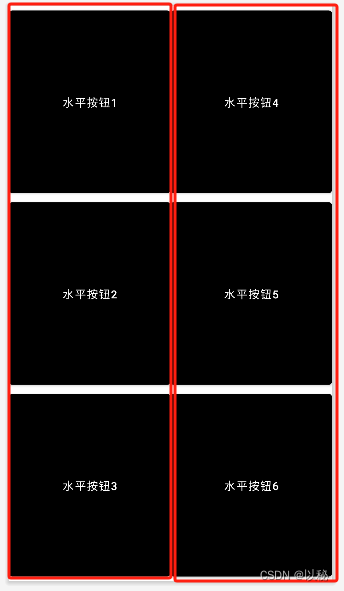
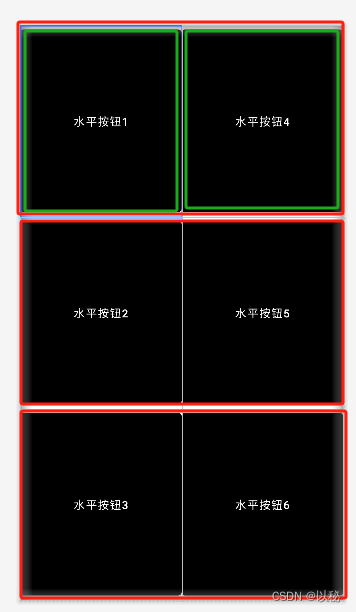
</LinearLayout>同样的道理,还可以将整体线性布局设置为垂直方向,然后嵌套三个线性布局(红色标记),每个布局的宽度设置为占满,高度设置为0dp、占比设置为相等,实现垂直均分;然后再每个子线性布局中放入2个按钮,设置高度占满,宽度为0dp、占比相等,实现两个按钮水平均分(绿色标记),此处给出思考图,不再给出代码。
这篇关于(四)Android布局类型(线性布局LinearLayout)的文章就介绍到这儿,希望我们推荐的文章对编程师们有所帮助!


