本文主要是介绍vagrant box配置本地开发环境以及常见错误解决方案,希望对大家解决编程问题提供一定的参考价值,需要的开发者们随着小编来一起学习吧!
这里有一个参考链接(http://jingyan.baidu.com/article/642c9d34e15cdd644b46f74b.html),当然也可以按照下面的步骤来操作:
一:准备各种材料了
(1)VirtualBox (https://www.virtualbox.org/)
(2)vagrant (https://www.vagrantup.com/downloads.html)
(3)vagrant box (http://www.vagrantbox.es/这是一个VirtualBox提供的box,当然你可以使用开发小组配置好打包的box)
二:开始安装
(1)安装VirtualBox (可以更换安装目录,然后直接下一步下一步就可以啦)
(2)安装vagrant (这个最好就默认安装吧,因为涉及到目录的指向)
(3)安装完vagrant,然后可以在你的工作盘里面创建一个文件夹来安装虚拟机了,比如我是这样:E:\centos6。然后在终端里进入这个目录: 
第一:执行安装命令:

(这里的add centos6——centos6就是为虚拟机box起的别名,便于以后操作。E:/vagrantbox/centos6.box就是上面准备材料中第三步准备的vagrant box)
第二:初始化开发环境

这样基础的安装就成了,下面就是修改配置文件Vagrantfile了。文件修改如下:
# -*- mode: ruby -*-
# vi: set ft=ruby :# All Vagrant configuration is done below. The "2" in Vagrant.configure
# configures the configuration version (we support older styles for
# backwards compatibility). Please don't change it unless you know what
# you're doing.
Vagrant.configure("2") do |config|# The most common configuration options are documented and commented below.# For a complete reference, please see the online documentation at# https://docs.vagrantup.com.# Every Vagrant development environment requires a box. You can search for# boxes at https://atlas.hashicorp.com/search.config.vm.box = "centos6" //box的别名# Disable automatic box update checking. If you disable this, then# boxes will only be checked for updates when the user runs# `vagrant box outdated`. This is not recommended.# config.vm.box_check_update = false# Create a forwarded port mapping which allows access to a specific port# within the machine from a port on the host machine. In the example below,# accessing "localhost:8080" will access port 80 on the guest machine.config.vm.network "forwarded_port", guest: 80, host: 80 //端口配置,这样才能访问虚拟机的nginx# Create a private network, which allows host-only access to the machine# using a specific IP.config.vm.network "private_network", ip: "192.168.33.10" //ip配置,配置后可以访问虚拟机(例如ssh等)# Create a public network, which generally matched to bridged network.# Bridged networks make the machine appear as another physical device on# your network.# config.vm.network "public_network"# Share an additional folder to the guest VM. The first argument is# the path on the host to the actual folder. The second argument is# the path on the guest to mount the folder. And the optional third# argument is a set of non-required options.config.vm.synced_folder "D:/workplace/code", "/home/www/" //前面的路径(D:/workplace/code)是本机代码的地址,后面的地址就是虚拟机的nginx部署的目录# Provider-specific configuration so you can fine-tune various# backing providers for Vagrant. These expose provider-specific options.# Example for VirtualBox:## config.vm.provider "virtualbox" do |vb|#   # Display the VirtualBox GUI when booting the machine#   vb.gui = true##   # Customize the amount of memory on the VM:#   vb.memory = "1024"# end## View the documentation for the provider you are using for more# information on available options.# Define a Vagrant Push strategy for pushing to Atlas. Other push strategies# such as FTP and Heroku are also available. See the documentation at# https://docs.vagrantup.com/v2/push/atlas.html for more information.# config.push.define "atlas" do |push|#   push.app = "YOUR_ATLAS_USERNAME/YOUR_APPLICATION_NAME"# end# Enable provisioning with a shell script. Additional provisioners such as# Puppet, Chef, Ansible, Salt, and Docker are also available. Please see the# documentation for more information about their specific syntax and use.# config.vm.provision "shell", inline: <<-SHELL#   apt-get update#   apt-get install -y apache2# SHELL
end
第三:启动虚拟机
还是在当前目录下,输入vagrant up命令,启动虚拟机
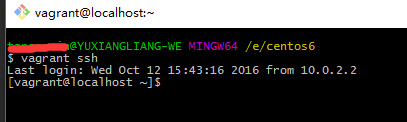
第四:ssh链接虚拟机
进入nginx的配置文件目录:

下面就是根据自己的需要去添加自己的配置文件了,当然记得去配置一下自己虚拟机的hosts文件(如果域名访问不到的话)
整体就是这样,下面是一些vagrant常用的命令:
(1)vagrant init # 初始化
(2)vagrant up # 启动虚拟机
(3)vagrant halt # 关闭虚拟机
(4)vagrant reload # 重启虚拟机
(5)vagrant ssh # SSH 至虚拟机
(6)vagrant status # 查看虚拟机运行状态
(7)vagrant destroy # 销毁当前虚拟机
三:一些常见的错误
(1)vagrant up时报如下错误:
angel:vagrant $ vagrant upBringing machine ‘default‘ up with ‘virtualbox‘ provider...[default] Clearing any previously set forwarded ports...[default] Creating shared folders metadata...[default] Clearing any previously set network interfaces...[default] Available bridged network interfaces:1) en0: 以太网2) en1: Wi-Fi (AirPort)3) bridge100What interface should the network bridge to? 2[default] Preparing network interfaces based on configuration...[default] Forwarding ports...[default] -- 22 => 2222 (adapter 1)[default] Booting VM...[default] Waiting for machine to boot. This may take a few minutes...[default] Machine booted and ready![default] Configuring and enabling network interfaces...The following SSH command responded with a non-zero exit status.Vagrant assumes that this means the command failed!ARPCHECK=no /sbin/ifup eth1 2> /dev/nullStdout from the command:Device eth1 does not seem to be present, delaying initialization.Stderr from the command: 解决方案 虽然vagrant up启动报错,但是vagrant ssh还是能登陆虚拟机的,进入虚拟机后,执行如下命令
sudo rm -f /etc/udev/rules.d/70-persistent-net.rules
对, 问题就处在在持久网络设备udev规则(persistent network device udev rules)是被原VM设置好的,再用box生成新VM时,这些rules需要被更新。而这和Vagrantfile里对新VM设置private network的指令发生冲突。删除就好了。
再次启动就没问题了(vagrant reload)。
(2)使用vagrant box add centos6 E:\vagrantboxfile\centos.box命令出现如下错误时:
Couldn't open the file \vagrantboxfile\centos.box 解决方案:
将centos.box文件放到你要初始化的目录下,直接用下面的命令, vagrant box add centos6 centos.box,不要再写绝对路径了,这样就可以安装成功了。
这篇关于vagrant box配置本地开发环境以及常见错误解决方案的文章就介绍到这儿,希望我们推荐的文章对编程师们有所帮助!


