本文主要是介绍基于Pytorch和Vgg16实现图片分类,希望对大家解决编程问题提供一定的参考价值,需要的开发者们随着小编来一起学习吧!
最近在基于Pytorch框架补一些CNN的基础知识,学会自己写简单的卷积神经网络,从加载数据集到训练模型、测试模型、保存模型和输出测试结果,现在来总结一下。
首先基于Pytorch实现Vgg16网络,命名为model.py(可为其他任意名字,但是后续导入时要记得更改)
import torch
import torch.nn as nnclass VGG16(nn.Module):def __init__(self):super(VGG16, self).__init__()self.layer1 = nn.Sequential(nn.Conv2d(3, 64, 3, 1, 1),nn.BatchNorm2d(64),nn.ReLU(),nn.Conv2d(64, 64, 3, 1, 1),nn.BatchNorm2d(64),nn.ReLU(),nn.MaxPool2d(2, 2))self.layer2 = nn.Sequential(nn.Conv2d(64, 128, 3, 1, 1),nn.BatchNorm2d(128),nn.ReLU(),nn.Conv2d(128, 128, 3, 1, 1),nn.BatchNorm2d(128),nn.ReLU(),nn.MaxPool2d(2, 2))self.layer3 = nn.Sequential(nn.Conv2d(128, 256, 3, 1, 1),nn.BatchNorm2d(256),nn.ReLU(),nn.Conv2d(256, 256, 3, 1, 1),nn.BatchNorm2d(256),nn.ReLU(),nn.Conv2d(256, 256, 3, 1, 1),nn.BatchNorm2d(256),nn.ReLU(),nn.MaxPool2d(2, 2))self.layer4 = nn.Sequential(nn.Conv2d(256, 512, 3, 1, 1),nn.BatchNorm2d(512),nn.ReLU(),nn.Conv2d(512, 512, 3, 1, 1),nn.BatchNorm2d(512),nn.ReLU(),nn.Conv2d(512, 512, 3, 1, 1),nn.BatchNorm2d(512),nn.ReLU(),nn.MaxPool2d(2, 2))self.layer5 = nn.Sequential(nn.Conv2d(512, 512, 3, 1, 1),nn.BatchNorm2d(512),nn.ReLU(),nn.Conv2d(512, 512, 3, 1, 1),nn.BatchNorm2d(512),nn.ReLU(),nn.Conv2d(512, 512, 3, 1, 1),nn.BatchNorm2d(512),nn.ReLU(),nn.MaxPool2d(2, 2))self.fc1 = nn.Sequential(nn.Flatten(),nn.Linear(512, 512),nn.ReLU(),nn.Dropout())self.fc2 = nn.Sequential(nn.Linear(512, 256),nn.ReLU(),nn.Dropout())self.fc3 = nn.Linear(256, 10)def forward(self, x):x = self.layer1(x)x = self.layer2(x)x = self.layer3(x)x = self.layer4(x)x = self.layer5(x)x = self.fc1(x)x = self.fc2(x)x = self.fc3(x)return xif __name__ == '__main__':VGG16 = VGG16()input = torch.ones((64, 3, 32, 32))output = VGG16(input)print(output.shape)
然后编写训练文件,导入需要的库(有些库没有的话需要提前安装)。
import torchvision
from torch import optim
from torch.utils.data import DataLoader
import torch.nn as nn
from model import *
import matplotlib.pyplot as plt
import time
下载CIFAR10数据集,并设置batch_size,第一次运行时会自动下载,之后直接加载已经下载好的。当然也可以使用其他数据集,从官方文档https://pytorch.org/vision/stable/datasets.html可以看到有各种用于分类、分割、检测等其他视觉任务的数据集,但是为了方便学习,这里选择较小的CIFAR10数据集。
rain_data = torchvision.datasets.CIFAR10(root="data", train=True, transform=torchvision.transforms.ToTensor(),download=True)
test_data = torchvision.datasets.CIFAR10(root="data", train=False, transform=torchvision.transforms.ToTensor(),download=True)
train_dataloader = DataLoader(train_data, batch_size=64)
test_dataloader = DataLoader(test_data, batch_size=64)
创建记录文档,名字为当下时间,将训练过程和结果保存并打印出来。
t = time.strftime('%Y-%m-%d_%H-%M-%S')  # 切记中间符号不能用冒号,不然会报错
file = open('logs/{}.txt'.format(t), 'w')
train_data_size = len(train_data)
test_data_size = len(test_data)
print('The size of train_data:{}'.format(train_data_size))
file.write('The size of train_data:{}'.format(train_data_size)+'\n')
print('The size of train_data:{}'.format(test_data_size))
file.write('The size of train_data:{}'.format(test_data_size)+'\n')
创建一些中间参数,配置损失函数和优化器,也可从官方文档中选择其他损失函数torch.nn.functional — PyTorch 1.11.0 documentation和优化器torch.optim — PyTorch 1.11.0 documentation
epoch = 10
train_step = 0
test_step = 0vgg16 = VGG16()  # 实例化网络
loss_fn = nn.CrossEntropyLoss()  learning_rate = 1e-2
# optimizer = optim.SGD(vgg16.parameters(), lr=learning_rate, momentum=0.9)
optimizer = optim.Adam(vgg16.parameters(), lr=learning_rate)losses = []  # 用于存储损失值,便于后面画损失变化曲线图
开始训练
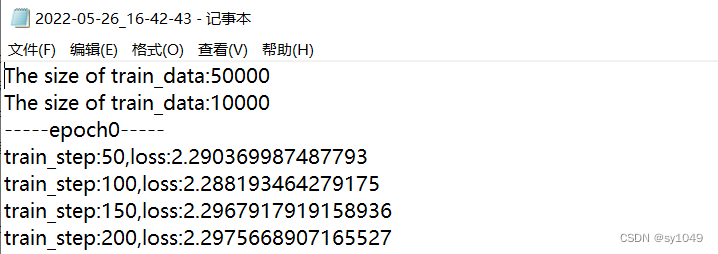
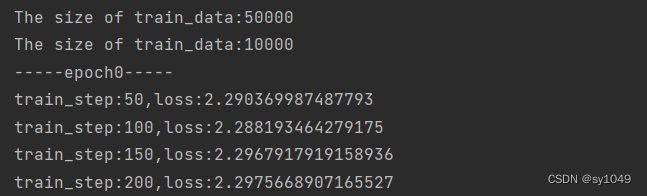
for i in range(epoch):print('-----epoch{}-----'.format(i))file.write('-----epoch{}-----'.format(i)+'\n')# 训练步骤开始vgg16.train()for data in train_dataloader:images, targets = dataoutput = vgg16(images)loss = loss_fn(output, targets)# 优化器优化模型optimizer.zero_grad()loss.backward()optimizer.step()train_step += 1if train_step % 50 == 0:print('train_step:{},loss:{}'.format(train_step, loss.item()))file.write('train_step:{},loss:{}'.format(train_step, loss.item())+'\n')losses.append(loss.item())# 测试步骤开始vgg16.eval()accuracy = 0with torch.no_grad():for data in test_dataloader:images, targets = dataoutput = vgg16(images)current_acc = (output.argmax(1) == targets).sum()accuracy += current_accacc = accuracy / test_data_sizeprint('-------eval accuracy:{}'.format(acc))file.write('-------eval accuracy:{}'.format(acc)+'\n')torch.save(tudui, 'checkpoints/vgg16_{}.pth'.format(i))print('The model has been saved')file.write('The model has been saved')file.close()保存的记录文档和打印输出如下所示
画出损失曲线变化图
plt.subplot(1, 1, 1)
plt.plot(losses, label='Training Loss')
plt.title('Training Loss')
plt.legend()
plt.show()
编写测试文件,将训练好的模型用于预测任意图片的类别。
import torch
from PIL import Image
from torchvision import transformsimage_path = 'imgs/dog.jpg'  # 随意选择一张图片进行测试
image = Image.open(image_path)
image = image.convert('RGB')
transform = transforms.Compose([transforms.Resize(32, 32), transforms.ToTensor()])  # 将图片大小改为32×32,并转换为Tensor类型
image = transform(image)classes = ['plane', 'car', 'bird', 'cat', 'deer', 'dog', 'frog', 'horse', 'ship', 'truck']model = torch.load('checkpoints/vgg16_30.pth')  # 加载训练好的模型image = torch.reshape(image, (1, 3, 32, 32))
model.eval()
with torch.no_grad():output = model(image)
index = output.argmax(1)
pred = classes[index]
print(pred)
这篇关于基于Pytorch和Vgg16实现图片分类的文章就介绍到这儿,希望我们推荐的文章对编程师们有所帮助!


