本文主要是介绍正确地访问网络资源----Proxy的使用,希望对大家解决编程问题提供一定的参考价值,需要的开发者们随着小编来一起学习吧!
http://blog.csdn.net/sodino/article/details/6302313
天朝有很多独特的东西,今天要涉及到的是CMWAP与CMNET。
现在仍有许多Android手机用的是CMWAP连接网络的,如果只是简单滴使用URL.openConnection()开启一个HttpURLConnection,则会发现有一个UnknownHostException被抛出。唉...身为悲剧的程序员,就要开始解决这种bug了。
Sodino还发现一个现象,为什么自己的程序会崩掉,而Google浏览器就不会呢?与国产软件不同,国产软件身处天朝的软硬件环境下成长,可能会将代理IP(10.0.0.172)写进程序中,Sodino也确实反编译了几个程序后发现他们也是这样做来保持CMWAP下的正常联接。但是,Google浏览器可不是国人写的,那帮老外可不考虑天朝还有个CMWAP。那他们是如何保证网络的正常联接呢?一番鼓捣下,有了以下代码,可以在WIFI/CMWAP/CMNET/CTNET下正常访问网络,附带如何使用ping使用。
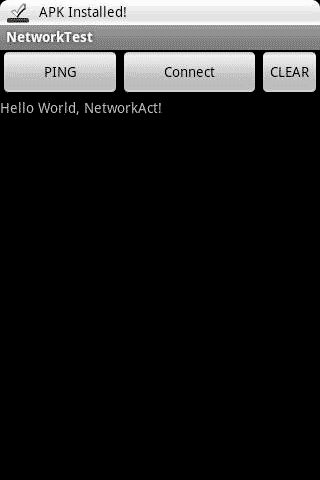
先上效果图:
- package lab.sodino.network;
- import java.io.IOException;
- import java.io.InputStream;
- import java.net.HttpURLConnection;
- import java.net.InetSocketAddress;
- import java.net.MalformedURLException;
- import java.net.URL;
- import java.net.UnknownHostException;
- import android.app.Activity;
- import android.content.Context;
- import android.net.ConnectivityManager;
- import android.net.NetworkInfo;
- import android.os.Bundle;
- import android.os.Handler;
- import android.os.Message;
- import android.util.Log;
- import android.view.View;
- import android.widget.Button;
- import android.widget.TextView;
- public class NetworkAct extends Activity {
- public static final int CLEAR_TEXT = 0;
- public static final int APPEND_TEXT = 1;
- private TextView txtInfo;
- private Button btnPing;
- private Button btnConnect;
- private Button btnClear;
- private BtnListener btnListener;
- private Handler handler = new Handler() {
- public void handleMessage(Message msg) {
- switch (msg.what) {
- case APPEND_TEXT:
- String content = msg.obj.toString();
- txtInfo.setText("/n" + content);
- break;
- case CLEAR_TEXT:
- txtInfo.setText("");
- break;
- }
- }
- };
- public void onCreate(Bundle savedInstanceState) {
- super.onCreate(savedInstanceState);
- setContentView(R.layout.main);
- btnListener = new BtnListener();
- txtInfo = (TextView) findViewById(R.id.txtInfo);
- btnPing = (Button) findViewById(R.id.btnPing);
- btnPing.setOnClickListener(btnListener);
- btnConnect = (Button) findViewById(R.id.btnConnect);
- btnConnect.setOnClickListener(btnListener);
- btnClear = (Button) findViewById(R.id.btnClear);
- btnClear.setOnClickListener(btnListener);
- }
- /**
- * @param param
- * 指定的域名如(www.google.com)或IP地址。
- */
- private void doPing(final String param) {
- new Thread() {
- public void run() {
- String line = "";
- InputStream is = null;
- try {
- line = "/nping -c 1 " + param;
- // -c 1:表示ping的次数为1次。
- Process p = Runtime.getRuntime().exec("ping -c 1 www.google.com");
- // 等待该命令执行完毕。
- int status = p.waitFor();
- if (status == 0) {
- // 正常退出
- line += "Pass";
- } else {
- // 异常退出
- line += "Fail: Host unreachable";
- }
- is = p.getInputStream();
- byte[] data = new byte[is.available()];
- is.read(data);
- line += "/n" + new String(data);
- } catch (UnknownHostException e) {
- line += "Fail: Unknown Host";
- } catch (IOException e) {
- line += "Fail: IOException";
- } catch (InterruptedException e) {
- line += "Fail: InterruptedException";
- }
- Message msg = new Message();
- msg.what = APPEND_TEXT;
- msg.obj = line;
- handler.sendMessage(msg);
- }
- }.start();
- }
- private void go2Network() {
- new Thread() {
- public void run() {
- String line = "";
- URL url = null;
- HttpURLConnection httpConn = null;
- InputStream is = null;
- try {
- url = new URL("http://www.sodino.com/index.html");
- // Log.d("ANDROID_LAB", "Protocol=" + new
- // URL("https://www.sodino.com").getProtocol());
- // 需要android.permission.ACCESS_NETWORK_STATE
- NetworkInfo networkInfo = ((ConnectivityManager) getSystemService(Context.CONNECTIVITY_SERVICE))
- .getActiveNetworkInfo();
- // 如果是使用的运营商网络
- if (networkInfo.getType() == ConnectivityManager.TYPE_MOBILE) {
- // 获取默认代理主机ip
- String host = android.net.Proxy.getDefaultHost();
- // 获取端口
- int port = android.net.Proxy.getDefaultPort();
- if (host != null && port != -1) {
- line += "/nhost[" + host + "] port[" + port + "]";
- // 封装代理連接主机IP与端口号。
- InetSocketAddress inetAddress = new InetSocketAddress(host, port);
- // 根据URL链接获取代理类型,本链接适用于TYPE.HTTP
- java.net.Proxy.Type proxyType = java.net.Proxy.Type.valueOf(url
- .getProtocol().toUpperCase());
- java.net.Proxy javaProxy = new java.net.Proxy(proxyType, inetAddress);
- httpConn = (HttpURLConnection) url.openConnection(javaProxy);
- } else {
- httpConn = (HttpURLConnection) url.openConnection();
- }
- } else {
- httpConn = (HttpURLConnection) url.openConnection();
- }
- httpConn.connect();
- int length = httpConn.getContentLength();
- byte[] data = new byte[length];
- String encoding = httpConn.getContentEncoding();
- line += "/nlength=" + length + " encoding=" + encoding;
- is = httpConn.getInputStream();
- is.read(data);
- String content = null;
- if (encoding != null) {
- content = new String(data, encoding);
- } else {
- content = new String(data);
- }
- line += "/nContent[/n" + content + "/n]";
- Message msg = new Message();
- msg.what = APPEND_TEXT;
- msg.obj = line;
- handler.sendMessage(msg);
- } catch (IOException ie) {
- ie.printStackTrace();
- } finally {
- try {
- if (is != null) {
- is.close();
- }
- if (httpConn != null) {
- httpConn.disconnect();
- }
- } catch (IOException ie) {
- ie.printStackTrace();
- }
- }
- }
- }.start();
- }
- class BtnListener implements Button.OnClickListener {
- public void onClick(View view) {
- if (view == btnPing) {
- // doPing("www.google.com");
- doPing("10.0.0.172");
- } else if (view == btnConnect) {
- go2Network();
- } else if (view == btnClear) {
- Message msg = new Message();
- msg.what = CLEAR_TEXT;
- handler.sendMessage(msg);
- }
- }
- }
- }
如此,悲剧的程序员解决了不同网络状态下如何保证正常链接的问题。
最后补充下:Android手机在CMWAP上要能够正常上网,除了设置一大堆代理数据外,还需进入拨号器下按"*#*#4636#*#*"→Phone Information下拉到最后后有个“Toggle DNS Check”,将其设置为allow
这篇关于正确地访问网络资源----Proxy的使用的文章就介绍到这儿,希望我们推荐的文章对编程师们有所帮助!


