本文主要是介绍flutter使用qr_code_scanner扫描二维码,希望对大家解决编程问题提供一定的参考价值,需要的开发者们随着小编来一起学习吧!

qr_code_scanner仓库地址:qr_code_scanner | Flutter Package
需要添加android和ios的相机权限和本地相册权限:
android中添加权限:
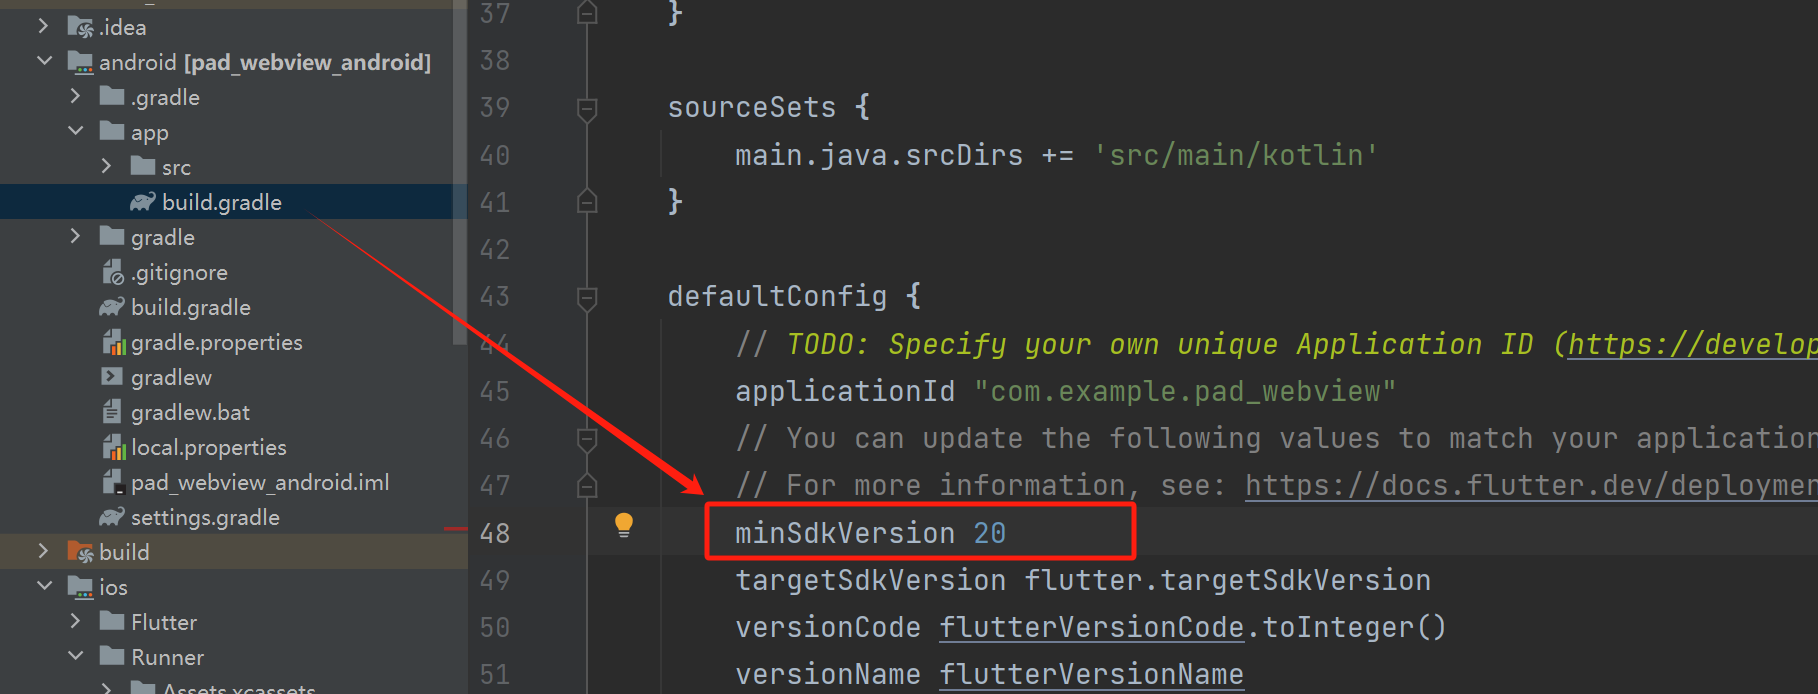
在android\app\build.gradle中修改:minSdkVersion 20
并且在android/app/src/main/AndroidManifest.xml中添加权限:
<uses-featureandroid:name="android.hardware.camera"android:required="false" /><uses-permission android:name="android.permission.CAMERA" /><uses-permission android:name="android.permission.WRITE_EXTERNAL_STORAGE"/><uses-permission android:name="android.permission.READ_EXTERNAL_STORAGE"/>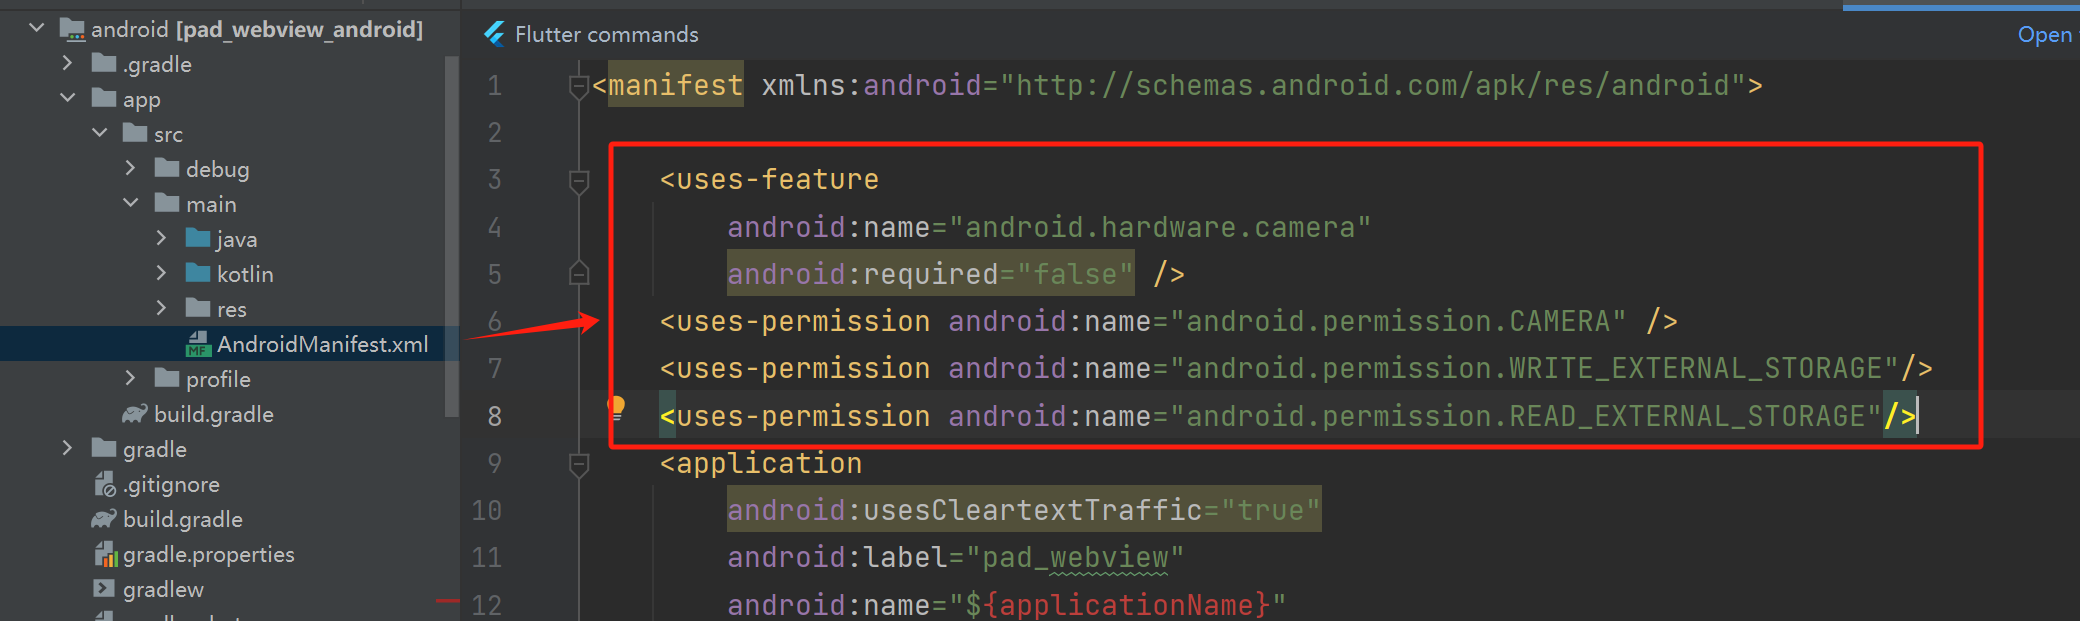
ios添加权限
在ios/Runner/Info.plist中添加权限
<key>NSCameraUsageDescription</key>
<string>Your Description</string><key>io.flutter.embedded_views_preview</key>
<string>YES</string>

运行demo
import 'dart:developer';
import 'dart:io';
import 'package:flutter/foundation.dart';
import 'package:flutter/material.dart';
import 'package:qr_code_scanner/qr_code_scanner.dart';void main() => runApp(const MaterialApp(home: MyHome()));class MyHome extends StatelessWidget {const MyHome({Key? key}) : super(key: key);@overrideWidget build(BuildContext context) {return Scaffold(appBar: AppBar(title: const Text('Flutter Demo Home Page')),body: Center(child: ElevatedButton(onPressed: () {Navigator.of(context).push(MaterialPageRoute(builder: (context) => const QRViewExample(),));},child: const Text('qrView'),),),);}
}class QRViewExample extends StatefulWidget {const QRViewExample({Key? key}) : super(key: key);@overrideState<StatefulWidget> createState() => _QRViewExampleState();
}class _QRViewExampleState extends State<QRViewExample> {Barcode? result;QRViewController? controller;final GlobalKey qrKey = GlobalKey(debugLabel: 'QR');// In order to get hot reload to work we need to pause the camera if the platform// is android, or resume the camera if the platform is iOS.@overridevoid reassemble() {super.reassemble();if (Platform.isAndroid) {controller!.pauseCamera();}controller!.resumeCamera();}@overrideWidget build(BuildContext context) {return Scaffold(body: Column(children: <Widget>[Expanded(flex: 4, child: _buildQrView(context)),Expanded(flex: 1,child: FittedBox(fit: BoxFit.contain,child: Column(mainAxisAlignment: MainAxisAlignment.spaceEvenly,children: <Widget>[if (result != null)Text('Barcode Type: ${describeEnum(result!.format)} Data: ${result!.code}')elseconst Text('Scan a code'),Row(mainAxisAlignment: MainAxisAlignment.center,crossAxisAlignment: CrossAxisAlignment.center,children: <Widget>[Container(margin: const EdgeInsets.all(8),child: ElevatedButton(onPressed: () async {await controller?.toggleFlash();setState(() {});},child: FutureBuilder(future: controller?.getFlashStatus(),builder: (context, snapshot) {return Text('Flash: ${snapshot.data}');},)),),Container(margin: const EdgeInsets.all(8),child: ElevatedButton(onPressed: () async {await controller?.flipCamera();setState(() {});},child: FutureBuilder(future: controller?.getCameraInfo(),builder: (context, snapshot) {if (snapshot.data != null) {return Text('Camera facing ${describeEnum(snapshot.data!)}');} else {return const Text('loading');}},)),)],),Row(mainAxisAlignment: MainAxisAlignment.center,crossAxisAlignment: CrossAxisAlignment.center,children: <Widget>[Container(margin: const EdgeInsets.all(8),child: ElevatedButton(onPressed: () async {await controller?.pauseCamera();},child: const Text('pause',style: TextStyle(fontSize: 20)),),),Container(margin: const EdgeInsets.all(8),child: ElevatedButton(onPressed: () async {await controller?.resumeCamera();},child: const Text('resume',style: TextStyle(fontSize: 20)),),)],),],),),)],),);}Widget _buildQrView(BuildContext context) {// For this example we check how width or tall the device is and change the scanArea and overlay accordingly.var scanArea = (MediaQuery.of(context).size.width < 400 ||MediaQuery.of(context).size.height < 400)? 150.0: 300.0;// To ensure the Scanner view is properly sizes after rotation// we need to listen for Flutter SizeChanged notification and update controllerreturn QRView(key: qrKey,onQRViewCreated: _onQRViewCreated,overlay: QrScannerOverlayShape(borderColor: Colors.red,borderRadius: 10,borderLength: 30,borderWidth: 10,cutOutSize: scanArea),onPermissionSet: (ctrl, p) => _onPermissionSet(context, ctrl, p),);}void _onQRViewCreated(QRViewController controller) {setState(() {this.controller = controller;});controller.scannedDataStream.listen((scanData) {setState(() {result = scanData;});});}void _onPermissionSet(BuildContext context, QRViewController ctrl, bool p) {log('${DateTime.now().toIso8601String()}_onPermissionSet $p');if (!p) {ScaffoldMessenger.of(context).showSnackBar(const SnackBar(content: Text('no Permission')),);}}@overridevoid dispose() {controller?.dispose();super.dispose();}
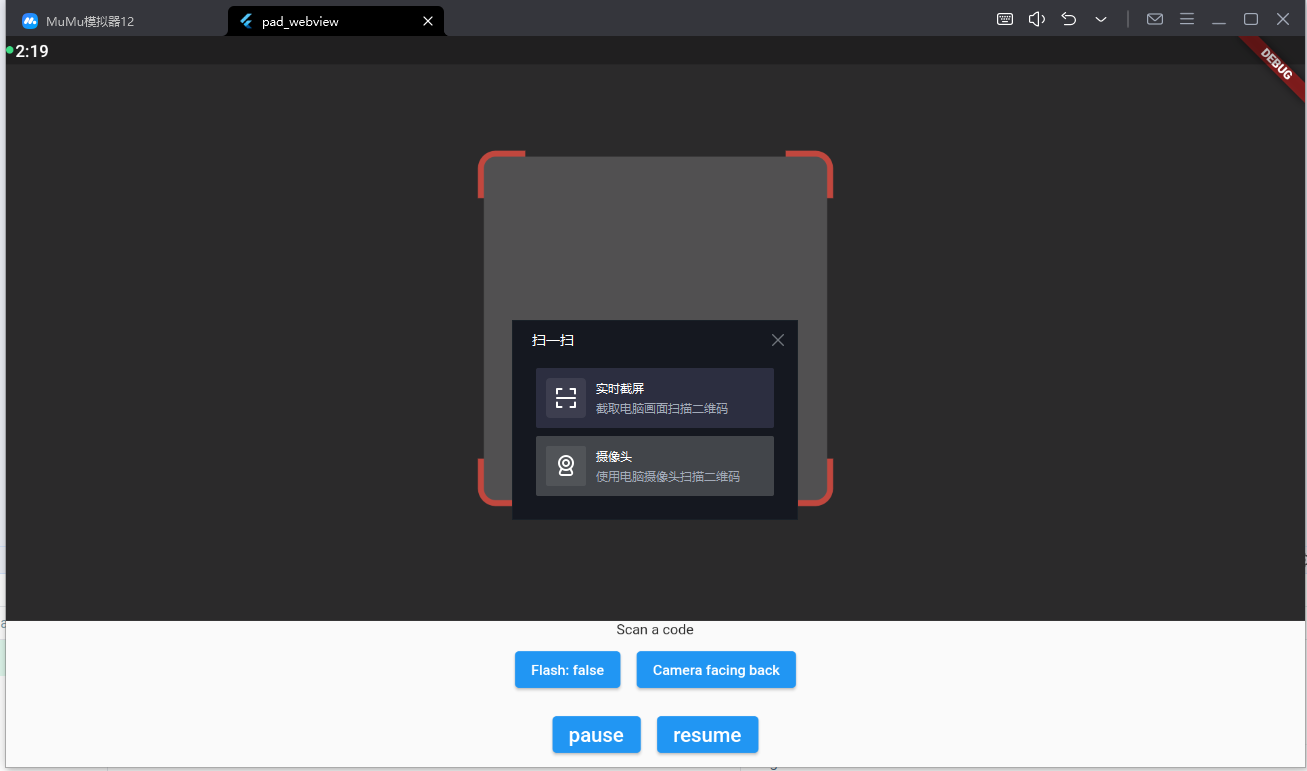
}最后实现的效果:
这篇关于flutter使用qr_code_scanner扫描二维码的文章就介绍到这儿,希望我们推荐的文章对编程师们有所帮助!


