本文主要是介绍Python使用zdppy_es国产框架操作Elasticsearch实现增删改查,希望对大家解决编程问题提供一定的参考价值,需要的开发者们随着小编来一起学习吧!
Python使用zdppy_es国产框架操作Elasticsearch实现增删改查
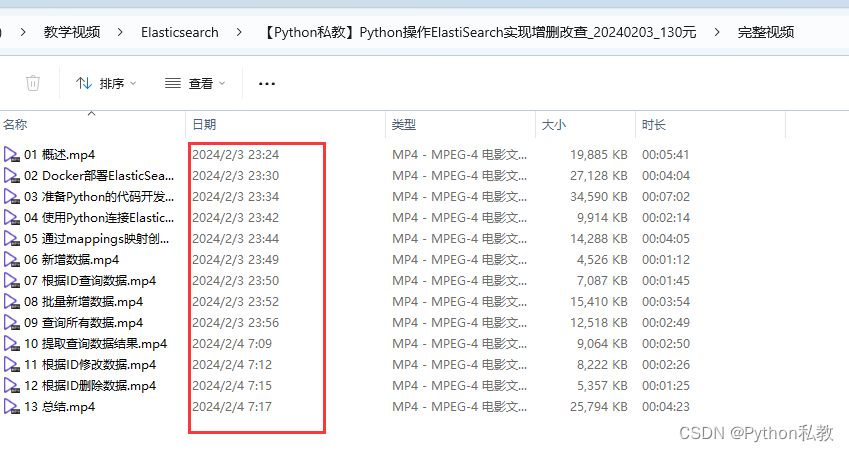
本套教程配套有录播课程和私教课程,欢迎私信我。

Docker部署ElasticSearch7
创建基本容器
docker run -itd --name elasticsearch -p 9200:9200 -e "discovery.type=single-node" -e ES_JAVA_OPTS="-Xms2g -Xmx2g" elasticsearch:7.17.17
配置账号密码
容器中配置文件的路径:
/usr/share/elasticsearch/config/elasticsearch.yml
把配置文件复制出来:
# 准备目录
sudo mkdir -p /docker
sudo chmod 777 -R /docker
mkdir -p /docker/elasticsearch/config
mkdir -p /docker/elasticsearch/data
mkdir -p /docker/elasticsearch/log# 拷贝配置文件
docker cp elasticsearch:/usr/share/elasticsearch/config/elasticsearch.yml /docker/elasticsearch/config/elasticsearch.yml
将配置文件修改为如下内容:
cluster.name: "docker-cluster"
network.host: 0.0.0.0
http.cors.enabled: true
http.cors.allow-origin: "*"
# 此处开启xpack
xpack.security.enabled: true
把本机的配置文件复制到容器里面:
docker cp /docker/elasticsearch/config/elasticsearch.yml elasticsearch:/usr/share/elasticsearch/config/elasticsearch.yml
重启ES服务:
docker restart elasticsearch
进入容器,设置es的密码:
docker exec -it elasticsearch bash
/usr/share/elasticsearch/bin/elasticsearch-setup-passwords interactive
执行上面的命令以后,输入y,会有如下提示,全都输入:zhangdapeng520
Please confirm that you would like to continue [y/N]yEnter password for [elastic]:
Reenter password for [elastic]:
Enter password for [apm_system]:
Reenter password for [apm_system]:
Passwords do not match.
Try again.
Enter password for [apm_system]:
Reenter password for [apm_system]:
Enter password for [kibana_system]:
Reenter password for [kibana_system]:
Enter password for [logstash_system]:
Reenter password for [logstash_system]:
Enter password for [beats_system]:
Reenter password for [beats_system]:
Enter password for [remote_monitoring_user]:
Reenter password for [remote_monitoring_user]:
Changed password for user [apm_system]
Changed password for user [kibana_system]
Changed password for user [kibana]
Changed password for user [logstash_system]
Changed password for user [beats_system]
Changed password for user [remote_monitoring_user]
Changed password for user [elastic]
将会得到如下用户名和密码:
elastic
zhangdapeng520apm_system
zhangdapeng520kibana_system
zhangdapeng520logstash_system
zhangdapeng520beats_system
zhangdapeng520remote_monitoring_user
zhangdapeng520
在宿主机中测试是否成功:
# 不带用户名密码
curl localhost:9200# 带用户名密码
curl localhost:9200 -u elastic
建立连接
from es import Elasticsearchauth = ("elastic", "zhangdapeng520")
es = Elasticsearch("http://192.168.234.128:9200/", basic_auth=auth)
print(es.info())
创建索引
from es import Elasticsearch# 连接es
auth = ("elastic", "zhangdapeng520")
edb = Elasticsearch("http://192.168.234.128:9200/", basic_auth=auth)# 创建索引
index = "user"
mappings = {"properties": {"id": {"type": "integer"},"name": {"type": "text"},"age": {"type": "integer"},}
}
edb.indices.create(index=index, mappings=mappings)# 删除索引
edb.indices.delete(index=index)
新增数据
from es import Elasticsearch# 连接es
auth = ("elastic", "zhangdapeng520")
edb = Elasticsearch("http://192.168.234.128:9200/", basic_auth=auth)# 创建索引
index = "user"
mappings = {"properties": {"id": {"type": "integer"},"name": {"type": "text"},"age": {"type": "integer"},}
}
edb.indices.create(index=index, mappings=mappings)# 添加数据
edb.index(index=index,id="1",document={"id": 1,"name": "张三","age": 23,}
)# 删除索引
edb.indices.delete(index=index)
根据ID查询数据
from es import Elasticsearch# 连接es
auth = ("elastic", "zhangdapeng520")
edb = Elasticsearch("http://192.168.234.128:9200/", basic_auth=auth)# 创建索引
index = "user"
mappings = {"properties": {"id": {"type": "integer"},"name": {"type": "text"},"age": {"type": "integer"},}
}
edb.indices.create(index=index, mappings=mappings)# 添加数据
edb.index(index=index,id="1",document={"id": 1,"name": "张三","age": 23,}
)# 查询数据
resp = edb.get(index=index, id="1")
print(resp["_source"])# 删除索引
edb.indices.delete(index=index)
批量新增数据
from es import Elasticsearch# 连接es
auth = ("elastic", "zhangdapeng520")
edb = Elasticsearch("http://192.168.234.128:9200/", basic_auth=auth)# 创建索引
index = "user"
mappings = {"properties": {"id": {"type": "integer"},"name": {"type": "text"},"age": {"type": "integer"},}
}
edb.indices.create(index=index, mappings=mappings)# 添加数据
data = [{"id": 1,"name": "张三1","age": 23,},{"id": 2,"name": "张三2","age": 23,},{"id": 3,"name": "张三3","age": 23,},
]
new_data = []
for u in data:new_data.append({"index": {"_index": index, "_id": f"{u.get('id')}"}})new_data.append(u)
edb.bulk(index=index,operations=new_data,refresh=True,
)# 查询数据
resp = edb.get(index=index, id="1")
print(resp["_source"])
resp = edb.get(index=index, id="2")
print(resp["_source"])
resp = edb.get(index=index, id="3")
print(resp["_source"])# 删除索引
edb.indices.delete(index=index)
查询所有数据
from es import Elasticsearch# 连接es
auth = ("elastic", "zhangdapeng520")
edb = Elasticsearch("http://192.168.234.128:9200/", basic_auth=auth)# 创建索引
index = "user"
mappings = {"properties": {"id": {"type": "integer"},"name": {"type": "text"},"age": {"type": "integer"},}
}
edb.indices.create(index=index, mappings=mappings)# 添加数据
data = [{"id": 1,"name": "张三1","age": 23,},{"id": 2,"name": "张三2","age": 23,},{"id": 3,"name": "张三3","age": 23,},
]
new_data = []
for u in data:new_data.append({"index": {"_index": index, "_id": f"{u.get('id')}"}})new_data.append(u)
edb.bulk(index=index,operations=new_data,refresh=True,
)# 查询数据
r = edb.search(index=index,query={"match_all": {}},
)
print(r)
print(r.get("hits").get("hits"))# 删除索引
edb.indices.delete(index=index)
提取搜索结果
from es import Elasticsearch# 连接es
auth = ("elastic", "zhangdapeng520")
edb = Elasticsearch("http://192.168.234.128:9200/", basic_auth=auth)# 创建索引
index = "user"
mappings = {"properties": {"id": {"type": "integer"},"name": {"type": "text"},"age": {"type": "integer"},}
}
edb.indices.create(index=index, mappings=mappings)# 添加数据
data = [{"id": 1,"name": "张三1","age": 23,},{"id": 2,"name": "张三2","age": 23,},{"id": 3,"name": "张三3","age": 23,},
]
new_data = []
for u in data:new_data.append({"index": {"_index": index, "_id": f"{u.get('id')}"}})new_data.append(u)
edb.bulk(index=index,operations=new_data,refresh=True,
)# 查询数据
r = edb.search(index=index,query={"match_all": {}},
)def get_search_data(data):new_data = []# 提取第一层hits = r.get("hits")if hits is None:return new_data# 提取第二层hits = hits.get("hits")if hits is None:return new_data# 提取第三层for hit in hits:new_data.append(hit.get("_source"))return new_dataprint(get_search_data(r))# 删除索引
edb.indices.delete(index=index)
根据ID修改数据
import timefrom es import Elasticsearch# 连接es
auth = ("elastic", "zhangdapeng520")
edb = Elasticsearch("http://192.168.234.128:9200/", basic_auth=auth)# 创建索引
index = "user"
mappings = {"properties": {"id": {"type": "integer"},"name": {"type": "text"},"age": {"type": "integer"},}
}
edb.indices.create(index=index, mappings=mappings)# 添加数据
data = [{"id": 1,"name": "张三1","age": 23,},{"id": 2,"name": "张三2","age": 23,},{"id": 3,"name": "张三3","age": 23,},
]
new_data = []
for u in data:new_data.append({"index": {"_index": index, "_id": f"{u.get('id')}"}})new_data.append(u)
edb.bulk(index=index,operations=new_data,refresh=True,
)# 修改
edb.update(index=index,id="1",doc={"id": "1","name": "张三333","age": 23,},
)# 查询数据
time.sleep(1)  # 等一会修改才会生效
r = edb.search(index=index,query={"match_all": {}},
)def get_search_data(data):new_data = []# 提取第一层hits = r.get("hits")if hits is None:return new_data# 提取第二层hits = hits.get("hits")if hits is None:return new_data# 提取第三层for hit in hits:new_data.append(hit.get("_source"))return new_dataprint(get_search_data(r))# 删除索引
edb.indices.delete(index=index)
根据ID删除数据
import timefrom es import Elasticsearch# 连接es
auth = ("elastic", "zhangdapeng520")
edb = Elasticsearch("http://192.168.234.128:9200/", basic_auth=auth)# 创建索引
index = "user"
mappings = {"properties": {"id": {"type": "integer"},"name": {"type": "text"},"age": {"type": "integer"},}
}
edb.indices.create(index=index, mappings=mappings)# 添加数据
data = [{"id": 1,"name": "张三1","age": 23,},{"id": 2,"name": "张三2","age": 23,},{"id": 3,"name": "张三3","age": 23,},
]
new_data = []
for u in data:new_data.append({"index": {"_index": index, "_id": f"{u.get('id')}"}})new_data.append(u)
edb.bulk(index=index,operations=new_data,refresh=True,
)# 删除
edb.delete(index=index, id="1")# 查询数据
time.sleep(1)  # 等一会修改才会生效
r = edb.search(index=index,query={"match_all": {}},
)def get_search_data(data):new_data = []# 提取第一层hits = r.get("hits")if hits is None:return new_data# 提取第二层hits = hits.get("hits")if hits is None:return new_data# 提取第三层for hit in hits:new_data.append(hit.get("_source"))return new_dataprint(get_search_data(r))# 删除索引
edb.indices.delete(index=index)
这篇关于Python使用zdppy_es国产框架操作Elasticsearch实现增删改查的文章就介绍到这儿,希望我们推荐的文章对编程师们有所帮助!


