本文主要是介绍基于Redis6.0 tracking客户端缓存实现本地缓存,希望对大家解决编程问题提供一定的参考价值,需要的开发者们随着小编来一起学习吧!
自己搭建了个小博客,本文与这篇文章同步:
基于Redis6.0 tracking客户端缓存实现本地缓存
1.需求背景
有一种业务场景:数据变更频率低、数据量不大,实时性要求低,但是查询频率很高。现在大部分的Java应用都是分布式,所以常见的做法是使用Redis远程缓存方案,但是那样的话当访问数据频率很频繁的时候我们的网络I/O开销会很高。如果换成本地缓存的话效果会更好,因为本地缓存没有网络开销,访问速度快,但受限于内存,不适合存储大量数据。但是如果使用本地缓存,如何能保证多个应用实例的本地缓存和远程缓存的数据一致性?
所以我们的需求就变更为我们需要使用本地缓存,但是当Redis远程缓存出现数据变更的时候,所有Java应用实例的本地缓存都需要得到通知并刷新它本地缓存的数据。
到了Redis6+后,官方推出了一个Client-side caching in Redis
客户端缓存是一种用于创建高性能服务的技术,它可以利用应用服务器上的可用内存(这些服务器通常是一些不同于数据库服务器的节点),在应用服务端商直接存储数据库中的一些信息。与访问数据库等网络服务相比,访问本地内存所需要的时间消耗要少得多,因此这个模式可以大大缩短应用程序获取数据的延迟,同时也能减轻数据库的负载压力。
2.项目实战
pom依赖
redis6.x才开始支持客户端缓存功能,lettuce依赖也需要使用6.x的版本
<!--SpringDataRedis的2.3.9版本并不支持Redis 6.2提供的GEOSEARCH命令,因此我们需要提示其版本,修改自己的POM-->
<dependency><groupId>org.springframework.data</groupId><artifactId>spring-data-redis</artifactId><version>2.6.2</version>
</dependency><dependency><groupId>io.lettuce</groupId><artifactId>lettuce-core</artifactId><version>6.1.6.RELEASE</version>
</dependency><dependency><groupId>org.springframework.boot</groupId><artifactId>spring-boot-starter-data-redis</artifactId><version>2.3.9.RELEASE</version>
</dependency><dependency><groupId>com.github.ben-manes.caffeine</groupId><artifactId>caffeine</artifactId><version>2.8.8</version>
</dependency>
CaffeineCacheAccessor
package cn.edu.gxust.redis.context;import com.github.benmanes.caffeine.cache.Cache;
import io.lettuce.core.support.caching.CacheAccessor;
import lombok.extern.slf4j.Slf4j;/*** @author zhaoyijie* @since 2024/1/21 10:07*/
@Slf4j
public class CaffeineCacheAccessor implements CacheAccessor {private Cache cache;public CaffeineCacheAccessor(Cache cache) {this.cache = cache;}@Overridepublic Object get(Object key) {log.info("caffeine get => {}", key);return cache.getIfPresent(key);}@Overridepublic void put(Object key, Object value) {log.info("caffeine put=>{}:{}", key, value);cache.put(key, value);}@Overridepublic void evict(Object key) {log.info("caffeine evict => {}", key);cache.invalidate(key);}
}
CacheFrontendContext
package cn.edu.gxust.redis.context;import com.github.benmanes.caffeine.cache.Cache;
import io.lettuce.core.RedisClient;
import io.lettuce.core.TrackingArgs;
import io.lettuce.core.api.StatefulRedisConnection;
import io.lettuce.core.codec.StringCodec;
import io.lettuce.core.support.caching.CacheFrontend;
import io.lettuce.core.support.caching.ClientSideCaching;
import lombok.Getter;
import lombok.extern.slf4j.Slf4j;import java.util.List;/*** @author zhaoyijie* @since 2024/1/21 09:57*/
@Slf4j
public class CacheFrontendContext {@Getterprivate CacheFrontend cacheFrontend;private final RedisClient redisClient;private final Cache cache;private StatefulRedisConnection<String, String> connection;public CacheFrontendContext(RedisClient redisClient, Cache cache) {this.redisClient = redisClient;this.cache = cache;}public void check() {if (connection != null) {if (connection.isOpen()) {return;}}try {connection = redisClient.connect();this.cacheFrontend = ClientSideCaching.enable(new CaffeineCacheAccessor(cache), connection, TrackingArgs.Builder.enabled());connection.addListener(message -> {List<Object> content = message.getContent(StringCodec.UTF8::decodeKey);log.info("type:{},content:{}", message.getType(), content);if (message.getType().equals("invalidate")) {List<String> keys = (List<String>) content.get(1);for (String key : keys) {cache.invalidate(key);}}});log.warn("The redis client side connection had been reconnected.");} catch (Exception e) {log.error("The redis client side connection 'had been disconnected,waiting reconnect...");}}}
RedisClientCacheConfiguration
package cn.edu.gxust.redis.config;import cn.edu.gxust.redis.context.CacheFrontendContext;
import com.github.benmanes.caffeine.cache.Cache;
import com.github.benmanes.caffeine.cache.Caffeine;
import io.lettuce.core.RedisClient;
import lombok.extern.slf4j.Slf4j;
import org.springframework.beans.factory.annotation.Autowired;
import org.springframework.boot.CommandLineRunner;
import org.springframework.context.annotation.Bean;
import org.springframework.context.annotation.Configuration;
import org.springframework.data.redis.connection.lettuce.LettuceConnectionFactory;import java.util.concurrent.TimeUnit;/*** @author zhaoyijie* @since 2024/1/21 09:47*/
@Slf4j
@Configuration
public class RedisClientCacheConfiguration {@Beanpublic CommandLineRunner init(@Autowired CacheFrontendContext cacheFrontendContext) {return args -> {while (true) {cacheFrontendContext.check();Thread.sleep(1000);}};}@Beanpublic Cache<String, Object> localCache() {return Caffeine.newBuilder()//设置最后一次写入或访间后经过固定时间过期.expireAfterWrite(5, TimeUnit.MINUTES)//初始的缓存空间大小.initialCapacity(100)//缓存的最大条数.maximumSize(1000).build();}@Beanpublic RedisClient redisClient(LettuceConnectionFactory lettuceConnectionFactory) {return (RedisClient) lettuceConnectionFactory.getNativeClient();}@Beanpublic CacheFrontendContext cacheFrontendContext(@Autowired RedisClient redisClient, @Autowired Cache cache) {return new CacheFrontendContext(redisClient, cache);}
}
RedisTestController
package cn.edu.gxust.redis.controller;import cn.edu.gxust.redis.context.CacheFrontendContext;
import io.swagger.annotations.Api;
import io.swagger.annotations.ApiOperation;
import lombok.extern.slf4j.Slf4j;
import org.springframework.beans.factory.annotation.Autowired;
import org.springframework.data.geo.Distance;
import org.springframework.data.geo.GeoResult;
import org.springframework.data.geo.GeoResults;
import org.springframework.data.geo.Point;
import org.springframework.data.redis.connection.BitFieldSubCommands;
import org.springframework.data.redis.connection.RedisGeoCommands;
import org.springframework.data.redis.core.GeoOperations;
import org.springframework.data.redis.core.RedisTemplate;
import org.springframework.data.redis.core.ZSetOperations;
import org.springframework.data.redis.domain.geo.GeoReference;
import org.springframework.transaction.annotation.Transactional;
import org.springframework.web.bind.annotation.GetMapping;
import org.springframework.web.bind.annotation.PostMapping;
import org.springframework.web.bind.annotation.RequestMapping;
import org.springframework.web.bind.annotation.RequestParam;
import org.springframework.web.bind.annotation.RestController;import java.time.LocalDateTime;
import java.time.Month;
import java.util.ArrayList;
import java.util.List;
import java.util.Set;/*** @author zhaoyijie* @since 2023/11/24 14:54*/
@Api(tags = "redis相关")
@Slf4j
@RestController
@RequestMapping(value = "/redis/test/api")
public class RedisTestController {@Autowiredprivate CacheFrontendContext cacheFrontendContext;@ApiOperation(value = "测试2")@GetMapping(value = "/test")public String test2(@RequestParam(value = "key") String key, @RequestParam(value = "value") String value) {redisTemplate.opsForValue().set(key, value);Object o = cacheFrontendContext.getCacheFrontend().get(key);return o == null ? null : o.toString();}@ApiOperation(value = "测试3")@GetMapping(value = "/test3")public String test3(@RequestParam(value = "key") String key) {Object o = cacheFrontendContext.getCacheFrontend().get(key);return o == null ? null : o.toString();}
}
验证
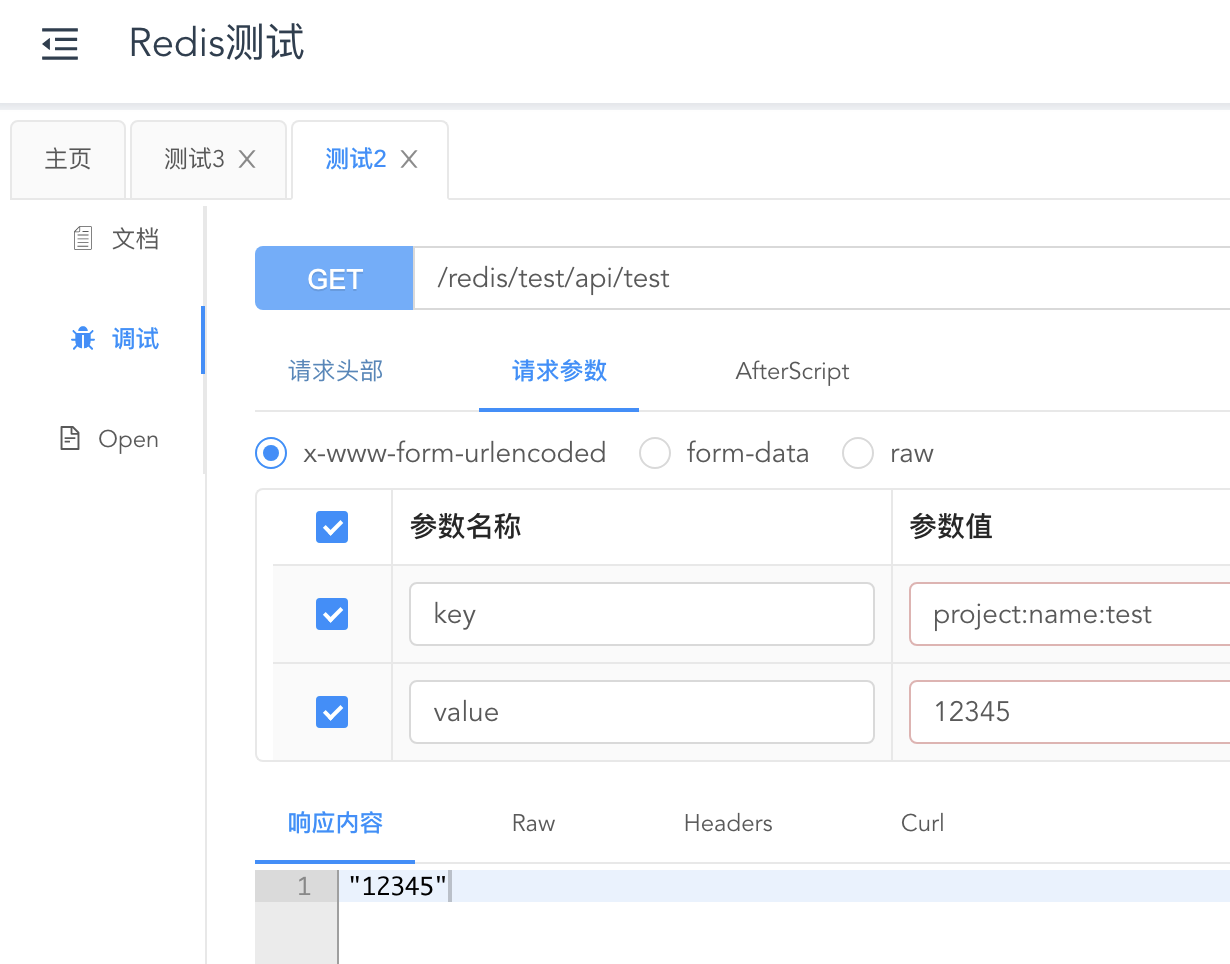
首先先往里面写数据:
然后利用redis管理工具修改数据:
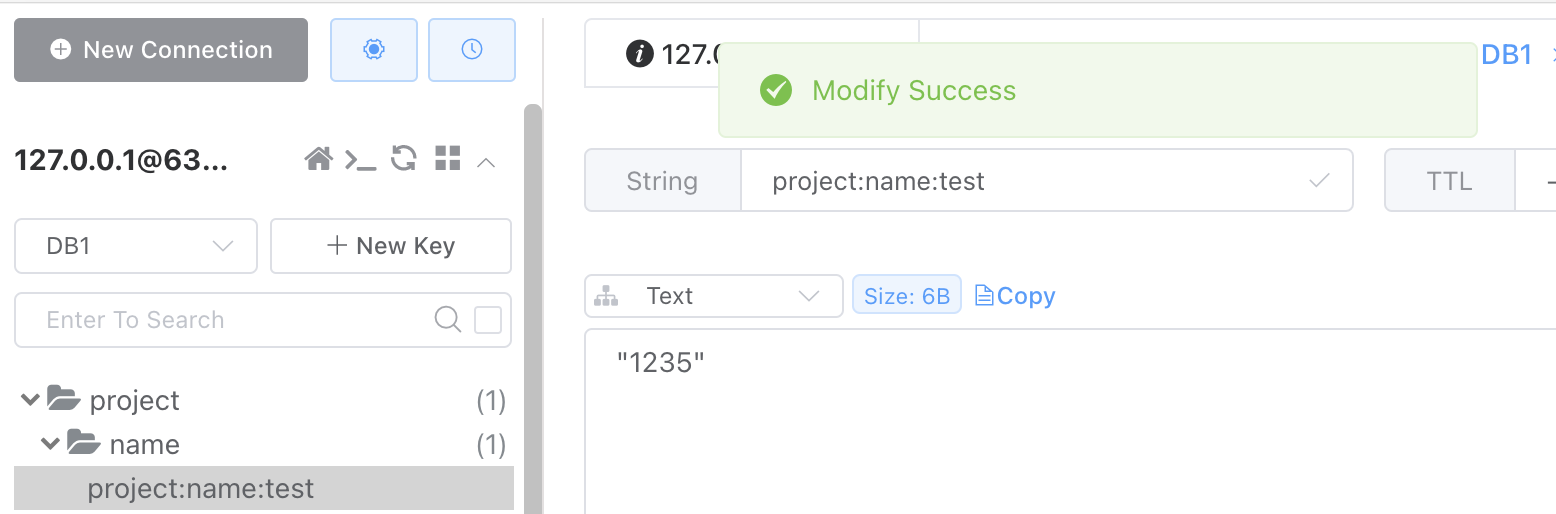
查看控制台打印信息:

我们可以发现Redis客户端数据发生变更的时候,本地缓存这边接受到了数据变更的消息,然后将变更数据的key置为了失效。
我们获取下数据:
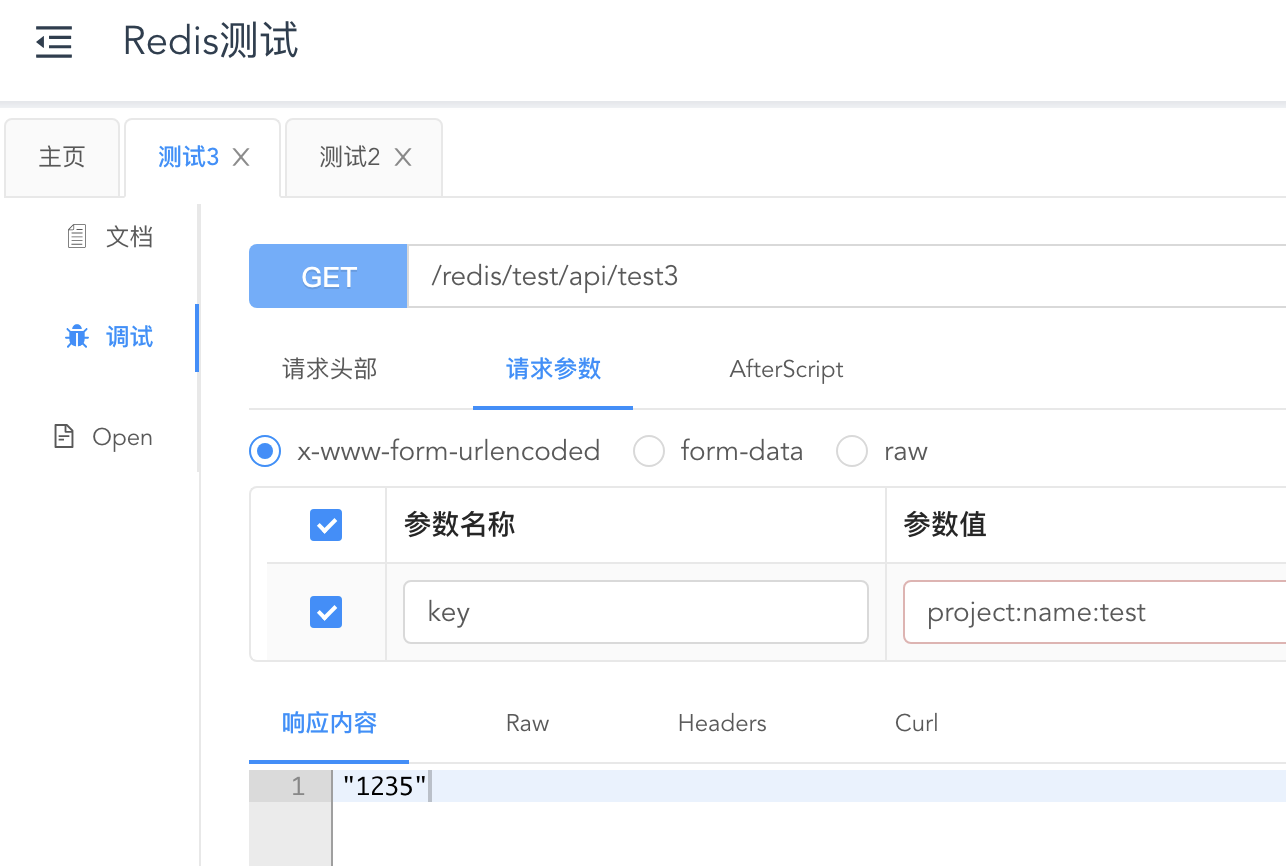
这次我们拿到的数据为最新的数据
查看下控制台打印:

可以得知key失效后,我们再次获取数据的时候,本地缓存从Redis远程缓存中获取到数据先返回数据再put进本地缓存里
最后我们可以得到结果,当远程缓存的数据发生变更的时候,本地缓存就会收到变更通知,并更新本地缓存的数据。
但是注意:
上面说的应用必须在Redis单机模式下(或者主从、Sentinel模式),遗憾的是,目前发现Lettuce(6.1.5版本)还没有支持Redis Cluster下的客户端缓存。
开启客户端缓存后,Redis连接不能断开。如果Redis连接断了,并且客户端自动重连,那么新的连接是没有开启Tracking机制的,该连接查询的键不会受到失效消息,后果很严重。
同样,开启Tracking的连接和查询缓存键的连接必须是同一个,不能使用A连接开启Tracking机制,使用B连接去查询缓存键(所以客户端不能使用连接池)
这篇关于基于Redis6.0 tracking客户端缓存实现本地缓存的文章就介绍到这儿,希望我们推荐的文章对编程师们有所帮助!


