本文主要是介绍Phantomjs+Java+springboot实现后端截图,希望对大家解决编程问题提供一定的参考价值,需要的开发者们随着小编来一起学习吧!
一、phantomjs介绍
(1)一个基于webkit内核的无界面浏览器,即没有UI界面,即它就是一个浏览器,只是其内的点击、翻页等人为相关操作需要程序设计实现。
(2)提供javascript API接口,即通过编写js程序可以直接与webkit内核交互,在此之上可以结合java语言等,通过java调用js等相关操作,从而解决了以前c/c++才能比较好的基于webkit开发优质采集器的限制。
(3)提供windows、linux、mac等不同os的安装使用包,也就是说可以在不同平台上二次开发采集项目或是自动项目测试等工作。
二、安装phantomjs
https://phantomjs.org/download.html
我下载的是phantomjs-2.1.1-windows版本,自行根据情况下载
下载完成后解压
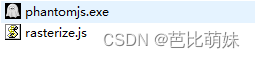
为方便使用,我将examples下面的rasterize.js复制到了bin目录下
之后可以通过cmd执行下面命令,进行测试,如果可以正常截图到D:/test.png,说明phantomjs软件没有问题,可以进行代码开发。
D:/phantomjs-2.1.1-windows/bin/phantomjs D:/phantomjs-2.1.1-windows/bin/rasterize.js https://www.bilibili.com/read/cv28388151/ D:/test.png三、Java代码实现截图
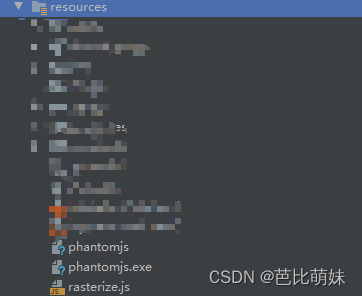
我将phantomjs .exe和rasterize.js放到了resources根目录下
CutPictureController.java
@GetMapping("/getCutPictureByPhantomjs")public void getCutPictureByPhantomjs(String url, HttpServletResponse response) {cutPictureService.getCutPictureByPhantomjs(url,response) ;}
CutPictureService.java
我这里实现的方案是将项目种的文件复制到对应系统的目录下,你也可以直接将phantomjs .exe和rasterize.js放到系统中,之后在代码里指定好路径就行。就不用我这么麻烦!
public void getCutPictureByPhantomjs(String url, HttpServletResponse response) {try {String os = System.getProperty("os.name").toLowerCase();ClassPathResource jsResource = new ClassPathResource("rasterize.js");InputStream jsInputStream = jsResource.getInputStream();String pluginPath ;String jsPath;String imagePath;Process process = null;if (os.contains("windows")) {ClassPathResource resource = new ClassPathResource("phantomjs.exe");InputStream pluginInputStream = resource.getInputStream();File pluginFile = new File("d:/" + "phantomjs.exe");if (!pluginFile.exists()) {FileOutputStream fileOutputStream = new FileOutputStream(pluginFile);IOUtils.copy(pluginInputStream, fileOutputStream);//复制到windows的对应路径fileOutputStream.close();}pluginPath = pluginFile.getAbsolutePath();//返回本地文件路径File jsFile = new File("d:/" + "rasterize.js");if (!jsFile.exists()) {FileOutputStream fileOutputStream = new FileOutputStream(jsFile);IOUtils.copy(jsInputStream, fileOutputStream);//复制到liunx的对应路径fileOutputStream.close();}jsPath = jsFile.getAbsolutePath();imagePath="d:/test.png";process = Runtime.getRuntime().exec(pluginPath + " " + jsPath +" " + url+" " + imagePath);} else {ClassPathResource resource = new ClassPathResource("phantomjs");InputStream pluginInputStream = resource.getInputStream();File pluginFile = new File("/tmp/" + "phantomjs");if (!pluginFile.exists()) {FileOutputStream fileOutputStream = new FileOutputStream(pluginFile);IOUtils.copy(pluginInputStream, fileOutputStream);//复制到liunx的对应路径fileOutputStream.close();Runtime.getRuntime().exec("chmod -R 777 /tmp/phantomjs");//赋可执行去权限}pluginPath = pluginFile.getAbsolutePath();File jsFile = new File("/tmp/" + "rasterize.js");if (!jsFile.exists()) {FileOutputStream fileOutputStream = new FileOutputStream(jsFile);IOUtils.copy(jsInputStream, fileOutputStream);//复制到liunx的对应路径fileOutputStream.close();}jsPath = jsFile.getAbsolutePath();imagePath="/tmp/test.png";String pluginAtr = pluginPath + " " + jsPath +" " + url+" " + imagePath;process = Runtime.getRuntime().exec(pluginAtr);}InputStream inputStream = process.getInputStream();//用一个读输出流类去读InputStreamReader isr=new InputStreamReader(inputStream);//用缓冲器读行BufferedReader br=new BufferedReader(isr);String line=null;//直到读完为止while((line=br.readLine())!=null){log.info("message={}",line);}if (process.waitFor() != 0 && process.exitValue() == 1) {return ;}//给前端返回流用于图片下载FileInputStream fis = new FileInputStream(imagePath);response.setHeader("Content-Disposition","attachment;filename=test.jpg");OutputStream out = response.getOutputStream();byte[] buffer = new byte[1024];int length;while ((length = fis.read(buffer)) != -1) {out.write(buffer,0,length);}out.close();fis.close();} catch (Exception e) {e.printStackTrace();}}
到此,正常外网网页都可以实现截图,但是发现自己系统页面不行,因为需要登录,没地方这是参数,也可能是我了解的还不够深,不太会用,最后没用这种方法。使用了chromedriver去实现后端截图。
这篇关于Phantomjs+Java+springboot实现后端截图的文章就介绍到这儿,希望我们推荐的文章对编程师们有所帮助!


