本文主要是介绍【yolov5系列】将yolov5s模型部署到SigmaStar的9383芯片上,希望对大家解决编程问题提供一定的参考价值,需要的开发者们随着小编来一起学习吧!
今年年初,接触了星宸科技(sigmastar)的芯片9383,将深度学习模型进行部署,使用sigmastar的深度学习加速硬件IPU进行模型推理。这里简单记录下sigmastar相关内容。
补充说明,之前使用的是瑞芯微的芯片,他们将芯片的SDK等信息已经上传至github。sigmastar也已经上传,但目前在个人github账号下,具体的还是由供应商提供。
1 工具包获取
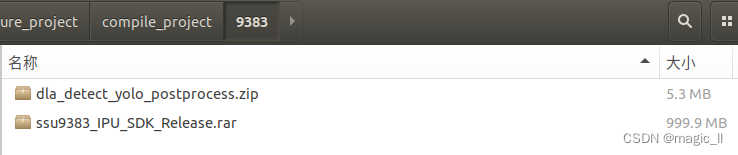
从别人手里获取到的包如下(只保留需要的内容)。
其中
IPU_SDK_Release:python上的转换模型的相关工程
dla_detect_yolo_postprocess:板端推理的C++的相关文件
在文件【IPU_SDK_Release/Sigmastar_SDK_vS3.0.2/SGS_IPU_SDK_vS3.0.2/doc/SDK_Doc_Release/index.html】中说明了sigmastar模型转换的环境的安装、已经相关转换流程和注意事项等。这里记录下如何转换onnx的流程,详细使用还是要看index.html的说明文档。
2 操作前需知
2.1 SDK介绍
SigmaStar模型为sim,全称Sigmastar IPU Model,查看工具使用 SGS_IPU_SDK/Netron/Netron Setup 5.3.5.exe 安装后打开。
本文中DLA与IPU指代同一个部件。即Sigmastar的深度学习加速硬件
SigmaStar DLA SDK主要包含以下工具:
- Convert Tool:
将TensorFlow、Keras、Caffe和ONNX框架的网络模型转换为 SigmaStar浮点网络模型(SGS Float file)
Convert Tool能根据硬件特性,将原网络框架的算子转换为SigmaStar DLA客制化算子,对网络模型无损优化;- Calibrator:
将SigmaStar浮点网络模型转化为 SigmaStar定点网络模型(SGS Fixed file);
Calibrator统计FeatureMap的取值,将SGS Float file量化为8bit / 16bit定点模型;- Compiler:
将SigmaStar定点网络模型转化为SigmaStar离线网络模型(SGS Offline cmd file);
Compiler将定点网络模型文件转化为离线指令文件,后缀【.img】能够直接部署在SigmaStar的硬件产品上;- Simulator:
Simulator提供模拟SigmaStar硬件的PC端模拟器,能够完整运行SGS Float file / SGS Fixed file / SGS Offline cmd file,加快网络网络模型的调试部署;- SGS Netron:
SGS Netron不仅能够查看SigmaStar的【SGS Float file / SGS Fixed file】模型,还能够查看原生框架的模型;
2.2 算子支持
在文档中陈列了caffe/TensorFlow/Onnx的支持的算子,以及模型性能优化规则。可关注了解下。
针对yolov5中的算子,sigmastar全部支持,也就是转换毫无波折。(yolov8需要修改些操作)


3 环境搭建与模型转换
3.1 环境搭建
电脑系统:ubuntu18。
在文档中,展示了环境的系统依赖。在自己电脑使用比较久了,没有特意安装这些。如果是新使用的电脑,将文档中的系统依赖环境安装一遍。我这里直接安装python的所需环境。
首先进入目录【IPU_SDK_Release/Sigmastar_SDK_vS3.0.2/SGS_IPU_SDK_vS3.0.2】,执行安装命令:
conda create -n SIM9383 python=3.7
conda activate SIM9383
pip3 install -r Scripts/calibrator/setup/requirements.txt –i https://pypi.tuna.tsinghua.edu.cn/simple
3.2 转换模型的准备文件
在文件DirectoryDescription.txt中,可以看到该工程文件的整体结构布局。
我这里是coco数据集训练的yolov5s模型举例,所以在路径【SGS_IPU_SDK_vS3.0.2】下创建文件夹【ONNX_convert/demo/】,将转换所需的文件放置该路径下。(在路径ONNX_conver下,可存放多个项目的转换所需文件。这样放置的目的是为了简洁方便。)
文件的copy与创建
mkdir -p ONNX_convert/demo
mkdir -p ONNX_convert/demo/dataset
touch ONNX_convert/demo/input_config.ini
touch ONNX_convert/demo/preprocess.py
然后将coco的yolov5s.onnx模型和测试图片bus.jpg放置该路径【ONNX_convert/demo】
将量化图片放置【ONNX_convert/demo/dataset】,这里使用bus.jpg测试转换流程。
- dataset:存放量化所需图片,训练集取有代表性的100张
- bus.jpg:测试图片
- yolov5s_rk.onnx:训练好的模型。官方提供的yolov5s.onnx无法转通,但使用源码自己训练的yolov5.onnx可以转通(这个问题不想做深究)。为了通用例子举例,使用了之前rknn提供的yolov5.onnx举例说明
- input_config.ini:模型转换所需的配置文件
- preprocess.py:转定点模型时,所需的图片预处理文件
tree ONNX_convert/demo
创建文件的内容。
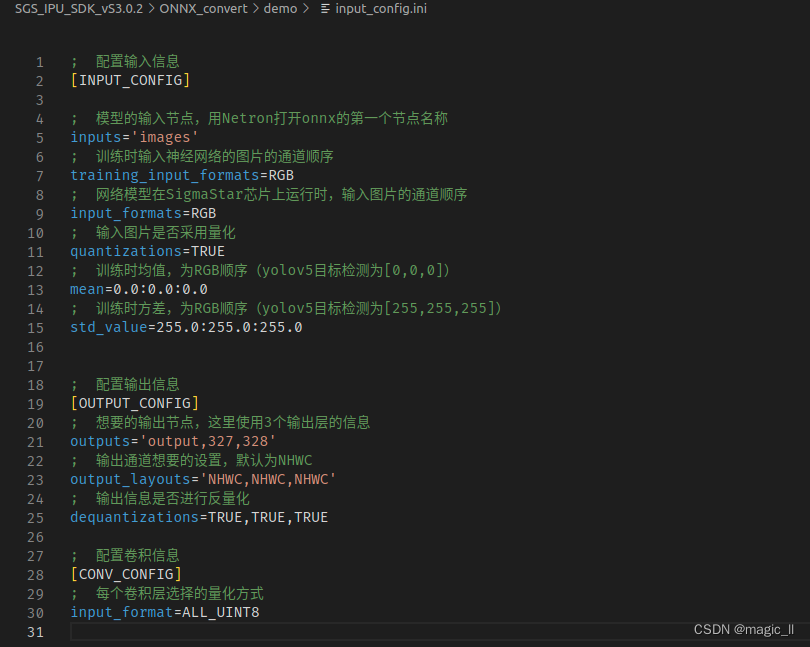
- input_config.ini:用于指定input tensor的配置信息文。
[INPUT_CONFIG] inputs='images' training_input_formats=RGB input_formats=RGB quantizations=TRUE mean=0.0:0.0:0.0 std_value=255.0:255.0:255.0[OUTPUT_CONFIG] outputs='output,327,328' output_layouts='NHWC,NHWC,NHWC' dequantizations=TRUE,TRUE,TRUE[CONV_CONFIG] input_format=ALL_UINT8- preprocess.py:用于指定input tensor的配置信息文。
一般的,这个脚本里面注意两点:图片的尺寸问题、均值方差的通道(这里的是BGR,input_config.ini 中的是RGB,当均值方差三通道数值不一致时,一定注意这里的设置)
这里对文档中提供的处理脚本做了简化,如果实际使用中有与yolov5的图片为其他格式,可仔细参考原文档# -*- coding: utf-8 -*-import cv2 import numpy as npdef get_image(img_path, norm=True, rgb=True, nchw=False):img = cv2.imread(img_path)if img is None:raise FileNotFoundError('No such image: {}'.format(img_path))img_float = img.astype('float32')img_norm = img_float## 如果提供的图片与模型输入图片大小不一致,这里需要设置大小并进行resize# resizeH, resizeW, resizeC = 640, 640, 3# img_norm = cv2.resize(img_float, (resizeW, resizeH), interpolation=cv2.INTER_LINEAR)## 注意这里的顺序和input_config.ini 中的mean/std的顺序问题mean_BGR=[0.0, 0.0, 0.0] std_BGR=[255.0, 255.0, 255.0]if norm:img_norm = (img - mean_BGR) / std_BGRimg_norm = img_norm.astype('float32')else:img_norm = np.round(img).astype('uint8')if rgb:img_norm = cv2.cvtColor(img_norm, cv2.COLOR_BGR2RGB)if nchw:# NCHWimg_norm = np.transpose(img_norm, axes=(2, 0, 1))return np.expand_dims(img_norm, 0)def image_preprocess(img_path, norm=True):return get_image(img_path, norm=norm)开始模型转换
a) 前三个阶段:模型转换如第一节描述,【浮点模型 (无损)】–> 【定点模型 (量化)】–> 【离线模型 (板端推理)】。
b)第四个阶段:转换后模型的仿真。这里只测试了最终的里面模型的推理效果。在第四个阶段,针对自己以上的设置,重新写了推理后的后处理(使用的rknn的后处理,也是为了两者的结果的对比)
c)说明:这里为为了不同的任务工程的模型方便转换,将4个阶段的模型转换写到一个bash脚本中(【SGS_IPU_SDK_vS3.0.2/export_SIM.sh】)。在自己新的工程第一次转换时,以下4个过程分别注释掉其他三个,运行看是否正常跑通,异常时这样方便定位是那个阶段存在问题。# ## demo inputpath='./ONNX_convert/demo/' exportpath='./ONNX_convert/SIM_demo/' ##导出模型的路径 ONNXname='yolov5s_rk' ## onnx模型名字 SIMname='yolov5_demo' ## 导出模型的命名 input_size='1,3,640,640' ## 模型的输入尺寸 dataset='dataset' ## 量化数据集的路径 test_image='bus.jpg' ## 测试图片mkdir ${exportpath}## step1: onnx->sim,将onnx模型转换为SGS浮点网络模型 python ./Scripts/ConvertTool/ConvertTool.py onnx \--input_shapes ${input_size} \--input_config ${inputpath}input_config.ini \--model_file ${inputpath}${ONNXname}.onnx \--output_file ${exportpath}${SIMname}.sim # step2: calibrator,将SigmaStar浮点网络模型转换为SigmaStar定点网络模型 python ./Scripts/calibrator/calibrator.py \--input_config ${inputpath}input_config.ini \--num_process 8 \-n ${inputpath}preprocess.py \-i ${inputpath}${dataset} \-m ${exportpath}${SIMname}.sim # step3:sim->img,将SigmaStar定点网络模型转换为SigmaStar离线网络模型 python ./Scripts/calibrator/compiler.py \-m ${exportpath}${SIMname}_fixed.sim## step4:pc仿真 python ./Scripts/calibrator/simulator.py \-c Detection \-t Offline \-n ${inputpath}preprocess.py \-i ${inputpath}${test_image} \-m ${exportpath}${SIMname}_fixed.sim_sgsimg.img \--draw_result ${exportpath}执行后的推理结果可视化在路径【./ONNX_convert/SIM_demo/】:
自己添加的后处理
源代码跑通 且不需要和 RK系列芯片的模型输出做对比,就不需要统一两个芯片的后处理,就不需要接下来的代码的修改。但要对比,需对齐后处理代码,具体的细节为如下。
创建文件Scripts/calibrator/utils/post_normal.py,内容为:import numpy as np import cv2BOX_THRESH = 0.3 NMS_THRESH = 0.5 CLASSES = None IMG_SIZE = Nonedef sigmoid(x):return 1 / (1 + np.exp(-x))def xywh2xyxy(x):# Convert [x, y, w, h] to [x1, y1, x2, y2]y = np.copy(x)y[:, 0] = x[:, 0] - x[:, 2] / 2 # top left xy[:, 1] = x[:, 1] - x[:, 3] / 2 # top left yy[:, 2] = x[:, 0] + x[:, 2] / 2 # bottom right xy[:, 3] = x[:, 1] + x[:, 3] / 2 # bottom right yreturn ydef process(input, mask, anchors):anchors = [anchors[i] for i in mask]grid_h, grid_w = map(int, input.shape[0:2])box_confidence = sigmoid(input[..., 4])box_confidence = np.expand_dims(box_confidence, axis=-1)box_class_probs = sigmoid(input[..., 5:])box_xy = sigmoid(input[..., :2])*2 - 0.5col = np.tile(np.arange(0, grid_w), grid_w).reshape(-1, grid_w)row = np.tile(np.arange(0, grid_h).reshape(-1, 1), grid_h)col = col.reshape(grid_h, grid_w, 1, 1).repeat(3, axis=-2)row = row.reshape(grid_h, grid_w, 1, 1).repeat(3, axis=-2)grid = np.concatenate((col, row), axis=-1)box_xy += gridbox_xy *= int(IMG_SIZE/grid_h)box_wh = pow(sigmoid(input[..., 2:4])*2, 2)box_wh = box_wh * anchorsbox = np.concatenate((box_xy, box_wh), axis=-1)return box, box_confidence, box_class_probsdef filter_boxes(boxes, box_confidences, box_class_probs):"""Filter boxes with box threshold. It's a bit different with origin yolov5 post process!# Argumentsboxes: ndarray, boxes of objects.box_confidences: ndarray, confidences of objects.box_class_probs: ndarray, class_probs of objects.# Returnsboxes: ndarray, filtered boxes.classes: ndarray, classes for boxes.scores: ndarray, scores for boxes."""box_classes = np.argmax(box_class_probs, axis=-1)box_class_scores = np.max(box_class_probs, axis=-1)pos = np.where(box_confidences[...,0] >= BOX_THRESH)boxes = boxes[pos]classes = box_classes[pos]scores = box_class_scores[pos]return boxes, classes, scoresdef nms_boxes(boxes, scores):"""Suppress non-maximal boxes.# Argumentsboxes: ndarray, boxes of objects.scores: ndarray, scores of objects.# Returnskeep: ndarray, index of effective boxes."""x = boxes[:, 0] #取用第一列y = boxes[:, 1]w = boxes[:, 2] - boxes[:, 0]h = boxes[:, 3] - boxes[:, 1]areas = w * horder = scores.argsort()[::-1] #scores.argsort()从小到大的索引值,再加> [::-1]就变成从大到小的索引keep = []while order.size > 0:i = order[0] #scores的每个索引值,选取最大的keep.append(i)xx1 = np.maximum(x[i], x[order[1:]])yy1 = np.maximum(y[i], y[order[1:]])xx2 = np.minimum(x[i] + w[i], x[order[1:]] + w[order[1:]])yy2 = np.minimum(y[i] + h[i], y[order[1:]] + h[order[1:]])w1 = np.maximum(0.0, xx2 - xx1 + 0.00001)h1 = np.maximum(0.0, yy2 - yy1 + 0.00001)inter = w1 * h1ovr = inter / (areas[i] + areas[order[1:]] - inter)inds = np.where(ovr <= NMS_THRESH)[0] #将不满足mns过滤的框重新进行过滤,直到没有候选框order = order[inds + 1]keep = np.array(keep)return keepdef yolov5_post_process(input_data):masks = [[0, 1, 2], [3, 4, 5], [6, 7, 8]]anchors = [[10, 13], [16, 30], [33, 23], [30, 61], [62, 45],[59, 119], [116, 90], [156, 198], [373, 326]]boxes, classes, scores = [], [], []for input,mask in zip(input_data, masks):b, c, s = process(input, mask, anchors)b, c, s = filter_boxes(b, c, s)boxes.append(b)classes.append(c)scores.append(s)boxes = np.concatenate(boxes)boxes = xywh2xyxy(boxes)classes = np.concatenate(classes)scores = np.concatenate(scores)nboxes, nclasses, nscores = [], [], []for c in set(classes):inds = np.where(classes == c)b = boxes[inds]c = classes[inds]s = scores[inds]keep = nms_boxes(b, s)nboxes.append(b[keep])nclasses.append(c[keep])nscores.append(s[keep])if not nclasses and not nscores:return None, None, Noneboxes = np.concatenate(nboxes)classes = np.concatenate(nclasses)scores = np.concatenate(nscores)return boxes, classes, scoresdef draw(image, boxes, scores, classes):"""Draw the boxes on the image.# Argument:image: original image.boxes: ndarray, boxes of objects.classes: ndarray, classes of objects.scores: ndarray, scores of objects.all_classes: all classes name."""for box, score, cl in zip(boxes, scores, classes):top, left, right, bottom = boxprint('class: {}, score: {}'.format(CLASSES[cl], score))print('box coordinate left,top,right,down: [{}, {}, {}, {}]'.format(top, left, right, bottom))top = int(top)left = int(left)right = int(right)bottom = int(bottom)cv2.rectangle(image, (top, left), (right, bottom), (255, 0, 0), 2)cv2.putText(image, '{0} {1:.2f}'.format(CLASSES[cl], score),(top, left - 6),cv2.FONT_HERSHEY_SIMPLEX,0.6, (0, 0, 255), 2)def letterbox(im, new_shape=(640, 640), color=(0, 0, 0)):# Resize and pad image while meeting stride-multiple constraintsshape = im.shape[:2] # current shape [height, width]if isinstance(new_shape, int):new_shape = (new_shape, new_shape)# Scale ratio (new / old)r = min(new_shape[0] / shape[0], new_shape[1] / shape[1])# Compute paddingratio = r, r # width, height ratiosnew_unpad = int(round(shape[1] * r)), int(round(shape[0] * r))dw, dh = new_shape[1] - new_unpad[0], new_shape[0] - new_unpad[1] # wh paddingdw /= 2 # divide padding into 2 sidesdh /= 2if shape[::-1] != new_unpad: # resizeim = cv2.resize(im, new_unpad, interpolation=cv2.INTER_LINEAR)top, bottom = int(round(dh - 0.1)), int(round(dh + 0.1))left, right = int(round(dw - 0.1)), int(round(dw + 0.1))im = cv2.copyMakeBorder(im, top, bottom, left, right, > cv2.BORDER_CONSTANT, value=color) # add borderreturn im, ratio, (dw, dh)
修改文件Scripts/calibrator/utils/misc.py,需要添加内容为(其他的代码不用动):... from utils import post_normal as P ...def demo_define(img, outputs, img_save_path):input0_data = outputs[0]input1_data = outputs[1]input2_data = outputs[2]print("直接输出的维度为=============")print(input0_data.shape)print(input1_data.shape)print(input2_data.shape)sign = "NHWC"# sign = "NCHW"if sign == "NHWC":input0_data = np.transpose(input0_data, (0, 3, 1, 2))input1_data = np.transpose(input1_data, (0, 3, 1, 2))input2_data = np.transpose(input2_data, (0, 3, 1, 2))input0_data = input0_data.reshape([3,-1]+list(input0_data.shape[-2:])) input1_data = input1_data.reshape([3,-1]+list(input1_data.shape[-2:])) input2_data = input2_data.reshape([3,-1]+list(input2_data.shape[-2:]))input_data = list()input_data.append(np.transpose(input0_data, (2, 3, 0, 1))) input_data.append(np.transpose(input1_data, (2, 3, 0, 1))) input_data.append(np.transpose(input2_data, (2, 3, 0, 1)))print(input_data[0].shape)print(input_data[1].shape)print(input_data[2].shape) ## 此时维度为 (H,W,3,C)P.IMG_SIZE = 640boxes, classes, scores = P.yolov5_post_process(input_data)if boxes is not None:P.CLASSES = ['person', 'bicycle', 'car', 'motorcycle', 'airplane', 'bus', 'train', 'truck', 'boat', 'traffic light','fire hydrant', 'stop sign', 'parking meter', 'bench', 'bird', 'cat', 'dog', 'horse', 'sheep', 'cow','elephant', 'bear', 'zebra', 'giraffe', 'backpack', 'umbrella', 'handbag', 'tie', 'suitcase', 'frisbee','skis', 'snowboard', 'sports ball', 'kite', 'baseball bat', 'baseball glove', 'skateboard', 'surfboard','tennis racket', 'bottle', 'wine glass', 'cup', 'fork', 'knife', 'spoon', 'bowl', 'banana', 'apple','sandwich', 'orange', 'broccoli', 'carrot', 'hot dog', 'pizza', 'donut', 'cake', 'chair', 'couch','potted plant', 'bed', 'dining table', 'toilet', 'tv', 'laptop', 'mouse', 'remote', 'keyboard', 'cell phone','microwave', 'oven', 'toaster', 'sink', 'refrigerator', 'book', 'clock', 'vase', 'scissors', 'teddy bear','hair drier', 'toothbrush'] P.draw(img, boxes, scores, classes)## show output# cv2.imshow("post process result", img)# cv2.waitKey(0)# cv2.destroyAllWindows()cv2.imwrite(img_save_path, img)... def postDetection(model_path, img_path, result_list, out_details, draw_result, show_log=False):im = img_path if not isinstance(img_path, list) else img_path[0]print("start post==================================")## 接入RK的后出理代码img_tmp = cv2.imread(im)img_save_path = os.path.join(draw_result, os.path.basename(img_path))demo_define(img_tmp, result_list, img_save_path)exit() ...


这篇关于【yolov5系列】将yolov5s模型部署到SigmaStar的9383芯片上的文章就介绍到这儿,希望我们推荐的文章对编程师们有所帮助!


