本文主要是介绍【vue/uniapp】使用 uni.chooseImage 和 uni.uploadFile 实现图片上传(包含样式,可以解决手机上无法上传的问题),希望对大家解决编程问题提供一定的参考价值,需要的开发者们随着小编来一起学习吧!
引入:
之前写过一篇关于 uview 1.x 版本上传照片 的文章,但是发现如果是在微信小程序的项目中嵌入 h5 的模块,这个 h5 的项目使用 u-upload 的话,图片上传功能在电脑上正常,但是在手机的小程序上测试就不会生效,点击上传加号按钮毫无反应。
解决方法:
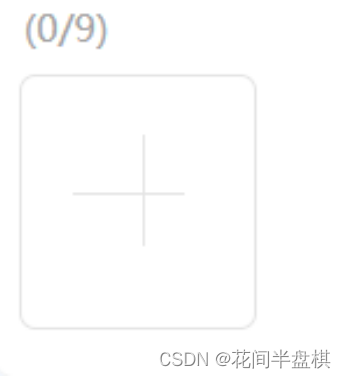
现在最终的解决方法是,使用 uniapp 的 uni.chooseImage 来选择照片,使用 uni.uploadFile 来上传图片,其他所有的样式和逻辑都自己来实现,最终的效果长这样:


代码与解析:
单独写一个组件,先实现样式:
<template><view class="meeting-image"><view class="title"><text></text><!-- 展示图片张数 --><text style="color: #a1a1a1;">({{ list.length }}/9)</text></view><view class="img_wrap flex-row flex-justify-between"><view class="img_box" v-for="(item, index) in list" :key="index"><!-- 展示上传之后的图片 --><image :src="item.imgUrl" class="pic" mode="aspectFill" @click="previewImage(index)" /><!-- 删除图标 --><!-- 这里的删除图标叉叉是用的在线网址,$public 是挂载在原型上的,可以自定义 --><image :src="`${$public()}/project-meeting/icon_20_close.png`" class="close"@click.stop="handleDeleteImg(index, item)" /></view><!-- 上传的方框 --><view class="upload-box" @click="chooseImg" v-if="list.length !== 9 && isSponsorUserFlag == 1"></view></view><u-toast ref="uToast" /></view>
</template>
.meeting-image {.title {font-size: 32rpx;line-height: 40 rpx;text:nth-of-type(1) {color: #ff3f30;padding-right: 4rpx;}text:nth-of-type(3) {padding-left: 12rpx;color: #cccccc;}}.img_wrap {flex-wrap: wrap;&::after {width: calc((100% - 40rpx) / 3);display: block;content: '';}.img_box {margin-top: 20rpx;position: relative;width: calc((100% - 40rpx) / 3);height: 220rpx;.pic {width: 100%;height: 100%;object-fit: cover;border-radius: 14rpx;}.close {position: absolute;top: -8rpx;right: -8rpx;width: 40rpx;height: 40rpx;}}.upload-box {position: relative;width: calc((100% - 40rpx) / 3);height: 220rpx;border: 1px solid #e5e5e5;box-sizing: border-box;position: relative;border-radius: 14rpx;margin-top: 20rpx;&::after {display: block;content: '';width: 1px;height: 96rpx;background-color: #e5e5e5;position: absolute;left: 105rpx;top: 50rpx;}&::before {display: block;content: '';width: 96rpx;height: 1px;background-color: #e5e5e5;position: absolute;right: 60rpx;top: 100rpx;}}}
}
js 逻辑部分,我这里后端提供的 api 有上传(查询文件地址),即代码中的 previewUrl ,删除的实现方法是在本地进行的,是对数组进行 splice 之后,再将最新的图片数组保存进大数组一次,最后再进行上传,注释写的很详细,方便以后回顾查看。
简单解释:
chooseImg 是最先执行的函数,即点击上传按钮时执行,进来判断是不是数量超过了 9 张,没超过就往下走;
使用 uni.chooseImage 进行图片选择功能,配置相应参数和值,选择成功,走到 then 的成功回调里,回显照片,此时调接口 previewUrl 来上传获取图片id;
然后将图片保存进数组中
<script>
import { BASE_URL } from '@/pages/workTable/utils/constant'
import { previewUrl } from '@/pages/workTable/utils/api.js'export default {name: 'meeting-image',// 接收参数props: {fileList: {type: Array,default: []},// 用于该页面有很多项,而每一项都需要传一组图片的页面subItem: {},// 用于只传一组图片的页面picListArr: {},picList: {}},data() {return {list: [],count: 9,}},computed: {},methods: {// 预览功能暂时有问题previewImage(index) {console.log('预览', this.list.map(el => el.imgUrl));uni.previewImage({current: index,urls: this.list.map(el => el.imgUrl)})},// 点击上传按钮触发chooseImg() {// 如果大于 9 张就不触发底下的 uni.chooseImageif (this.count == 0) {this.$refs.uToast.show({title: '最多能上传9张照片',duration: 2000})return}uni.chooseImage({// 最多可以选择的图片张数,默认9count: this.count,// original 原图,compressed 压缩图,默认二者都有sizeType: ['original', 'compressed'],// album 从相册选图,camera 使用相机,默认二者都有sourceType: ['album', 'camera'],success: res => {// console.log('res',res);uni.showLoading({title: '上传中'})Promise.all(res.tempFilePaths.map(item => {return this.uploadFile({filePath: item})})).then(re => {uni.hideLoading()// let fileList = []re.map((el, index) => {let data = JSON.parse(el.data)// 用于上传成功后照片回显// console.log('data',data.data);previewUrl(data.data).then(res => {console.log('我要预览图片', res); this.list.push({ fileUrl: data.data, imgUrl: res.data })setTimeout(() => {console.log('this.list', this.list);this.saveFile(this.list)}, 800)})})}).catch(err => {console.log('err', err);this.$refs.uToast.show({title: '上传失败',duration: 2000})uni.hideLoading()})},fail: () => { }})},// 上传图片uploadFile({ filePath }) {return new Promise((resolve, reject) => {uni.uploadFile({url: `${BASE_URL}/mobilemanage/api/common/upload?typeEnum=IMAGE`,filePath: filePath,name: 'file',header: {'site3-f-ue': uni.getStorageSync('site3-f-ue')},formData: {typeEnum: "IMAGE",},success: res => {console.log('调用上传接口的结果', res);resolve(res)},fail: error => {reject(error)}})})},// 将图片保存进数组saveFile(list) {console.log('aaaaaaaaaa', list);// 子组件拿接到的父组件传过来的值,subItem 是每一项的数据,里面有 picList 和 picListArrconsole.log('父组件传过来的subItem', this.subItem);// 每一项都需要上传照片这种情况才需要用到 subItemif (this.subItem) {console.log('有 subItem 的情况');let subItem = this.subItemsubItem.picList = []subItem.picListArr = []list.map(async item => {console.log('bbbbbbbb', item);subItem.picList.push({fileUrl: item.fileUrl})console.log('subItem.picList', subItem.picList);})console.log('subItem.picList', subItem.picList);subItem.picList.map(item => {subItem.picListArr.push(item.fileUrl)})console.log('subItem.picListArr', subItem.picListArr);} else {console.log('没有subItem的情况', list);// 只需要上传一组图片let picList = this.picListlet picListArr = this.picListArrpicList = []picListArr = []// console.log('list',list);list.map(async item => {console.log('qqqqqqqqqqqq', item);picList.push({fileUrl: item.fileUrl})})this.$emit('getPicList', picList)console.log('照片列表', picList);}},// 删除图片handleDeleteImg(index, item) {this.list.splice(index, 1)this.saveFile(this.list)this.$refs.uToast.show({title: '删除成功',duration: 2000})}},watch: {// 监视当前图片数组长度,增减张数显示fileList: {handler: function (value) {this.list = valuethis.count = 9 - this.list.length},deep: true,immediate: true}}
}
</script>
使用的时候,父组件进行调用传值:
import uploadImage from '../components/upload-image'
components: {uploadImage
},
<upload-image :fileList="subItem.picList" :subItem="subItem" :projectMeetingId="1":isSponsorUserFlag="1"
></upload-image>
这篇关于【vue/uniapp】使用 uni.chooseImage 和 uni.uploadFile 实现图片上传(包含样式,可以解决手机上无法上传的问题)的文章就介绍到这儿,希望我们推荐的文章对编程师们有所帮助!


