本文主要是介绍Elasticsearch:升级索引以使用 ELSER 最新的模型,希望对大家解决编程问题提供一定的参考价值,需要的开发者们随着小编来一起学习吧!
在此 notebook 中,我们将看到有关如何使用 Reindex API 将索引升级到 ELSER 模型 .elser_model_2 的示例。
注意:或者,你也可以通过 update_by_query 来更新索引以使用 ELSER。 在本笔记本中,我们将看到使用 Reindex API 的示例。
我们将在本笔记本中看到的场景:
- 将未生成 text_expansion 字段的索引迁移到 ELSER 模型 .elser_model_2
- 使用 .elser_model_1 升级现有索引以使用 .elser_model_2 模型
- 升级使用不同模型的索引以使用 ELSER
在下面的颜色中,我们将使用 Elastic Stack 8.11 来进行展示。
安装
如果你还没有安装好自己的 Elasticsearch 及 Kibana,请参考文章:
安装 Elasticsearch 及 Kibana
如果你还没有安装好自己的 Elasticsearch 及 Kibana,那么请参考一下的文章来进行安装:
-
如何在 Linux,MacOS 及 Windows 上进行安装 Elasticsearch
-
Kibana:如何在 Linux,MacOS 及 Windows 上安装 Elastic 栈中的 Kibana
在安装的时候,请选择 Elastic Stack 8.x 进行安装。在安装的时候,我们可以看到如下的安装信息:

为了能够上传向量模型,我们必须订阅白金版或试用。


安装 ELSER 模型
如果你还没有安装好 ELSER 模型,请参考文章 “Elasticsearch:部署 ELSER - Elastic Learned Sparse EncoderR” 来进行安装。在这里就不再累述了。请注意安装好的 ELSER 模型的 ID 为 .elser_model_2 而不是之前那篇文章中的 .elser_model_1。

Python
我们需要安装相应的 Elasticsearch 包:
$ pwd
/Users/liuxg/python/elser
$ pip3 install elasticsearch -qU
$ pip3 list | grep elasticseach
elasticsearch             8.11.1
rag-elasticsearch         0.0.1        /Users/liuxg/python/rag-elasticsearch/my-app/packages/rag-elasticsearch
环境变量
在启动 Jupyter 之前,我们设置如下的环境变量:
export ES_USER="elastic"
export ES_PASSWORD="yarOjyX5CLqTsKVE3v*d"
export ES_ENDPOINT="localhost"
拷贝 Elasticsearch 证书
我们把 Elasticsearch 的证书拷贝到当前的目录下:
$ pwd
/Users/liuxg/python/elser
$ cp ~/elastic/elasticsearch-8.11.0/config/certs/http_ca.crt .
$ lsfind_books_about_christmas_without_searching_for_christmas.ipynb
Chatbot with LangChain conversational chain and OpenAI.ipynb
ElasticKnnSearch.ipynb
ElasticVectorSearch.ipynb
ElasticsearchStore.ipynb
Mental Health FAQ.ipynb
Multilingual semantic search.ipynb
NLP text search using hugging face transformer model.ipynb
Question Answering with Langchain and OpenAI.ipynb
RAG-langchain-elasticsearch.ipynb
Semantic search - ELSER.ipynb
Semantic search quick start.ipynb
book_summaries_1000_chunked.json
books.json
data.json
http_ca.crt
lib
sample_data.json
upgrading-index-to-use-elser.ipynb
vector_search_implementation_guide_api.ipynb
workplace-docs.json
在上面,我们把 Elasticsearch 的证书 http_ca.crt 拷贝到当前的目录下。
运行应用
使用客户端连接 Elasticsearch
from elasticsearch import Elasticsearch
import oselastic_user=os.getenv('ES_USER')
elastic_password=os.getenv('ES_PASSWORD')
elastic_endpoint=os.getenv("ES_ENDPOINT")url = f"https://{elastic_user}:{elastic_password}@{elastic_endpoint}:9200"
es = Elasticsearch(url, ca_certs = "./http_ca.crt", verify_certs = True)print(es.info())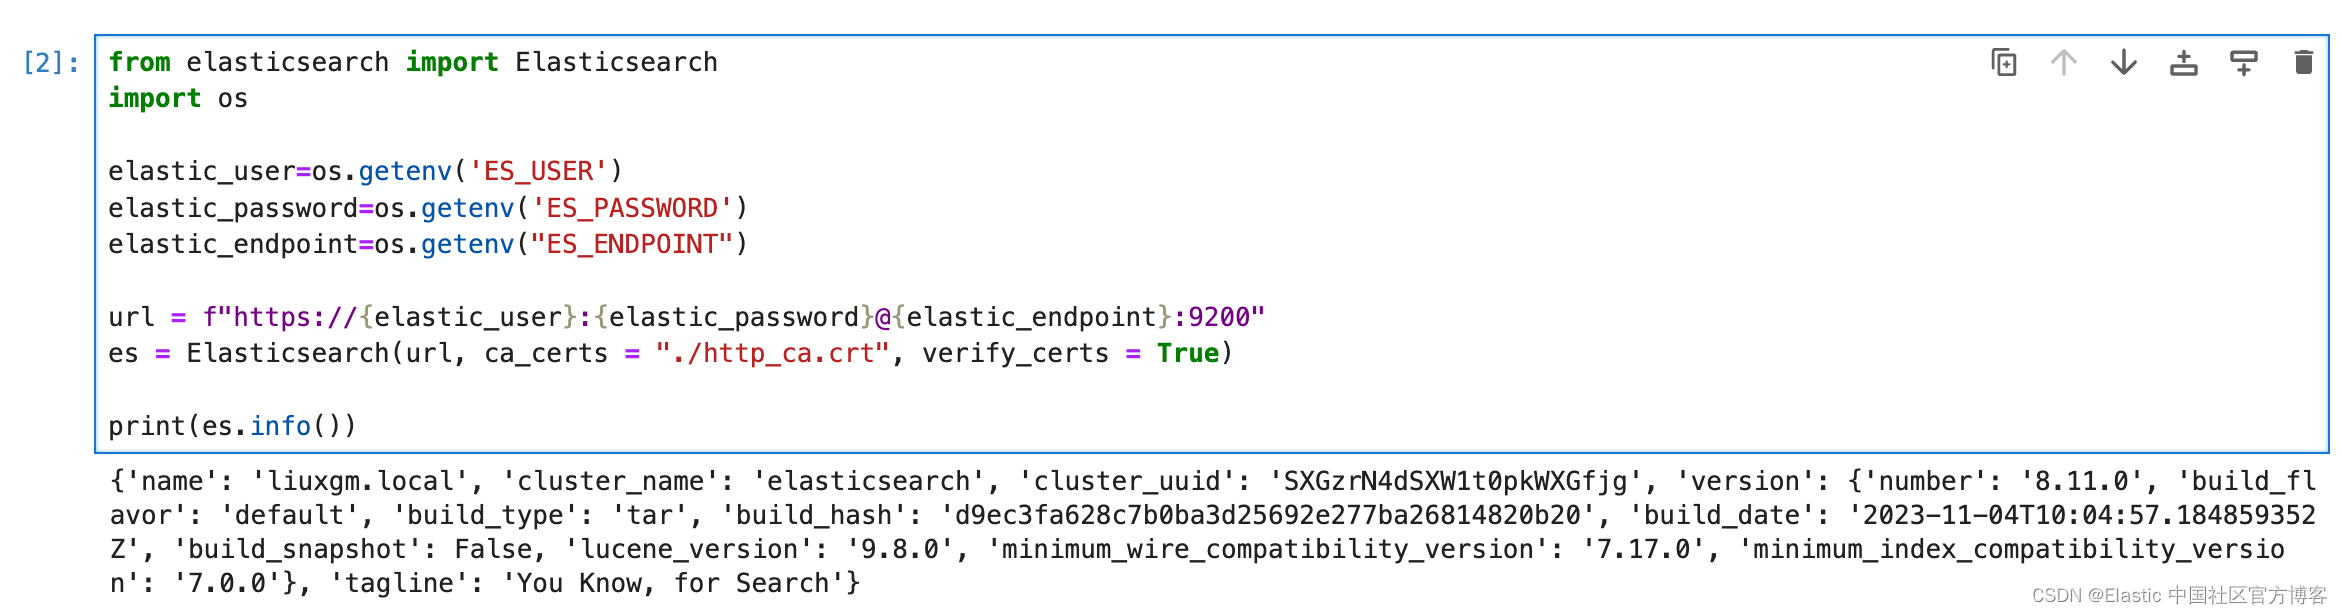
从上面的输出中,我们可以看到与 Elasticsearch 的连接是成功的。
案例一
在本例中,我们将了解如何升级已经配置了摄取管道的索引,以使用 ELSER 模型 elser_model_2
使用 lowercase 创建摄取管道
我们将创建一个简单的管道来将标题字段值转换为小写,并在我们的索引上使用此摄取管道。
es.ingest.put_pipeline(id="ingest-pipeline-lowercase", description="Ingest pipeline to change title to lowercase",processors=[{"lowercase": {"field": "title"}}]
)
创建索引 - 带有映射的 movies
接下来,我们将使用我们在上一步中创建的管道 ingest-pipeline-lowercase 创建一个索引。
es.indices.delete(index="movies",ignore_unavailable=True)
es.indices.create(index="movies",settings={"index": {"number_of_shards": 1,"number_of_replicas": 1,"default_pipeline": "ingest-pipeline-lowercase"}},mappings={"properties": {"plot": {"type": "text","fields": {"keyword": {"type": "keyword","ignore_above": 256}}},}}
)
摄入文档
我们现在准备将 12 部电影的示例数据集插入到我们的电影索引中。我们把如下的数据保存到一个叫做 movies.json 的文件中。
movies.json
[{"title": "Pulp Fiction","runtime": "154","plot": "The lives of two mob hitmen, a boxer, a gangster and his wife, and a pair of diner bandits intertwine in four tales of violence and redemption.","keyScene": "John Travolta is forced to inject adrenaline directly into Uma Thurman's heart after she overdoses on heroin.","genre": "Crime, Drama","released": "1994"},{"title": "The Dark Knight","runtime": "152","plot": "When the menace known as the Joker wreaks havoc and chaos on the people of Gotham, Batman must accept one of the greatest psychological and physical tests of his ability to fight injustice.","keyScene": "Batman angrily responds 'I’m Batman' when asked who he is by Falcone.","genre": "Action, Crime, Drama, Thriller","released": "2008"},{"title": "Fight Club","runtime": "139","plot": "An insomniac office worker and a devil-may-care soapmaker form an underground fight club that evolves into something much, much more.","keyScene": "Brad Pitt explains the rules of Fight Club to Edward Norton. The first rule of Fight Club is: You do not talk about Fight Club. The second rule of Fight Club is: You do not talk about Fight Club.","genre": "Drama","released": "1999"},{"title": "Inception","runtime": "148","plot": "A thief who steals corporate secrets through the use of dream-sharing technology is given the inverse task of planting an idea into thed of a C.E.O.","keyScene": "Leonardo DiCaprio explains the concept of inception to Ellen Page by using a child's spinning top.","genre": "Action, Adventure, Sci-Fi, Thriller","released": "2010"},{"title": "The Matrix","runtime": "136","plot": "A computer hacker learns from mysterious rebels about the true nature of his reality and his role in the war against its controllers.","keyScene": "Red pill or blue pill? Morpheus offers Neo a choice between the red pill, which will allow him to learn the truth about the Matrix, or the blue pill, which will return him to his former life.","genre": "Action, Sci-Fi","released": "1999"},{"title": "The Shawshank Redemption","runtime": "142","plot": "Two imprisoned men bond over a number of years, finding solace and eventual redemption through acts of common decency.","keyScene": "Andy Dufresne escapes from Shawshank prison by crawling through a sewer pipe.","genre": "Drama","released": "1994"},{"title": "Goodfellas","runtime": "146","plot": "The story of Henry Hill and his life in the mob, covering his relationship with his wife Karen Hill and his mob partners Jimmy Conway and Tommy DeVito in the Italian-American crime syndicate.","keyScene": "Joe Pesci's character Tommy DeVito shoots young Spider in the foot for not getting him a drink.","genre": "Biography, Crime, Drama","released": "1990"},{"title": "Se7en","runtime": "127","plot": "Two detectives, a rookie and a veteran, hunt a serial killer who uses the seven deadly sins as his motives.","keyScene": "Brad Pitt's character David Mills shoots John Doe after he reveals that he murdered Mills' wife.","genre": "Crime, Drama, Mystery, Thriller","released": "1995"},{"title": "The Silence of the Lambs","runtime": "118","plot": "A young F.B.I. cadet must receive the help of an incarcerated and manipulative cannibal killer to help catch another serial killer, a madman who skins his victims.","keyScene": "Hannibal Lecter explains to Clarice Starling that he ate a census taker's liver with some fava beans and a nice Chianti.","genre": "Crime, Drama, Thriller","released": "1991"},{"title": "The Godfather","runtime": "175","plot": "An organized crime dynasty's aging patriarch transfers control of his clandestine empire to his reluctant son.","keyScene": "James Caan's character Sonny Corleone is shot to death at a toll booth by a number of machine gun toting enemies.","genre": "Crime, Drama","released": "1972"},{"title": "The Departed","runtime": "151","plot": "An undercover cop and a mole in the police attempt to identify each other while infiltrating an Irish gang in South Boston.","keyScene": "Leonardo DiCaprio's character Billy Costigan is shot to death by Matt Damon's character Colin Sullivan.","genre": "Crime, Drama, Thriller","released": "2006"},{"title": "The Usual Suspects","runtime": "106","plot": "A sole survivor tells of the twisty events leading up to a horrific gun battle on a boat, which began when five criminals met at a seemingly random police lineup.","keyScene": "Kevin Spacey's character Verbal Kint is revealed to be the mastermind behind the crime, when his limp disappears as he walks away from the police station.","genre": "Crime, Mystery, Thriller","released": "1995"}
]
$ pwd
/Users/liuxg/python/elser
$ ls movies.json
movies.json我们接下来运行如下的代码:
import json
from elasticsearch import helpers
import timewith open('movies.json') as f:data_json = json.load(f)# Prepare the documents to be indexed
documents = []
for doc in data_json:documents.append({"_index": "movies","_source": doc,})# Use helpers.bulk to index
helpers.bulk(es, documents)print("Done indexing documents into `movies` index!")
time.sleep(5)
我们可以在 Kibana 中查看到刚才摄入的 12 个文档:

更新 movies 索引使用 ELSER 模型
我们已准备好使用 ELSER 模型 .elser_model_2 将 movies 重新索引到新索引。 第一步,我们必须创建新的摄取管道和索引才能使用 ELSER 模型。
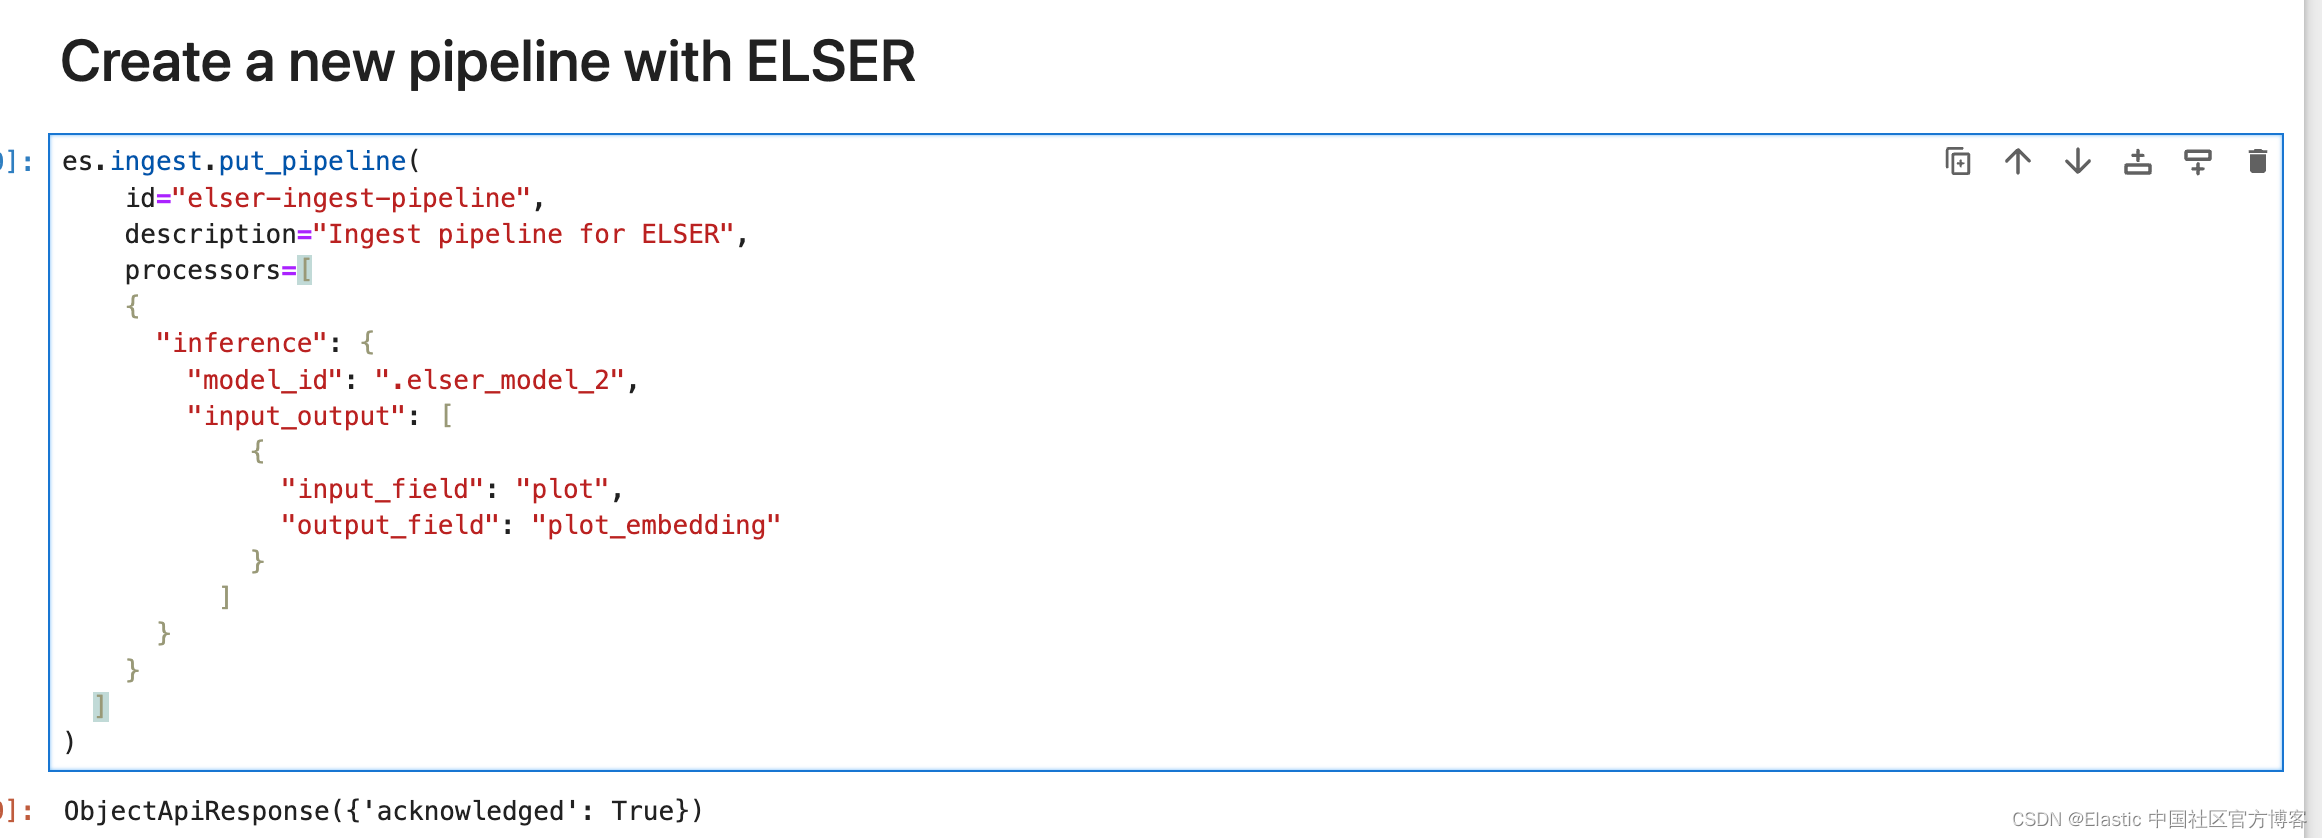
创建一个使用 ELSER 模型的新的 ingest pipeline
让我们使用 ELSER 模型 .elser_model_2 创建一个新的摄取管道。
es.ingest.put_pipeline(id="elser-ingest-pipeline", description="Ingest pipeline for ELSER",processors=[{"inference": {"model_id": ".elser_model_2","input_output": [{"input_field": "plot","output_field": "plot_embedding"}]}}]
)
使用映射创建一个新的索引
接下来,使用 ELSER 所需的映射创建索引。
es.indices.delete(index="elser-movies",ignore_unavailable=True)
es.indices.create(index="elser-movies",mappings={"properties": {"plot": {"type": "text","fields": {"keyword": {"type": "keyword","ignore_above": 256}}},"plot_embedding": { "type": "sparse_vector" }}}
)
注意:
- plot_embedding 是包含生成的类型为稀疏向量的标记的字段的名称
- plot 是创建稀疏向量的字段的名称。
使用更新的 ingest pipeline 来进行 reindex
借助 Reindex API,我们可以将数据从旧索引电影复制到新索引 elser-movies,并将摄取管道设置为 elser-ingest-pipeline 。 成功后,索引 elser-movies 会在你针对 ELSER 推理的 text_expansion 术语上创建标记。
es.reindex(source={"index": "movies"}, dest={"index": "elser-movies","pipeline":  "elser-ingest-pipeline"})
time.sleep(7)
重新索引完成后,检查索引 elser-movies 中的任何文档,并注意到该文档有一个附加字段 plot_embedding,其中包含我们将在 text_expansion 查询中使用的术语。
使用 ELSER 来查询文档
让我们尝试使用 ELSER 模型 .elser_model_2 对索引进行语义搜索:
response = es.search(index='elser-movies', size=3,query={"text_expansion": {"plot_embedding": {"model_id":".elser_model_2","model_text":"investigation"}}}
)for hit in response['hits']['hits']:doc_id = hit['_id']score = hit['_score']title = hit['_source']['title']plot = hit['_source']['plot']print(f"Score: {score}\nTitle: {title}\nPlot: {plot}\n")
案例二:将 ELSER 模型的索引升级到 .elser_model_2
如果你已有 ELSER 模型 .elser_model_1 的索引,并且想要升级到 .elser_model_2,则可以结合使用 Reindex API 和摄取管道来使用 ELSER .elser_model_2 模型。
注意:在开始之前,请确保你使用的是 Elasticsearch 8.11 版本并且已部署 ELSER 模型 .elser_model_2。
创建一个新的 ingest pipeline
我们将使用 .elser_model_2 创建一个管道,以便能够重新索引。
es.ingest.put_pipeline(id="elser-pipeline-upgrade-demo", description="Ingest pipeline for ELSER upgrade demo",processors=[{"inference": {"model_id": ".elser_model_2","input_output": [{"input_field": "plot","output_field": "plot_embedding"}]}}]
)
创建一个带有 mapping 的新索引
我们将创建一个新索引,其中包含支持 ELSER 所需的映射:
es.indices.delete(index="elser-upgrade-index-demo", ignore_unavailable=True)
es.indices.create(index="elser-upgrade-index-demo",mappings={"properties": {"plot": {"type": "text","fields": {"keyword": {"type": "keyword","ignore_above": 256}}},"plot_embedding": {"type": "sparse_vector"},}}
)
使用 reindex API
我们将使用 Reindex API 将数据从旧索引移动到新索引 elser-upgrade-index-demo。 我们将从旧索引中排除 target 字段,并在重新索引时使用 .elser_model_2 在字段 plot_embedding 中生成新 token。
注意:请确保将 my-index 替换为你要升级的索引名称,并将字段 my-tokens-field 替换为你之前生成的 token 的字段名称。
client.reindex(source={"index": "my-index", # replace with your index name"_source": {"excludes": ["my-tokens-field"]  # replace with the field-name from your index, that has previously generated tokens}}, dest={"index": "elser-upgrade-index-demo","pipeline":  "elser-pipeline-upgrade-demo"})
time.sleep(5)
为了演示的目的。我们使用上一步中得到的 elser-movies 来进行练习。我们假定它是有 .elser_model_1 所生成的(尽管它是由 .elser_model_2 模型所生成的)。我们使用如下的代码:
es.reindex(source={"index": "elser-movies", # replace with your index name"_source": {"excludes": ["plot_embedding"]  # replace with the field-name from your index, that has previously generated tokens}}, dest={"index": "elser-upgrade-index-demo","pipeline":  "elser-pipeline-upgrade-demo"})
time.sleep(5)
查询你的数据
重新索引完成后,你就可以查询数据并执行语义搜索:
response = es.search(index='elser-upgrade-index-demo', size=3,query={"text_expansion": {"plot_embedding": {"model_id":".elser_model_2","model_text":"child toy"}}}
)for hit in response['hits']['hits']:doc_id = hit['_id']score = hit['_score']title = hit['_source']['title']plot = hit['_source']['plot']print(f"Score: {score}\nTitle: {title}\nPlot: {plot}\n")

案例三:将不同模型的索引升级到 ELSER
现在我们将了解如何使用不同的模型移动已经生成嵌入的索引。
让我们考虑索引 - blogs,并使用 NLP 模型 Sentence-transformers__all-minilm-l6-v2 生成 text_embedding。 如果你想了解更多如何将 NLP 模型加载到索引的信息,请按照我们的笔记本中的步骤 NLP text search using hugging face transformer model.ipynb
请遵循我们之前执行的类似过程:
- 使用 ELSER 模型 .elser_model_2 创建摄取管道
- 使用我们在上一步中创建的管道创建带有映射的索引。
- 重新索引,从 blogs 索引中排除 embedding 的字段
在开始之前,让我们先看一下我们的索引博客并查看映射:
es.indices.get(index="blogs")
注意字段 text_embedding,我们将在新索引中排除 (exclude) 该字段,并根据博客索引中的字段 title 生成新映射
创建 ingest pipeline
接下来,我们将使用 ELSER 模型 .elser_model_2 创建管道
client.ingest.put_pipeline(id="elser-pipeline-blogs", description="Ingest pipeline for ELSER upgrade",processors=[{"inference": {"model_id": ".elser_model_2","input_output": [{"input_field": "title","output_field": "title_embedding"}]}}]
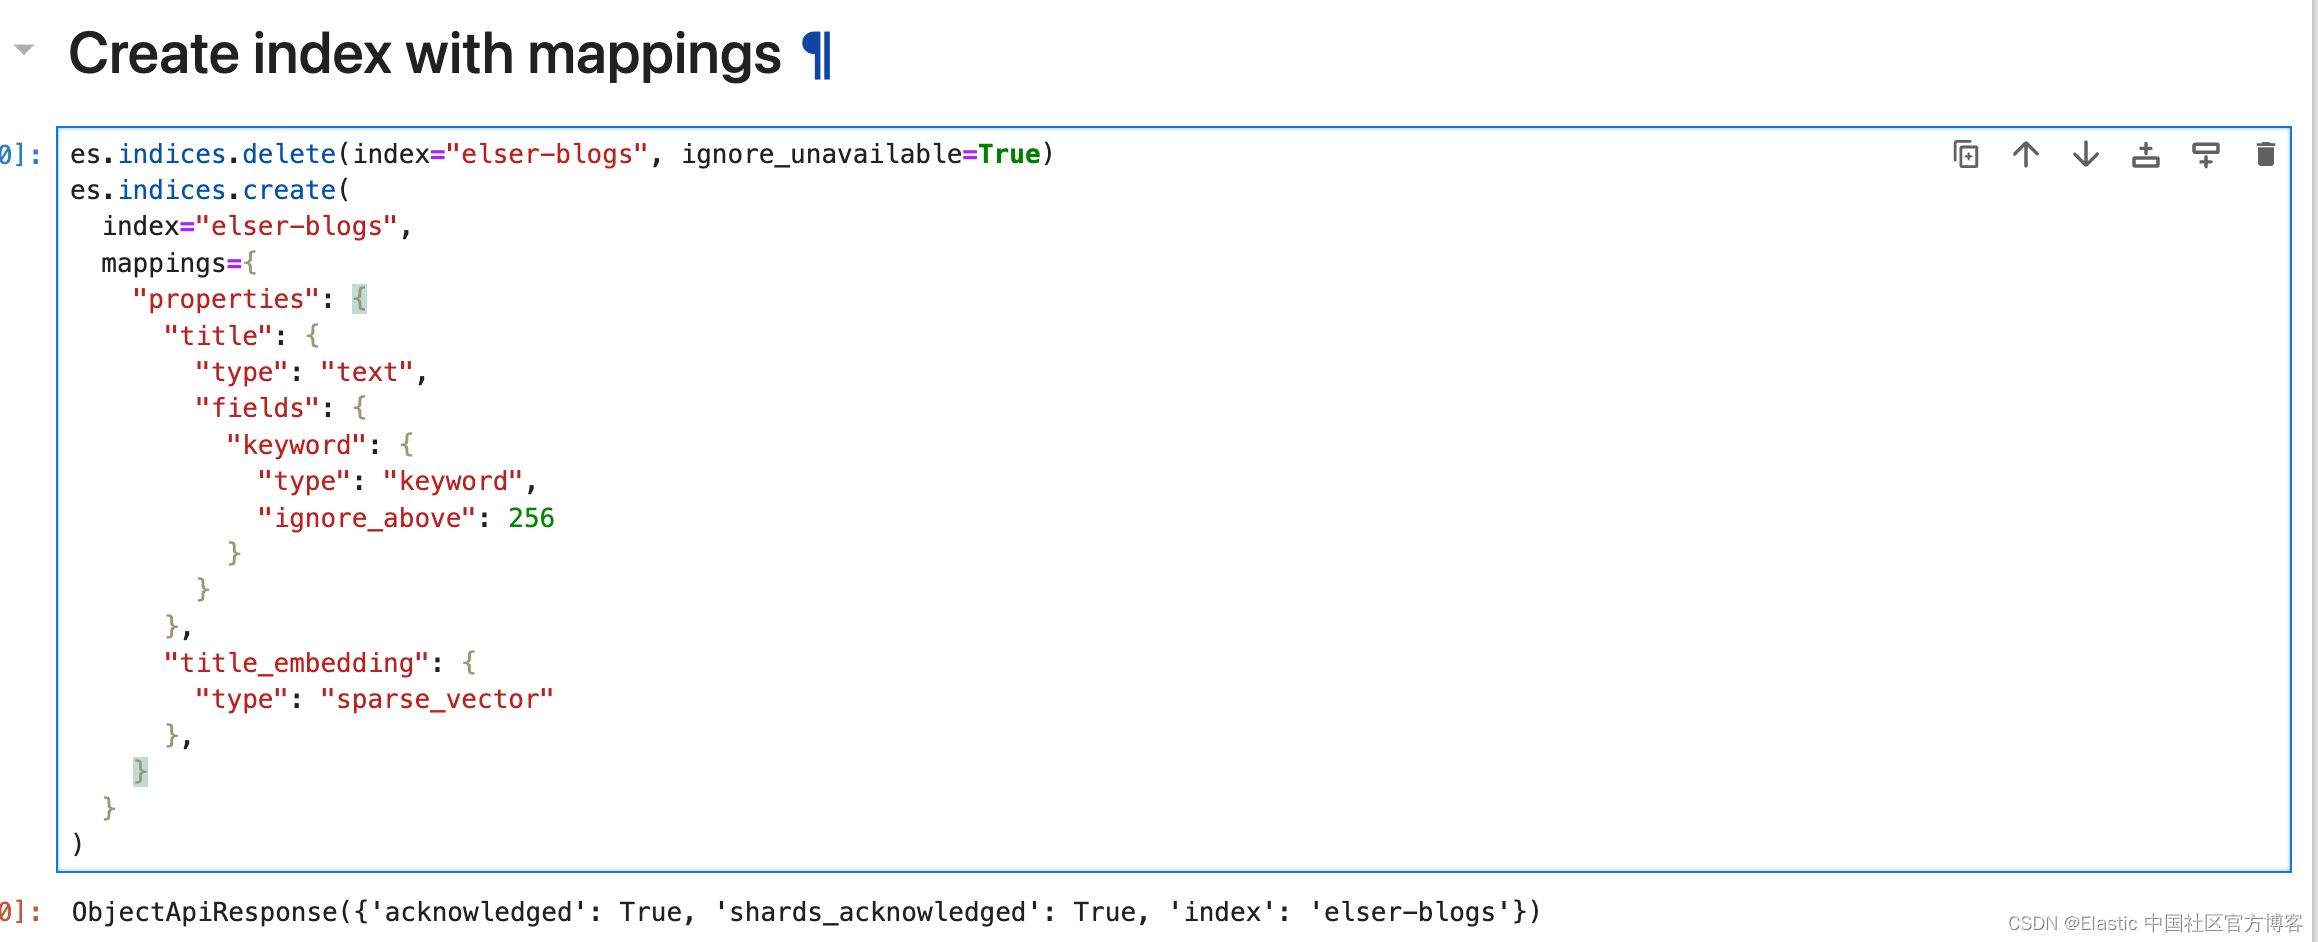
)创建带有 mappings 的索引
让我们创建一个带有映射的索引 elser-blogs
es.indices.delete(index="elser-blogs", ignore_unavailable=True)
es.indices.create(index="elser-blogs",mappings={"properties": {"title": {"type": "text","fields": {"keyword": {"type": "keyword","ignore_above": 256}}},"title_embedding": {"type": "sparse_vector"},}}
)
Reindex API
我们将使用 Reindex API 复制数据并生成 text_expansion 嵌入到我们的新索引 elser-blogs 中。
es.reindex(source={"index": "blogs","_source": {"excludes": ["text_embedding"]}}, dest={"index": "elser-blogs","pipeline":  "elser-pipeline-blogs"})
time.sleep(5)
查询你的数据
成功! 现在我们可以在索引 elser-blogs 上查询数据。
response = es.search(index='elser-blogs', size=3,query={"text_expansion": {"title_embedding": {"model_id":".elser_model_2","model_text":"Track network connections"}}}
)for hit in response['hits']['hits']:doc_id = hit['_id']score = hit['_score']title = hit['_source']['title']print(f"Score: {score}\nTitle: {title}")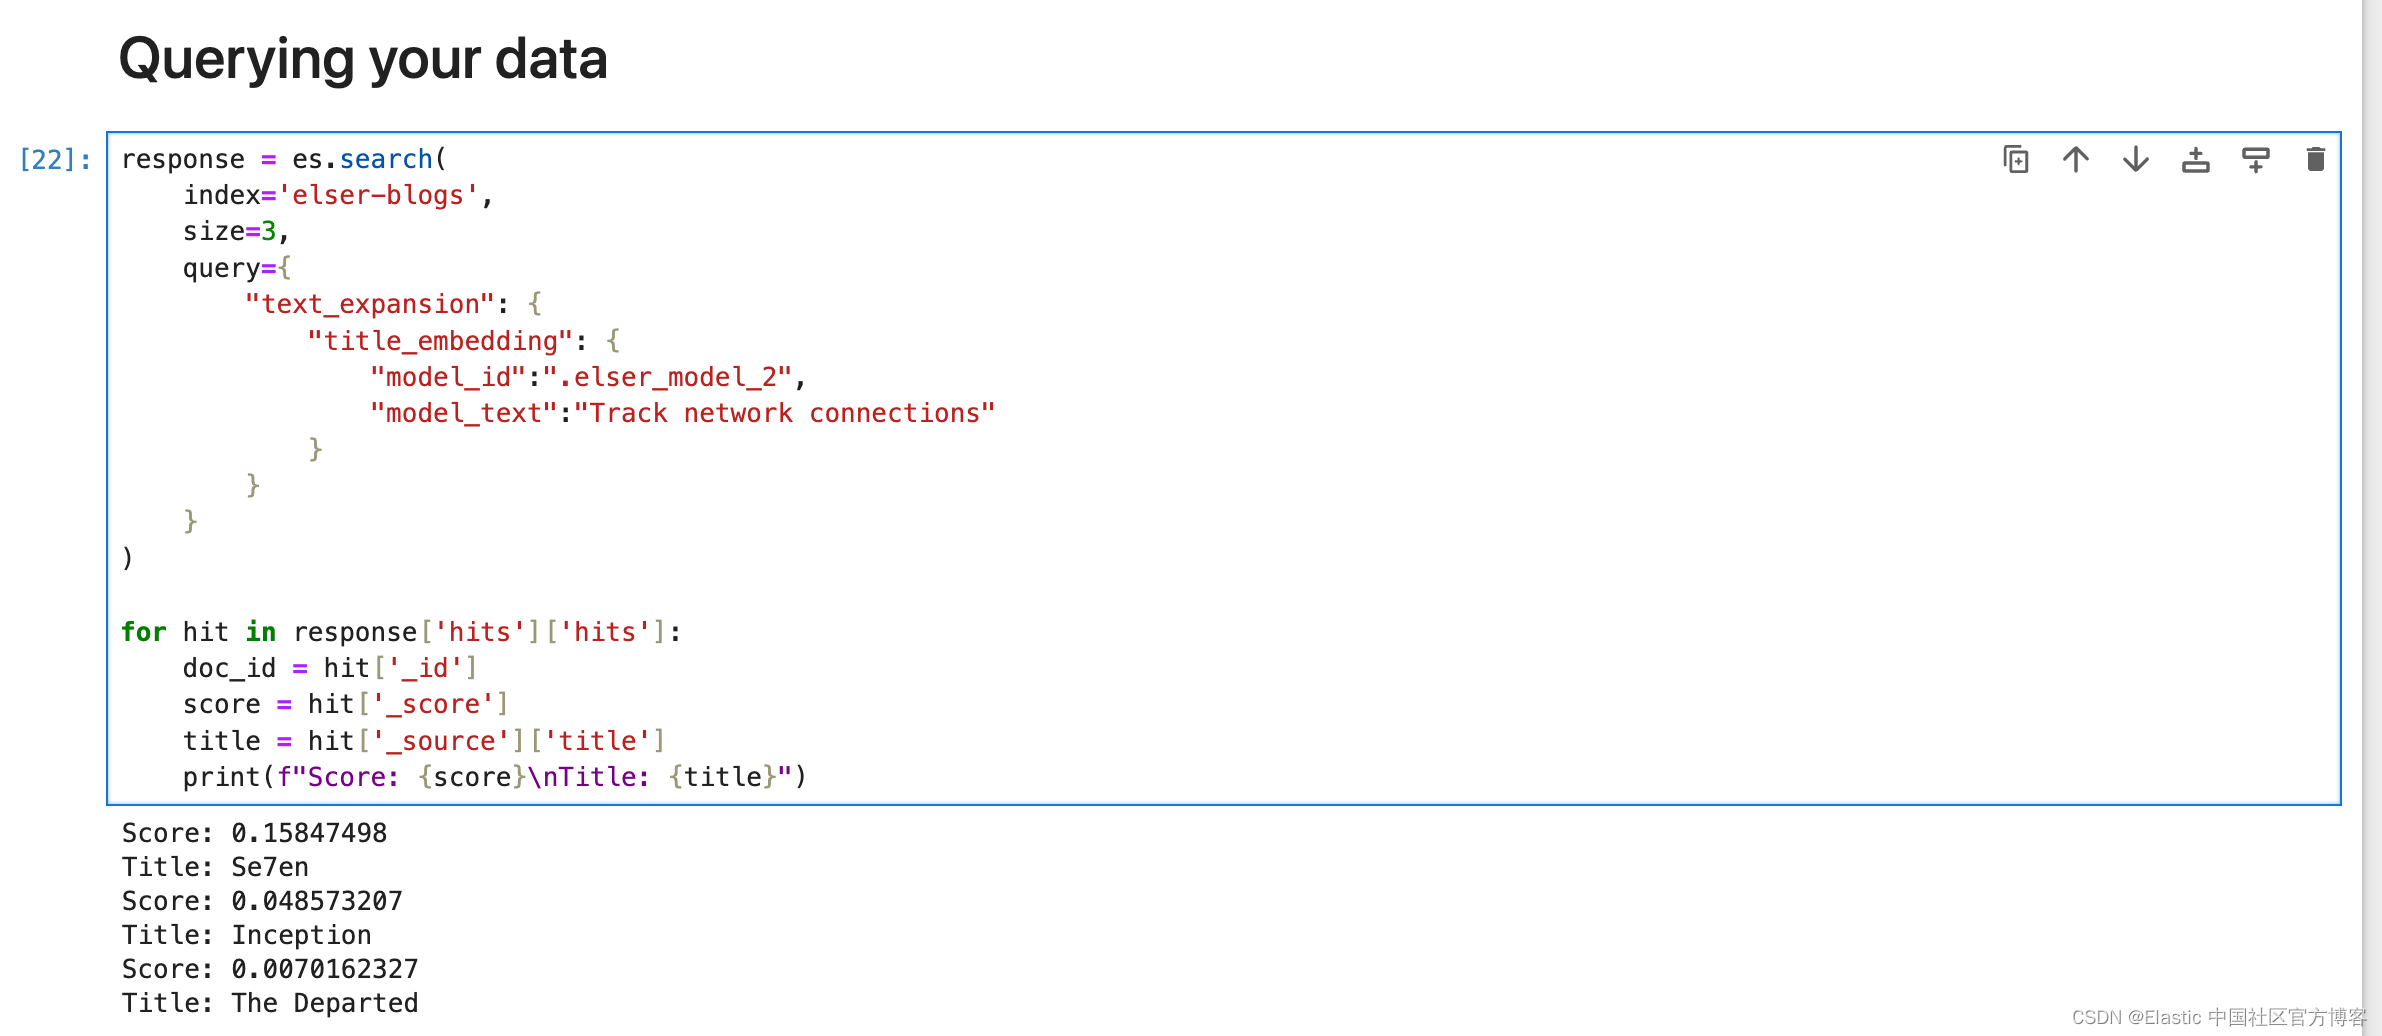
整个 notebook 可以在地址进行下载。
这篇关于Elasticsearch:升级索引以使用 ELSER 最新的模型的文章就介绍到这儿,希望我们推荐的文章对编程师们有所帮助!


