本文主要是介绍java +vtk.jar+dlls,环境部署配置遇到的问题,希望对大家解决编程问题提供一定的参考价值,需要的开发者们随着小编来一起学习吧!
1、Java版本的vtk编译成功后会产生两种文件(2种不是2个):
一个vtk.jar文件
多个.dll文件

2、本地配置部署vtk+java 环境
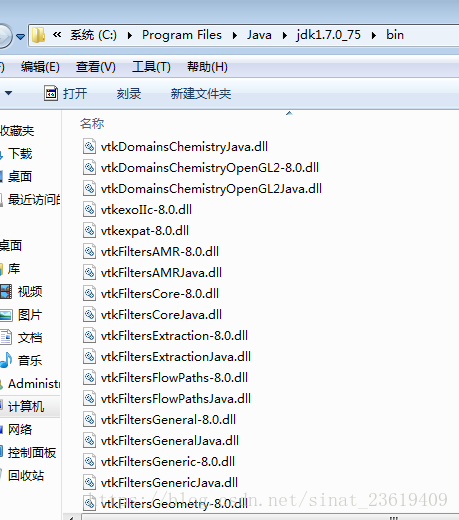
讲所有的.dll文件复制到jdk安装目录下的bin目录里面,(和javaw.exe文件在同一个文件夹下)
项目中导入vtk.jar包
运行demo即可成功
如果没有成功,检查本地是否安装了vs
如果本地电脑没有安装过或没有安装Visual Studio 2017或者其他版本的Visual Studio,则很有可能会运行不成功,此时就需要安装Visual Studio 2017,原因我猜测可能是VTK在运行时可能需要依赖VS安装的某些相关组件,具体原因不明,经过我的实践发现的确安装了vs之后,demo可以正常运行。
(建议安装与编译工具VS一样的版本,比较靠谱点)

eg:
我的jdk安装的是1.7,安装目录是C:\Program Files\Java\jdk1.7.0_75
所有的dll文件需要复制到C:\Program Files\Java\jdk1.7.0_75\bin目录下
新建测试项目Java project,然后在项目中build panth,导入vtk.jar包
运行测试demo,成功
测试项目目录:

测试demo:
/*public class cone {*//*** @param args*//*public static void main(String[] args) {// TODO Auto-generated method stub}}*/
//
//This example creates a polygonal model of a cone, and then renders it to
//the screen. It will rotate the cone 360 degrees and then exit. The basic
//setup of source -> mapper -> actor -> renderer -> renderwindow is
//typical of most VTK programs.
////We import the vtk wrapped classes first.
import vtk.*;  //Then we define our class.
public class Cone { static {if (!vtkNativeLibrary.LoadAllNativeLibraries()) {for (vtkNativeLibrary lib : vtkNativeLibrary.values()) {if (!lib.IsLoaded()) {System.out.println(lib.GetLibraryName() + " not loaded");}}}vtkNativeLibrary.DisableOutputWindow(null);}// In the static contructor we load in the native code.
// The libraries must be in your path to work.
//static {
//System.loadLibrary("vtkCommonJava");
//System.loadLibrary("vtkFilteringJava");
//System.loadLibrary("vtkIOJava");
//System.loadLibrary("vtkImagingJava");
//System.loadLibrary("vtkGraphicsJava");
//System.loadLibrary("vtkRenderingJava");
//}  // now the main program
public static void main (String []args) {
//
// Next we create an instance of vtkConeSource and set some of its
// properties. The instance of vtkConeSource "cone" is part of a
// visualization pipeline (it is a source process object); it produces data
// (output type is vtkPolyData) which other filters may process.
//
vtkConeSource cone = new vtkConeSource();
cone.SetHeight( 3.0 );
cone.SetRadius( 1.0 );
cone.SetResolution( 10 );  //
// In this example we terminate the pipeline with a mapper process object.
// (Intermediate filters such as vtkShrinkPolyData could be inserted in
// between the source and the mapper.)  We create an instance of
// vtkPolyDataMapper to map the polygonal data into graphics primitives. We
// connect the output of the cone souece to the input of this mapper.
//
vtkPolyDataMapper coneMapper = new vtkPolyDataMapper();
coneMapper.SetInputConnection( cone.GetOutputPort() );  //
// Create an actor to represent the cone. The actor orchestrates rendering
// of the mapper's graphics primitives. An actor also refers to properties
// via a vtkProperty instance, and includes an internal transformation
// matrix. We set this actor's mapper to be coneMapper which we created
// above.
//
vtkActor coneActor = new vtkActor();
coneActor.SetMapper( coneMapper );  //
// Create the Renderer and assign actors to it. A renderer is like a
// viewport. It is part or all of a window on the screen and it is
// responsible for drawing the actors it has.  We also set the background
// color here
//
vtkRenderer ren1 = new vtkRenderer();
ren1.AddActor( coneActor );
ren1.SetBackground( 0.1, 0.2, 0.4 );  //
// Finally we create the render window which will show up on the screen
// We put our renderer into the render window using AddRenderer. We also
// set the size to be 300 pixels by 300
//
vtkRenderWindow renWin = new vtkRenderWindow();
renWin.AddRenderer( ren1 );
renWin.SetSize( 300, 300 );  //
// now we loop over 360 degreeees and render the cone each time
//
int i;
for (i = 0; i < 360; ++i)  {  // render the image  renWin.Render();  // rotate the active camera by one degree  ren1.GetActiveCamera().Azimuth( 1 );  }  }
}
import vtk.*;//Then we define our class.
public class Cylinder {// In the static contructor we load in the native code.
// The libraries must be in your path to work.static {if (!vtkNativeLibrary.LoadAllNativeLibraries()) {for (vtkNativeLibrary lib : vtkNativeLibrary.values()) {if (!lib.IsLoaded()) {System.out.println(lib.GetLibraryName() + " not loaded");}}}vtkNativeLibrary.DisableOutputWindow(null);}// now the main program
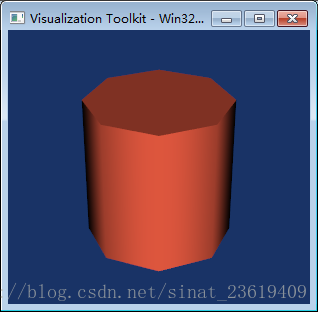
public static void main (String []args) {vtkCylinderSource cylinder = new vtkCylinderSource();cylinder.SetResolution( 8 );vtkPolyDataMapper cylinderMapper = new vtkPolyDataMapper();cylinderMapper.SetInputConnection( cylinder.GetOutputPort() );vtkActor cylinderActor = new vtkActor();cylinderActor.SetMapper( cylinderMapper );cylinderActor.GetProperty().SetColor(1.0000, 0.3882, 0.2784);cylinderActor.RotateX(30.0);cylinderActor.RotateY(-45.0);vtkRenderer ren = new vtkRenderer();vtkRenderWindow renWin = new vtkRenderWindow();renWin.AddRenderer( ren );ren.AddActor( cylinderActor );vtkRenderWindowInteractor iren = new vtkRenderWindowInteractor();iren.SetRenderWindow(renWin);ren.AddActor(cylinderActor);ren.SetBackground(0.1, 0.2, 0.4);renWin.SetSize(200, 200);iren.Initialize();ren.ResetCamera();ren.GetActiveCamera().Zoom(1.5);renWin.Render();iren.Start();}
}测试结果:

4、遇到的问题
一、问题1
java.lang.UnsatisfiedLinkError: C:\Program Files\Java\jdk1.7.0_75\bin\vtkChartsCoreJava.dll: Can't find dependent libraries
。。。。。。
解决方法:
未安装VS2017,安装了之后即可成功运行
(PS:因为我调用的vtk.jar包和dll文件都是从VS2017编译得到的,所以需要安装这个版本的VS,如果你用的是其他版本的VS编译得到的vtkjar包和dll文件,则需要安装对应版本的vs)
二、问题2

解决方法:
原因是项目默认的jdk是自带的jdk1.6,而我的dll文件是配置给了jdk1.7的bin目录,
所以显示找不到指定程序
所以,2种方法:
1.给jdk1.6配一下dll。需要把dll文件载复制一份到对应的jdk1.6的bin目录下即可
2.把项目的jdk换成1.7即可
5、相关资源
VTK8.0.1+VS2017+Cmake3+64位机器
编译后的必须文件dll+jar文件
获取资源:https://download.csdn.net/download/sinat_23619409/10340863
这篇关于java +vtk.jar+dlls,环境部署配置遇到的问题的文章就介绍到这儿,希望我们推荐的文章对编程师们有所帮助!


