本文主要是介绍EPICS asynPortDriver使用示例,希望对大家解决编程问题提供一定的参考价值,需要的开发者们随着小编来一起学习吧!
在文本中,将展示如何将EPICS asyn模块和其他库联用,从而实现对arm单板机上GPIO口的控制。
在本例中使用到的硬件是:
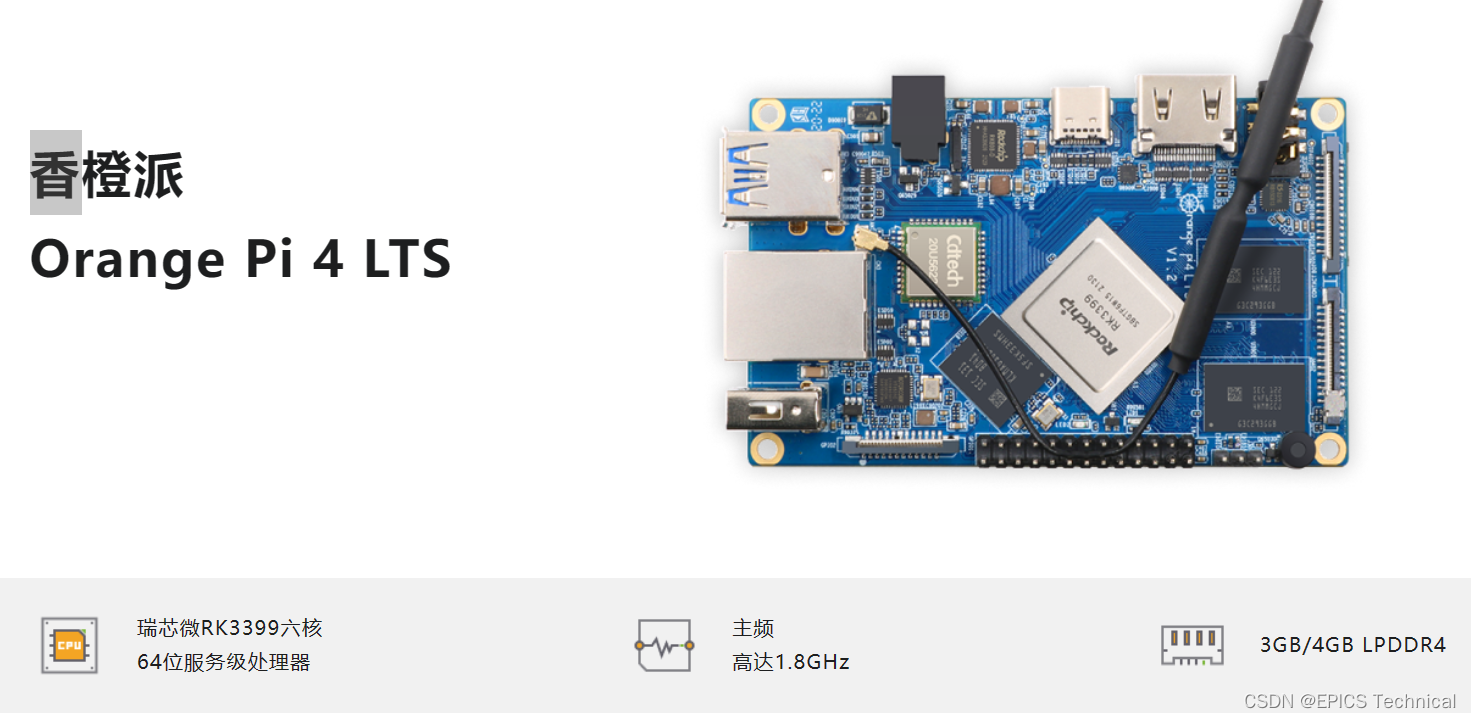
在程序中需要厂家提供的wringPi库,才能通过C语言库函数调用实现对其GPIO的控制。
以下是这个单板机GPIO的管脚对应关系,本程序中用到的wPi编号是9和10:

本IOC应用程序,仅需要需要base和asyn模块,在configure/RELEASSE文件中指定:
SUPPORT = /usr/local/EPICS/synApps/support
ASYN = ${SUPPORT}/asynEPICS_BASE = /usr/local/EPICS/base
以下是cpp源代码,它继承了asynPortDriver类,并且重写了其writeUInt32Digital方法,用于在指定GPIO管脚上,设置电平状态:
# drvgpioasyn.cpp
#include <iocsh.h>
#include <epicsThread.h>
#include <asynPortDriver.h>
#include <wiringPi.h>#include <epicsExport.h>static const char *driverName = "GPIOAsynDriver";#define digitalOutputString       "DIGITAL_OUTPUT"#define NUM_IO_BITS     2   // Number of digital I/O bits to USEclass GPIOAsynDriverOut : public asynPortDriver {
public:GPIOAsynDriverOut(const char *portName);/* These are the methods that we override from asynPortDriver */virtual asynStatus writeUInt32Digital(asynUser *pasynUser, epicsUInt32 value, epicsUInt32 mask);virtual void report(FILE *fp, int details);protected:// Analog output parametersint digitalOutput_;#define FIRST_GPIOOUT_PARAM  digitalOutput_#define LAST_GPIOOUT_PARAM digitalOutput_
private:int gpio[2];void init_GPIO_Out();asynStatus setGPIO(int index, int val);
};#define NUM_PARAMS ((int)(&LAST_GPIOOUT_PARAM - &FIRST_GPIOOUT_PARAM + 1))GPIOAsynDriverOut::GPIOAsynDriverOut(const char *portName): asynPortDriver(portName, 1 , NUM_PARAMS,asynUInt32DigitalMask | asynDrvUserMask,  // Interfaces that we implementasynUInt32DigitalMask,                    // Interfaces that do callbacksASYN_MULTIDEVICE | ASYN_CANBLOCK, 1, /* ASYN_CANBLOCK=1, ASYN_MULTIDEVICE=1, autoConnect=1 */0, 0) /* Default priority and stack size */
{// Digital I/O parametersinit_GPIO_Out();createParam(digitalOutputString,     asynParamUInt32Digital, &digitalOutput_);
}asynStatus GPIOAsynDriverOut::writeUInt32Digital(asynUser *pasynUser, epicsUInt32 value, epicsUInt32 mask)
{int function = pasynUser->reason;int status=0;int i;epicsUInt32 outValue=0, outMask;static const char *functionName = "writeUInt32Digital";setUIntDigitalParam(function, value, mask);if (function == digitalOutput_) {for (i=0, outMask=1; i<NUM_IO_BITS; i++, outMask = (outMask<<1)) {// Only write the value if the mask has this bit setoutValue = ((value &outMask) == 0) ? 0 : 1;if ((mask & outMask ) != 0) {status = setGPIO(i, outValue);}}}if (status == 0) {asynPrint(pasynUser, ASYN_TRACEIO_DRIVER,"%s:%s, port %s, wrote outValue=0x%x, value=0x%x, mask=0x%x\n",driverName, functionName, this->portName, outValue, value, mask);} else {asynPrint(pasynUser, ASYN_TRACE_ERROR,"%s:%s, port %s, ERROR writing outValue=0x%x, value=0x%x, mask=0x%x,  status=%d\n",driverName, functionName, this->portName, outValue, value, mask, status);}return (status==0) ? asynSuccess : asynError;
}void GPIOAsynDriverOut::init_GPIO_Out()
{int i;this->gpio[0] = 9;this->gpio[1] = 10;wiringPiSetup();for (i = 0; i < NUM_IO_BITS ; i++){pinMode(this->gpio[i], OUTPUT);digitalWrite(this->gpio[i], 0);}
}asynStatus GPIOAsynDriverOut::setGPIO(int index, int val)
{digitalWrite(this->gpio[index], val);return asynSuccess;
}void GPIOAsynDriverOut::report(FILE *fp, int details)
{fprintf(fp, "  Port: %s,GPIO %d - %d\n", this->portName, this->gpio[0], this->gpio[1]);asynPortDriver::report(fp, details);
}extern "C" int GPIOAsynDriverOutConfig(const char *portName)
{GPIOAsynDriverOut *pGPIOAsynDriverOut = new GPIOAsynDriverOut(portName);pGPIOAsynDriverOut = NULL;return(asynSuccess);
}static const iocshArg configArg0 = { "Port name",      iocshArgString};
static const iocshArg * const configArgs[] = {&configArg0,};
static const iocshFuncDef configFuncDef = {"GPIOAsynDriverOutConfig", 1, configArgs};
static void configCallFunc(const iocshArgBuf *args)
{GPIOAsynDriverOutConfig(args[0].sval);
}void drvGPIOAsynDriverOutRegister(void)
{iocshRegister(&configFuncDef,configCallFunc);
}extern "C" {epicsExportRegistrar(drvGPIOAsynDriverOutRegister);
}
编写一个数据库定义文件:
# drvgpioasyn.dbd
registrar(drvGPIOAsynDriverOutRegister)
在同级目录下的Makefile中指定需要的数据库定义文件,库文件以及源文件:
TOP=../..include $(TOP)/configure/CONFIG
#----------------------------------------
#  ADD MACRO DEFINITIONS AFTER THIS LINE
#=============================#=============================
# Build the IOC applicationPROD_IOC = gpioasyn
# gpioasyn.dbd will be created and installed
DBD += gpioasyn.dbd# gpioasyn.dbd will be made up from these files:
gpioasyn_DBD += base.dbd
gpioasyn_DBD += asyn.dbd
gpioasyn_DBD += drvgpioasyn.dbd# Include dbd files from all support applications:
#gpioasyn_DBD += xxx.dbd# Add all the support libraries needed by this IOC
gpioasyn_LIBS += asyn
gpioasyn_LIBS +=  wiringPi
wiringPi_DIR = /usr/libgpioasyn_SRCS += drvgpioasyn.cpp
# gpioasyn_registerRecordDeviceDriver.cpp derives from gpioasyn.dbd
gpioasyn_SRCS += gpioasyn_registerRecordDeviceDriver.cpp# Build the main IOC entry point on workstation OSs.
gpioasyn_SRCS_DEFAULT += gpioasynMain.cpp
gpioasyn_SRCS_vxWorks += -nil-# Add support from base/src/vxWorks if needed
#gpioasyn_OBJS_vxWorks += $(EPICS_BASE_BIN)/vxComLibrary# Finally link to the EPICS Base libraries
gpioasyn_LIBS += $(EPICS_BASE_IOC_LIBS)#===========================include $(TOP)/configure/RULES
在Db/目录下,定义数据库模板文件digitalout.template,在此仅定义了一个数字量输出记录bo,用于写GPIO管脚:
record(bo, "$(P)$(R)")
{field(PINI, "$(PINI=YES)")field(DESC, "$(DESC=)")field(DTYP, "asynUInt32Digital")field(OUT,  "@asynMask($(PORT),$(ADDR),$(MASK))DIGITAL_OUTPUT")field(ZNAM, "$(ZNAM=Low)")field(ZSV,  "$(ZSV=NO_ALARM)")field(ONAM, "$(ONAM=High)")field(OSV,  "$(OSV=NO_ALARM)")
}
将这个模板文件添加到同级的Makefile文件中。
返回这个IOC的顶层目录,执行make,编译整个项目。
进入启动目录cd iocBoot/iocgpioasyn/,编辑以下文件:
1) digitalout.substitutions
file "$(TOP)/db/digitalout.template"
{
pattern
{ R,   MASK,  ADDR}
{Bo1,  0x01,     0}
{Bo2,  0x02,     0}
}
2) st.cmd:
orangepi@orangepi4-lts:/usr/local/EPICS/program/gpioasyn/iocBoot/iocgpioasyn$ cat st.cmd
#!../../bin/linux-aarch64/gpioasyn#- You may have to change gpioasyn to something else
#- everywhere it appears in this file< envPathscd "${TOP}"## Register all support components
dbLoadDatabase "dbd/gpioasyn.dbd"
gpioasyn_registerRecordDeviceDriver pdbbaseGPIOAsynDriverOutConfig("GPIO")
cd "${TOP}/iocBoot/${IOC}"
dbLoadTemplate("digitalout.substitutions","P=TEST:,PORT=GPIO,ADDR=0,TIMEOUT=1")
iocInit
启动程序,进行测试:
root@orangepi4-lts:/usr/local/EPICS/program/gpioasyn/iocBoot/iocgpioasyn# ../../bin/linux-aarch64/gpioasyn st.cmd
#!../../bin/linux-aarch64/gpioasyn
< envPaths
epicsEnvSet("IOC","iocgpioasyn")
epicsEnvSet("TOP","/usr/local/EPICS/program/gpioasyn")
epicsEnvSet("SUPPORT","/usr/local/EPICS/synApps/support")
epicsEnvSet("EPICS_BASE","/usr/local/EPICS/base")
cd "/usr/local/EPICS/program/gpioasyn"
## Register all support components
dbLoadDatabase "dbd/gpioasyn.dbd"
gpioasyn_registerRecordDeviceDriver pdbbase
## Load record instances
#dbLoadRecords("db/gpioasyn.db","user=orangepi")
GPIOAsynDriverOutConfig("GPIO")
cd "/usr/local/EPICS/program/gpioasyn/iocBoot/iocgpioasyn"
dbLoadTemplate("digitalout.substitutions","P=TEST:,PORT=GPIO,ADDR=0,TIMEOUT=1")
iocInit
Starting iocInit
############################################################################
## EPICS R7.0.7
## Rev. 2023-06-25T15:48+0000
## Rev. Date build date/time:
############################################################################
iocRun: All initialization complete
## Start any sequence programs
#seq sncxxx,"user=orangepi"
epics> dbl
TEST:Bo1
TEST:Bo2
用caput对IOC中加载的两个bo记录进行写1和写0,可以测量到GPIO对应管脚上电平的变化。
这篇关于EPICS asynPortDriver使用示例的文章就介绍到这儿,希望我们推荐的文章对编程师们有所帮助!


