本文主要是介绍【超分辨率】python中的图像空间的转换 RGB--YCBCR,希望对大家解决编程问题提供一定的参考价值,需要的开发者们随着小编来一起学习吧!
由于人眼对颜色不敏感,而对光亮通道更加敏感。因此在超分辨率任务中,我们通常需要将RGB通道转换为Ycbcr通道。在Python的代码实现中,我发现opencv的RGB转Ycbcr的计算方式和Matlab的实现方式有些不同,而NTIRE的评估往往是在matlab平台的。因此,这里需要注意。
Python RGB转Ycbcr通道
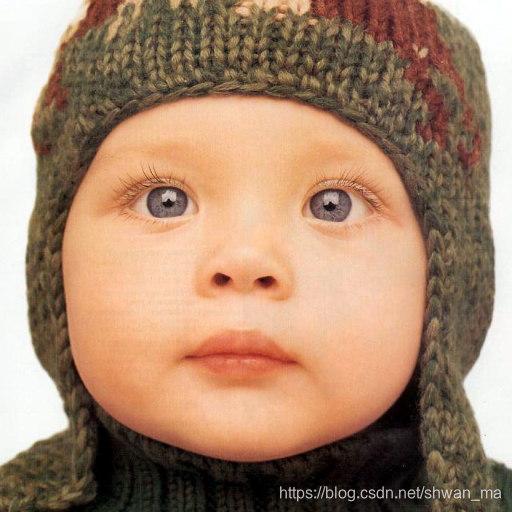
对于Set5中的baby图像
Code:
img = cv2.imread(imgpath)
img = cv2.cvtColor(img, cv2.COLOR_BGR2YCR_CB)
img_y = img[:,:,0]
Result:
array([[253, 253, 253, ..., 254, 254, 254],[253, 253, 253, ..., 254, 254, 254],[253, 253, 253, ..., 254, 254, 254],...,[ 62, 70, 72, ..., 67, 67, 67],[ 54, 58, 59, ..., 69, 68, 68],[ 49, 52, 53, ..., 70, 70, 69]], dtype=uint8)
实验原理:

参考链接:https://docs.opencv.org/3.0.0/de/d25/imgproc_color_conversions.html
Matlab RGB转Ycbcr通道
Code:
im  = imread(imgpath);
im = rgb2ycbcr(im);
im = im(:, :, 1);
Result:
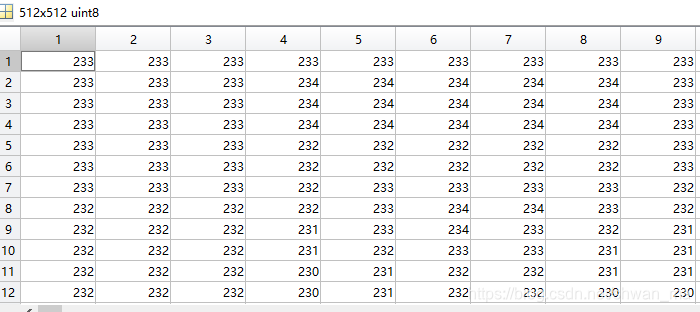
Matlab实现方式:
function ycbcr = rgb2ycbcr(varargin)
%RGB2YCBCR Convert RGB color values to YCbCr color space.
%   YCBCRMAP = RGB2YCBCR(MAP) converts the RGB values in MAP to the YCBCR
%   color space. MAP must be a M-by-3 array. YCBCRMAP is a M-by-3 matrix
%   that contains the YCBCR luminance (Y) and chrominance (Cb and Cr) color
%   values as columns.  Each row represents the equivalent color to the
%   corresponding row in the RGB colormap.
%
%   YCBCR = RGB2YCBCR(RGB) converts the truecolor image RGB to the
%   equivalent image in the YCBCR color space. RGB must be a M-by-N-by-3
%   array.
%
%   If the input is uint8, then YCBCR is uint8 where Y is in the range [16
%   235], and Cb and Cr are in the range [16 240].  If the input is a double,
%   then Y is in the range [16/255 235/255] and Cb and Cr are in the range
%   [16/255 240/255].  If the input is uint16, then Y is in the range [4112
%   60395] and Cb and Cr are in the range [4112 61680].
%
%   Class Support
%   -------------
%   If the input is an RGB image, it can be uint8, uint16, or double. If the
%   input is a colormap, then it must be double. The output has the same class
%   as the input.
%
%   Examples
%   --------
%   Convert RGB image to YCbCr.
%
%      RGB = imread('board.tif');
%      YCBCR = rgb2ycbcr(RGB);
%
%   Convert RGB color space to YCbCr.
%
%      map = jet(256);
%      newmap = rgb2ycbcr(map);
%
%   See also NTSC2RGB, RGB2NTSC, YCBCR2RGB.%   Copyright 1993-2010 The MathWorks, Inc.  %   References:
%     C.A. Poynton, "A Technical Introduction to Digital Video", John Wiley
%     & Sons, Inc., 1996, p. 175
%
%     Rec. ITU-R BT.601-5, "STUDIO ENCODING PARAMETERS OF DIGITAL TELEVISION
%     FOR STANDARD 4:3 AND WIDE-SCREEN 16:9 ASPECT RATIOS",
%     (1982-1986-1990-1992-1994-1995), Section 3.5.rgb = parse_inputs(varargin{:});%initialize variables
isColormap = false;%must reshape colormap to be m x n x 3 for transformation
if (ndims(rgb) == 2)%colormapisColormap=true;colors = size(rgb,1);rgb = reshape(rgb, [colors 1 3]);
end% This matrix comes from a formula in Poynton's, "Introduction to
% Digital Video" (p. 176, equations 9.6). % T is from equation 9.6: ycbcr = origT * rgb + origOffset;
origT = [65.481 128.553 24.966;...-37.797 -74.203 112; ...112 -93.786 -18.214];
origOffset = [16;128;128];% The formula ycbcr = origT * rgb + origOffset, converts a RGB image in the range
% [0 1] to a YCbCr image where Y is in the range [16 235], and Cb and Cr
% are in that range [16 240]. For each class type (double,uint8,
% uint16), we must calculate scaling factors for origT and origOffset so that
% the input image is scaled between 0 and 1, and so that the output image is
% in the range of the respective class type.scaleFactor.double.T = 1/255;      % scale output so in range [0 1].
scaleFactor.double.offset = 1/255; % scale output so in range [0 1].
scaleFactor.uint8.T = 1/255;       % scale input so in range [0 1].
scaleFactor.uint8.offset = 1;      % output is already in range [0 255].
scaleFactor.uint16.T = 257/65535;  % scale input so it is in range [0 1]  % and scale output so it is in range % [0 65535] (255*257 = 65535).
scaleFactor.uint16.offset = 257;   % scale output so it is in range [0 65535].% The formula ycbcr = origT*rgb + origOffset is rewritten as
% ycbcr = scaleFactorForT * origT * rgb + scaleFactorForOffset*origOffset.
% To use imlincomb, we rewrite the formula as ycbcr = T * rgb + offset, where T and
% offset are defined below.
classIn = class(rgb);
T = scaleFactor.(classIn).T * origT;
offset = scaleFactor.(classIn).offset * origOffset;%initialize output
ycbcr = zeros(size(rgb),classIn);for p = 1:3ycbcr(:,:,p) = imlincomb(T(p,1),rgb(:,:,1),T(p,2),rgb(:,:,2), ...T(p,3),rgb(:,:,3),offset(p));
end  if isColormapycbcr = reshape(ycbcr, [colors 3 1]);
end%%%
%Parse Inputs
%%%
function X = parse_inputs(varargin)narginchk(1,1);
X = varargin{1};if ndims(X)==2% For backward compatibility, this function handles uint8 and uint16% colormaps. This usage will be removed in a future release.validateattributes(X,{'uint8','uint16','double'},{'nonempty'},mfilename,'MAP',1);if (size(X,2) ~=3 || size(X,1) < 1)error(message('images:rgb2ycbcr:invalidSizeForColormap'))endif ~isa(X,'double')warning(message('images:rgb2ycbcr:notAValidColormap'))X = im2double(X);endelseif ndims(X)==3validateattributes(X,{'uint8','uint16','double'},{},mfilename,'RGB',1);if (size(X,3) ~=3)error(message('images:rgb2ycbcr:invalidTruecolorImage'))end
elseerror(message('images:rgb2ycbcr:invalidInputSize'))
end
实验可发现两种实现方式的结果存在着不同, 这是因为两者的内部实现原理不同。这里提供一个与Matlab的Ycbcr空间转换类似的函数:
def rgb2ycbcr(img, only_y=True):'''same as matlab rgb2ycbcronly_y: only return Y channelInput:uint8, [0, 255]float, [0, 1]'''in_img_type = img.dtypeimg.astype(np.float32)if in_img_type != np.uint8:img *= 255.# convertif only_y:rlt = np.dot(img, [65.481, 128.553, 24.966]) / 255.0 + 16.0else:rlt = np.matmul(img, [[65.481, -37.797, 112.0], [128.553, -74.203, -93.786],[24.966, 112.0, -18.214]]) / 255.0 + [16, 128, 128]if in_img_type == np.uint8:rlt = rlt.round()else:rlt /= 255.return rlt.astype(in_img_type)
这篇关于【超分辨率】python中的图像空间的转换 RGB--YCBCR的文章就介绍到这儿,希望我们推荐的文章对编程师们有所帮助!


