本文主要是介绍基于热成像的巡检和AidLux的工程方案,希望对大家解决编程问题提供一定的参考价值,需要的开发者们随着小编来一起学习吧!
一、热成像巡检介绍
输电线路巡检主要分为线路本体、附属设施、通道及电力保护区三大类。其中线路线路本体巡检内容包括绝缘子、金具以及导、地线等。特别的,绝缘子,顾名思义,是隔离导线与塔体,起绝缘作用。
输电线路运行过程中,由于内在或外在的原因,导致绝缘子串的温度异常,甚至导致低零值、零值等问题。
提示:什么是零值和低零值?
绝缘子的电阻值应该达到相当的数量级才能保证绝缘作用。当绝缘子的电阻变得很小,就会出现低零值现象,当绝缘子电阻趋近于0时,就出现了零值问题。绝缘子出现低零值和零值,就基本丧失了绝缘作用。
解决方法:可以通过红外相机进行拍摄,对图片进行温度分析,判断绝缘子能否处于正常工作状态
劣化的陶瓷绝缘子表现为低温、复合绝缘子表现为高温。
在考虑由于绝缘子电压程U型分布,以及导线端电压高于塔头端等呈现的温度分布特征。通过检测、分析绝缘子串的温度信息,可以判断绝缘子是否出现工作异常
二、热成像巡检
本文使用目标检测网络对旋转后的部件进行定位,具体的网络训练由于数据集过大没有做,所以采用的是老师提供的pt模型。大家有需要可以根据r-retinanet网络自己训练一个。
接下来训练好的模型部署在Aidlux平台,所以需要将模型pt转换为onnx再转换为tflite导出onnx模型以后,我们需要对模型本身进行一定的精简。精简本质上是对生成的onnx模型中的多余参数进行精简,同时对一些结果恒为常量的算子进行优化
onnx导出得到tflite模型,具体代码如下:
def onnx2tflite(onnx_path):onnx_converter(onnx_model_path = onnx_path,need_simplify = False,output_path = os.path.dirname(onnx_path), target_formats = ['tflite'], # or ['keras'], ['keras', 'tflite']weight_quant = False,int8_model = False,int8_mean = None,int8_std = None,image_root = None)
def onnx_converter(onnx_model_path:str,  output_path:str=None, input_node_names:list=None, output_node_names:list=None,need_simplify:bool=True, target_formats:list = ['keras', 'tflite'],native_groupconv:bool=False,weight_quant:bool=False, int8_model:bool=False, image_root:str=None,int8_mean:list or float = [123.675, 116.28, 103.53], int8_std:list or float = [58.395, 57.12, 57.375])->float:if not isinstance(target_formats, list) and  'keras' not in target_formats and 'tflite' not in target_formats:raise KeyError("'keras' or 'tflite' should in list")model_proto = load_onnx_modelproto(onnx_model_path, input_node_names, output_node_names, need_simplify)keras_model = keras_builder(model_proto, native_groupconv)if 'tflite' in target_formats:tflite_model = tflite_builder(keras_model, weight_quant, int8_model, image_root, int8_mean, int8_std)onnx_path, model_name = os.path.split(onnx_model_path)if output_path is None:output_path = onnx_pathoutput_path = os.path.join(output_path, model_name.split('.')[0])keras_model_path = Noneif 'keras' in target_formats:keras_model_path = output_path + ".h5"keras_model.save(keras_model_path)LOG.info(f"keras model saved in {keras_model_path}")tflite_model_path = Noneif 'tflite' in target_formats:tflite_model_path = output_path + ".tflite"with open(tflite_model_path, "wb") as fp:fp.write(tflite_model)convert_result = {"keras":keras_model_path, "tflite":tflite_model_path, "keras_error":0, "tflite_error":0}# ignore quantization modelif int8_model:return convert_resulterror_dict = {}try:error_dict = get_elements_error(model_proto, keras_model_path, tflite_model_path)keras_error, tflite_error = error_dict.get("keras", None), error_dict.get("tflite", None)if keras_error:if keras_error > 1e-2:LOG.error("h5 model elements' max error has reached {:^.4E}, but convert is done, please check {} carefully!".format(keras_error, keras_model_path))elif keras_error > 1e-4:LOG.warning("h5 model elements' max error is {:^.4E}, pass, h5 saved in {}".format(keras_error, keras_model_path))else:LOG.info("h5 model elements' max error is {:^.4E}, pass, h5 saved in {}".format(keras_error, keras_model_path))if tflite_error:if tflite_error > 1e-2:LOG.error("tflite model elements' max error has reached {:^.4E}, but convert is done, please check {} carefully!".format(tflite_error, tflite_model_path))elif tflite_error > 1e-4:LOG.warning("tflite model elements' max error is {:^.4E}, pass, tflite saved in {}".format(tflite_error, tflite_model_path))else:LOG.info("tflite model elements' max error is {:^.4E}, pass, tflite saved in {}".format(tflite_error, tflite_model_path))except:LOG.warning("convert is successed, but model running is failed, please check carefully!")convert_result["keras_error"] = error_dict.get("keras", None)convert_result["tflite_error"] = error_dict.get("tflite", None)return convert_result
导出模型成功后对tflite进行测试
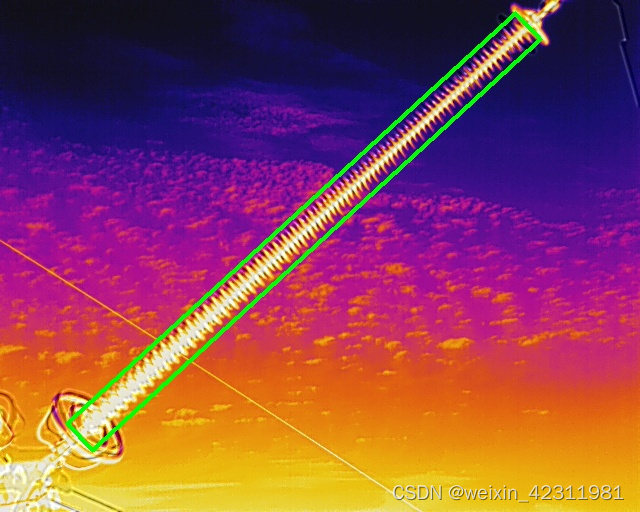
if __name__=='__main__':tflite_model = r"D:\BaiduNetdiskDownload\Lesson3_Training_and_Deploy\Lesson3_Training_and_Deploy\r-retinanet.tflite" # [SAI-KEY] 指定tflite模型路径image_path = r'D:\BaiduNetdiskDownload\Lesson3_Training_and_Deploy\Lesson3_Training_and_Deploy\AidLux_Deploy\AidLux_Deploy\samples\000001.jpg' # [SAI-KEY] 指定测试样本路径tflite_model = tf.lite.Interpreter(tflite_model) # Load tflite modeltflite_model.allocate_tensors()tflife_input_details = tflite_model.get_input_details() # 输入节点描述.tflife_output_details = tflite_model.get_output_details() # 输出节点描述.# 输入预处理img = cv2.imread(image_path)im, im_scales = process_img(img, NCHW=False, ToTensor=False)# 设定输入tflite_model.set_tensor(tflife_input_details[0]['index'], im)# 推理tflite_model.invoke()# 捕获推理输出outputs = tflite_model.get_tensor(tflife_output_details[0]['index'])output = np.transpose(outputs, (0, 2, 1)) # .astype(np.float32)im_anchor = np.transpose(im, (0, 3, 1, 2)).astype(np.float32)# 构造Anchor信息anchors_list = []anchor_generator = Anchors(ratios = np.array([0.2, 0.5, 1, 2, 5]))original_anchors = anchor_generator(im_anchor) # (bs, num_all_achors, 5)anchors_list.append(original_anchors)# 后解算decode_output = decoder(im_anchor, anchors_list[-1], output[..., 5:8], output[..., 0:5], thresh=0.5, nms_thresh=0.2, test_conf=None)# 重构解算scores = decode_output[0].reshape(-1, 1)classes = decode_output[1].reshape(-1, 1)boxes = decode_output[2]boxes[:, :4] = boxes[:, :4] / im_scalesif boxes.shape[1] > 5: boxes[:, 5:9] = boxes[:, 5:9] / im_scalesdets = np.concatenate([classes, scores, boxes], axis=1)# 过滤输出keep = np.where(classes > 0)[0]dets = dets[keep, :]# 转换坐标形式 'xywha' to 'xyxyxyxy'res = sort_corners(rbox_2_quad(dets[:, 2:]))# 写本地out_file = image_path.replace('.jpg', '.txt')with codecs.open(out_file, 'w', 'utf-8') as f:if dets.shape[0] == 0:f.close()else:for k in range(dets.shape[0]):f.write('{:.0f} {:.0f} {:.0f} {:.0f} {:.0f} {:.0f} {:.0f} {:.0f} {} {} {:.2f}\n'.format(res[k, 0], res[k, 1], res[k, 2], res[k, 3],res[k, 4], res[k, 5], res[k, 6], res[k, 7],dets[k, 0], Path(image_path).stem, dets[k, 1],)# (x, y, x, y, x, y, x, y, class, image_name, score))# cv绘图for k in range(dets.shape[0]):cv2.line(img, (int(res[k, 0]), int(res[k, 1])), (int(res[k, 2]), int(res[k, 3])), (0, 255, 0), 3)cv2.line(img, (int(res[k, 2]), int(res[k, 3])), (int(res[k, 4]), int(res[k, 5])), (0, 255, 0), 3)cv2.line(img, (int(res[k, 4]), int(res[k, 5])), (int(res[k, 6]), int(res[k, 7])), (0, 255, 0), 3)cv2.line(img, (int(res[k, 6]), int(res[k, 7])), (int(res[k, 0]), int(res[k, 1])), (0, 255, 0), 3)cv2.imwrite(image_path.replace('.jpg', '_eval.jpg'), img)如果输出为下图则表示转换tflite成功
三、AidLux平台部署
对于开发者而言,AI项目中各种算法的数据集准备+模型训练+模型部署依然存在着不小的难度。AidLux的出现,可以将我们的安卓设备以非虚拟的形式变成同时拥有Android和Linux系统环境的边缘计算设备,支持主流AI框架,非常易于部署,还有专门的接口调度算力资源,极大地降低了AI应用落地门槛。
def process_img(img, target_size=640, max_size=2000, multiple=32, keep_ratio=True, NCHW=True, ToTensor=True):img = cv2.resize(img, (640, 512), interpolation=cv2.INTER_LINEAR)im_shape = img.shapeim_size_min = np.min(im_shape[0:2])im_size_max = np.max(im_shape[0:2])# resize with keep_ratioif keep_ratio:im_scale = float(target_size) / float(im_size_min)  if np.round(im_scale * im_size_max) > max_size:     im_scale = float(max_size) / float(im_size_max)im_scale_x = np.floor(img.shape[1] * im_scale / multiple) * multiple / img.shape[1]im_scale_y = np.floor(img.shape[0] * im_scale / multiple) * multiple / img.shape[0]image_resized = cv2.resize(img, None, None, fx=im_scale_x, fy=im_scale_y, interpolation=cv2.INTER_LINEAR)im_scales = np.array([im_scale_x, im_scale_y, im_scale_x, im_scale_y])im = image_resized / 255.0  # np.float64im = im.astype(np.float32)PIXEL_MEANS =(0.485, 0.456, 0.406)    # RGB  format mean and variancesPIXEL_STDS = (0.229, 0.224, 0.225)im -= np.array(PIXEL_MEANS)im /= np.array(PIXEL_STDS)im = cv2.cvtColor(im, cv2.COLOR_BGR2RGB)  # BGR2RGBif NCHW:im = np.transpose(im, (2, 0, 1)).astype(np.float32)  # [SAI-KEY] TensorFlow use input with NHWC.im = im[np.newaxis, ...]if ToTensor:im = torch.from_numpy(im)return im, im_scaleselse:return None
if __name__=="__main__":cap = cvs.VideoCapture(0)frame_id = 0while True:frame = cap.read()if frame is None:continueframe_id += 1if frame_id % 3 != 0:continuetime0 = time.time()# 预处理im, im_scales = process_img(frame, NCHW=False, ToTensor=False)  # im: NHWC#img = preprocess_img(frame, target_shape=(640, 640), div_num=255, means=None, stds=None)# img /= 255''' 定义输入输出shape '''in_shape = [1 * 640 * 800 * 3 * 4]  # HWC, float32out_shape = [1 * 53325 * 8 * 4]  # 8400: total cells, 52 = 48(num_classes) + 4(xywh), float32#out_shape = [1 * 55425 * 8 * 4]  # 8400: total cells, 52 = 48(num_classes) + 4(xywh), float32''' AidLite初始化 '''aidlite = aidlite_gpu.aidlite()''' 加载R-RetinaNet模型 '''tflite_model = '/home/AidLux_Deploy/models/r-retinanet.tflite'res = aidlite.ANNModel(tflite_model, in_shape, out_shape, 4, -1) # Infer on -1: cpu, 0: gpu, 1: mixed, 2: dsp''' 设定输入输出 '''aidlite.setInput_Float32(im, 640, 800)''' 启动推理 '''aidlite.invoke()''' 捕获输出 '''preds = aidlite.getOutput_Float32(0)#preds = preds.reshape(1, 8, 53325)preds = preds.reshape(1, 8, (int)(preds.shape[0]/8))output = np.transpose(preds, (0, 2, 1))''' 创建Anchor '''im_anchor = np.transpose(im, (0, 3, 1, 2)).astype(np.float32)anchors_list = []anchor_generator = Anchors(ratios = np.array([0.2, 0.5, 1, 2, 5]))original_anchors = anchor_generator(im_anchor)   # (bs, num_all_achors, 5)anchors_list.append(original_anchors)''' 解算输出 '''decode_output = decoder(im_anchor, anchors_list[-1], output[..., 5:8], output[..., 0:5], thresh=0.5, nms_thresh=0.2, test_conf=None)for i in range(len(decode_output)):print("dim({}), shape: {}".format(i, decode_output[i].shape))''' 重构输出 '''scores = decode_output[0].reshape(-1, 1)classes = decode_output[1].reshape(-1, 1)boxes = decode_output[2]boxes[:, :4] = boxes[:, :4] / im_scalesif boxes.shape[1] > 5:   boxes[:, 5:9] = boxes[:, 5:9] / im_scalesdets = np.concatenate([classes, scores, boxes], axis=1)''' 过滤类别 '''keep = np.where(classes > 0)[0]dets =  dets[keep, :]''' 转换坐标('xyxya'->'xyxyxyxy') '''res = sort_corners(rbox_2_quad(dets[:, 2:]))''' 评估绘图 '''for k in range(dets.shape[0]):cv2.line(frame, (int(res[k, 0]), int(res[k, 1])), (int(res[k, 2]), int(res[k, 3])), (0, 255, 0), 3)cv2.line(frame, (int(res[k, 2]), int(res[k, 3])), (int(res[k, 4]), int(res[k, 5])), (0, 255, 0), 3)cv2.line(frame, (int(res[k, 4]), int(res[k, 5])), (int(res[k, 6]), int(res[k, 7])), (0, 255, 0), 3)cv2.line(frame, (int(res[k, 6]), int(res[k, 7])), (int(res[k, 0]), int(res[k, 1])), (0, 255, 0), 3)cvs.imshow(frame)
具体实现代码如上所示,这个代码是aidlux实现摄像头提取目标区域的,实现效果如下
目标检测
如果使用本地图片实现代码
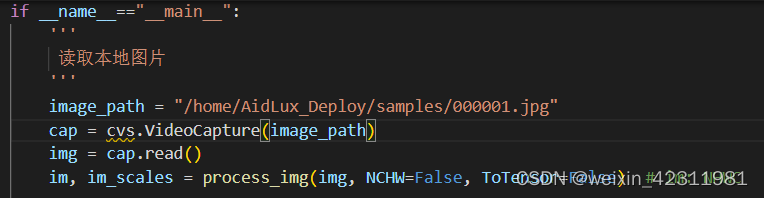
具体实现结果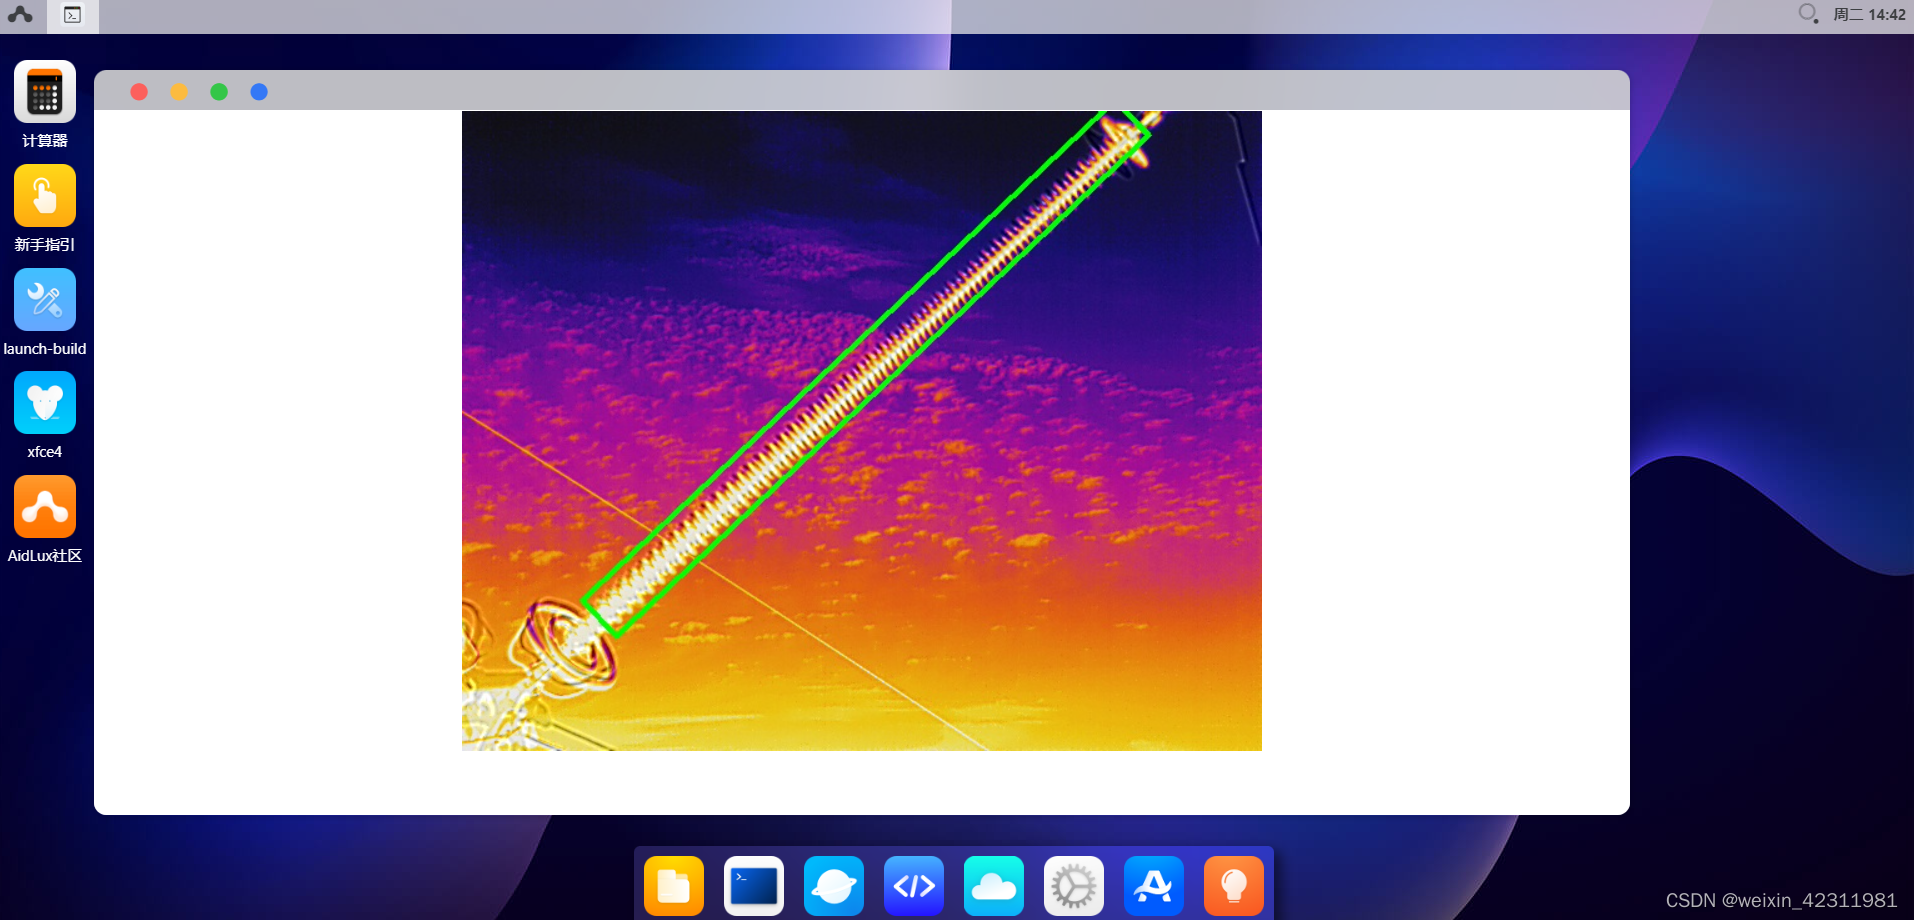
这篇关于基于热成像的巡检和AidLux的工程方案的文章就介绍到这儿,希望我们推荐的文章对编程师们有所帮助!


