本文主要是介绍H5 新增内容大全(包括Web Workers、SSE、WebSocket的详细使用代码),希望对大家解决编程问题提供一定的参考价值,需要的开发者们随着小编来一起学习吧!
目录
- 前言
- canvas和内联SVG
- 本地存储 localStorage与sessionStorage
- requestAnimationFrame
- 媒体标签 video和audio
- 内容拖放
- 地理位置获取
- 新的语义化标签
- 新的input类型
- 新的表单元素
- 新的表单属性
- 应用程序缓存
- Web Workers
- Server-Sent Events(nodejs案例)
- WebSocket(nodejs案例)
前言
H5内容之前一直没抽出时间整理,做个归纳使用的笔记。
记录包括一些新的标签、属性、新的api。
还有拖放drag、Web Workers、SSE与nodejs、WebSocket与nodejs的前后端详细使用案例。
canvas和内联SVG
canvas
- 自定义图形图表,基于js的绘图api描述 2D 图形。
- 逐像素进行渲染,因此一旦被渲染就不会被浏览器关注了,不过可以搭配requestAnimationFrame重新绘制制作页面动画。
<body><canvas id="myCanvas" width="200" height="100" style="border:1px solid #000000;"></canvas>
</body><script>var c = document.getElementById("myCanvas");var ctx = c.getContext("2d");ctx.fillStyle = "#FF0000";ctx.fillRect(0, 0, 150, 75);
</script>
svg
- 是一种使用 XML 描述 2D 图形的语言。
- 每个被绘制的图形均被视为对象。如果 SVG 对象的属性发生变化,那么浏览器能够自动重现图形。
<svg height="190"><polygon points="100,10 40,180 190,60 10,60 160,180"style="fill:lime;stroke:purple;stroke-width:5;fill-rule:evenodd;"></svg>
本地存储 localStorage与sessionStorage
- 本地存储,缓存一些数据在浏览器。
- localStorage与sessionStorage区别就是sessionStorage只在一次会话中有效,关闭浏览器再打开就失效,而localstorage除非手动清除否则仍然有效。
- 与cookie区别是,Storage不会传去服务端,且存储内容比较大,cookie的可存储内容是比较小的。
- 使用方法我单独记录过:一分钟掌握本地缓存localstorage使用方法。
requestAnimationFrame
- 简称raf,面试时可能会被问到。
- 使用方法:在声明的函数fun中调用requestAnimationFrame(fun)。
- 相对于setTimeout实现动画来说,raf运行时会根据浏览器的绘制频率运行,所以不会掉帧看起来很流畅。
const test = () => {//...执行内容requestAnimationFrame(test)}test()
媒体标签 video和audio
- 音频与视频,h5嵌入音频与视频使用的标签,比较方便。
<video width="320" height="240" controls><source src="movie.mp4" type="video/mp4"><source src="movie.ogg" type="video/ogg">您的浏览器不支持Video标签。
</video>
<audio controls><source src="horse.ogg" type="audio/ogg"><source src="horse.mp3" type="audio/mpeg">您的浏览器不支持 audio 元素。
</audio>
内容拖放
被拖动的内容
- 添加
draggable="true",表示允许被拖放。 - 添加
ondragstart事件,表示拖放时储存的数据,可以将event作为入参,方便我们使用信息。
<img id="drag" src="./xx.jpg" draggable="true" ondragstart="drag(event)" width="336" height="69">
event.dataTransfer.setData可以储存我们拖放时内容的信息,我们可以将id存入,入参前面是key,后面是value。
function drag(e) {e.dataTransfer.setData("Text", e.target.id);}
存放内容的容器或位置
- 默认是不允许被拖放的,因此我们要给
ondragover和ondrop事件添加阻止默认事件。 - 添加
ondrop事件,这个是鼠标将东西拖到该容器并松手时触发的事件,它可以用e.dataTransfer.getData读取ondragstart事件中使用event.dataTransfer.setData储存的值。 - 用id选中被托放的内容,让容器调用
appendChild将内容添加进自己的内容区。
<div id="box" ondrop="drop(event)" ondragover="allowDrop(event)"></div>
function allowDrop(e) {e.preventDefault();}
function drop(e) {e.preventDefault();var id = e.dataTransfer.getData("Text");e.target.appendChild(document.getElementById(id));}
原理
- 只要是被拖放的内容添加了
draggable="true",当它被appendChild调用添加进别的内容时,就会发生回流,让原来的被托放内容消失,就给人带来了拖放的效果。 - 我尝试手动添加按钮不进行拖动操作,发现只要达到了上面的条件,即便把被拖动元素的拖动事件删除,也可以实现效果,从原来的位置移动到目标容器位置。
<button onclick="test()">点击试试</button>
function test() {document.getElementById('box').appendChild(document.getElementById('drag'))}
完整示例
<style>#box {width: 350px;height: 70px;padding: 10px;border: 1px solid #aaaaaa;}
</style>
<body><p>拖动图片到矩形框中:</p><div id="box" ondrop="drop(event)" ondragover="allowDrop(event)"></div><br><img loading="lazy" id="drag" src="./xxx.jpg" ondragstart="drag(event)"draggable="true" width="336" height="69"><button onclick="test()">点击试试</button>
</body>
<script>function allowDrop(e) {e.preventDefault();}function drag(e) {e.dataTransfer.setData("Text", e.target.id);}function drop(e) {e.preventDefault();var data = e.dataTransfer.getData("Text");e.target.appendChild(document.getElementById(data));}function test() {document.getElementById('box').appendChild(document.getElementById('drag'))}
</script>
地理位置获取
navigator.geolocation.getCurrentPosition获取位置,入参为函数。- 函数会获得一个参数position,经纬度分别为
position.coords.longitude和position.coords.latitude。
<body><p id="demo">点击按钮获取您当前坐标(可能需要比较长的时间获取):</p><button onclick="getLocation()">点我</button><script>var x = document.getElementById("demo");function getLocation() {if (navigator.geolocation) {navigator.geolocation.getCurrentPosition(showPosition);}else {x.innerHTML = "该浏览器不支持获取地理位置。";}}function showPosition(position) {x.innerHTML = "纬度: " + position.coords.latitude +"<br>经度: " + position.coords.longitude;}</script>
</body>
新的语义化标签
header,section, footer, aside, nav, main, article, figure
新的input类型
color,date,datetime,datetime-local,email,month,number,range,search,tel,time,url,week
新的表单元素
datalist
- 将
input的list属性与datalist的id设置为相同的即可给input绑定一个待输入内容框,list属性也是h5新的表单属性。
<input list="listName"><datalist id="listName"><option value="value1"><option value="value2"><option value="value3"><option value="value4"><option value="value5"></datalist>

output
- 用于不同类型的输出,比如计算或脚本输出
<form oninput="x.value=parseInt(a.value)+parseInt(b.value)">0
<input type="range" id="a" value="50">100 +
<input type="number" id="b" value="50">=
<output name="x" for="a b"></output>
</form>

新的表单属性
(已经常见的)
- 常见于number:min、max、step。
- 常见于file:multiple 。
- 与datalist有关:list。
- 其他:autofocus、multiple 、placeholder 、required、pattern、height 、width。
(不常见与不常用)
autocomplete
- form与input中可以添加该属性,决定是否自动完成,form添加了true所有input都会自动完成,不过input可以单独添加false,会以input单独添加的优先。
- 自动完成效果就是进行过提交的输入数据,再次输入该表单时可能会显示过去输入过的提示。
- 有些浏览器会自动存在该功能,有些需要自己手动添加。
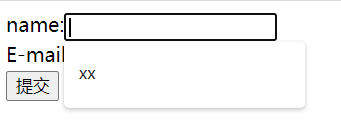
<form action="demo" autocomplete="on">name:<input type="text" name="fname"><br>E-mail: <input type="email" name="email" autocomplete="off"><br><input type="submit">
</form>
novalidate
- form添加该属性将不再input进行过滤,比如
type="email"的input也允许随意输入。
<form action="demo" novalidate>E-mail: <input type="email" name="user_email"><input type="submit">
</form>
其他
还有一些关于覆盖表单属性的属性,个人并不常用,有兴趣自己查询:form 、formaction 、formenctype 、formmethod、formnovalidate 、formtarget 。
应用程序缓存
- 给html标签添加
manifest="demo.appcache",并在html同源创建demo.appcacheManifest文件就可以进行缓存,访问过的页面,离线了再次访问仍然可以访问。 - 通过Manifest文件配置要缓存的内容,添加版本为了可以更好的更新缓存,底下列出来的就是要缓存的同源文件。
- 缓存容量存在限制。
demo.appcache
CACHE MANIFEST
#v0.0.1
/index.html
/...
/...
Web Workers
- 运行在后台的js,不影响页面性能。
- 检测用户浏览器是否支持。
if (typeof (Worker) !== undefined) {console.log('支持Web worker')}
- 在外部编写要运行的js文件,也就是web worker 文件。
test.js
let i = 0setInterval(() => {i++//postMessage传递数据postMessage(i)
}, 1000)
- 在html页面接收,
onmessage监听web worker 文件的postMessage事件,onmessage参数event中有一个data属性就是从postMessage传来的。
let wif (typeof (Worker) !== undefined) {w = new Worker("/test.js")}w.onmessage = (event) => {console.log(event.data)//1...2...3.....}
w.terminate()终止Web Worker
<body><button onclick="start()">使用Web Worker</button><button onclick="stop()">终止Web Worker</button>
</body>
<script>let wconst start = () => {if (typeof (Worker) !== undefined) {w = new Worker("/test.js")}w.onmessage = (e) => {console.log(e.data)}}const stop = () => {w.terminate();}
</script>
- 注意html用本地文件打开不支持Web Worker,最好部署一下,比如用nginx代理一下静态页面。
Server-Sent Events(nodejs案例)
- 简称SEE,服务器发送事件,网页自动获取来自服务器的更新,单向消息传递。
编写nodejs服务端
-
创建一个服务放在8844端口,我这里命名为
/stream,我用的express,不喜欢的话用http也行。 -
res.set请求头的设置很关键,'Content-Type': 'text/event-stream'这种是sse必须的类型,'Access-Control-Allow-Origin': '*'解决跨域方便测试。 -
res.write进行消息推送,因为要保持连接,所以肯定不能用send。
import express from 'express'
const app = new express()
app.use(express.json())app.get('/stream', (req, res) => {res.set({'Content-Type': 'text/event-stream','Cache-Control': 'no-cache',Connection: 'keep-alive','Access-Control-Allow-Origin': '*',})res.write('retry: 10000\n')res.write('event: connecttime\n')res.write('data: ' + new Date() + '\n\n')res.write('data: ' + new Date() + '\n\n')let interval = setInterval(function () {res.write('data: ' + new Date() + '\n\n')}, 1000)req.connection.addListener('close',function () {clearInterval(interval)},false)
})app.listen(8844, () => {console.log('开启')
})// 以下是使用http的方案,同理// import http from 'http'
// http
//   .createServer(function (req, res) {
//     var fileName = '.' + req.url//     if (fileName === './stream') {
//       res.writeHead(200, {
//         'Content-Type': 'text/event-stream',
//         'Cache-Control': 'no-cache',
//         Connection: 'keep-alive',
//         'Access-Control-Allow-Origin': '*',
//       })
//       res.write('retry: 10000\n')
//       res.write('event: connecttime\n')
//       res.write('data: ' + new Date() + '\n\n')
//       res.write('data: ' + new Date() + '\n\n')//       let interval = setInterval(function () {
//         res.write('data: ' + new Date() + '\n\n')
//       }, 1000)//       req.connection.addListener(
//         'close',
//         function () {
//           clearInterval(interval)
//         },
//         false
//       )
//     }
//   })
//   .listen(8844, '127.0.0.1')
前端html页面
new EventSource('http://127.0.0.1:8844/stream')请求对应的的服务。- 添加几个监听,获取服务器推送的消息。
<body><div id="example"></div>
</body>
<script>if (typeof (EventSource) !== "undefined") {// 浏览器支持 Server-Sentvar source = new EventSource('http://127.0.0.1:8844/stream');var div = document.getElementById('example');source.onopen = function (event) {div.innerHTML += '<p>Connection open ...</p>';};source.onerror = function (event) {div.innerHTML += '<p>Connection close.</p>';};source.addEventListener('connecttime', function (event) {div.innerHTML += ('<p>Start time: ' + event.data + '</p>');}, false);source.onmessage = function (event) {div.innerHTML += ('<p>Ping: ' + event.data + '</p>');};}
</script>

WebSocket(nodejs案例)
HTML5 定义的 WebSocket 协议,能更好的节省服务器资源和带宽,并且能够更实时地进行通讯。
编写nodejs服务端
- nodejs有很多支持WebSocket的包,这里使用的是
nodejs-websocket。 ws.createServer创建服务,三个监听事件,close与error就不用讲了,text监听前客户端传递过来的消息。sendText用于向客户端传递消息,实现双向通信。
import ws from 'nodejs-websocket'console.log('开始建立连接...')const server = ws.createServer(function (conn) {conn.on('text', function (str) {console.log('从客户端收到的信息:' + str)conn.sendText('从服务端传来的信息:收到')})conn.on('close', function (code, reason) {console.log('关闭连接')})conn.on('error', function (code, reason) {console.log('异常关闭')})}).listen(8001)console.log('WebSocket建立完毕')
前端html页面
new WebSocket连接ws服务端口,记得服务前加上ws:。ws.send向服务端发送消息。ws.onmessage监听,可以在这里随时等待服务端传递信息回来。
<body><div id="mess">正在连接...</div><div class="values"><div class="value" id="value1">西瓜</div><div class="value" id="value2">苹果</div><div class="value" id="value3">梨子</div></div><script>const mess = document.getElementById("mess");if (window.WebSocket) {const ws = new WebSocket('ws://localhost:8001');ws.onopen = function (e) {console.log("连接服务器成功");ws.send("瓦达西连接了服务器");}ws.onclose = function (e) {console.log("服务器关闭");}ws.onerror = function () {console.log("连接出错");}ws.onmessage = function (e) {mess.innerHTML = "连接成功"console.log(e)}document.querySelector(".values").onclick = function (e) {const time = new Date();ws.send(time + "  点击了“" + e.target.innerHTML + "”");}}</script>
</body>
这篇关于H5 新增内容大全(包括Web Workers、SSE、WebSocket的详细使用代码)的文章就介绍到这儿,希望我们推荐的文章对编程师们有所帮助!


