本文主要是介绍用Mask-RCNN训练海贼王路飞和索隆(人脸识别)训练自己的数据集(源代码下载),希望对大家解决编程问题提供一定的参考价值,需要的开发者们随着小编来一起学习吧!
文章目录
- 前言
- 一、所用的环境
- 二、步骤
- 1.labelme标注工作
- 2.处理数据
- 总结
前言
Mask-RCNN是最近权威的目标检测算法,本文分享和记录训练自己的数据集的整个流程
一、所用的环境
- python==3.6
- tensorflow-gpu==1.13.1
- pillow==8.2.0
- labelme==4.5.7
- pyqt5==5.15.2
二、步骤
1.labelme标注工作
(自行百度搜安装labelme)
打开Anaconda Prompt,激活环境,再输出labelme即可,如图:

会弹出一个用来标注图片的系统:
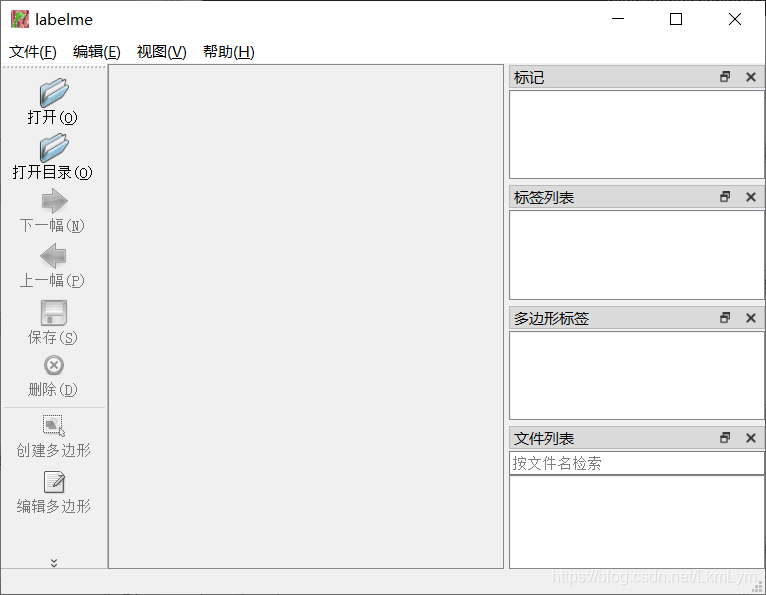
直接点击左上角打开需要标注的图片目录
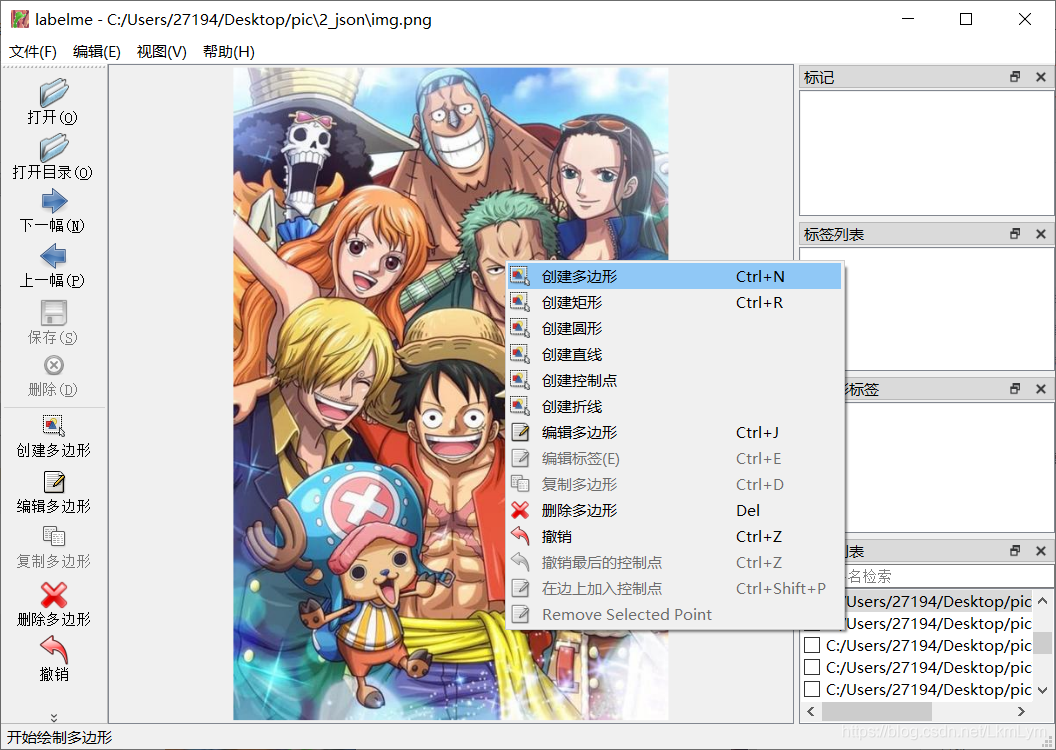
开始标注路飞和索隆的脸

标注一个类别就要起一个名字,这里我就直接起zoro了。
一张一张标注完会得到对应的json。接下来就是处理json文件
我是直接用Python代码批量处理这些json文件:
代码如下:
'''
处理时记得指定的路径里只能在文件夹里放json文件
'''
import argparse
import base64
import json
import os
import os.path as osp
import yaml
import imgviz
import PIL.Imagefrom labelme.logger import logger
from labelme import utils
import cv2
from math import *
import numpy as np
import randomdef main():list_path = os.listdir('C:/Users/27194/Desktop/data/json') #与下面的json_file的路径最好一致;for i in range(0, len(list_path)):logger.warning('This script is aimed to demonstrate how to convert the''JSON file to a single image dataset, and not to handle''multiple JSON files to generate a real-use dataset.')parser = argparse.ArgumentParser()parser.add_argument('--json_file')parser.add_argument('-o', '--out', default=None)args = parser.parse_args()json_file = 'C:/Users/27194/Desktop/data/json/' + list_path[i]print(list_path[i])if args.out is None:out_dir = osp.basename(json_file).replace('.', '_')  # 返回文件名out_dir = osp.join(osp.dirname(json_file), out_dir)  # 把目录和文件名合成一个路径else:out_dir = args.outif not osp.exists(out_dir):os.mkdir(out_dir)  # 用于以数字权限模式创建目录data = json.load(open(json_file))imageData = data.get('imageData')if not imageData:imagePath = os.path.join(os.path.dirname(json_file), data['imagePath'])  # os.path.dirname返回文件路径with open(imagePath, 'rb') as f:imageData = f.read()imageData = base64.b64encode(imageData).decode('utf-8')img = utils.img_b64_to_arr(imageData)label_name_to_value = {'_background_': 0}for shape in sorted(data['shapes'], key=lambda x: x['label']):label_name = shape['label']if label_name in label_name_to_value:label_value = label_name_to_value[label_name]else:label_value = len(label_name_to_value)label_name_to_value[label_name] = label_valuelbl, _ = utils.shapes_to_label(img.shape, data['shapes'], label_name_to_value)label_names = [None] * (max(label_name_to_value.values()) + 1)for name, value in label_name_to_value.items():label_names[value] = namelbl_viz = imgviz.label2rgb(label=lbl, img=imgviz.asgray(img), label_names=label_names, loc='rb')PIL.Image.fromarray(img).save(osp.join(out_dir, 'img.png'))utils.lblsave(osp.join(out_dir, 'label.png'), lbl)PIL.Image.fromarray(lbl_viz).save(osp.join(out_dir, 'label_viz.png'))with open(osp.join(out_dir, 'label_names.txt'), 'w') as f:for lbl_name in label_names:f.write(lbl_name + '\n')logger.warning('info.yaml is being replaced by label_names.txt')info = dict(label_names=label_names)with open(osp.join(out_dir, 'info.yaml'), 'w') as f:yaml.safe_dump(info, f, default_flow_style=False)logger.info('Saved to: {}'.format(out_dir))x = out_dir + '\\label.png'if __name__ == '__main__':main()
可以将代码稍加改动复制粘贴到自己的编译器上运行
需要修改的地方也就是(记得选定的文件夹里只能含有json文件):
list_path = os.listdir(‘改成json文件所在的路径’)
json_file = ‘改成json文件所在的路径’ + list_path[i]
再运行就ok
会得到五个文件:


接下来就是处理数据的时候了,先将所有的文件整理成这样的模式:
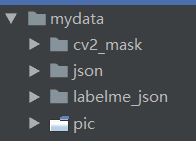
2.处理数据
训练代码如下:
# -*- coding: utf-8 -*-import os
import sys
import random
import math
import re
import time
import numpy as np
import cv2
import matplotlib
import matplotlib.pyplot as plt
import tensorflow as tf
from mrcnn.config import Config
#import utils
from mrcnn import model as modellib,utils
from mrcnn import visualize
import yaml
from mrcnn.model import log
from PIL import Image
"""
加入自己类别名称
更改类别个数
"""#os.environ["CUDA_VISIBLE_DEVICES"] = "0"
# Root directory of the project
ROOT_DIR = os.getcwd()#ROOT_DIR = os.path.abspath("../")
# Directory to save logs and trained model
MODEL_DIR = os.path.join(ROOT_DIR, "logs")iter_num=0# Local path to trained weights file
COCO_MODEL_PATH = os.path.join(ROOT_DIR, "mask_rcnn_coco.h5")
# Download COCO trained weights from Releases if needed
if not os.path.exists(COCO_MODEL_PATH):utils.download_trained_weights(COCO_MODEL_PATH)class ShapesConfig(Config):"""Configuration for training on the toy shapes dataset.Derives from the base Config class and overrides values specificto the toy shapes dataset."""# Give the configuration a recognizable nameNAME = "shapes"# Train on 1 GPU and 8 images per GPU. We can put multiple images on each# GPU because the images are small. Batch size is 8 (GPUs * images/GPU).GPU_COUNT = 1IMAGES_PER_GPU = 1# Number of classes (including background)NUM_CLASSES = 1 + 2  # background + 3 shapes# Use small images for faster training. Set the limits of the small side# the large side, and that determines the image shape.IMAGE_MIN_DIM = 320IMAGE_MAX_DIM = 384# Use smaller anchors because our image and objects are smallRPN_ANCHOR_SCALES = (8 * 6, 16 * 6, 32 * 6, 64 * 6, 128 * 6)  # anchor side in pixels# Reduce training ROIs per image because the images are small and have# few objects. Aim to allow ROI sampling to pick 33% positive ROIs.TRAIN_ROIS_PER_IMAGE = 100# Use a small epoch since the data is simpleSTEPS_PER_EPOCH = 100# use small validation steps since the epoch is smallVALIDATION_STEPS = 50config = ShapesConfig()
config.display()class DrugDataset(utils.Dataset):# 得到该图中有多少个实例(物体)def get_obj_index(self, image):n = np.max(image)return n# 解析labelme中得到的yaml文件,从而得到mask每一层对应的实例标签def from_yaml_get_class(self, image_id):info = self.image_info[image_id]with open(info['yaml_path']) as f:temp = yaml.load(f.read(), Loader=yaml.FullLoader)labels = temp['label_names']del labels[0]return labels# 重新写draw_maskdef draw_mask(self, num_obj, mask, image,image_id):info = self.image_info[image_id]for index in range(num_obj):for i in range(info['width']):for j in range(info['height']):at_pixel = image.getpixel((i, j))if at_pixel == index + 1:mask[j, i, index] = 1return mask# 重新写load_shapes,里面包含自己的自己的类别# 并在self.image_info信息中添加了path、mask_path 、yaml_path# yaml_pathdataset_root_path = "/tongue_dateset/"# img_floder = dataset_root_path + "rgb"# mask_floder = dataset_root_path + "mask"# dataset_root_path = "/tongue_dateset/"def load_shapes(self, count, img_floder, mask_floder, imglist, dataset_root_path):"""Generate the requested number of synthetic images.count: number of images to generate.height, width: the size of the generated images."""# Add classes#self.add_class("shapes", 1, "tank") # 黑色素瘤#self.add_class("shapes", 1, "luffy")self.add_class("shapes", 2, "zoro")for i in range(count):# 获取图片宽和高filestr = imglist[i].split(".")[0]mask_path = mask_floder + "/" + filestr + ".png"yaml_path = dataset_root_path + "labelme_json/" + filestr + "_json/info.yaml"print(dataset_root_path + "labelme_json/" + filestr + "_json/img.png")cv_img = cv2.imread(dataset_root_path + "labelme_json/" + filestr + "_json/img.png")self.add_image("shapes", image_id=i, path=img_floder + "/" + imglist[i],width=cv_img.shape[1], height=cv_img.shape[0], mask_path=mask_path, yaml_path=yaml_path)# 重写load_maskdef load_mask(self, image_id):"""Generate instance masks for shapes of the given image ID."""global iter_numprint("image_id",image_id)info = self.image_info[image_id]count = 1  # number of objectimg = Image.open(info['mask_path'])num_obj = self.get_obj_index(img)mask = np.zeros([info['height'], info['width'], num_obj], dtype=np.uint8)mask = self.draw_mask(num_obj, mask, img,image_id)occlusion = np.logical_not(mask[:, :, -1]).astype(np.uint8)for i in range(count - 2, -1, -1):mask[:, :, i] = mask[:, :, i] * occlusionocclusion = np.logical_and(occlusion, np.logical_not(mask[:, :, i]))labels = []labels = self.from_yaml_get_class(image_id)labels_form = []for i in range(len(labels)):if labels[i].find("luffy") != -1:labels_form.append("luffy")if labels[i].find("zoro") != -1:labels_form.append("zoro")class_ids = np.array([self.class_names.index(s) for s in labels_form])return mask, class_ids.astype(np.int32)def get_ax(rows=1, cols=1, size=8):"""Return a Matplotlib Axes array to be used inall visualizations in the notebook. Provide acentral point to control graph sizes.Change the default size attribute to control the sizeof rendered images"""_, ax = plt.subplots(rows, cols, figsize=(size * cols, size * rows))return ax#基础设置
dataset_root_path="mydata/"
img_floder = dataset_root_path + "pic"
mask_floder = dataset_root_path + "cv2_mask"
imglist = os.listdir(img_floder)
count = len(imglist)
#train与val数据集准备
dataset_train = DrugDataset()
dataset_train.load_shapes(count, img_floder, mask_floder, imglist,dataset_root_path)
dataset_train.prepare()print("dataset_train-->",dataset_train._image_ids)dataset_val = DrugDataset()
dataset_val.load_shapes(7, img_floder, mask_floder, imglist,dataset_root_path)
dataset_val.prepare()print("dataset_val-->",dataset_val._image_ids)# Load and display random samples
#image_ids = np.random.choice(dataset_train.image_ids, 4)
#for image_id in image_ids:
#    image = dataset_train.load_image(image_id)
#    mask, class_ids = dataset_train.load_mask(image_id)
#    visualize.display_top_masks(image, mask, class_ids, dataset_train.class_names)# Create model in training mode
model = modellib.MaskRCNN(mode="training", config=config,model_dir=MODEL_DIR)# Which weights to start with?
init_with = "coco"  # imagenet, coco, or lastif init_with == "imagenet":model.load_weights(model.get_imagenet_weights(), by_name=True)
elif init_with == "coco":# Load weights trained on MS COCO, but skip layers that# are different due to the different number of classes# See README for instructions to download the COCO weightsmodel.load_weights(COCO_MODEL_PATH, by_name=True,exclude=["mrcnn_class_logits", "mrcnn_bbox_fc","mrcnn_bbox", "mrcnn_mask"])
elif init_with == "last":# Load the last model you trained and continue trainingmodel.load_weights(model.find_last()[1], by_name=True)# Train the head branches
# Passing layers="heads" freezes all layers except the head
# layers. You can also pass a regular expression to select
# which layers to train by name pattern.
model.train(dataset_train, dataset_val,learning_rate=config.LEARNING_RATE,epochs=10,layers='heads')# Fine tune all layers
# Passing layers="all" trains all layers. You can also
# pass a regular expression to select which layers to
# train by name pattern.
model.train(dataset_train, dataset_val,learning_rate=config.LEARNING_RATE / 10,epochs=10,layers="all")
想训练的话就可以改以下三个地方的代码

第一个是类别,1+2,其中1是背景,2是你需要识别的类别数目,像是我只识别路飞和索隆,那么我就是1+2,如果你只需要识别一种类型,那就是1+1;
第二个是照片大小,需要提前统一处理照片的大小;
第三个是RPN层的数据设置,根据自己的情况设置anchor size;
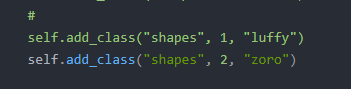
此处自己labelme标注的类别名称就按格式写就行。
有多少往后写多少,按照1,2,3,4的顺序来。
测试代码如下:
# -*- coding: utf-8 -*-import os
import sys
import random
import math
import numpy as np
import skimage.io
import matplotlib
import matplotlib.pyplot as plt
import cv2
import time
from mrcnn.config import Config
from datetime import datetime
# Root directory of the project
ROOT_DIR = os.getcwd()# Import Mask RCNN
sys.path.append(ROOT_DIR) # To find local version of the library
from mrcnn import utils
import mrcnn.model as modellib
from mrcnn import visualize
# Import COCO config
sys.path.append(os.path.join(ROOT_DIR, "samples/coco/")) # To find local version
from samples.coco import coco# Directory to save logs and trained model
MODEL_DIR = os.path.join(ROOT_DIR, "logs")
MODEL_WEIGHT = './logs/shapes20210503T1622/mask_rcnn_shapes_0010.h5'
"""
# Local path to trained weights file
COCO_MODEL_PATH = os.path.join(MODEL_DIR ,"mask_rcnn_coco.h5")
# Download COCO trained weights from Releases if needed
if not os.path.exists(COCO_MODEL_PATH):utils.download_trained_weights(COCO_MODEL_PATH)print("cuiwei***********************")
"""
# Directory of images to run detection on
IMAGE_DIR = os.path.join(ROOT_DIR, "images")class ShapesConfig(Config):"""Configuration for training on the toy shapes dataset.Derives from the base Config class and overrides values specificto the toy shapes dataset."""# Give the configuration a recognizable nameNAME = "shapes"# Train on 1 GPU and 8 images per GPU. We can put multiple images on each# GPU because the images are small. Batch size is 8 (GPUs * images/GPU).GPU_COUNT = 1IMAGES_PER_GPU = 1# Number of classes (including background)NUM_CLASSES = 1 + 2 # background + 3 shapes# Use small images for faster training. Set the limits of the small side# the large side, and that determines the image shape.IMAGE_MIN_DIM = 320IMAGE_MAX_DIM = 384# Use smaller anchors because our image and objects are smallRPN_ANCHOR_SCALES = (8 * 6, 16 * 6, 32 * 6, 64 * 6, 128 * 6) # anchor side in pixels# Reduce training ROIs per image because the images are small and have# few objects. Aim to allow ROI sampling to pick 33% positive ROIs.TRAIN_ROIS_PER_IMAGE =100# Use a small epoch since the data is simpleSTEPS_PER_EPOCH = 100# use small validation steps since the epoch is smallVALIDATION_STEPS = 50#import train_tongue
#class InferenceConfig(coco.CocoConfig):
class InferenceConfig(ShapesConfig):# Set batch size to 1 since we'll be running inference on# one image at a time. Batch size = GPU_COUNT * IMAGES_PER_GPUGPU_COUNT = 1IMAGES_PER_GPU = 1config = InferenceConfig()# Create model object in inference mode.
model = modellib.MaskRCNN(mode="inference", model_dir=MODEL_DIR, config=config)# Load weights trained on MS-COCO
model.load_weights(MODEL_WEIGHT, by_name=True)# COCO Class names
# Index of the class in the list is its ID. For example, to get ID of
# the teddy bear class, use: class_names.index('teddy bear')
class_names = ['BG', 'luffy', 'zoro']
# Load a random image from the images folder
# file_names = next(os.walk(IMAGE_DIR))[2]
# image = skimage.io.imread(os.path.join(IMAGE_DIR, random.choice(file_names)))
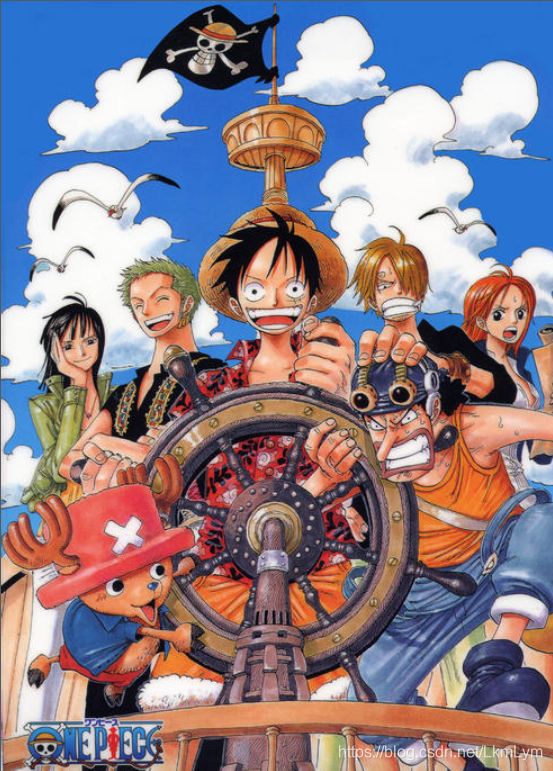
image = skimage.io.imread('./images/test.jpg')
#a=datetime.now()
# Run detection
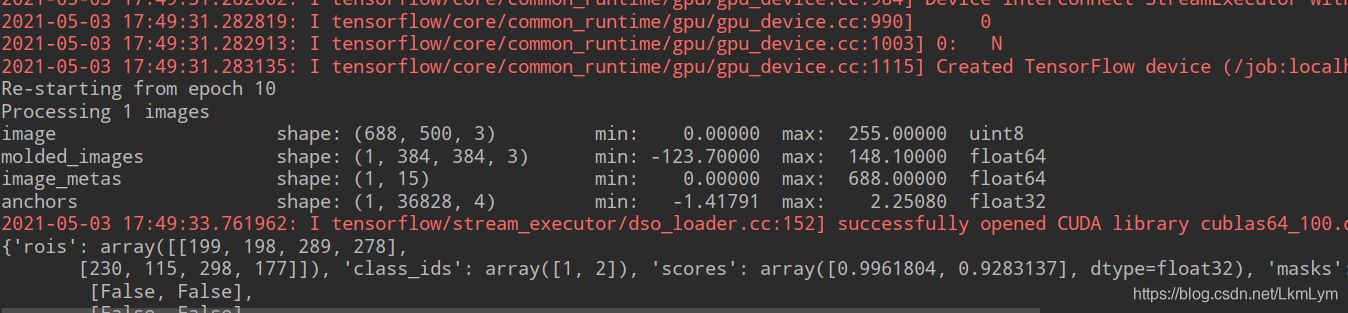
results = model.detect([image], verbose=1)
#b=datetime.now()
# Visualize results
#print("time:",(b-a).seconds)
r = results[0]
print (r)
visualize.display_instances(image, r['rois'], r['masks'], r['class_ids'], class_names, r['scores'])测试集的话就需要改你自己训练的权重,当你训练完后会生成logs文件里面有训练好的权重文件:

当然class_names也记得改:

需要测试的图片用imread方法获取就行(自行改路径):
image = skimage.io.imread('./images/test.jpg')
训练后得到图片:
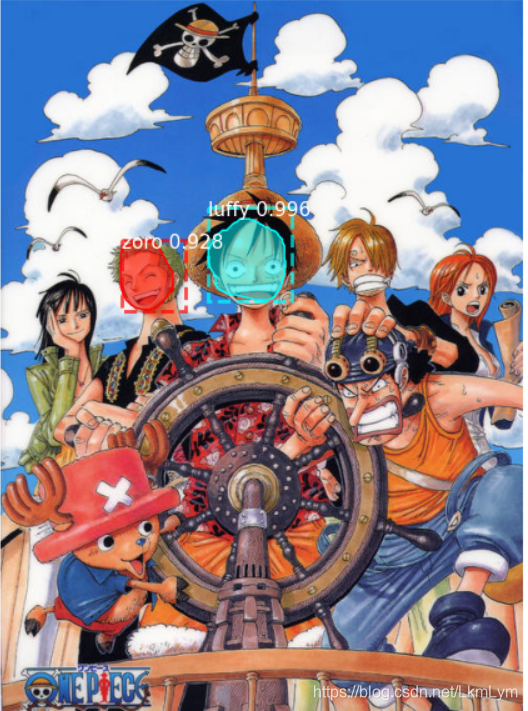
对比图,我只训练了十几张图片,训练集越多越准确。
总结
当代人工智能方向的研究生就是这种拿着别人发明的算法各种抄抄改改的,以后估计也不太会从事这个方向,说是十分缺做人工智能方向的人,但是实际上缺的是那种正儿八经能改进算法的人,一起加油吧
百度云源代码链接:
链接:https://pan.baidu.com/s/1PgLR3sFqKcLomrWnWM15aQ
提取码:xm3h
这篇关于用Mask-RCNN训练海贼王路飞和索隆(人脸识别)训练自己的数据集(源代码下载)的文章就介绍到这儿,希望我们推荐的文章对编程师们有所帮助!


