本文主要是介绍Flutter 使用intl实现国际化,希望对大家解决编程问题提供一定的参考价值,需要的开发者们随着小编来一起学习吧!
1.添加依赖
dependencies:#...省略无关项intl: ^0.15.7
dev_dependencies:#...省略无关项intl_translation: ^0.17.2
2.创建必要目录
首先,在项目根目录下创建一个i10n-arb目录,该目录保存我们接下来通过intl_translation命令生成的arb文件。一个简单的arb文件内容如下:
{"@@last_modified": "2020-04-07T09:25:06.663066","title": "intl demo","@title": {"description": "应用标题","type": "text","placeholders": {}},"testintl": "生存,还是毁灭,这是个问题。 ","@testintl": {"description": "生存","type": "text","placeholders": {}}
}
然后在lib目录下创建一个i10n的目录,该目录用于保存从arb文件生成的dart代码文件。
3.实现Localizations和Delegate类
1.在lib/i10n目录下新建一个“localization_intl.dart”的文件,文件内容如下:
import 'package:fish_redux/fish_redux.dart';
import 'package:flutter/cupertino.dart';
import 'package:flutter/material.dart';
import 'package:intl/intl.dart';
import 'messages_all.dart'; //1class AppLocalizations  implements CupertinoLocalizations{Locale locale;AppLocalizations(this.locale);static Future<AppLocalizations> load(Locale locale) {final String name =locale.countryCode.isEmpty ? locale.languageCode : locale.toString();final String localeName = Intl.canonicalizedLocale(name);//2return initializeMessages(locale.toString()).then((Object _) {Intl.defaultLocale=localeName;return new AppLocalizations(locale);});}/// 基于Map,根据当前语言的 languageCode: en或zh来获取对应的文案static Map<String, BaseLanguage> _localValue = {'en' : EnLanguage(),'zh' : ChLanguage()};/// 返回当前的内容维护类BaseLanguage get currentLocalized {return _localValue[locale.languageCode];}///通过 Localizations.of(context,type) 加载当前的 FZLocalizationsstatic AppLocalizations of(BuildContext context) {return CupertinoLocalizations.of(context);}@overrideString get selectAllButtonLabel {return currentLocalized.selectAllButtonLabel;}@overrideString get pasteButtonLabel {return currentLocalized.pasteButtonLabel;}@overrideString get copyButtonLabel {return currentLocalized.copyButtonLabel;}@overrideString get cutButtonLabel {return currentLocalized.cutButtonLabel;}@overrideString get todayLabel {return "今天";}static const List<String> _shortWeekdays = <String>['周一','周二','周三','周四','周五','周六','周日',];static const List<String> _shortMonths = <String>['Jan','Feb','Mar','Apr','May','Jun','Jul','Aug','Sep','Oct','Nov','Dec',];static const List<String> _months = <String>['01月','02月','03月','04月','05月','06月','07月','08月','09月','10月','11月','12月',];@overrideString datePickerYear(int yearIndex) => yearIndex.toString() + "年";@overrideString datePickerMonth(int monthIndex) => _months[monthIndex - 1];@overrideString datePickerDayOfMonth(int dayIndex) => dayIndex.toString() + "日";@overrideString datePickerHour(int hour) => hour.toString();@overrideString datePickerHourSemanticsLabel(int hour) => hour.toString() + " 小时";@overrideString datePickerMinute(int minute) => minute.toString().padLeft(2, '0');@overrideString datePickerMinuteSemanticsLabel(int minute) {return '1 分钟';}@overrideString datePickerMediumDate(DateTime date) {return '${_shortWeekdays[date.weekday - DateTime.monday]} ''${_shortMonths[date.month - DateTime.january]} ''${date.day.toString().padRight(2)}';}@overrideDatePickerDateOrder get datePickerDateOrder => DatePickerDateOrder.ymd;@overrideDatePickerDateTimeOrder get datePickerDateTimeOrder => DatePickerDateTimeOrder.date_time_dayPeriod;@overrideString get anteMeridiemAbbreviation => 'AM';@overrideString get postMeridiemAbbreviation => 'PM';@overrideString get alertDialogLabel => '提示信息';@overrideString timerPickerHour(int hour) => hour.toString();@overrideString timerPickerMinute(int minute) => minute.toString();@overrideString timerPickerSecond(int second) => second.toString();@overrideString timerPickerHourLabel(int hour) => '时';@overrideString timerPickerMinuteLabel(int minute) => '分';@overrideString timerPickerSecondLabel(int second) => '秒';String get title {return Intl.message('intl demo',name: 'title',desc: '应用标题',);}String get  testintl  {return Intl.message('生存,还是毁灭,这是个问题。',name: 'testintl',desc: '生存',);}
}
/// 这个抽象类和它的实现类可以拉出去新建类
/// 中文和英语 语言内容维护
abstract class BaseLanguage {String name;String selectAllButtonLabel;String pasteButtonLabel;String copyButtonLabel;String cutButtonLabel;
}
class EnLanguage implements BaseLanguage {@overrideString name = "This is English";@overrideString selectAllButtonLabel = "全选";@overrideString pasteButtonLabel = "粘贴";@overrideString copyButtonLabel = "复制";@overrideString cutButtonLabel = "剪切";
}
class ChLanguage implements BaseLanguage {@overrideString name = "这是中文";@overrideString selectAllButtonLabel = "全选";@overrideString pasteButtonLabel = "粘贴";@overrideString copyButtonLabel = "复制";@overrideString cutButtonLabel = "剪切";}
我这个版本是做了改进的,之前在使用intl的时候输入框长按会报错,所以添加了处理输入框长按bug的代码。
2.在lib/i10n目录下新建一个“localization_delegate.dart”的文件,文件内容如下:
//Locale代理类
class AppLocalizationsDelegate extends LocalizationsDelegate<CupertinoLocalizations> {AppLocalizationsDelegate();///是否支持某个Local///支持中文和英语@overridebool isSupported(Locale locale) {return ['zh', 'en'].contains(locale.languageCode);}///shouldReload的返回值决定当Localizations Widget重新build时,是否调用load方法重新加载Locale资源@overridebool shouldReload(LocalizationsDelegate<CupertinoLocalizations> old) {return false;}///根据locale,创建一个对象用于提供当前locale下的文本显示///Flutter会调用此类加载相应的Locale资源类@overrideFuture<CupertinoLocalizations> load(Locale locale) {println(locale.toString()+"------66666");return AppLocalizations.load(locale);}static AppLocalizationsDelegate delegate = AppLocalizationsDelegate();
}
4.生成arb文件
上面i10n/localization_intl.dart中如果直接拷贝的的代码会在注释1跟注释2那报错,所以下面来生成注释位置相关的文件。
1.通过intl_translation包的工具来提取代码中的字符串到一个arb文件,运行如下命令:
flutter pub pub run intl_translation:extract_to_arb --output-dir=i10n-arb lib/i10n/localization_intl.dart
运行此命令会将在localization_intl.dart中通过Intl API标识的属性和字符串提取到“i10n-arb/intl_messages.arb”文件中:
{"@@last_modified": "2020-04-24T10:21:36.493230","title": "soft_fox","@title": {"description": "应用标题","type": "text","placeholders": {}},"testintl": "生存,还是毁灭,这是个问题。 ","@testintl": {"description": "呵呵","type": "text","placeholders": {}}
}
对应在localization_intl.dart中的内容为:
String get title {return Intl.message('soft_fox',name: 'title',desc: '应用标题',);}String get  testintl  {return Intl.message('生存,还是毁灭,这是个问题。 ',name: 'testintl',desc: '呵呵',);}
}
此时生成的是默认的Locale资源文件,如果我们现在要支持英文和中文,只需要在该文件同级目录创建"intl_en.arb"文件和"intl_zh.arb"文件,然后将"intl_messages.arb"的内容拷贝到两个文件中,接下来将新建的文件中的内容进行翻译即可,翻译后的"intl_en.arb"文件内容如下:
{"@@last_modified": "2020-04-06T21:24:01.928263","title": "soft_fox","@title": {"description": "app title","type": "text","placeholders": {}},"testintl": "To be, or not to be- that is the question: ","@testintl": {"description": "haha","type": "text","placeholders": {}}
}
由于在定义的时候使用的是中文,在这里intl_zh.arb中就可以不做处理。
5.生成dart代码
最后一步就是根据arb生成dart文件,这里的dart就是在localization_intl.dart中需要引用的:
flutter pub pub run intl_translation:generate_from_arb --output-dir=lib/i10n --no-use-deferred-loading lib/i10n/localization_intl.dart i10n-arb/intl_*.arb
这句命令会根据我们的arb文件生成对应的dart文件:
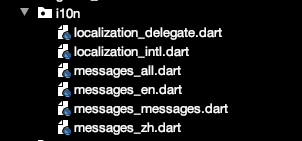
最后我们将之前用到的两句命令合并在一个intl.sh文件中,内容如下:
flutter pub pub run intl_translation:extract_to_arb --output-dir=i10n-arb lib/i10n/localization_intl.dart
flutter pub pub run intl_translation:generate_from_arb --output-dir=lib/i10n --no-use-deferred-loading lib/i10n/localization_intl.dart i10n-arb/intl_*.arb
后面新增新的需要国际话的文字之后直接运行这个intl.sh文件即可。
6.在main.dart中引入我们定义的代理
@overrideWidget build(BuildContext context) {return new MaterialApp(title: 'intl demo',debugShowCheckedModeBanner: false,//...省略无关项localizationsDelegates: [AppLocalizationsDelegate(), // 我们定义的代理GlobalMaterialLocalizations.delegate,GlobalWidgetsLocalizations.delegate,],locale: GlobalThemeStyles.themeLocale,supportedLocales: <Locale>[const Locale('en', 'US'), // 美国英语const Locale('zh', 'CN'), // 中文简体],//...省略无关项);}
到此就完成了国际化的操作。
这篇关于Flutter 使用intl实现国际化的文章就介绍到这儿,希望我们推荐的文章对编程师们有所帮助!


