本文主要是介绍Docker 网络模型使用详解 (1)Dockers网络基础,希望对大家解决编程问题提供一定的参考价值,需要的开发者们随着小编来一起学习吧!
目录
环境准备
Dockers 网络基础
1.端口映射
查看随机映射端口范围
-p可以指定映射到本地端口
映射指定地址和指定端口
映射指定地址 宿主机端口随机分配
指定传输协议
端口暴露
容器互联
自定义网络
现在把container7加入到demo_net中
在启动一个容器加入到demo_net
查看三个容器内部网络
进行ping测试
使用link参数
网络是激活Docker体系的唯一途径,如果Docker没有比较出色的容器网络,那么Docker根本没有如今的竞争力,起初Docker网络的解决方案并不理想,但是经过最近几年的发展,再加上很多云计算服务商都参与了进来,大批的SDN方案如雨后春笋般的冒了出来。
环境准备
安装docker-ce
[root@localhost ~]# wget -O /etc/yum.repos.d/CentOS-Base.repo http://mirrors.aliyun.com/repo/Centos-7.repo
--2023-08-04 13:36:55-- http://mirrors.aliyun.com/repo/Centos-7.repo
正在解析主机 mirrors.aliyun.com (mirrors.aliyun.com)... 42.202.208.238, 42.202.208.239, 42.202.208.240, ...
正在连接 mirrors.aliyun.com (mirrors.aliyun.com)|42.202.208.238|:80... 已连接。
已发出 HTTP 请求,正在等待回应... 200 OK
长度:2523 (2.5K) [application/octet-stream]
正在保存至: “/etc/yum.repos.d/CentOS-Base.repo”
100%[=============================================================>] 2,523 --.-K/s 用时 0.002s
2023-08-04 13:36:55 (1.38 MB/s) - 已保存 “/etc/yum.repos.d/CentOS-Base.repo” [2523/2523])
[root@localhost ~]# yum -y install yum-utils device-mapper-persistent-data lvm2
已加载插件:fastestmirror, product-id, search-disabled-repos, subscription-manager
This system is not registered with an entitlement server. You can use subscription-manager to register.
Loading mirror speeds from cached hostfile
* base: mirrors.aliyun.com
* epel: ftp.riken.jp
* extras: mirrors.aliyun.com
* updates: mirrors.aliyun.com
软件包 yum-utils-1.1.31-54.el7_8.noarch 已安装并且是最新版本
软件包 device-mapper-persistent-data-0.8.5-3.el7_9.2.x86_64 已安装并且是最新版本
软件包 7:lvm2-2.02.187-6.el7_9.5.x86_64 已安装并且是最新版本
无须任何处理
[root@localhost ~]# yum-config-manager --add-repo http://mirrors.aliyun.com/docker-ce/linux/centos/docker-ce.repo
已加载插件:fastestmirror, product-id, subscription-manager
This system is not registered with an entitlement server. You can use subscription-manager to register.
adding repo from: http://mirrors.aliyun.com/docker-ce/linux/centos/docker-ce.repo
grabbing file http://mirrors.aliyun.com/docker-ce/linux/centos/docker-ce.repo to /etc/yum.repos.d/docker-ce.repo
repo saved to /etc/yum.repos.d/docker-ce.repo
[root@localhost ~]# yum -y install docker-ce
已加载插件:fastestmirror, product-id, search-disabled-repos, subscription-manager
This system is not registered with an entitlement server. You can use subscription-manager to register.
Loading mirror speeds from cached hostfile
* base: mirrors.aliyun.com
* epel: mirror.lzu.edu.cn
* extras: mirrors.aliyun.com
* updates: mirrors.aliyun.com
docker-ce-stable | 3.5 kB 00:00:00
软件包 3:docker-ce-24.0.5-1.el7.x86_64 已安装并且是最新版本
无须任何处理
[root@localhost ~]# systemctl restart docker
[root@localhost ~]# systemctl enable docker
阿里云镜像加速
[root@localhost ~]# vim /etc/docker/daemon.json
{
"registry-mirrors":[ "https://nyakyfun.mirror.aliyuncs.com" ]
}
~
[root@localhost ~]# systemctl daemon-reload
[root@localhost ~]# systemctl restart docker
[root@localhost ~]# docker version
Client: Docker Engine - Community
Version: 24.0.5
API version: 1.43
Go version: go1.20.6
Git commit: ced0996
Built: Fri Jul 21 20:39:02 2023
OS/Arch: linux/amd64
Context: default
Server: Docker Engine - Community
Engine:
Version: 24.0.5
API version: 1.43 (minimum version 1.12)
Go version: go1.20.6
Git commit: a61e2b4
Built: Fri Jul 21 20:38:05 2023
OS/Arch: linux/amd64
Experimental: false
containerd:
Version: 1.6.22
GitCommit: 8165feabfdfe38c65b599c4993d227328c231fca
runc:
Version: 1.1.8
GitCommit: v1.1.8-0-g82f18fe
docker-init:
Version: 0.19.0
GitCommit: de40ad0
下载镜像
[root@localhost ~]# docker pull nginx
Using default tag: latest
latest: Pulling from library/nginx
Digest: sha256:0d17b565c37bcbd895e9d92315a05c1c3c9a29f762b011a10c54a66cd53c9b31
Status: Downloaded newer image for nginx:latest
docker.io/library/nginx:latest
[root@localhost ~]# docker pull busybox
Using default tag: latest
latest: Pulling from library/busybox
5cc84ad355aa: Pull complete
Digest: sha256:5acba83a746c7608ed544dc1533b87c737a0b0fb730301639a0179f9344b1678
Status: Downloaded newer image for busybox:latest
docker.io/library/busybox:latest
[root@localhost ~]# docker pull mysql
Using default tag: latest
latest: Pulling from library/mysql
72a69066d2fe: Pull complete
93619dbc5b36: Pull complete
99da31dd6142: Pull complete
626033c43d70: Pull complete
37d5d7efb64e: Pull complete
ac563158d721: Pull complete
d2ba16033dad: Pull complete
688ba7d5c01a: Pull complete
00e060b6d11d: Pull complete
1c04857f594f: Pull complete
4d7cfa90e6ea: Pull complete
e0431212d27d: Pull complete
Digest: sha256:e9027fe4d91c0153429607251656806cc784e914937271037f7738bd5b8e7709
Status: Downloaded newer image for mysql:latest
docker.io/library/mysql:latest
[root@localhost ~]# vim /etc/sysctl.conf
net.ipv4.ipforward=1
~
1.Dockers 网络基础
Docker目前对单节点的设备提供了将容器端口映射到宿主机和容器互联两个网络服务。
1.端口映射
在Docker中容器默认是无法与外部通信的,需要在启动命令中加入对应的参数才允许容器与外界通信。
当Docker中运行一个Web服务时,需要把容器内的Web服务应用程序端口映射到本地宿主机的端口。这样,用户访问宿主机指定的端口的话,就相当于访问容器内部的Web服务端口。
-p选项是随机映射一个端口到容器内部开放端口
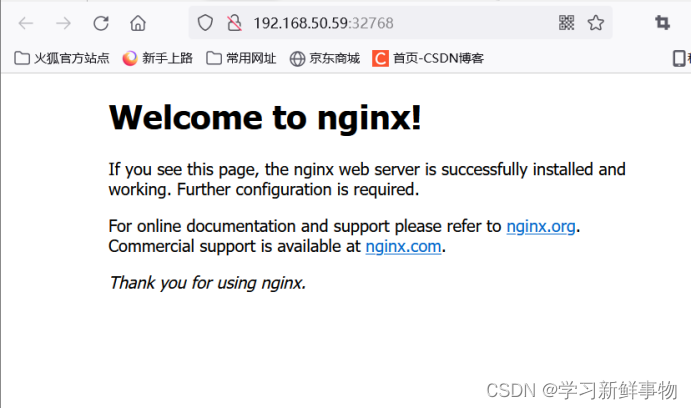
[root@localhost ~]# docker run -d -P --name test1 nginx
f4e45f0f9bcd8af728496d2fd0116b602bff4d4aa66a039ec4df6566bc4058eb
[root@localhost ~]# docker port test1
80/tcp -> 0.0.0.0:32768
80/tcp -> [::]:32768
查看nginx日志
[root@localhost ~]# docker logs test1
/docker-entrypoint.sh: /docker-entrypoint.d/ is not empty, will attempt to perform configuration
/docker-entrypoint.sh: Looking for shell scripts in /docker-entrypoint.d/
/docker-entrypoint.sh: Launching /docker-entrypoint.d/10-listen-on-ipv6-by-default.sh
10-listen-on-ipv6-by-default.sh: info: Getting the checksum of /etc/nginx/conf.d/default.conf
10-listen-on-ipv6-by-default.sh: info: Enabled listen on IPv6 in /etc/nginx/conf.d/default.conf
/docker-entrypoint.sh: Launching /docker-entrypoint.d/20-envsubst-on-templates.sh
/docker-entrypoint.sh: Launching /docker-entrypoint.d/30-tune-worker-processes.sh
/docker-entrypoint.sh: Configuration complete; ready for start up
2023/08/04 05:46:13 [notice] 1#1: using the "epoll" event method
2023/08/04 05:46:13 [notice] 1#1: nginx/1.21.5
2023/08/04 05:46:13 [notice] 1#1: built by gcc 10.2.1 20210110 (Debian 10.2.1-6)
2023/08/04 05:46:13 [notice] 1#1: OS: Linux 3.10.0-1160.92.1.el7.x86_64
2023/08/04 05:46:13 [notice] 1#1: getrlimit(RLIMIT_NOFILE): 1048576:1048576
2023/08/04 05:46:13 [notice] 1#1: start worker processes
2023/08/04 05:46:13 [notice] 1#1: start worker process 31
192.168.50.1 - - [04/Aug/2023:05:47:26 +0000] "GET / HTTP/1.1" 200 615 "https://www.baidu.com/s?ie=utf-8&f=8&rsv_bp=1&tn=baidu&wd=192.168.50.59%3A32768&oq=192.168.200.111&rsv_pq=ee1be515000ac9da&rsv_t=2aeeT%2FKILYdQRMVlG4UwsNF%2FfwwxU4ZCXdDb%2Bjo2%2FLuk4797OvfrWsFufh8&rqlang=cn&rsv_dl=tb&rsv_enter=0&rsv_btype=t&inputT=5216&rsv_sug3=25&rsv_sug1=16&rsv_sug7=100&bs=192.168.200.111" "Mozilla/5.0 (Windows NT 10.0; Win64; x64; rv:109.0) Gecko/20100101 Firefox/116.0" "-"
2023/08/04 05:47:26 [error] 31#31: *1 open() "/usr/share/nginx/html/favicon.ico" failed (2: No such file or directory), client: 192.168.50.1, server: localhost, request: "GET /favicon.ico HTTP/1.1", host: "192.168.50.59:32768", referrer: "http://192.168.50.59:32768/"
192.168.50.1 - - [04/Aug/2023:05:47:26 +0000] "GET /favicon.ico HTTP/1.1" 404 153 "http://192.168.50.59:32768/" "Mozilla/5.0 (Windows NT 10.0; Win64; x64; rv:109.0) Gecko/20100101 Firefox/116.0" "-"
查看随机映射端口范围
[root@localhost ~]# cat /proc/sys/net/ipv4/ip_local_port_range
32768 60999
-p可以指定映射到本地端口
[root@localhost ~]# docker run -d -p 800:80 --name test2 nginx
6ae3a06faf8e84597bcf9fe904cbda35033bedcf62b6bfe45f9aec0a72c927dc

这种方式会映射到所有接口地址,所有访客都可以通过宿主机所有IP的端口来访问容器。
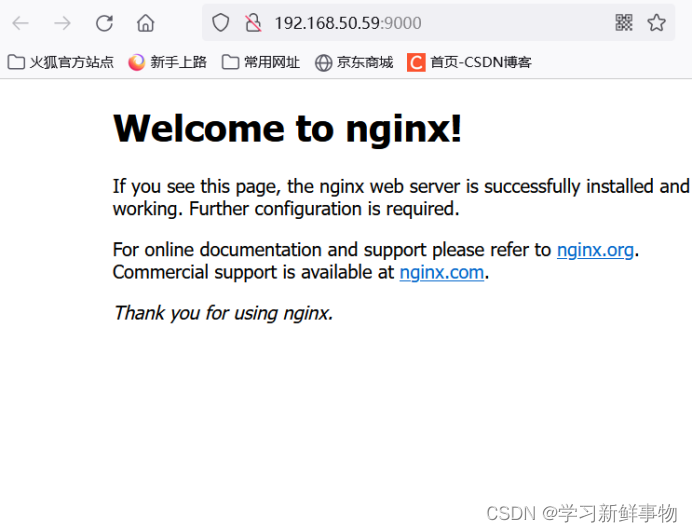
映射指定地址和指定端口
[root@localhost ~]# docker run -d -p 192.168.50.59:9000:80 --name test3 nginx
5c7f7271226075782a0e4078f9a57a7c996c678eeb1e48a2faa93d56e10ff32e
映射指定地址 宿主机端口随机分配
[root@localhost ~]# docker run -d -p 192.168.50.59::80 --name ttt nginx
bdf2a43e6457e9c79ca17e91f7480539ad98a10a541faf38755229f7bb845a00
[root@localhost ~]# docker port ttt
80/tcp -> 192.168.50.59:32769

指定传输协议
[root@localhost ~]# docker run -d -p 80:80/tcp --name test5 nginx
4e64bce18d657fa65d7307c0528f5665edd240acde8c1657e0984c999fb5146b
[root@localhost ~]#
2. 端口暴露
端口暴露和端口映射是不一样的首先要暴露端口 才可以映射
Dockerfile的作者一般在包含EXPOSE规则时都只提示哪个端口提供哪个服务。访问时还需要运维人员通过端口映射来指定。--expose和EXPOSE只是为其他命令提供所需信息的元数据。
查看网络配置
[root@localhost ~]# docker inspect test1
"NetworkSettings": {
"Bridge": "",
"SandboxID": "bd6efff9aa793bb9356045380794004f2eb65eb7699187a51becf5ed1bb1ff31",
"HairpinMode": false,
"LinkLocalIPv6Address": "",
"LinkLocalIPv6PrefixLen": 0,
"Ports": {
"80/tcp": [
{
"HostIp": "0.0.0.0",
"HostPort": "32768"
},
{
"HostIp": "::",
"HostPort": "32768"
}
]
},
3.容器互联
容器互联是除了端口映射外另一种可以与容器通信的方式。端口映射的用途是宿主机网络与容器的通信,而容器互联是容器之间的通信。
当前实现容器互联有两种方式,一种是把两个容器放进一个用户自定义的网络中,另一种是使用--link参数(已经弃用,即将删除的功能)。
为什么要使用一个单独的网络来连接两个容器呢?设想一下后端容器需要调用一个数据库环境,数据库容器和后端服务容器如果使用上下文中的暴露端口或者映射端口来通信,势必会把数据库的端口也暴露在外网中,导致数据库容器的安全性大大降低,为了解决这个问题,docker允许用户建立一个独立的网络来放置相应的容器,只有在该网络中的容器才能相互通信,外部容器是无法进入这个特定网络中的。
一个容器可以同时加入多个网络,使用不同地址可以访问不同网络中的容器。
自定义网络
[root@localhost ~]# docker run -itd --name=container7 busybox
d970bd74cad26be2b77a45a8867a018706b73341ded97cf972d59681250c7df5
[root@localhost ~]# docker run -itd --name=container8 busybox
6109755ba4b380e4a88fd890a4e86e9c94de8a6ca55f5090a3116f64642998f0
接下来创建一个独立的容器网络,这里使用bridge驱动(桥接模式),其他可选的值还有overlay和macvlan
[root@localhost ~]# docker network create -d bridge --subnet 172.25.0.0/16 demo_net
fcf5201effd82258391ccbae4b6636f3872da2c03e53daa83aa8cb0550d127a6
[root@localhost ~]# docker network ls
NETWORK ID NAME DRIVER SCOPE
ebcfad6f4255 bridge bridge local
b881c67f8813 compose_lnmp_lnmp bridge local
fcf5201effd8 demo_net bridge local
8104a1b1ed6c host host local
7a7562f2d82d none null local
现在把container7加入到demo_net中
[root@localhost ~]# docker network connect demo_net container7
查看
[root@localhost ~]# docker network inspect demo_net
[
{
"Name": "demo_net",
"Id": "fcf5201effd82258391ccbae4b6636f3872da2c03e53daa83aa8cb0550d127a6",
"Created": "2023-08-04T14:02:22.853085789+08:00",
"Scope": "local",
"Driver": "bridge",
"EnableIPv6": false,
"IPAM": {
"Driver": "default",
"Options": {},
"Config": [
{
"Subnet": "172.25.0.0/16"
}
]
},
"Internal": false,
"Attachable": false,
"Ingress": false,
"ConfigFrom": {
"Network": ""
},
"ConfigOnly": false,
"Containers": {
"d970bd74cad26be2b77a45a8867a018706b73341ded97cf972d59681250c7df5": {
"Name": "container7",
"EndpointID": "ad133356137a32a24c45fb4a28b20412cc1f9b376a5eb1f72a0a6db685bdb100",
"MacAddress": "02:42:ac:19:00:02",
"IPv4Address": "172.25.0.2/16",
"IPv6Address": ""
}
},
"Options": {},
"Labels": {}
}
]
使用docker network inspect可以查看网络中容器的连接状态。Container7已经在demo_net网络中,注意IP地址使自动分配的。
在启动一个容器加入到demo_net
[root@localhost ~]# docker run --network=demo_net --ip=172.25.3.4 -itd --name=container9 busybox
e60d9237253a9de39991c9e2929a33b8acd60f15aea00aba6c5bb2927d231bfd
查看
[root@localhost ~]# docker network inspect demo_net
[
{
"Name": "demo_net",
"Id": "fcf5201effd82258391ccbae4b6636f3872da2c03e53daa83aa8cb0550d127a6",
"Created": "2023-08-04T14:02:22.853085789+08:00",
"Scope": "local",
"Driver": "bridge",
"EnableIPv6": false,
"IPAM": {
"Driver": "default",
"Options": {},
"Config": [
{
"Subnet": "172.25.0.0/16"
}
]
},
"Internal": false,
"Attachable": false,
"Ingress": false,
"ConfigFrom": {
"Network": ""
},
"ConfigOnly": false,
"Containers": {
"d970bd74cad26be2b77a45a8867a018706b73341ded97cf972d59681250c7df5": {
"Name": "container7",
"EndpointID": "ad133356137a32a24c45fb4a28b20412cc1f9b376a5eb1f72a0a6db685bdb100",
"MacAddress": "02:42:ac:19:00:02",
"IPv4Address": "172.25.0.2/16",
"IPv6Address": ""
},
"e60d9237253a9de39991c9e2929a33b8acd60f15aea00aba6c5bb2927d231bfd": {
"Name": "container9",
"EndpointID": "f774f3ebc8c39817b6497e3c07c747725ee83fb80ce62d1939bc47db44f758eb",
"MacAddress": "02:42:ac:19:03:04",
"IPv4Address": "172.25.3.4/16",
"IPv6Address": ""
}
},
"Options": {},
"Labels": {}
}
}
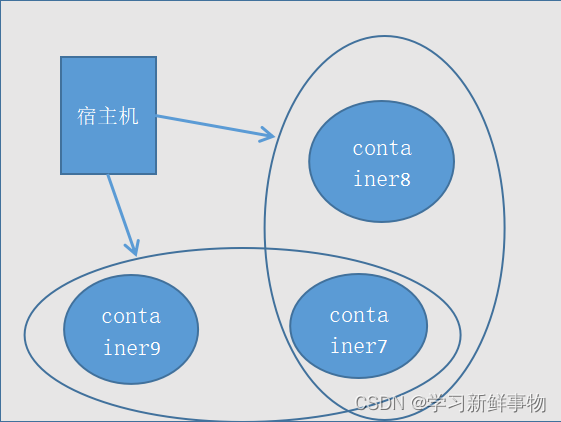
查看三个容器内部网络
[root@localhost ~]# docker exec -it container7 ifconfig
eth0 Link encap:Ethernet HWaddr 02:42:AC:11:00:07
inet addr:172.17.0.7 Bcast:172.17.255.255 Mask:255.255.0.0
UP BROADCAST RUNNING MULTICAST MTU:1500 Metric:1
RX packets:8 errors:0 dropped:0 overruns:0 frame:0
TX packets:0 errors:0 dropped:0 overruns:0 carrier:0
collisions:0 txqueuelen:0
RX bytes:656 (656.0 B) TX bytes:0 (0.0 B)
eth1 Link encap:Ethernet HWaddr 02:42:AC:19:00:02
inet addr:172.25.0.2 Bcast:172.25.255.255 Mask:255.255.0.0
UP BROADCAST RUNNING MULTICAST MTU:1500 Metric:1
RX packets:13 errors:0 dropped:0 overruns:0 frame:0
TX packets:0 errors:0 dropped:0 overruns:0 carrier:0
collisions:0 txqueuelen:0
RX bytes:1102 (1.0 KiB) TX bytes:0 (0.0 B)
lo Link encap:Local Loopback
inet addr:127.0.0.1 Mask:255.0.0.0
UP LOOPBACK RUNNING MTU:65536 Metric:1
RX packets:0 errors:0 dropped:0 overruns:0 frame:0
TX packets:0 errors:0 dropped:0 overruns:0 carrier:0
collisions:0 txqueuelen:1000
RX bytes:0 (0.0 B) TX bytes:0 (0.0 B)
[root@localhost ~]# docker exec -it container8 ifconfig
eth0 Link encap:Ethernet HWaddr 02:42:AC:11:00:08
inet addr:172.17.0.8 Bcast:172.17.255.255 Mask:255.255.0.0
UP BROADCAST RUNNING MULTICAST MTU:1500 Metric:1
RX packets:8 errors:0 dropped:0 overruns:0 frame:0
TX packets:0 errors:0 dropped:0 overruns:0 carrier:0
collisions:0 txqueuelen:0
RX bytes:656 (656.0 B) TX bytes:0 (0.0 B)
lo Link encap:Local Loopback
inet addr:127.0.0.1 Mask:255.0.0.0
UP LOOPBACK RUNNING MTU:65536 Metric:1
RX packets:0 errors:0 dropped:0 overruns:0 frame:0
TX packets:0 errors:0 dropped:0 overruns:0 carrier:0
collisions:0 txqueuelen:1000
RX bytes:0 (0.0 B) TX bytes:0 (0.0 B)
[root@localhost ~]# docker exec -it container9 ifconfig
eth0 Link encap:Ethernet HWaddr 02:42:AC:19:03:04
inet addr:172.25.3.4 Bcast:172.25.255.255 Mask:255.255.0.0
UP BROADCAST RUNNING MULTICAST MTU:1500 Metric:1
RX packets:8 errors:0 dropped:0 overruns:0 frame:0
TX packets:0 errors:0 dropped:0 overruns:0 carrier:0
collisions:0 txqueuelen:0
RX bytes:656 (656.0 B) TX bytes:0 (0.0 B)
lo Link encap:Local Loopback
inet addr:127.0.0.1 Mask:255.0.0.0
UP LOOPBACK RUNNING MTU:65536 Metric:1
RX packets:0 errors:0 dropped:0 overruns:0 frame:0
TX packets:0 errors:0 dropped:0 overruns:0 carrier:0
collisions:0 txqueuelen:1000
RX bytes:0 (0.0 B) TX bytes:0 (0.0 B)
再看图有没有更清楚

进行ping测试
[root@localhost ~]# docker exec -it container7 ping 172.17.0.8
PING 172.17.0.8 (172.17.0.8): 56 data bytes
64 bytes from 172.17.0.8: seq=0 ttl=64 time=0.120 ms
64 bytes from 172.17.0.8: seq=1 ttl=64 time=0.094 ms
64 bytes from 172.17.0.8: seq=2 ttl=64 time=0.093 ms
^C64 bytes from 172.17.0.8: seq=3 ttl=64 time=0.087 ms
^C
--- 172.17.0.8 ping statistics ---
4 packets transmitted, 4 packets received, 0% packet loss
round-trip min/avg/max = 0.087/0.098/0.120 ms
[root@localhost ~]# docker exec -it container7 ping 172.25.3.4
PING 172.25.3.4 (172.25.3.4): 56 data bytes
64 bytes from 172.25.3.4: seq=0 ttl=64 time=0.107 ms
64 bytes from 172.25.3.4: seq=1 ttl=64 time=0.089 ms
64 bytes from 172.25.3.4: seq=2 ttl=64 time=0.093 ms
^C
--- 172.25.3.4 ping statistics ---
3 packets transmitted, 3 packets received, 0% packet loss
round-trip min/avg/max = 0.089/0.096/0.107 ms
[root@localhost ~]# docker exec -it container9 ping 172.17.0.8
PING 172.17.0.8 (172.17.0.8): 56 data bytes
--- 172.17.0.8 ping statistics ---
17 packets transmitted, 0 packets received, 100% packet loss

进入容器测试
[root@localhost ~]# docker ps -a
CONTAINER ID IMAGE COMMAND CREATED STATUS PORTS NAMES
e60d9237253a busybox "sh" 26 minutes ago Up 26 minutes container9
6109755ba4b3 busybox "sh" 35 minutes ago Up 35 minutes container8
d970bd74cad2 busybox "sh" 36 minutes ago Up 36 minutes container7
都没有问题
[root@localhost ~]# docker exec -it e6 /bin/sh
/ # ping 172.17.0.8
PING 172.17.0.8 (172.17.0.8): 56 data bytes
^C
--- 172.17.0.8 ping statistics ---
10 packets transmitted, 0 packets received, 100% packet loss
/ # exit
[root@localhost ~]# docker exec -it d9 /bin/sh
/ # ping 172.17.0.8
PING 172.17.0.8 (172.17.0.8): 56 data bytes
64 bytes from 172.17.0.8: seq=0 ttl=64 time=0.099 ms
64 bytes from 172.17.0.8: seq=1 ttl=64 time=0.094 ms
^C
--- 172.17.0.8 ping statistics ---
2 packets transmitted, 2 packets received, 0% packet loss
round-trip min/avg/max = 0.094/0.096/0.099 ms
/ # ping 172.25.3.4
PING 172.25.3.4 (172.25.3.4): 56 data bytes
64 bytes from 172.25.3.4: seq=0 ttl=64 time=0.075 ms
64 bytes from 172.25.3.4: seq=1 ttl=64 time=0.094 ms
^C
--- 172.25.3.4 ping statistics ---
2 packets transmitted, 2 packets received, 0% packet loss
round-trip min/avg/max = 0.075/0.084/0.094 ms
/ # exit
4.使用link参数
容器的连接(linking)系统是除了端口映射外另一种可以与容器中应用进行交互的方式。它会在源和接收容器之间创建一个隧道,接收容器可以看到源容器指定的信息。
使用这个参数容器必须设置一个名字,也就是--name指定的值。
就是使用建立别名进行通联
[root@localhost ~]# docker run -itd --name test busybox
9b45c62f24cbbcefcb6d317b21aa0f184580b48015440fb00b0fb29d1e383cab
--link参数的格式: --link name:alias , 其中name是要链接的容器的名称,alias是这个链接的别名。
先建立一个test 在创建一个link 并设置一个test的别名
[root@localhost ~]# docker run -itd --name=link --link test:test busybox
de2bf9cd7428d2e7c35be872451f75202a695a14ca0668b9182b0c98828f838d
[root@localhost ~]# docker exec -it link ping test
PING test (172.17.0.9): 56 data bytes
64 bytes from 172.17.0.9: seq=0 ttl=64 time=0.123 ms
64 bytes from 172.17.0.9: seq=1 ttl=64 time=0.092 ms
64 bytes from 172.17.0.9: seq=2 ttl=64 time=0.093 ms
^C
--- test ping statistics ---
3 packets transmitted, 3 packets received, 0% packet loss
round-trip min/avg/max = 0.092/0.102/0.123 ms
这篇关于Docker 网络模型使用详解 (1)Dockers网络基础的文章就介绍到这儿,希望我们推荐的文章对编程师们有所帮助!


