本文主要是介绍pytorch基于Unet的铁轨缺陷语义分割,希望对大家解决编程问题提供一定的参考价值,需要的开发者们随着小编来一起学习吧!
pytorch基于Unet的铁轨缺陷语义分割
- 分割效果
- Unet网络
- 数据读取器
- 训练及保存模型
- 遇到问题
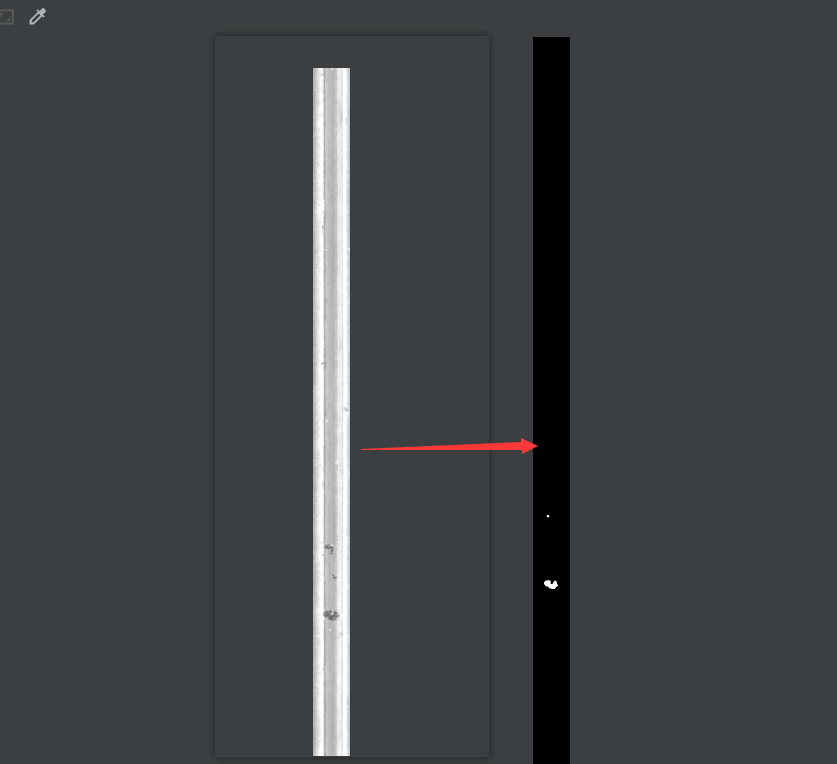
分割效果
Unet网络
""" Full assembly of the parts to form the complete network """
"""Refer https://github.com/milesial/Pytorch-UNet/blob/master/unet/unet_model.py"""import torch.nn.functional as Ffrom unet_parts import *class UNet(nn.Module):def __init__(self, n_channels, n_classes, bilinear=False):super(UNet, self).__init__()self.n_channels = n_channelsself.n_classes = n_classesself.bilinear = bilinearself.inc = DoubleConv(n_channels, 64)self.down1 = Down(64, 128)self.down2 = Down(128, 256)self.down3 = Down(256, 512)self.down4 = Down(512, 1024)self.up1 = Up(1024, 512, bilinear)self.up2 = Up(512, 256, bilinear)self.up3 = Up(256, 128, bilinear)self.up4 = Up(128, 64, bilinear)self.outc = OutConv(64, n_classes)def forward(self, x):x1 = self.inc(x)x2 = self.down1(x1)x3 = self.down2(x2)x4 = self.down3(x3)x5 = self.down4(x4)x = self.up1(x5, x4)x = self.up2(x, x3)x = self.up3(x, x2)x = self.up4(x, x1)logits = self.outc(x)return logits# if __name__ == '__main__':
#     net = UNet(n_channels=3, n_classes=1)
#     print(net)
""" Parts of the U-Net model """
"""https://github.com/milesial/Pytorch-UNet/blob/master/unet/unet_parts.py"""import torch
import torch.nn as nn
import torch.nn.functional as Fclass DoubleConv(nn.Module):"""(convolution => [BN] => ReLU) * 2"""def __init__(self, in_channels, out_channels):super().__init__()self.double_conv = nn.Sequential(nn.Conv2d(in_channels, out_channels, kernel_size=3, padding=1),nn.BatchNorm2d(out_channels),nn.ReLU(inplace=True),nn.Conv2d(out_channels, out_channels, kernel_size=3, padding=1),nn.BatchNorm2d(out_channels),nn.ReLU(inplace=True))def forward(self, x):return self.double_conv(x)class Down(nn.Module):"""Downscaling with maxpool then double conv"""def __init__(self, in_channels, out_channels):super().__init__()self.maxpool_conv = nn.Sequential(nn.MaxPool2d(2),DoubleConv(in_channels, out_channels))def forward(self, x):return self.maxpool_conv(x)class Up(nn.Module):"""Upscaling then double conv"""def __init__(self, in_channels, out_channels, bilinear=True):super().__init__()# if bilinear, use the normal convolutions to reduce the number of channelsif bilinear:self.up = nn.Upsample(scale_factor=2, mode='bilinear', align_corners=True)else:self.up = nn.ConvTranspose2d(in_channels, in_channels // 2, kernel_size=2, stride=2)self.conv = DoubleConv(in_channels, out_channels)def forward(self, x1, x2):x1 = self.up(x1)# input is CHWdiffY = torch.tensor([x2.size()[2] - x1.size()[2]])diffX = torch.tensor([x2.size()[3] - x1.size()[3]])x1 = F.pad(x1, [diffX // 2, diffX - diffX // 2,diffY // 2, diffY - diffY // 2])# if you have padding issues, see# https://github.com/HaiyongJiang/U-Net-Pytorch-Unstructured-Buggy/commit/0e854509c2cea854e247a9c615f175f76fbb2e3a# https://github.com/xiaopeng-liao/Pytorch-UNet/commit/8ebac70e633bac59fc22bb5195e513d5832fb3bdx = torch.cat([x2, x1], dim=1)return self.conv(x)class OutConv(nn.Module):def __init__(self, in_channels, out_channels):super(OutConv, self).__init__()self.conv = nn.Conv2d(in_channels, out_channels, kernel_size=1)def forward(self, x):return self.conv(x)
数据读取器
import torch
import cv2
import os
import glob
from torch.utils.data import Dataset
from PIL import Image
import random
import numpy as npclass ISBI_Loader(Dataset):def __init__(self, data_path, label_path):# 初始化函数,读取所有data_path下的图片self.images_path = glob.glob(os.path.join(data_path, '*.jpg'))self.labels_path = glob.glob(os.path.join(label_path, '*.jpg'))print(self.images_path)print(self.labels_path)def augment(self, image, flipCode):# 使用cv2.flip进行数据增强,filpCode为1水平翻转,0垂直翻转,-1水平+垂直翻转flip = cv2.flip(image, flipCode)return flipdef __getitem__(self, index):# 根据index读取图片image_path = self.images_path[index]# 根据image_path生成label_pathlabel_path = self.labels_path[index]# 读取训练图片和标签图片image = cv2.imread(image_path)label = cv2.imread(label_path)# image = cv2.resize(image, dsize=(1000, 160))# label = cv2.resize(label, dsize=(1000, 160))# 将数据转为单通道的图片image = cv2.cvtColor(image, cv2.COLOR_BGR2GRAY)label = cv2.cvtColor(label, cv2.COLOR_BGR2GRAY)image = image.reshape(1, image.shape[0], image.shape[1])label = label.reshape(1, label.shape[0], label.shape[1])# 处理标签,将像素值为255的改为1if label.max() > 1:label = label / 255# 随机进行数据增强,为2时不做处理flipCode = random.choice([-1, 0, 1, 2])if flipCode != 2:image = self.augment(image, flipCode)label = self.augment(label, flipCode)return image, labeldef __len__(self):# 返回训练集大小return len(self.images_path)if __name__ == "__main__":isbi_dataset = ISBI_Loader("Railsurfaceimages/", "GroundTruth/")print("数据个数:", len(isbi_dataset))train_loader = torch.utils.data.DataLoader(dataset=isbi_dataset,batch_size=2,shuffle=False)for image, label in train_loader:print(image.shape)
训练及保存模型
import torch.nn as nn
import torch
# from model import Unet
from data import ISBI_Loader
import numpy as np
from unet_model import UNetdef train_net(net, device, train_loader, epochs=40, batch_size=1, lr=0.00001):# 加载训练集train_loader = train_loader# 定义RMSprop算法optimizer = torch.optim.RMSprop(net.parameters(), lr=lr, weight_decay=1e-8, momentum=0.9)# 定义Loss算法criterion = nn.BCEWithLogitsLoss()# best_loss统计,初始化为正无穷best_loss = float('inf')# 训练epochs次for epoch in range(epochs):# 训练模式net.train()# 按照batch_size开始训练for image, label in train_loader:optimizer.zero_grad()# 将数据拷贝到device中image = image.to(device=device, dtype=torch.float32)label = label.to(device=device, dtype=torch.float32)# 使用网络参数,输出预测结果pred = net(image)# 计算lossloss = criterion(pred, label)print('Loss/train', loss.item())# 保存loss值最小的网络参数if loss < best_loss:best_loss = losstorch.save(net.state_dict(), 'best_model.pth')# 更新参数loss.backward()optimizer.step()if __name__ == '__main__':# 加载训练数据isbi_dataset = ISBI_Loader("Railsurfaceimages/", "GroundTruth/")train_loader = torch.utils.data.DataLoader(dataset=isbi_dataset,batch_size=2,shuffle=True)device = 'cuda'net = UNet(n_channels=1, n_classes=1)net.to(device=device)train_net(net, device, train_loader, epochs=40, batch_size=1, lr=0.00001)
遇到问题
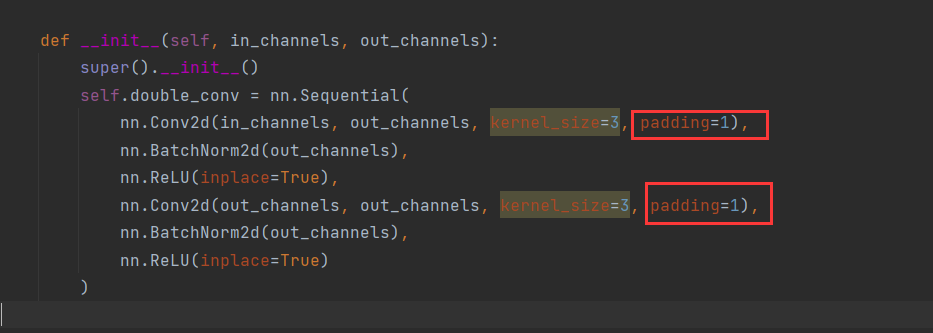
padding值设为1,卷积时自动填充,不然会因尺寸为问题导致错误。
这篇关于pytorch基于Unet的铁轨缺陷语义分割的文章就介绍到这儿,希望我们推荐的文章对编程师们有所帮助!


