本文主要是介绍uniapp小程序自定义签名面板组件,小程序页面引用实现横屏签字(亲测有效),希望对大家解决编程问题提供一定的参考价值,需要的开发者们随着小编来一起学习吧!
需求: uniapp小程序自定义签字面板组件, canvas手写签名画板, 小程序页面引用实现横屏签字
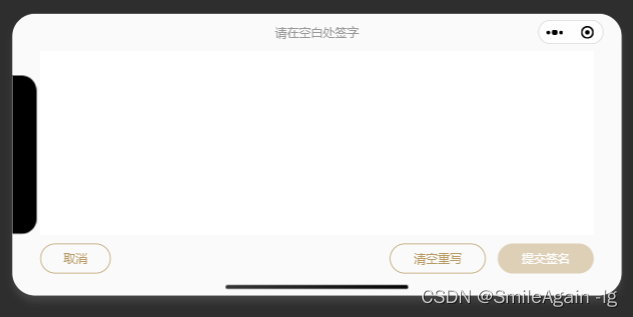
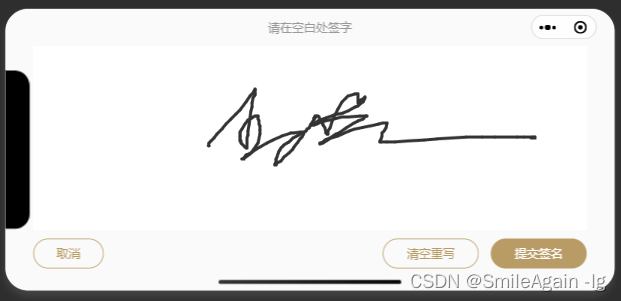
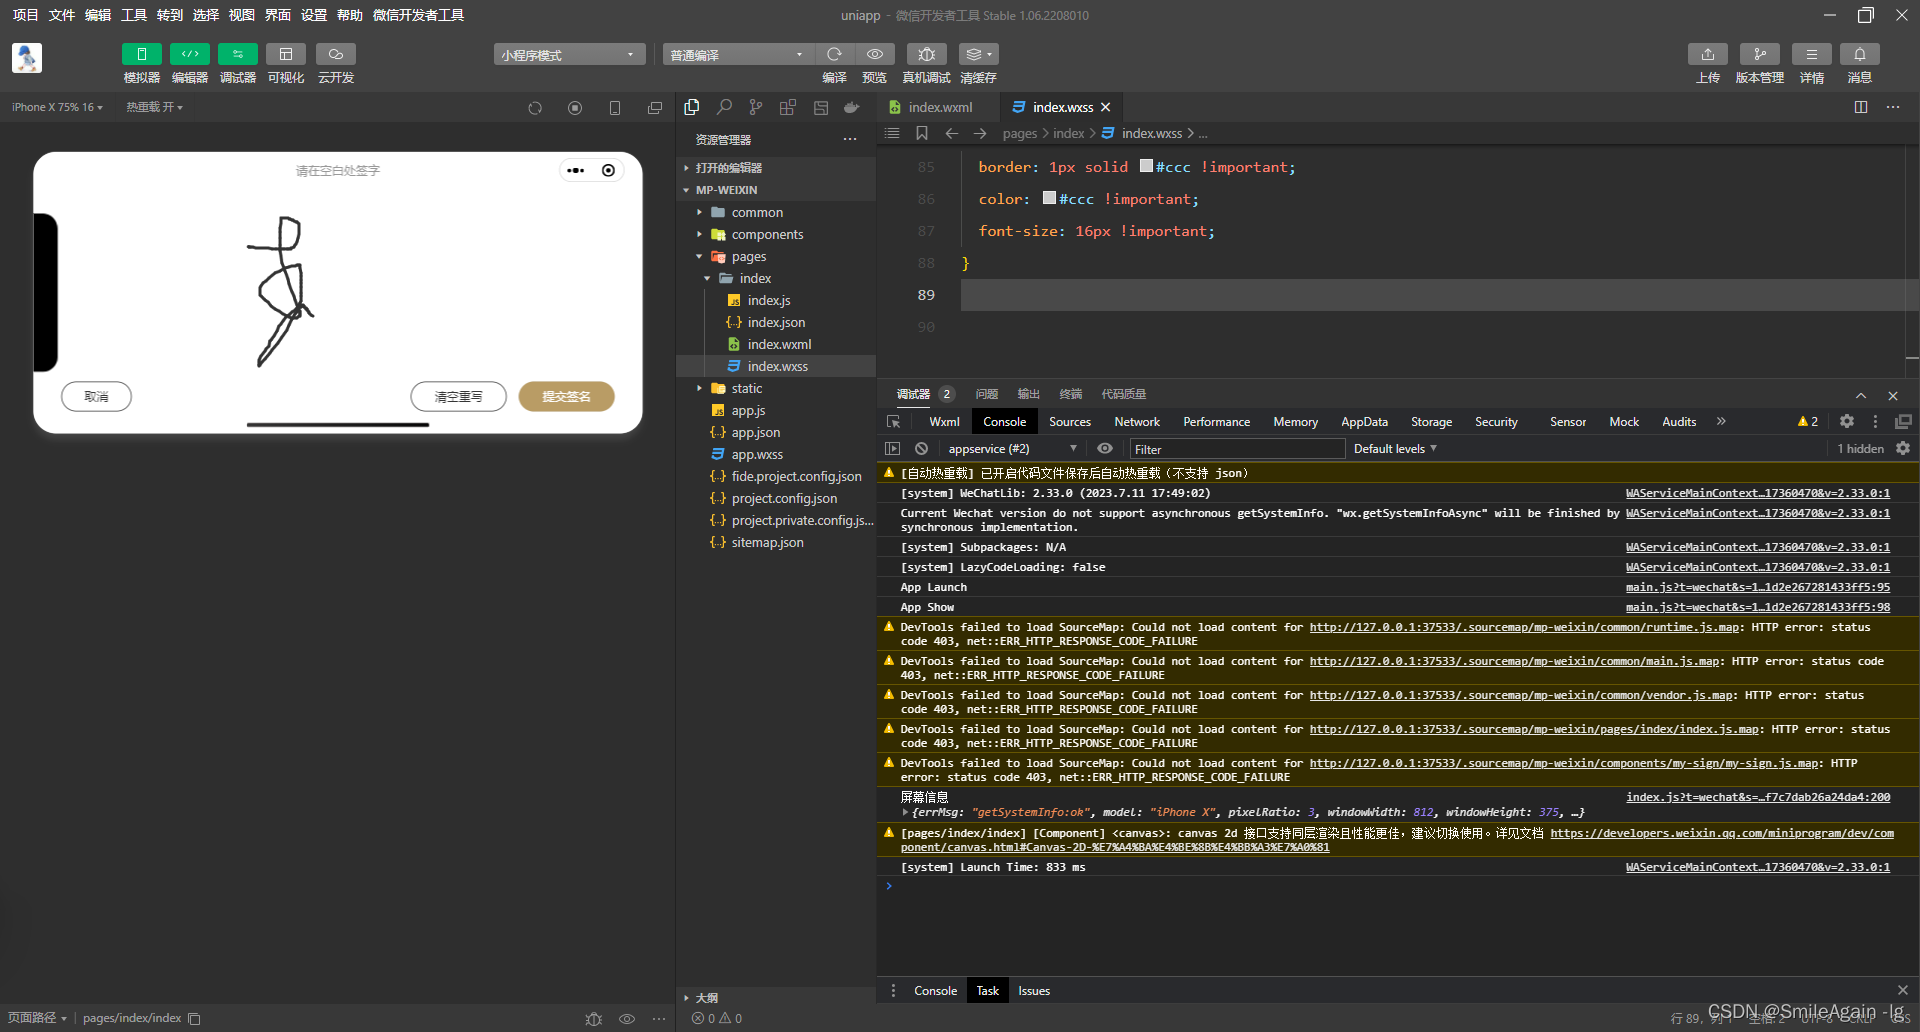
实现效果:
一、自定义组件
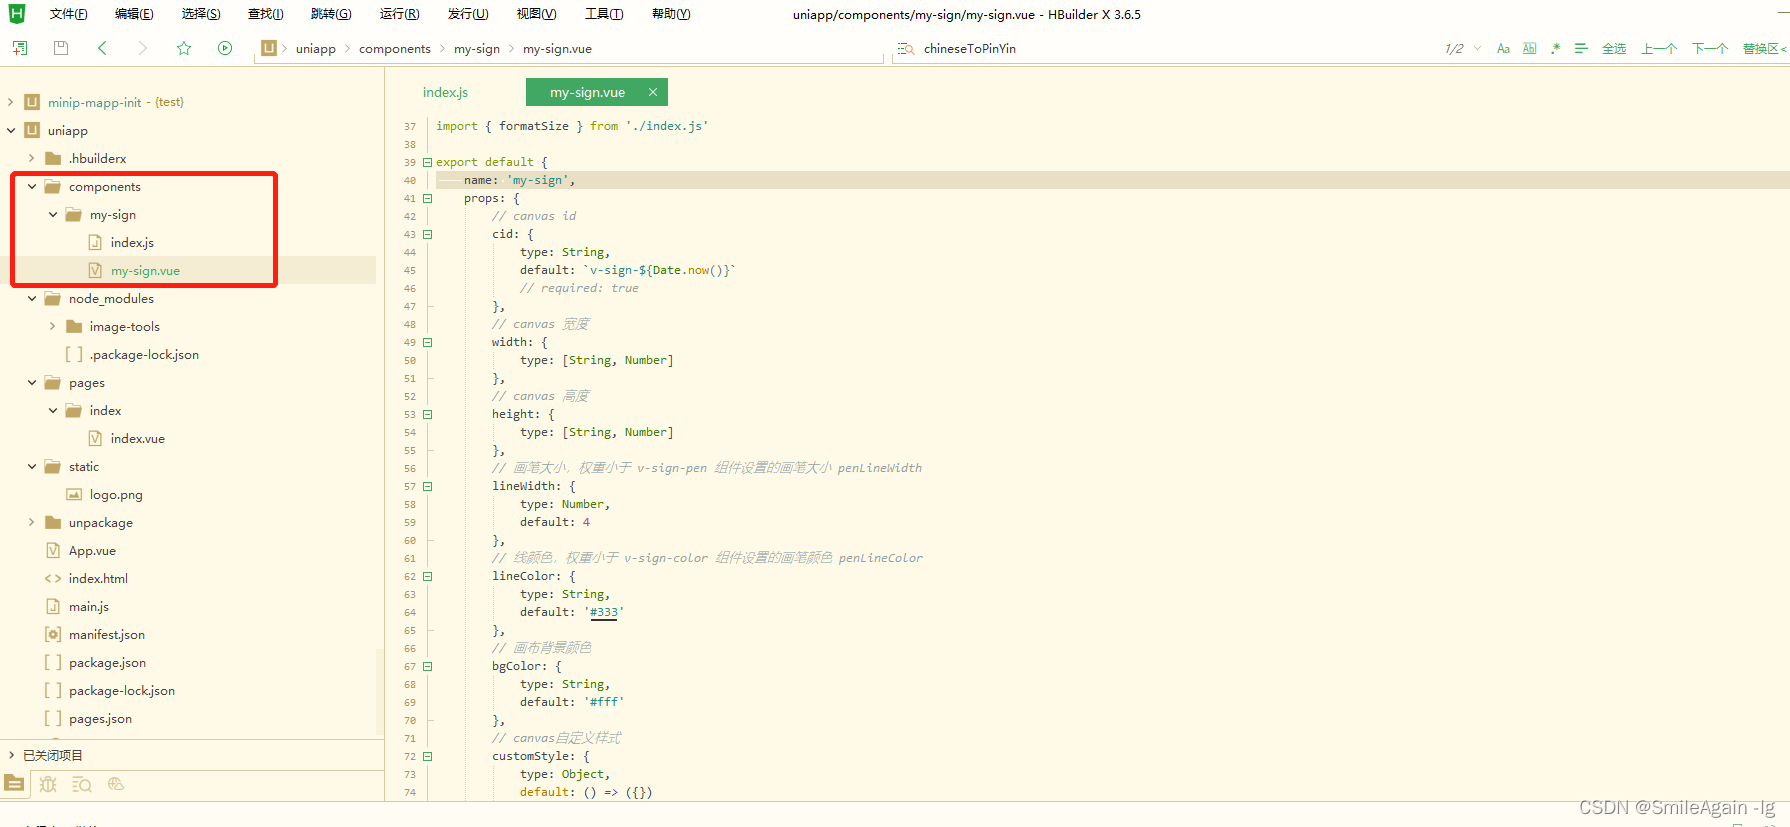
在项目中创建components文件夹, 在文件夹下创建my-sign组件, 组件下创建my-sign.vue和index.js
my-sign.vue组件代码:
<template><view class="signature-wrap"><canvas:canvas-id="cid":id="cid"@touchstart="onTouchStart"@touchmove="onTouchMove"@touchend="onTouchEnd"disable-scroll:style="[{width: width && formatSize(width),height: height && formatSize(height)},customStyle]"></canvas><slot /></view>
</template><script>
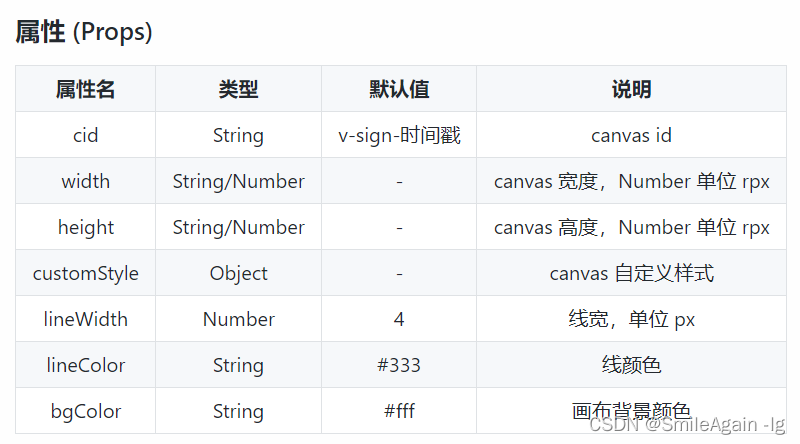
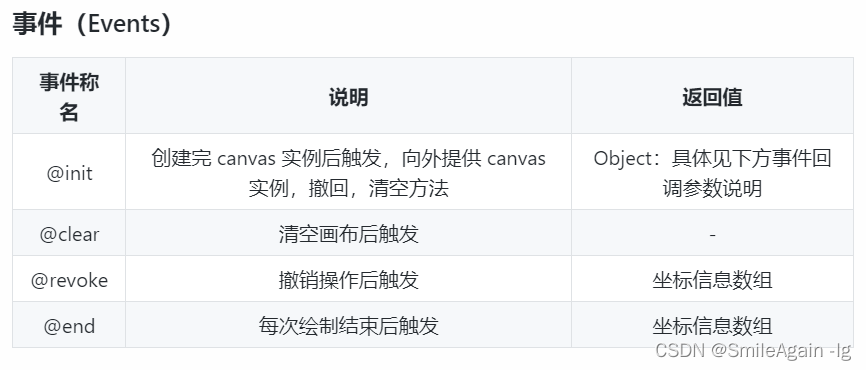
/*** sign canvas 手写签名* @description 设置线条宽度、颜色,撤回,清空* @tutorial* @property {String} cid canvas id 不设置则默认为 v-sign-时间戳* @property {String, Number} width canvas 宽度* @property {String, Number} height canvas 高度* @property {bgColor} bgColor 画布背景颜色* @property {Object} customStyle canvas 自定义样式* @property {String} lineWidth 画笔大小,权重小于 v-sign-pen 组件设置的画笔大小* @property {Number} lineColor 画笔颜色,权重小于 v-sign-pen 组件设置的画笔大小* @event {Function} init 当创建完 canvas 实例后触发,向外提供 canvas实例,撤回,清空方法* @example <v-sign @init="signInit"></v-sign>*/
import { formatSize } from './index.js'export default {name: 'my-sign',props: {// canvas idcid: {type: String,default: `v-sign-${Date.now()}`// required: true},// canvas 宽度width: {type: [String, Number]},// canvas 高度height: {type: [String, Number]},// 画笔大小,权重小于 v-sign-pen 组件设置的画笔大小 penLineWidthlineWidth: {type: Number,default: 4},// 线颜色,权重小于 v-sign-color 组件设置的画笔颜色 penLineColorlineColor: {type: String,default: '#333'},// 画布背景颜色bgColor: {type: String,default: '#fff'},// canvas自定义样式customStyle: {type: Object,default: () => ({})}},provide() {return {getSignInterface: this.provideSignInterface}},data() {return {formatSize,lineData: [],winWidth: 0,winHeight: 0,penLineWidth: null, // v-sign-pen 组件设置的画笔大小penLineColor: null // v-sign-color 组件设置的颜色}},created() {// 获取窗口宽高const { windowWidth, windowHeight } = uni.getSystemInfoSync()this.winWidth = windowWidththis.winHeight = windowHeight},mounted() {this.canvasCtx = uni.createCanvasContext(this.cid, this)// h5 需延迟绘制,否则绘制失败// #ifdef H5setTimeout(() => {// #endifthis.setBackgroundColor(this.bgColor)// #ifdef H5}, 10)// #endif// 初始化完成,触发 init 事件this.$emit('init', this.provideSignInterface())},methods: {onTouchStart(e) {const pos = e.touches[0]this.lineData.push({style: {color: this.penLineColor || this.lineColor,width: this.penLineWidth || this.lineWidth},// 屏幕坐标coordinates: [{type: e.type,x: pos.x,y: pos.y}]})this.drawLine()},onTouchMove(e) {const pos = e.touches[0]this.lineData[this.lineData.length - 1].coordinates.push({type: e.type,x: pos.x,y: pos.y})this.drawLine()},onTouchEnd(e) {this.$emit('end', this.lineData)},// 清空画布clear() {this.lineData = []this.canvasCtx.clearRect(0, 0, this.winWidth, this.winHeight)this.canvasCtx.draw()this.setBackgroundColor(this.bgColor)this.$emit('clear')},// 撤销revoke() {this.setBackgroundColor(this.bgColor)this.lineData.pop()this.lineData.forEach((item, index) => {this.canvasCtx.beginPath()this.canvasCtx.setLineCap('round')this.canvasCtx.setStrokeStyle(item.style.color)this.canvasCtx.setLineWidth(item.style.width)if (item.coordinates.length < 2) {const pos = item.coordinates[0]this.canvasCtx.moveTo(pos.x, pos.y)this.canvasCtx.lineTo(pos.x + 1, pos.y)} else {item.coordinates.forEach(pos => {if (pos.type == 'touchstart') {this.canvasCtx.moveTo(pos.x, pos.y)} else {this.canvasCtx.lineTo(pos.x, pos.y)}})}this.canvasCtx.stroke()})this.canvasCtx.draw(true)this.$emit('revoke', this.lineData)},// 绘制线条drawLine() {const lineDataLen = this.lineData.lengthif (!lineDataLen) returnconst currentLineData = this.lineData[lineDataLen - 1]const coordinates = currentLineData.coordinatesconst coordinatesLen = coordinates.lengthif (!coordinatesLen) returnlet startPoslet endPosif (coordinatesLen < 2) {// only start, no move eventstartPos = coordinates[coordinatesLen - 1]endPos = {x: startPos.x + 1,y: startPos.y}} else {startPos = coordinates[coordinatesLen - 2]endPos = coordinates[coordinatesLen - 1]}const style = currentLineData.stylethis.canvasCtx.beginPath()this.canvasCtx.setLineCap('round')this.canvasCtx.setStrokeStyle(style.color)this.canvasCtx.setLineWidth(style.width)this.canvasCtx.moveTo(startPos.x, startPos.y)this.canvasCtx.lineTo(endPos.x, endPos.y)// const P1 = this.caculateBezier(startPos, endPos, centerPos)// console.log(P1.x, P1.y)// this.canvasCtx.moveTo(startPos.x, startPos.y)// this.canvasCtx.quadraticCurveTo(P1.x, P1.y, endPos.x, endPos.y)this.canvasCtx.stroke()this.canvasCtx.draw(true)},// 保存png图片,文件名配置 filename 仅支持 h5async saveImage(filename = '签名') {const tempFilePath = await this.canvasToTempFilePath()return new Promise((resolve, reject) => {// #ifdef H5try {const a = document.createElement('a')a.href = tempFilePatha.download = filenamedocument.body.appendChild(a)a.click()a.remove()resolve({errMsg: 'saveImageH5:ok'})} catch (e) {console.error(e)reject(e)}// #endif// #ifndef H5uni.saveImageToPhotosAlbum({filePath: tempFilePath,success(resObj) {resolve(resObj)},fail(err) {reject(err)}})// #endif})},// canvas 保存为临时图片路径,h5返回 base64canvasToTempFilePath(conf = {}) {return new Promise((resolve, reject) => {uni.canvasToTempFilePath({canvasId: this.cid,...conf,success: res => {resolve(res.tempFilePath)},fail: err => {console.log('fail', err)reject(err)}},this)})},setBackgroundColor(color = '#fff') {this.canvasCtx.beginPath()this.canvasCtx.setFillStyle(color)this.canvasCtx.fillRect(0, 0, this.winWidth, this.winHeight)this.canvasCtx.fill()this.canvasCtx.draw(true)},setLineWidth(numberVal) {this.penLineWidth = numberVal},setLineColor(strValue) {this.penLineColor = strValue},// 向外暴露内部方法provideSignInterface() {return {cid: this.cid,ctx: this.canvasCtx,clear: this.clear,revoke: this.revoke,saveImage: this.saveImage,canvasToTempFilePath: this.canvasToTempFilePath,setLineWidth: this.setLineWidth,setLineColor: this.setLineColor,setBackgroundColor: this.setBackgroundColor,getLineData: () => this.lineData}},/*** 计算二次贝塞尔曲线 控制点 P1* 起点 P0(x0,y0)、控制点P1(x1, y1)、P2(x2, y2)、曲线上任意点B(x, y)* 二次贝塞尔公式:B(t) = (1-t)²P0 + 2t(1-t)P1 + t²P2* 代入坐标得:* x = (1-t)²*x0 + 2t(1-t)*x1 + t²*x2* y = (1-t)²*y0 + 2t(1-t)*y1 + t²*y2*/caculateBezier(P0, P2, B, t = 0.5) {const { x: x0, y: y0 } = P0const { x: x2, y: y2 } = P2const { x, y } = Blet x1 = (x - (1 - t) * (1 - t) * x0 - t * t * x2) / (2 * t * (1 - t))let y1 = (y - (1 - t) * (1 - t) * y0 - t * t * y2) / (2 * t * (1 - t))return {x: x1,y: y1}}}
}
</script><style lang="scss" scoped>
.signature-wrap {position: relative;
}
</style>
index.js代码:
/*** 判断是否未数值* @param {Object} val*/
export function isNumber(val) {return !isNaN(Number(val))
}/*** 处理大小单位* @param {Object} val*/
export function formatSize(val, unit = 'rpx') {return isNumber(val) ? `${val}${unit}` : val
}
二、配置小程序页面横屏
在pages.json中添加"pageOrientation": “landscape”, pageOrientation 设置为 landscape ,表示固定为横屏显示
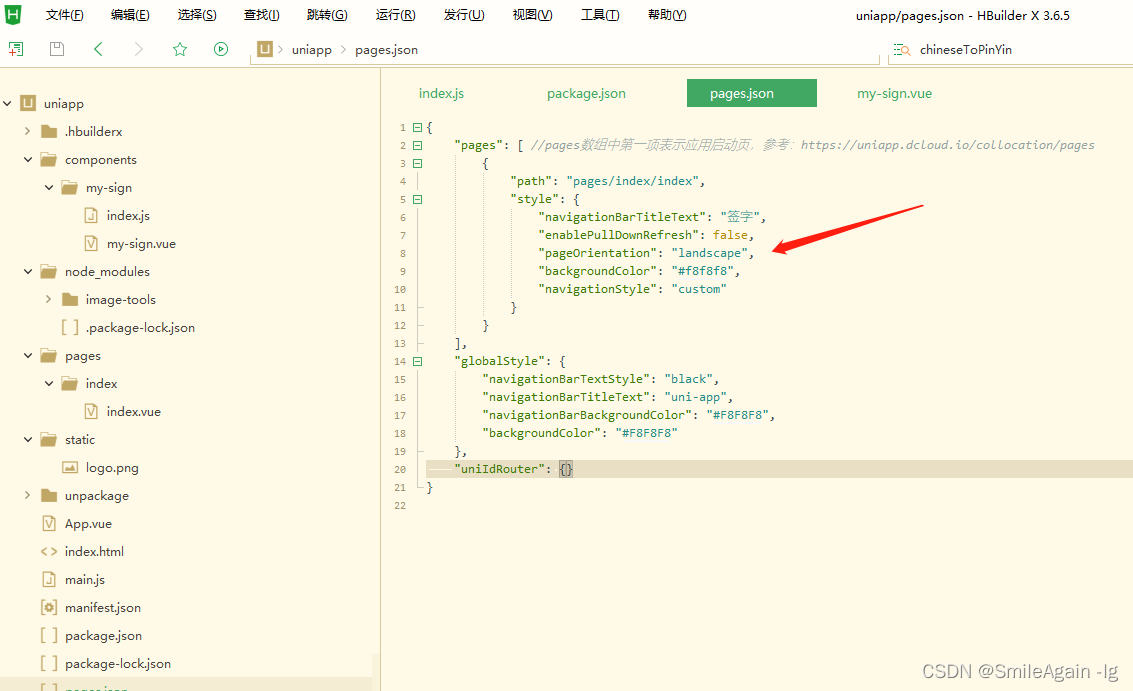
{"pages": [ //pages数组中第一项表示应用启动页,参考:https://uniapp.dcloud.io/collocation/pages{"path": "pages/index/index","style": {"navigationBarTitleText": "签字","enablePullDownRefresh": false,"pageOrientation": "landscape","backgroundColor": "#f8f8f8","navigationStyle": "custom"}}],"globalStyle": {"navigationBarTextStyle": "black","navigationBarTitleText": "uni-app","navigationBarBackgroundColor": "#F8F8F8","backgroundColor": "#F8F8F8"},"uniIdRouter": {}
}
三、在页面中使用
代码:
<template><view class="sign-contain"><view class="sign-top">请在空白处签字</view><my-sign @init="onSignInit" @end="endConfirm" bgColor="#fff" width="100%" :height="signHeight"></my-sign><!-- 按钮 --><view class="signBtn-box"><view class="signBtn-item1"><button type="default" plain="true" class="lnvestor-btn" hover-class="hover"@click="cancelBtn">取消</button></view><view class="signBtn-item2"><button type="default" plain="true" class="lnvestor-btn1" hover-class="hover"@click="clear">清空重写</button><button type="primary" class="lnvestor-btn2" hover-class="hover"@click="submitBtn" :disabled="vsignDisabled">提交签名</button></view></view></view>
</template><script>export default {data() {return {signHeight: '375px',vsignDisabled: true}},onLoad() {var that = this;uni.getSystemInfo({success: function(res) {console.log('屏幕信息', res)that.signHeight = (res.windowHeight-130)+"px";}})},methods: {submitBtn(){uni.redirectTo({url: '/qualifyLnvestor/qualifyLnvestor/result'})},// 取消cancelBtn(){uni.navigateBack({delta: 1})},// 清除clear() {this.signCtx.clear();this.vsignDisabled = true;},onSignInit(signCtx) {this.signCtx = signCtx},// 绘画结束触发endConfirm() {this.vsignDisabled = false;}}}
</script><style lang="scss">.sign-contain {padding-left: 35rpx;padding-right: 35rpx;.sign-top {width: 100%;height: 50px;line-height: 50px;font-size: 16px;text-align: center;color: #999999;}.signBtn-box {display: flex;justify-content: space-between;align-items: center;.signBtn-item1 {// 按钮样式.lnvestor-btn {margin-top: 11px;width: 94px;height: 40px;border-radius: 20px;display: flex;justify-content: center;align-items: center;font-size: 16px;}.hover {border: 1px solid #ccc !important;color: #ccc !important;font-size: 16px !important;}}.signBtn-item2 {display: flex;// 按钮样式.lnvestor-btn1 {margin-top: 11px;width: 128px;height: 40px;border-radius: 20px;display: flex;justify-content: center;align-items: center;font-size: 16px;margin-right: 16px;}.lnvestor-btn2 {margin-top: 11px;width: 128px;height: 40px;border-radius: 20px;display: flex;justify-content: center;align-items: center;background: #b99c65;font-size: 16px;}.hover {border: 1px solid #ccc !important;color: #ccc !important;font-size: 16px !important;}}}}
</style>
效果:
这篇关于uniapp小程序自定义签名面板组件,小程序页面引用实现横屏签字(亲测有效)的文章就介绍到这儿,希望我们推荐的文章对编程师们有所帮助!


