本文主要是介绍CustomShapes/自定义形状, CustomCurves/自定义曲线, AnimateableData/数据变化动画 的使用,希望对大家解决编程问题提供一定的参考价值,需要的开发者们随着小编来一起学习吧!
1. CustomShapes 自定义形状视图
1.1 资源图文件 therock.png
1.2 创建自定义形状视图 CustomShapesBootcamp.swift
import SwiftUI/// 三角形
struct Triangle: Shape{func path(in rect: CGRect) -> Path {Path { path inpath.move(to: CGPoint(x: rect.midX, y: rect.minY))path.addLine(to: CGPoint(x: rect.maxX, y: rect.maxY))path.addLine(to: CGPoint(x: rect.minX, y: rect.maxY))path.addLine(to: CGPoint(x: rect.midX, y: rect.minY))}}
}/// 菱形
struct Diamond: Shape{func path(in rect: CGRect) -> Path {Path { path inlet horizontalOffset: CGFloat = rect.width * 0.2path.move(to: CGPoint(x: rect.midX, y: rect.minY))path.addLine(to: CGPoint(x: rect.maxX - horizontalOffset, y: rect.midY))path.addLine(to: CGPoint(x: rect.midX, y: rect.maxY))path.addLine(to: CGPoint(x: rect.minX + horizontalOffset, y: rect.midY))path.addLine(to: CGPoint(x: rect.midX, y: rect.minY))}}
}/// 梯型
struct Trapezoid: Shape{func path(in rect: CGRect) -> Path {Path { path inlet horizontalOffset: CGFloat = rect.width * 0.2//let verticalOffset: CGFloat = rect.height * 0.58let verticalOffset: CGFloat = rect.height * 0.2path.move(to: CGPoint(x: rect.minX + horizontalOffset, y: rect.minY + verticalOffset))path.addLine(to: CGPoint(x: rect.maxX - horizontalOffset, y: rect.minY + verticalOffset))path.addLine(to: CGPoint(x: rect.maxX, y: rect.maxY))path.addLine(to: CGPoint(x: rect.minX, y: rect.maxY))path.addLine(to: CGPoint(x: rect.minX + horizontalOffset, y: rect.minY + verticalOffset))}}
}/// 自定义形状
struct CustomShapesBootcamp: View {var body: some View {VStack(spacing: 20) {// triangleView// imageViewdiamondViewtrapezoidView}}/// 三角形var triangleView: some View{Triangle().stroke(style: StrokeStyle(lineWidth: 5, lineCap: .round, dash: [10]))//.trim(from: 0, to: 0.5).foregroundColor(.accentColor).frame(width: 300, height: 300)}/// 图片设置var imageView: some View{Image("therock").resizable().scaledToFill().frame(width: 300, height: 300).clipShape(Triangle().rotation(Angle(degrees: 180)))}/// 菱形var diamondView: some View{Diamond()//.trim(from: 0, to: 0.5).fill(LinearGradient(gradient: Gradient(colors: [Color.red, Color.blue]), startPoint: .leading, endPoint: .trailing)).frame(width: 300, height: 300)}/// 梯形var trapezoidView: some View{Trapezoid().frame(width: 300, height: 300 * 0.5)}
}struct CustomShapesBootcamp_Previews: PreviewProvider {static var previews: some View {CustomShapesBootcamp()}
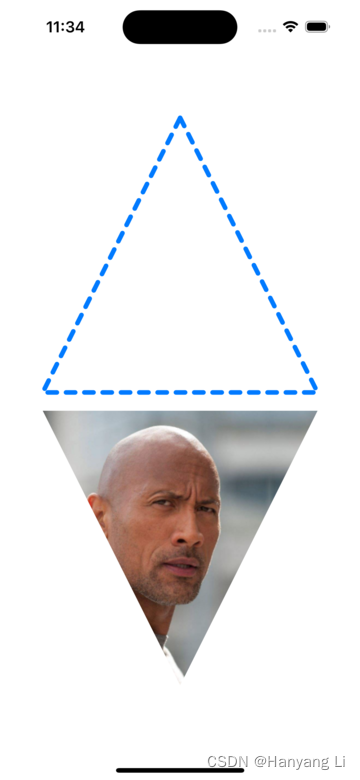
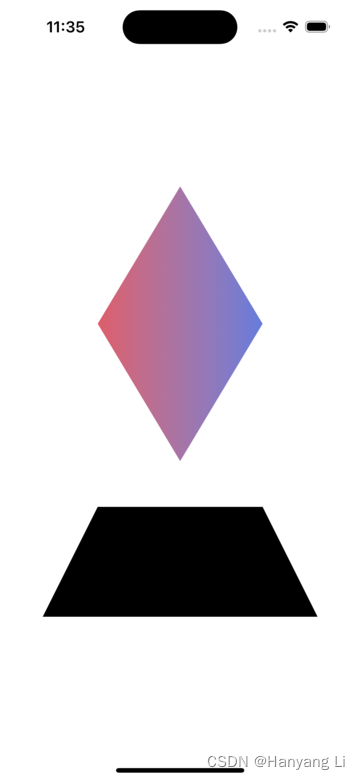
}1.3 效果图:
2. CustomCurves 自定义曲线视图
2.1 创建自定义曲线视图 CustomCurvesBootcamp.swift
import SwiftUI/// 自定义曲线
struct CustomCurvesBootcamp: View {var body: some View {VStack(spacing: 20) {//arcSampleView//shapeWithArcView//quadSampleViewwaterView}}/// 弧形样本var arcSampleView :some View{ArcSample().stroke(lineWidth: 5).frame(width: 200, height: 200)}/// 弧形形状var shapeWithArcView: some View{ShapeWithArc().frame(width: 200, height: 200)//.rotationEffect(Angle(degrees: 90))}/// 四边曲线样本var quadSampleView: some View{QuadSample().frame(width: 200, height: 200).padding(.top, 30)}/// 水波浪var waterView: some View{WaterShape().fill(LinearGradient(gradient: Gradient(colors: [Color(#colorLiteral(red: 0.2196078449, green: 0.007843137719, blue: 0.8549019694, alpha: 1)), Color(#colorLiteral(red: 0.06274510175, green: 0, blue: 0.1921568662, alpha: 1))]),startPoint: .topLeading,endPoint: .bottomTrailing)).ignoresSafeArea()}
}struct CustomCurvesBootcamp_Previews: PreviewProvider {static var previews: some View {CustomCurvesBootcamp()}
}/// 弧形样本
struct ArcSample: Shape{func path(in rect: CGRect) -> Path {Path { path inpath.move(to: CGPoint(x: rect.maxX, y: rect.midY))path.addArc(center: CGPoint(x: rect.midX, y: rect.midY),radius: rect.height / 2,startAngle: Angle(degrees: 0),endAngle: Angle(degrees: 40),clockwise: true)}}
}/// 弧形形状
struct ShapeWithArc: Shape{func path(in rect: CGRect) -> Path {Path { path in// 上 左path.move(to: CGPoint(x: rect.minX, y: rect.minY))// 上 右path.addLine(to: CGPoint(x: rect.maxX, y: rect.minY))// 中 右path.addLine(to: CGPoint(x: rect.maxX, y: rect.midY))// 下path.addArc(center: CGPoint(x: rect.midX, y: rect.midY),radius: rect.height * 0.5,startAngle: Angle(degrees: 0),endAngle: Angle(degrees: 180),clockwise: false)//path.addLine(to: CGPoint(x: rect.midX, y: rect.maxY))// 中 左path.addLine(to: CGPoint(x: rect.minX, y: rect.midY))}}
}/// 四边曲线形样本
struct QuadSample: Shape{func path(in rect: CGRect) -> Path {Path { path inpath.move(to: .zero)// 添加四边形曲线path.addQuadCurve(to: CGPoint(x: rect.midX, y: rect.midY),control: CGPoint(x: rect.maxX - 50, y: rect.minY - 100))}}
}/// 水波浪形状
struct WaterShape: Shape{func path(in rect: CGRect) -> Path {Path { path inpath.move(to: CGPoint(x: rect.minX, y: rect.midY))// 添加四边形曲线path.addQuadCurve(to: CGPoint(x: rect.midX, y: rect.midY),control: CGPoint(x: rect.width * 0.25, y: rect.height * 0.40))path.addQuadCurve(to: CGPoint(x: rect.maxX, y: rect.midY),control: CGPoint(x: rect.width * 0.75, y: rect.height * 0.60))path.addLine(to: CGPoint(x: rect.maxX, y: rect.maxY))path.addLine(to: CGPoint(x: rect.minX, y: rect.maxY))}}
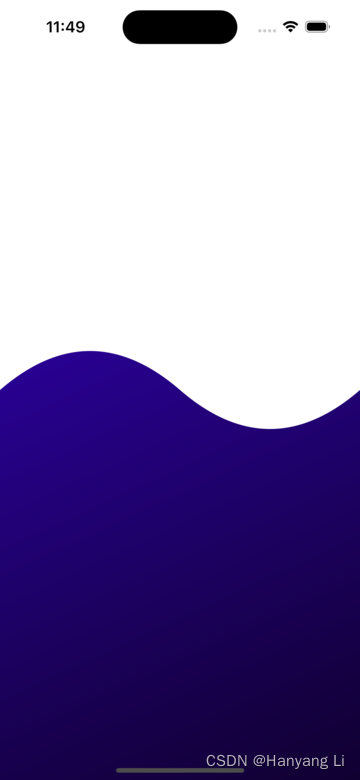
}2.2 效果图:

3. AnimateableData 根据数据的变化设置动画效果
3.1 创建数据变化的动画 AnimateableDataBootcamp.swift
import SwiftUI/// 数据变化动画
struct AnimateableDataBootcamp: View {@State private var animate: Bool = falsevar body: some View {// rectangleWithSingleCornerAnimationpacmanView}/// 一个圆角的矩形动画 Viewvar rectangleWithSingleCornerAnimation: some View{ZStack {// RoundedRectangle(cornerRadius: animate ? 60 : 0)RectangleWithSingleCornerAnimation(cornerRadius: animate ? 60 : 0).frame(width: 250, height: 250)}.onAppear {// 添加动画withAnimation(Animation.linear(duration: 2.0).repeatForever()) {animate.toggle()}}}/// 吃豆人动画var pacmanView: some View{Pacman(offsetAmount: animate ? 20 : 0).frame(width: 250, height: 250).onAppear {// 添加动画withAnimation(Animation.easeInOut.repeatForever()) {animate.toggle()}}}
}/// 一个圆角的矩形动画
struct RectangleWithSingleCornerAnimation :Shape{var cornerRadius: CGFloat// 自带动画数据var animatableData: CGFloat {get { cornerRadius }set { cornerRadius = newValue }}func path(in rect: CGRect) -> Path {Path { path inpath.move(to: .zero)path.addLine(to: CGPoint(x: rect.maxX, y: rect.minY))path.addLine(to: CGPoint(x: rect.maxX, y: rect.maxY - cornerRadius))// 添加曲线path.addArc(center: CGPointMake(rect.maxX - cornerRadius, rect.maxY - cornerRadius),radius: cornerRadius,startAngle: Angle(degrees: 0),endAngle: Angle(degrees: 360),clockwise: false)path.addLine(to: CGPoint(x: rect.maxX - cornerRadius, y: rect.maxY))path.addLine(to: CGPoint(x: rect.minX, y: rect.maxY))}}
}/// 吃豆人动画
struct Pacman: Shape{var offsetAmount: Doublevar animatableData: Double{get{ offsetAmount }set{ offsetAmount = newValue}}func path(in rect: CGRect) -> Path {Path { path inpath.move(to: CGPoint(x: rect.midX, y: rect.minY))path.addArc(center: CGPoint(x: rect.midX, y: rect.minY),radius: rect.height * 0.5,startAngle: Angle(degrees: offsetAmount),endAngle: Angle(degrees: 360 - offsetAmount),clockwise: false)}}
}struct AnimateableDataBootcamp_Previews: PreviewProvider {static var previews: some View {AnimateableDataBootcamp()}
}
3.2 效果图:

这篇关于CustomShapes/自定义形状, CustomCurves/自定义曲线, AnimateableData/数据变化动画 的使用的文章就介绍到这儿,希望我们推荐的文章对编程师们有所帮助!


