本文主要是介绍Android 进程间通信AIDL简单使用,希望对大家解决编程问题提供一定的参考价值,需要的开发者们随着小编来一起学习吧!
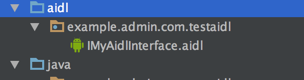
最近出去面试经常会被问到Android进程间通信,因为项目中基本上用不到进程间通信,所以不是特别了解,下来之后专门去查询了下资料,Android进程通信有4种,下面简单介绍下AIDL 的通信方法,简单的写个demo。那么首先什么是AIDL呢 ,aidl是 AnInterface definition language的缩写,一看就明白,它是一种android内部进程通信接口的描述语言。首先新建一个aidl类型的类命名为IMyAidlInterface

package example.admin.com.testaidl;
interface IMyAidlInterface { void hello(String str); /** Demonstrates some basic types that you can use as parameters * and return values in AIDL. */ void basicTypes(int anInt, long aLong, boolean aBoolean, float aFloat, double aDouble, String aString);
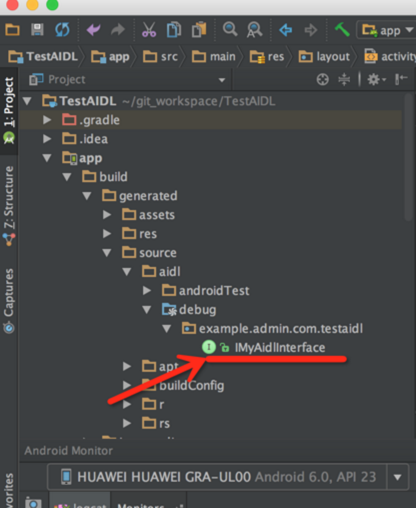
}我们发现aidl文件其实就是一个接口文件,as会自动新建一个方法basicTypes方法,这个方法并没什么卵用,可以直接删掉,我们新定义一个方法叫hello 接收一个String类型的参数.然后重新编译一下,编译完成后,在build目录下面自动生成了一个IMyAidlInterface的接口文件,它集成了android.os.IInterface接口,有一个名为Stub的内部类,stub类继承Binder。自动生成文件路径如下图
接着新建一个MyService类继承Service
package example.admin.com.testaidl;
import android.app.Service;
import android.content.Intent;
import android.os.IBinder;
import android.os.RemoteException;
import android.support.annotation.Nullable;
import android.util.Log;
/** * Created by admin * date 16/10/11. */
public class MyService extends Service {    public MyService() {        Log.i("TAG", "MyService: ");   } @Override   public void onCreate() {        super.onCreate();        Log.i("TAG", "onCreate: ");    }   @Nullable   @Override    public IBinder onBind(Intent intent) {        Log.i("TAG", "onBind: " + intent);        return mBinder;   }   public final IMyAidlInterface.Stub mBinder = new IMyAidlInterface.Stub() {       @Override        public void hello(String str) throws RemoteException {            Log.i("TAG", "hello: " + str);       }       @Override        public void basicTypes(int anInt, long aLong, boolean aBoolean, float aFloat, double aDouble, String aString) throws RemoteException { }   };
}
核心代码就是mBinder 这一段,创建一个IMyAidlInterface的内部类Stub的实力,里面实现我们接口中定义的方法,此处就是接受输入参数 并打印出来。然后在manifest.xml 文件中注册这个service
<service android:name=".MyService"> <intent-filter> <action android:name="example.admin.com.testaidl.MyService" /></intent-filter>
</service>
到目前为止服务端的代码我们已经完成。接下来是客户端的代码
package example.admin.com.testaidl;
import android.app.Service;
import android.content.ComponentName;
import android.content.Context;
import android.content.Intent;import android.content.ServiceConnection;
import android.os.IBinder;import android.os.RemoteException;import android.support.v7.app.AppCompatActivity;
import android.os.Bundle;import android.util.Log;
import android.view.View;import android.widget.Button;
import android.widget.TextView;
public class MainActivity extends AppCompatActivity { TextView mTextView;Button mButton; IMyAidlInterface mIMyAidlInterface; @Override protected void onCreate(Bundle savedInstanceState) {                super.onCreate(savedInstanceState); setContentView(R.layout.activity_main); initView();} private void initView(){ mTextView = (TextView) findViewById(R.id.textview); mButton = (Button) findViewById(R.id.button);           mButton.setOnClickListener(new View.OnClickListener() { @Overridepublic void onClick(View v) { Intent intent = new Intent();           intent.setAction("example.admin.com.testaidl.MyService");//你定义的service的action intent.setPackage("example.admin.com.testaidl");//这里你需要设置你应用的包名 bindService(intent,mConnection, Context.BIND_AUTO_CREATE); } });} ServiceConnection mConnection = new ServiceConnection() { @Override public void onServiceConnected(ComponentName name, IBinder service) {mIMyAidlInterface = IMyAidlInterface.Stub.asInterface(service); Log.i("TAG", "onServiceConnected: " + mIMyAidlInterface); try { mIMyAidlInterface.hello("World!!!"); }  catch (RemoteException e) { e.printStackTrace(); } } @Override public void onServiceDisconnected(ComponentName name) {Log.i("TAG", "onServiceDisconnected: " + name); }};
}
布局文件
<?xml version="1.0" encoding="utf-8"?>
<RelativeLayout xmlns:android="http://schemas.android.com/apk/res/android"
xmlns:tools="http://schemas.android.com/tools"
android:id="@+id/activity_main"
android:layout_width="match_parent"
android:layout_height="match_parent"
android:paddingBottom="@dimen/activity_vertical_margin"
android:paddingLeft="@dimen/activity_horizontal_margin"
android:paddingRight="@dimen/activity_horizontal_margin"
android:paddingTop="@dimen/activity_vertical_margin"
tools:context="example.admin.com.testaidl.MainActivity"><TextView android:id="@+id/textview"android:layout_width="wrap_content" android:layout_height="wrap_content" android:text="Hello World!"/><Button android:id="@+id/button" android:layout_width="wrap_content" android:layout_height="wrap_content" android:text="Button"/>
</RelativeLayout>
点击按钮 查看输出日志

运行正常!!
中间遇到一个错误,报错信息IllegalArgumentException: Service Intent must be explicit 解决办法 如何解决Android 5.0中出现的警告:Service Intent must be expli
github地址:https://github.com/cnexcelee/TestAIDL/tree/master
推荐阅读:Android:学习AIDL,这一篇文章就够了(上)
这篇关于Android 进程间通信AIDL简单使用的文章就介绍到这儿,希望我们推荐的文章对编程师们有所帮助!


