本文主要是介绍使用RMBG-1.4进行抠图(背景移除),希望对大家解决编程问题提供一定的参考价值,需要的开发者们随着小编来一起学习吧!
使用RMBG-1.4进行抠图(背景移除)
说明:
- 首次发表日期:2024-08-28
- RMBG-1.4 Hugging Face 地址: https://huggingface.co/briaai/RMBG-1.4
准备工作
创建环境并安装依赖::
# 如果`~/.local/lib/python3.10/site-packages`里面存在python模块,需要禁用。
## 可以直接删除该文件夹,或者:
## 参考:https://stackoverflow.com/questions/62352699/conda-uses-local-packages
export PYTHONUSERBASE=intentionally-disabledconda create -n rmbg python=3.10
conda activate rmbg
pip install torch==2.3.1 torchvision==0.18.1 --index-url https://download.pytorch.org/whl/cu121# 官方文档为:pip install -qr https://huggingface.co/briaai/RMBG-1.4/resolve/main/requirements.txt
pip install pillow numpy typing scikit-image huggingface_hub transformers>=4.39.1
下载模型权重:
export HF_ENDPOINT=https://hf-mirror.com
huggingface-cli download --resume-download briaai/RMBG-1.4
运行推理
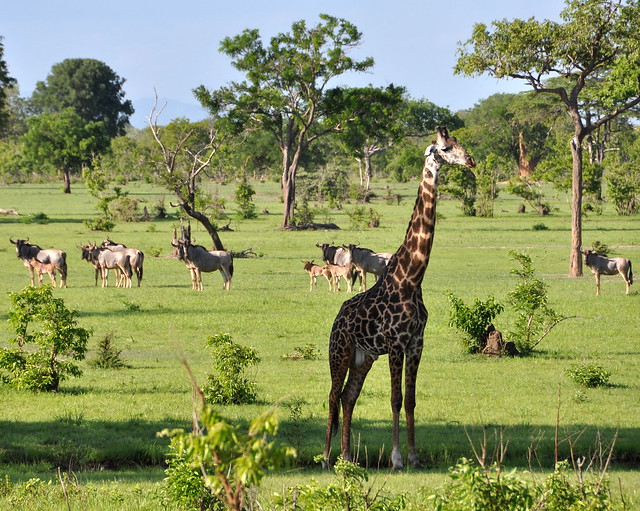
下图为将会使用的图片:
先导入可能用到的模块
from PIL import Image
import torch
from skimage import io
import torch.nn.functional as F
import numpy as np
使用transformers的pipeline子模块
from transformers import pipeline
image_path = "https://farm5.staticflickr.com/4007/4322154488_997e69e4cf_z.jpg"
pipe = pipeline("image-segmentation", model="briaai/RMBG-1.4", trust_remote_code=True)
pillow_mask = pipe(image_path, return_mask = True) # outputs a pillow mask
pillow_image = pipe(image_path) # applies mask on input and returns a pillow image
pillow_mask

pillow_image

直接使用transformers推理
from transformers import AutoModelForImageSegmentation
from torchvision.transforms.functional import normalize
model = AutoModelForImageSegmentation.from_pretrained("briaai/RMBG-1.4",trust_remote_code=True)
def preprocess_image(im: np.ndarray, model_input_size: list) -> torch.Tensor:if len(im.shape) < 3:im = im[:, :, np.newaxis]# orig_im_size=im.shape[0:2]im_tensor = torch.tensor(im, dtype=torch.float32).permute(2,0,1)im_tensor = F.interpolate(torch.unsqueeze(im_tensor,0), size=model_input_size, mode='bilinear')image = torch.divide(im_tensor,255.0)image = normalize(image,[0.5,0.5,0.5],[1.0,1.0,1.0])return imagedef postprocess_image(result: torch.Tensor, im_size: list)-> np.ndarray:result = torch.squeeze(F.interpolate(result, size=im_size, mode='bilinear') ,0)ma = torch.max(result)mi = torch.min(result)result = (result-mi)/(ma-mi)im_array = (result*255).permute(1,2,0).cpu().data.numpy().astype(np.uint8)im_array = np.squeeze(im_array)return im_arraydevice = torch.device("cuda:0" if torch.cuda.is_available() else "cpu")
model.to(device)# prepare input
image_path = "https://farm5.staticflickr.com/4007/4322154488_997e69e4cf_z.jpg"
orig_im = io.imread(image_path)
orig_im_size = orig_im.shape[0:2]
model_input_size = [1024,1024]
image = preprocess_image(orig_im, model_input_size).to(device)# inference
result=model(image)# post process
result_image = postprocess_image(result[0][0], orig_im_size)
# save result
pil_im = Image.fromarray(result_image)
pil_im
no_bg_image = Image.new("RGBA", pil_im.size, (0,0,0,0))
orig_image = Image.fromarray(orig_im)
# orig_image = Image.open(image_path)
no_bg_image.paste(orig_image, mask=pil_im)
no_bg_image
这篇关于使用RMBG-1.4进行抠图(背景移除)的文章就介绍到这儿,希望我们推荐的文章对编程师们有所帮助!


