本文主要是介绍K8S - 实现statefulset 有状态service的灰度发布,希望对大家解决编程问题提供一定的参考价值,需要的开发者们随着小编来一起学习吧!
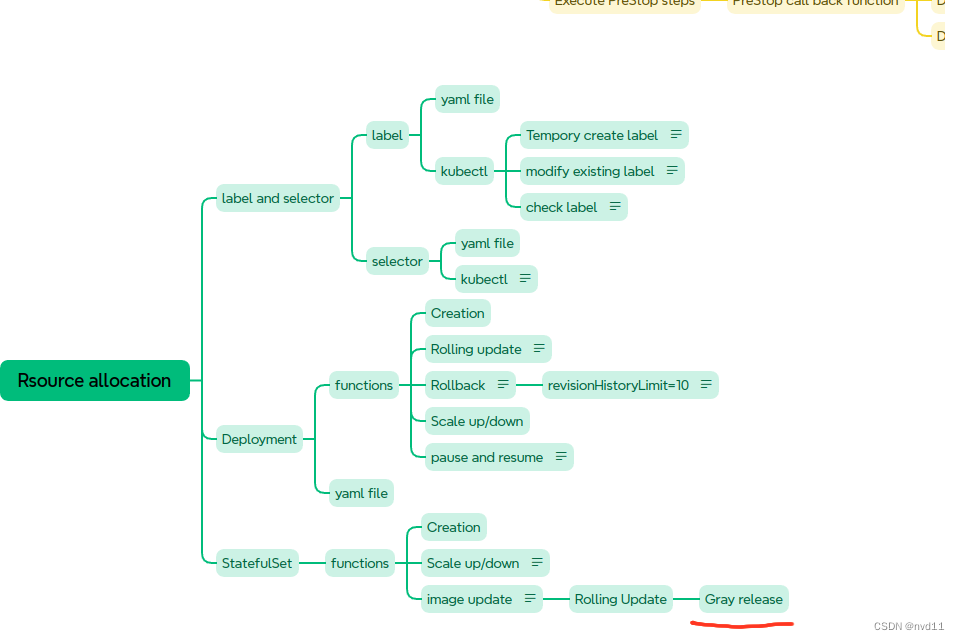
什么是灰度发布 Canary Release

参考
理解 什么是 滚动更新,蓝绿部署,灰度发布 以及它们的区别
配置partition in updateStrategy/rollingUpdate
这次我为修改了 statefulset 的1个yaml file
statefulsets/stateful-nginx-without-pvc.yaml:
---
apiVersion: v1 # api version
kind: Service # type of this resource e.g. Pod/Deployment ..
metadata:name: nginx-stateful-service # name of the servicelabels:app: nginx-stateful-service
spec:ports: - port: 80 # port of the service, used to access the servicename: web-portclusterIP: None # the service is not exposed outside the clusterselector: # label of the Pod that the Service is selectingapp: nginx-stateful # only service selector could skip the matchLabels:
---apiVersion: apps/v1
kind: StatefulSet # it's for a stateful application, it's a controller
metadata:name: nginx-statefulset # name of the statefulsetlabels:app: nginx-stateful
spec: # detail descriptionserviceName: "nginx-stateful-service" # name of the service that used to manange the dns,  # must be the same as the service name defined abovereplicas: 3 # desired replica countselector: # label of the Pod that the StatefulSet is managingmatchLabels:app: nginx-statefultemplate: # Pod templatemetadata:labels:app: nginx-statefulspec:containers:- name: nginx-containeimage: nginx:1.25.4 # image of the containerports: # the ports of the container and they will be exposed- containerPort: 80 # the port used by the container servicename: web-portupdateStrategy:rollingUpdate:partition: 2type: RollingUpdate
关键是最后1个block
updateStrategy:rollingUpdate:partition: 2type: RollingUpdate
rollingUpdate 很容易理解, 关键是partition 的值
这个值表示在image 版本更新后, 只会更新 pod-index 中index >= partition 的POD, 其他POD保持先版本, 这就能同时让两个版本存在一段时间, 实现灰度发布
一个例子
首先我们先apply 上面的yaml
[gateman@manjaro-x13 statefulsets]$ kubectl apply -f stateful-nginx-without-pvc.yaml
service/nginx-stateful-service unchanged
statefulset.apps/nginx-statefulset created
检查pods , 3个pod 起来了分别是0, 1, 2
[gateman@manjaro-x13 statefulsets]$ kubectl get pods -o wide
NAME                  READY   STATUS    RESTARTS   AGE   IP             NODE        NOMINATED NODE   READINESS GATES
nginx-statefulset-0   1/1     Running   0          12m   10.244.2.120   k8s-node0   <none>           <none>
nginx-statefulset-1   1/1     Running   0          12m   10.244.1.59    k8s-node1   <none>           <none>
nginx-statefulset-2   1/1     Running   0          12m   10.244.3.69    k8s-node3   <none>           <none>
为了更好的present, 我们把pods数量scale 到5个
[gateman@manjaro-x13 statefulsets]$ kubectl scale statefulset nginx-statefulset --replicas=5
statefulset.apps/nginx-statefulset scaled
[gateman@manjaro-x13 statefulsets]$ kubectl get pods -o wide
NAME                  READY   STATUS    RESTARTS   AGE   IP             NODE        NOMINATED NODE   READINESS GATES
nginx-statefulset-0   1/1     Running   0          13m   10.244.2.120   k8s-node0   <none>           <none>
nginx-statefulset-1   1/1     Running   0          13m   10.244.1.59    k8s-node1   <none>           <none>
nginx-statefulset-2   1/1     Running   0          13m   10.244.3.69    k8s-node3   <none>           <none>
nginx-statefulset-3   1/1     Running   0          13s   10.244.2.121   k8s-node0   <none>           <none>
nginx-statefulset-4   1/1     Running   0          12s   10.244.3.70    k8s-node3   <none>           <none>
这时5个pod 起来了
查看每个pod的image 版本
[gateman@manjaro-x13 statefulsets]$ kubectl get pods -o=jsonpath='{range .items[*]}{.metadata.name}{"\t"}{.spec.containers[*].image}{"\n"}{end}'
nginx-statefulset-0	nginx:1.25.4
nginx-statefulset-1	nginx:1.25.4
nginx-statefulset-2	nginx:1.25.4
nginx-statefulset-3	nginx:1.25.4
nginx-statefulset-4	nginx:1.25.4
这时我们更新image 版本从 1.25.4 更新到1.26.1
[gateman@manjaro-x13 statefulsets]$ kubectl set image statefulset/nginx-statefulset nginx-container=nginx:1.26.1
statefulset.apps/nginx-statefulset image updated
再次检查 每个pod 的image version
nginx-statefulset-0	nginx:1.25.4
nginx-statefulset-1	nginx:1.25.4
nginx-statefulset-2	nginx:1.26.1
nginx-statefulset-3	nginx:1.26.1
nginx-statefulset-4	nginx:1.26.1
可以见到只有pod 2 3 和4 更新了, 0, 1 还是旧版本
下一步, 把新版本应到pod 1 和 pod 0
也很简单, 只需要更改partition 的值就行
---
apiVersion: v1 # api version
kind: Service # type of this resource e.g. Pod/Deployment ..
metadata:name: nginx-stateful-service # name of the servicelabels:app: nginx-stateful-service
spec:ports: - port: 80 # port of the service, used to access the servicename: web-portclusterIP: None # the service is not exposed outside the clusterselector: # label of the Pod that the Service is selectingapp: nginx-stateful # only service selector could skip the matchLabels:
---apiVersion: apps/v1
kind: StatefulSet # it's for a stateful application, it's a controller
metadata:name: nginx-statefulset # name of the statefulsetlabels:app: nginx-stateful
spec: # detail descriptionserviceName: "nginx-stateful-service" # name of the service that used to manange the dns,  # must be the same as the service name defined abovereplicas: 5 # desired replica countselector: # label of the Pod that the StatefulSet is managingmatchLabels:app: nginx-statefultemplate: # Pod templatemetadata:labels:app: nginx-statefulspec:containers:- name: nginx-containerimage: nginx:1.26.1 # image of the containerports: # the ports of the container and they will be exposed- containerPort: 80 # the port used by the container servicename: web-portupdateStrategy:rollingUpdate:partition: 1type: RollingUpdate
记得修改3个地方, 1是
replicas: 5 改成当前的数量
image: nginx:1.26.1 要改成新的版本
partition: 1 改成1 就是意思把pod 1 也部署新版本
[gateman@manjaro-x13 statefulsets]$ kubectl replace -f stateful-nginx-without-pvc.yaml
service/nginx-stateful-service replaced
statefulset.apps/nginx-statefulset replaced
[gateman@manjaro-x13 statefulsets]$ kubectl get pods -o=jsonpath='{range .items[*]}{.metadata.name}{"\t"}{.spec.containers[*].image}{"\n"}{end}'
nginx-statefulset-0	nginx:1.25.4
nginx-statefulset-1	nginx:1.26.1
nginx-statefulset-2	nginx:1.26.1
nginx-statefulset-3	nginx:1.26.1
nginx-statefulset-4	nginx:1.26.1
这时只有pod0 还是旧版本
如何 把pod0 也同步?
方法1是用上面的方法重新更新partition 的值为0
方法2使用 kubectl patch 修改
kubectl patch statefulset nginx-statefulset --type=‘json’ -p=‘[{“op”: “replace”, “path”: “/spec/updateStrategy/rollingUpdate/partition”, “value”: 0}]’
[gateman@manjaro-x13 statefulsets]$ kubectl get pods -o=jsonpath='{range .items[*]}{.metadata.name}{"\t"}{.spec.containers[*].image}{"\n"}{end}'
nginx-statefulset-0	nginx:1.26.1
nginx-statefulset-1	nginx:1.26.1
nginx-statefulset-2	nginx:1.26.1
nginx-statefulset-3	nginx:1.26.1
nginx-statefulset-4	nginx:1.26.1
Deployment 的灰度发布
如果是无状态service 的deployment , 可以用这种方法灰度发布吗?
不行
因为 deployment 的pods 的后续不是1个index 数字, 无序的, 所以无法去比较 pod 的index 和 partition的值
强行写上yaml 就会有如下错误:
[gateman@manjaro-x13 bq-api-service]$ kubectl apply -f bq-api-service-test.yaml
error: error validating "bq-api-service-test.yaml": error validating data: ValidationError(Deployment.spec.strategy.rollingUpdate): unknown field "partition" in io.k8s.api.apps.v1.RollingUpdateDeployment; if you choose to ignore these errors, turn validation off with --validate=false
但是灰度发布只是1个思想, 实现的方法有很多种
deployment的灰度发布在k8s 是可行的, 例如简单粗暴地用多个deployment 去cover 不同的instance. 具体方法不在此讨论
这篇关于K8S - 实现statefulset 有状态service的灰度发布的文章就介绍到这儿,希望我们推荐的文章对编程师们有所帮助!


