本文主要是介绍YOLOv10目标检测算法的使用,希望对大家解决编程问题提供一定的参考价值,需要的开发者们随着小编来一起学习吧!
目录
一、环境安装
1、创建虚拟环境
2、安装依赖
二、数据集准备
1、预训练权重
2、数据划分
3、建立数据集的yaml文件
三、训练
1、终端运行指令
2、建立一个 python 文件运行
四、验证
1、终端运行指令
2、建立一个 python 文件运行
五、模型推理
1、单张图片推理
2、视频推理
六、导出报告
七、报错处理
1、提示数据集.yaml文件错误:RuntimeError: Dataset 'datasets/fire.yaml' error
八、附录
1、xml转txt脚本
一、环境安装
1、创建虚拟环境
conda create -n yolov10 python=3.8# 激活yolov9 env
conda activate yolov10
2、安装依赖
pip install -r requirements.txt -i https://pypi.tuna.tsinghua.edu.cn/simple注意:如果需要终端运行命令,即yolo xxx,还需要运行下面命令进行额外安装:
pip install -e .二、数据集准备
1、预训练权重
预训练权重下载:
import os
import urllib.request# Create a directory for the weights in the current working directory
weights_dir = os.path.join(os.getcwd(), "weights")
os.makedirs(weights_dir, exist_ok=True)# URLs of the weight files
urls = ["https://github.com/jameslahm/yolov10/releases/download/v1.0/yolov10n.pt","https://github.com/jameslahm/yolov10/releases/download/v1.0/yolov10s.pt","https://github.com/jameslahm/yolov10/releases/download/v1.0/yolov10m.pt","https://github.com/jameslahm/yolov10/releases/download/v1.0/yolov10b.pt","https://github.com/jameslahm/yolov10/releases/download/v1.0/yolov10x.pt","https://github.com/jameslahm/yolov10/releases/download/v1.0/yolov10l.pt"
]# Download each file
for url in urls:file_name = os.path.join(weights_dir, os.path.basename(url))urllib.request.urlretrieve(url, file_name)print(f"Downloaded {file_name}")
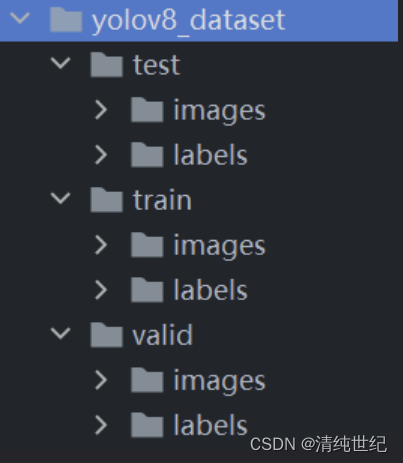
2、数据划分
将需要训练的数据集,放入项目目录下,格式如下(目前的图片和标签是这个样子的):
Moon_Cake├─images└─all└─labels└─all现在通过脚本将数据集进行划分,格式如下:
├── yolov10_dataset└── train└── images (folder including all training images)└── labels (folder including all training labels)└── test└── images (folder including all testing images)└── labels (folder including all testing labels)└── valid└── images (folder including all testing images)└── labels (folder including all testing labels)划分代码:
import os
import random
import shutildef copy_files(src_dir, dst_dir, filenames, extension):os.makedirs(dst_dir, exist_ok=True)missing_files = 0for filename in filenames:src_path = os.path.join(src_dir, filename + extension)dst_path = os.path.join(dst_dir, filename + extension)# Check if the file exists before copyingif os.path.exists(src_path):shutil.copy(src_path, dst_path)else:print(f"Warning: File not found for {filename}")missing_files += 1return missing_filesdef split_and_copy_dataset(image_dir, label_dir, output_dir, train_ratio=0.7, valid_ratio=0.15, test_ratio=0.15):# 获取所有图像文件的文件名(不包括文件扩展名)image_filenames = [os.path.splitext(f)[0] for f in os.listdir(image_dir)]# 随机打乱文件名列表random.shuffle(image_filenames)# 计算训练集、验证集和测试集的数量total_count = len(image_filenames)train_count = int(total_count * train_ratio)valid_count = int(total_count * valid_ratio)test_count = total_count - train_count - valid_count# 定义输出文件夹路径train_image_dir = os.path.join(output_dir, 'train', 'images')train_label_dir = os.path.join(output_dir, 'train', 'labels')valid_image_dir = os.path.join(output_dir, 'valid', 'images')valid_label_dir = os.path.join(output_dir, 'valid', 'labels')test_image_dir = os.path.join(output_dir, 'test', 'images')test_label_dir = os.path.join(output_dir, 'test', 'labels')# 复制图像和标签文件到对应的文件夹train_missing_files = copy_files(image_dir, train_image_dir, image_filenames[:train_count], '.jpg')train_missing_files += copy_files(label_dir, train_label_dir, image_filenames[:train_count], '.txt')valid_missing_files = copy_files(image_dir, valid_image_dir, image_filenames[train_count:train_count + valid_count], '.jpg')valid_missing_files += copy_files(label_dir, valid_label_dir, image_filenames[train_count:train_count + valid_count], '.txt')test_missing_files = copy_files(image_dir, test_image_dir, image_filenames[train_count + valid_count:], '.jpg')test_missing_files += copy_files(label_dir, test_label_dir, image_filenames[train_count + valid_count:], '.txt')# Print the count of each datasetprint(f"Train dataset count: {train_count}, Missing files: {train_missing_files}")print(f"Validation dataset count: {valid_count}, Missing files: {valid_missing_files}")print(f"Test dataset count: {test_count}, Missing files: {test_missing_files}")# 使用例子
image_dir = 'datasets/coco128/images/train2017'
label_dir = 'datasets/coco128/labels/train2017'
output_dir = './my_dataset'split_and_copy_dataset(image_dir, label_dir, output_dir)
划分后的样子:
3、建立数据集的yaml文件
自己建立的,写成绝对路径,防止出错:
# Train/val/test sets as 1) dir: path/to/imgs, 2) file: path/to/imgs.txt, or 3) list: [path/to/imgs1, path/to/imgs2, ..]
path: /hy-tmp/yolov10/datasets/dataset_split
train: train # train images
val: val # val images
test: test # test images (optional) # number of classes
nc: 2# Classes,这个类别也可以这样写:names: [ 'sleep' , 'phone' ]
names:0: sleep1: phone
下面的自带的:
path: ../datasets/coco128  # dataset root dir
train: images/train2017  # train images (relative to 'path') 128 images
val: images/train2017  # val images (relative to 'path') 128 images
test:  # test images (optional)# Classes
names:0: person1: bicycle2: car''''''79: toothbrush
三、训练
YOLov10 提供两种训练方式,终端运行指令和新建一个 python 文件运行
1、终端运行指令
通过命令直接进行训练在其中指定参数,命令如下(注意:如果是Windows系统,Workers最好设置成0,否则容易报线程的错误):
# 从YAML构建一个新模型,从头开始训练
yolo task=detect mode=train model=yolov10n.yaml data=替换你数据集的yaml文件地址 batch=16 epochs=100 imgsz=640 workers=0 device=0# 从预训练的*.pt模型开始训练
yolo task=detect mode=train model=yolov10n.pt data=替换你数据集的yaml文件地址 batch=16 epochs=100 imgsz=640 workers=0 device=0# 从YAML中构建一个新模型,将预训练的权重转移到它并开始训练
yolo task=detect mode=train model=yolov10n.yaml pretrained=yolov10n.pt data=替换你数据集的yaml文件地址 batch=16 epochs=100 imgsz=640 workers=0 device=0
通过指定cfg直接进行训练,配置好ultralytics/cfg/default.yaml这个文件之后,可以直接执行这个文件进行训练,这样就不用在命令行输入其它的参数了:
yolo cfg=ultralytics/cfg/default.yaml2、建立一个 python 文件运行
有些教程写的是,需要导入YOLOv10模块,而不是YOLO模块(参考),但是实际上也没啥问题(推荐这个,注意修改yolov10n.yaml模型配置文件的类别数)。
from ultralytics import YOLO# 模型配置文件
model_yaml_path = "ultralytics/cfg/models/v10/yolov10n.yaml"
#数据集配置文件
data_yaml_path = 'datasets/fire.yaml'
#预训练模型
pre_model_name = 'yolov10n.pt'if __name__ == '__main__':#加载预训练模型model = YOLO(model_yaml_path).load(pre_model_name)#训练模型results = model.train(data=data_yaml_path,epochs=20,batch=4,name='train_v10')
而应对指令命令的三种形式如下:
from ultralytics import YOLOv10# Load a model # 三选一
model = YOLOv10('yolov10n.yaml')  # build a new model from YAML
model = YOLOv10('yolov10n.pt')  # load a pretrained model (recommended for training)
model = YOLOv10('yolov10n.yaml').load('yolov10n.pt')  # build from YAML and transfer weights# Train the model
model.train(data='coco128.yaml', epochs=100, imgsz=640)
可以通过tensorboard查看实时训练效果:
tensorboard --logdir runs\detect\train2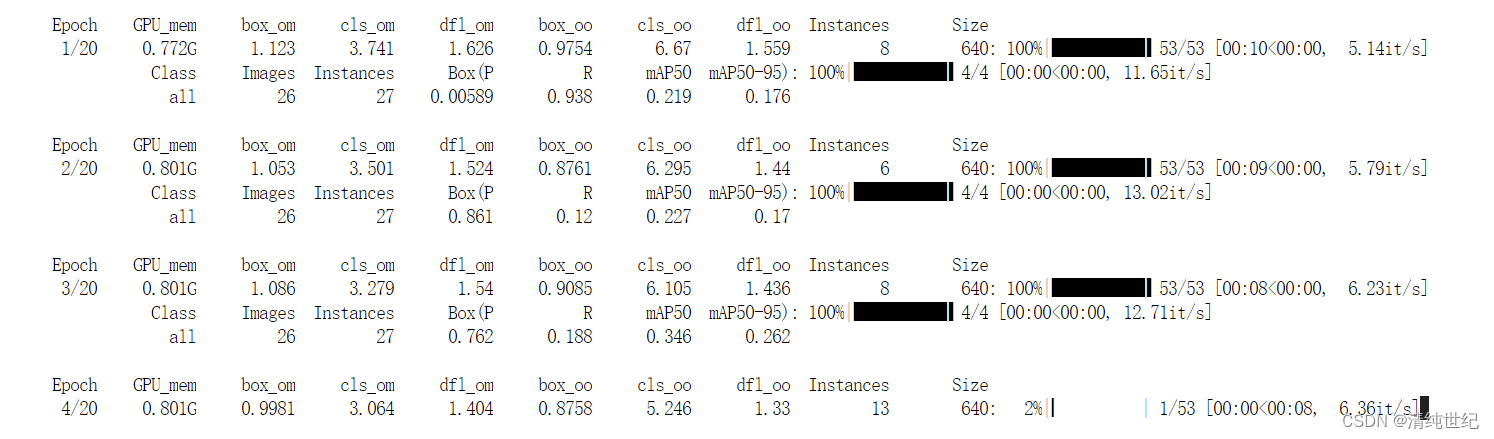
四、验证
1、终端运行指令
yolo task=detect mode=val model=yolov10n.pt
# mode=val 就是看验证集
yolo task=detect mode=val split=val model=runs/detect/train2/weights/best.pt  data=ultralytics/datasets/MoonCake.yaml # 替换你数据集的yaml文件地址
# mode=test 就是看测试集
yolo task=detect mode=val split=test model=runs/detect/train2/weights/best.pt  data=ultraly
这篇关于YOLOv10目标检测算法的使用的文章就介绍到这儿,希望我们推荐的文章对编程师们有所帮助!


