本文主要是介绍vue3+ts 使用vue3-ace-editor实现Json编辑器,希望对大家解决编程问题提供一定的参考价值,需要的开发者们随着小编来一起学习吧!
1、效果图
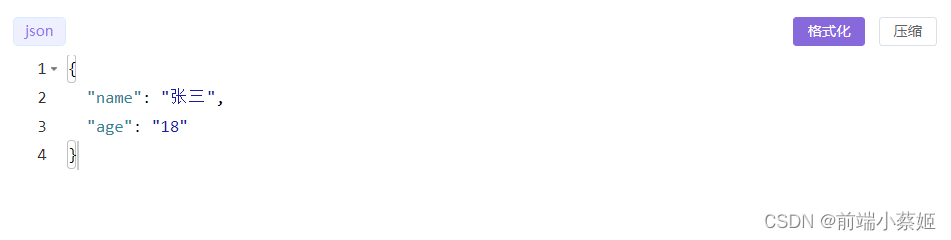
输入代码,点击格式化就出现以上效果,再点击压缩,是以下效果 2、安装
2、安装
npm i vue3-ace-editor3、使用
新建aceConfig.js文件
// ace配置,使用动态加载来避免第一次加载开销
import ace from 'ace-builds'// 导入不同的主题模块,并设置对应 URL
import themeGithubUrl from 'ace-builds/src-noconflict/theme-github?url'
ace.config.setModuleUrl('ace/theme/github', themeGithubUrl)import themeChromeUrl from 'ace-builds/src-noconflict/theme-chrome?url'
ace.config.setModuleUrl('ace/theme/chrome', themeChromeUrl)import themeMonokaiUrl from 'ace-builds/src-noconflict/theme-monokai?url'
ace.config.setModuleUrl('ace/theme/monokai', themeMonokaiUrl)// 导入不同语言的语法模式模块,并设置对应 URL (所有支持的主题和模式:node_modules/ace-builds/src-noconflict)
import modeJsonUrl from 'ace-builds/src-noconflict/mode-json?url'
ace.config.setModuleUrl('ace/mode/json', modeJsonUrl)import modeJavascriptUrl from 'ace-builds/src-noconflict/mode-javascript?url'
ace.config.setModuleUrl('ace/mode/javascript', modeJavascriptUrl)import modeHtmlUrl from 'ace-builds/src-noconflict/mode-html?url'
ace.config.setModuleUrl('ace/mode/html', modeHtmlUrl)import modePythonUrl from 'ace-builds/src-noconflict/mode-python?url'
ace.config.setModuleUrl('ace/mode/yaml', modePythonUrl)// 用于完成语法检查、代码提示、自动补全等代码编辑功能,必须注册模块 ace/mode/lang _ worker,并设置选项 useWorker: true
import workerBaseUrl from 'ace-builds/src-noconflict/worker-base?url'
ace.config.setModuleUrl('ace/mode/base', workerBaseUrl)import workerJsonUrl from 'ace-builds/src-noconflict/worker-json?url' // for vite
ace.config.setModuleUrl('ace/mode/json_worker', workerJsonUrl)import workerJavascriptUrl from 'ace-builds/src-noconflict/worker-javascript?url'
ace.config.setModuleUrl('ace/mode/javascript_worker', workerJavascriptUrl)import workerHtmlUrl from 'ace-builds/src-noconflict/worker-html?url'
ace.config.setModuleUrl('ace/mode/html_worker', workerHtmlUrl)// 导入不同语言的代码片段,提供代码自动补全和代码块功能
import snippetsJsonUrl from 'ace-builds/src-noconflict/snippets/json?url'
ace.config.setModuleUrl('ace/snippets/json', snippetsJsonUrl)import snippetsJsUrl from 'ace-builds/src-noconflict/snippets/javascript?url'
ace.config.setModuleUrl('ace/snippets/javascript', snippetsJsUrl)import snippetsHtmlUrl from 'ace-builds/src-noconflict/snippets/html?url'
ace.config.setModuleUrl('ace/snippets/html', snippetsHtmlUrl)import snippetsPyhontUrl from 'ace-builds/src-noconflict/snippets/python?url'
ace.config.setModuleUrl('ace/snippets/javascript', snippetsPyhontUrl)// 启用自动补全等高级编辑支持,
import extSearchboxUrl from 'ace-builds/src-noconflict/ext-searchbox?url'
ace.config.setModuleUrl('ace/ext/searchbox', extSearchboxUrl)// 启用自动补全等高级编辑支持
import 'ace-builds/src-noconflict/ext-language_tools'
ace.require('ace/ext/language_tools')
4、在页面使用
<template><div><div class="flex justify-between mb-2"><el-tag color="#eff0ff" effect="light">json</el-tag><div><el-button color="#8769db" size="small" @click="jsonFormat">{{ $t('format') }}</el-button><el-button size="small" @click="jsonNoFormat">{{ $t('zip') }}</el-button></div></div><v-ace-editorv-model:value="content"lang="json"theme="chrome":options="options"class="w-full text-base pt-5":readonly="options.readonly"/></div>
</template><script lang="ts" setup>
import { ref, reactive, watch } from 'vue'
import emitter from '@/utils/emitter'
import { VAceEditor } from 'vue3-ace-editor'
import './aceConfig.js'const content = ref('') // 显示的内容const options = reactive({useWorker: true, // 启用语法检查,必须为trueenableBasicAutocompletion: true, // 自动补全enableLiveAutocompletion: true, // 智能补全enableSnippets: true, // 启用代码段showPrintMargin: false, // 去掉灰色的线,printMarginColumnhighlightActiveLine: false, // 高亮行highlightSelectedWord: true, // 高亮选中的字符tabSize: 4, // tab锁进字符fontSize: 14, // 设置字号wrap: false, // 是否换行readonly: false, // 是否可编辑minLines: 1, // 最小行数,minLines和maxLines同时设置之后,可以不用给editor再设置高度maxLines: 50, // 最大行数
})// JSON格式化
const jsonFormat = () => {try {content.value = JSON.stringify(JSON.parse(content.value), null, 2)} catch (e) {jsonError(e)}
}// JSON压缩
const jsonNoFormat = () => {try {content.value = JSON.stringify(JSON.parse(content.value))} catch (e) {jsonError(e)}
}watch(content, (newValue) => {console.log('New Content:', newValue)emitter.emit('handleCondition', newValue)
})const jsonError = (e: any) => {console.log(`JSON字符串错误:${e.message}`)
}
</script><style>
.ace_gutter {background-color: transparent !important;
}
.ace-chrome .ace_gutter-active-line {background-color: transparent !important;
}
</style>
参考:vue3-ace-editor使用记录-CSDN博客
这篇关于vue3+ts 使用vue3-ace-editor实现Json编辑器的文章就介绍到这儿,希望我们推荐的文章对编程师们有所帮助!


