本文主要是介绍封装了一个使用UICollectionViewLayout 实现的吸附居左banner图,希望对大家解决编程问题提供一定的参考价值,需要的开发者们随着小编来一起学习吧!
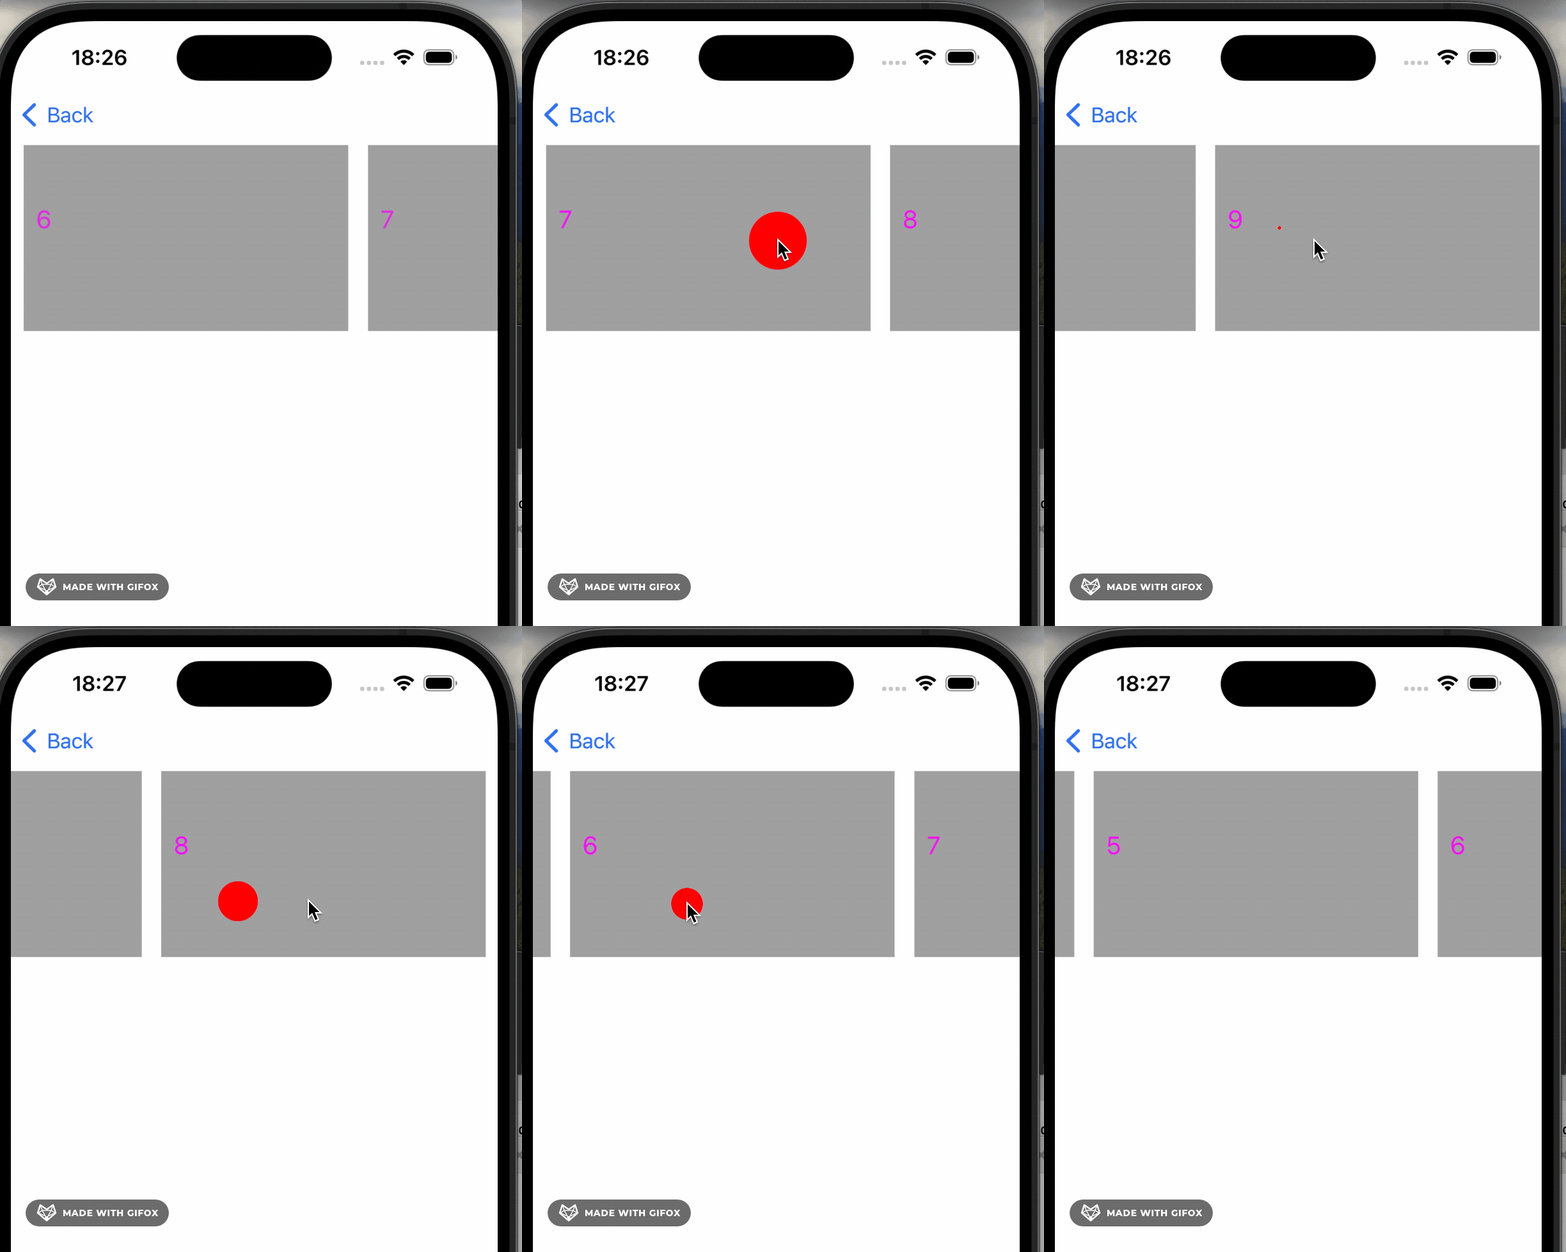
首先查看效果图

实现的原理就是通过自定义UICollectionView layout,然后
设置减速速率是快速就可以达到吸附的效果
_collectionView.decelerationRate = UIScrollViewDecelerationRateFast;
下面贴出所有代码
这里是.h
//
//  LBMiddleExpandLayout.h
//  LiuboMiddleExpandLayout
//
//  Created by liubo on 2023/7/8.
//#import <UIKit/UIKit.h>NS_ASSUME_NONNULL_BEGIN@interface LBMiddleExpandLayout : UICollectionViewFlowLayout@property (nonatomic, assign) BOOL scrollAnimation;/**<是否有分页动画*/
@property (nonatomic, assign) CGPoint lastOffset;/**<记录上次滑动停止时contentOffset值*/- (instancetype)initWithSectionInset:(UIEdgeInsets)insetsandMiniLineSapce:(CGFloat)miniLineSpaceandMiniInterItemSpace:(CGFloat)miniInterItemSpaceandItemSize:(CGSize)itemSize;@endNS_ASSUME_NONNULL_END
//
// LBMiddleExpandLayout.m
// LiuboMiddleExpandLayout
//
// Created by liubo on 2023/7/8.
//#import "LBMiddleExpandLayout.h"@interface LBMiddleExpandLayout ()@property (nonatomic, assign) UIEdgeInsets sectionInsets;
@property (nonatomic, assign) CGFloat miniLineSpace;
@property (nonatomic, assign) CGFloat miniInterItemSpace;
@property (nonatomic, assign) CGSize eachItemSize;@end@implementation LBMiddleExpandLayout/*初始化部分*/
- (instancetype)initWithSectionInset:(UIEdgeInsets)insetsandMiniLineSapce:(CGFloat)miniLineSpaceandMiniInterItemSpace:(CGFloat)miniInterItemSpaceandItemSize:(CGSize)itemSize
{self = [self init];if (self) {//基本尺寸/边距设置self.sectionInsets = insets;self.miniLineSpace = miniLineSpace;self.miniInterItemSpace = miniInterItemSpace;self.eachItemSize = itemSize;}return self;
}- (instancetype)init
{self = [super init];if (self) {_lastOffset = CGPointZero;}return self;
}-(void)prepareLayout
{[super prepareLayout];self.scrollDirection = UICollectionViewScrollDirectionHorizontal;// 水平滚动/*设置内边距*/self.sectionInset = _sectionInsets;self.minimumLineSpacing = _miniLineSpace;self.minimumInteritemSpacing = _miniInterItemSpace;self.itemSize = _eachItemSize;/*** decelerationRate系统给出了2个值:* 1. UIScrollViewDecelerationRateFast(速率快)* 2. UIScrollViewDecelerationRateNormal(速率慢)* 此处设置滚动加速度率为fast,这样在移动cell后就会出现明显的吸附效果*/self.collectionView.decelerationRate = UIScrollViewDecelerationRateFast;
}/*** 这个方法的返回值,就决定了collectionView停止滚动时的偏移量*/
-(CGPoint)targetContentOffsetForProposedContentOffset:(CGPoint)proposedContentOffset withScrollingVelocity:(CGPoint)velocity
{CGFloat pageSpace = [self stepSpace];//计算分页步距CGFloat offsetMax = self.collectionView.contentSize.width - (pageSpace + self.sectionInset.right + self.miniLineSpace);CGFloat offsetMin = 0;/*修改之前记录的位置,如果小于最小contentsize或者大于最大contentsize则重置值*/if (_lastOffset.x<offsetMin){_lastOffset.x = offsetMin;}else if (_lastOffset.x>offsetMax){_lastOffset.x = offsetMax;}CGFloat offsetForCurrentPointX = ABS(proposedContentOffset.x - _lastOffset.x);//目标位移点距离当前点的距离绝对值CGFloat velocityX = velocity.x;BOOL direction = (proposedContentOffset.x - _lastOffset.x) > 0;//判断当前滑动方向,手指向左滑动:YES;手指向右滑动:NOif (offsetForCurrentPointX > pageSpace/8. && _lastOffset.x>=offsetMin && _lastOffset.x<=offsetMax){NSInteger pageFactor = 0;//分页因子,用于计算滑过的cell个数if (velocityX != 0){/*滑动*/pageFactor = ABS(velocityX);//速率越快,cell滑过数量越多}else{/*** 拖动* 没有速率,则计算:位移差/默认步距=分页因子*/pageFactor = ABS(offsetForCurrentPointX/pageSpace);}/*设置pageFactor上限为2, 防止滑动速率过大,导致翻页过多*/pageFactor = pageFactor<1?1:(pageFactor<3?1:2);CGFloat pageOffsetX = pageSpace*pageFactor;proposedContentOffset = CGPointMake(_lastOffset.x + (direction?pageOffsetX:-pageOffsetX), proposedContentOffset.y);}else{/*滚动距离,小于翻页步距一半,则不进行翻页操作*/proposedContentOffset = CGPointMake(_lastOffset.x, _lastOffset.y);}//记录当前最新位置_lastOffset.x = proposedContentOffset.x;return proposedContentOffset;
}/***计算每滑动一页的距离:步距*/
-(CGFloat)stepSpace
{return self.eachItemSize.width + self.miniLineSpace;
}/*** 当collectionView的显示范围发生改变的时候,是否需要重新刷新布局* 一旦重新刷新布局,就会重新调用 layoutAttributesForElementsInRect:方法*/
-(BOOL)shouldInvalidateLayoutForBoundsChange:(CGRect)newBounds
{return YES;
}/***防止报错先复制attributes*/
- (NSArray *)getCopyOfAttributes:(NSArray *)attributes
{NSMutableArray *copyArr = [NSMutableArray new];for (UICollectionViewLayoutAttributes *attribute in attributes) {[copyArr addObject:[attribute copy]];}return copyArr;
}/***设置放大动画*/
-(NSArray<UICollectionViewLayoutAttributes *> *)layoutAttributesForElementsInRect:(CGRect)rect
{/*获取rect范围内的所有subview的UICollectionViewLayoutAttributes*/NSArray *arr = [self getCopyOfAttributes:[super layoutAttributesForElementsInRect:rect]];/*动画计算*/if (self.scrollAnimation){/*计算屏幕中线*/CGFloat centerX = self.collectionView.contentOffset.x + self.collectionView.bounds.size.width/2.0f;/*刷新cell缩放*/for (UICollectionViewLayoutAttributes *attributes in arr) {CGFloat distance = fabs(attributes.center.x - centerX);/*移动的距离和屏幕宽度的的比例*/CGFloat apartScale = distance/self.collectionView.bounds.size.width;/*把卡片移动范围固定到 -π/4到 +π/4这一个范围内*/CGFloat scale = fabs(cos(apartScale * M_PI/4));/*设置cell的缩放按照余弦函数曲线越居中越趋近于1*/CATransform3D plane_3D = CATransform3DIdentity;plane_3D = CATransform3DScale(plane_3D, 1, scale, 1);attributes.transform3D = plane_3D;}}return arr;
}@end使用的地方
//
//  LLLeftPointBannerController.m
//  LiuboMiddleExpandLayout_Example
//
//  Created by liubo on 2023/10/10.
//  Copyright © 2023 liubo. All rights reserved.
//#import "LLLeftPointBannerController.h"
#import "LBMiddleExpandLayout.h"
#import "LBCollectionViewCell.h"@interface LLLeftPointBannerController () <UICollectionViewDataSource, UICollectionViewDelegate>@property (nonatomic, strong) UICollectionView *collectionView;@property (nonatomic, strong) NSMutableArray *signsArray;@end@implementation LLLeftPointBannerController- (void)viewDidLoad {[super viewDidLoad];self.view.backgroundColor = [UIColor whiteColor];[self.view addSubview:self.collectionView];for (int i = 0; i < 10; i ++) {[self.signsArray addObject:[NSString stringWithFormat:@"%d", i]];}[self.collectionView reloadData];// Do any additional setup after loading the view.
}#pragma mark - UICollectionViewDataSource, UICollectionViewDelegate- (NSInteger)numberOfSectionsInCollectionView:(UICollectionView *)collectionView {return 1;
}- (NSInteger)collectionView:(UICollectionView *)collectionView numberOfItemsInSection:(NSInteger)section {return self.signsArray.count;
}- (UIEdgeInsets)collectionView:(UICollectionView *)collectionView layout:(UICollectionViewLayout*)collectionViewLayout insetForSectionAtIndex:(NSInteger)section {//自定义item的UIEdgeInsetsreturn UIEdgeInsetsMake(0, 10 * PLUS_SCALE, 0, 0);
}- (UICollectionViewCell *)collectionView:(UICollectionView *)collectionView cellForItemAtIndexPath:(NSIndexPath *)indexPath {LBCollectionViewCell *cell = [collectionView dequeueReusableCellWithReuseIdentifier:NSStringFromClass([LBCollectionViewCell class]) forIndexPath:indexPath];NSString *titleString = self.signsArray[indexPath.item];cell.titleString = titleString;return cell;
}#pragma mark  - lazy load- (UICollectionView *)collectionView
{if (!_collectionView) {LBMiddleExpandLayout *layout = [[LBMiddleExpandLayout alloc] initWithSectionInset:UIEdgeInsetsZeroandMiniLineSapce:15 * PLUS_SCALEandMiniInterItemSpace:15 * PLUS_SCALEandItemSize:CGSizeMake(250 * PLUS_SCALE, 150)];layout.scrollAnimation = NO;_collectionView = [[UICollectionView alloc] initWithFrame:CGRectZero collectionViewLayout:layout];_collectionView.delegate = self;_collectionView.dataSource = self;_collectionView.pagingEnabled = NO;_collectionView.decelerationRate = UIScrollViewDecelerationRateFast;_collectionView.showsHorizontalScrollIndicator = NO;_collectionView.backgroundColor = [UIColor clearColor];[_collectionView registerClass:[LBCollectionViewCell class] forCellWithReuseIdentifier:NSStringFromClass([LBCollectionViewCell class])];[_collectionView setFrame:CGRectMake(0,  100, SCREEN_WIDTH,150)];}return _collectionView;
}- (NSMutableArray *)signsArray
{if (!_signsArray) {_signsArray = [NSMutableArray array];}return _signsArray;
}/*
#pragma mark - Navigation// In a storyboard-based application, you will often want to do a little preparation before navigation
- (void)prepareForSegue:(UIStoryboardSegue *)segue sender:(id)sender {// Get the new view controller using [segue destinationViewController].// Pass the selected object to the new view controller.
}
*/@end
本文demo链接: link
这里是之前写的一个,使用自定义视图实现的,没有使用
UICollectionViewLayout 实现
链接: link
这篇关于封装了一个使用UICollectionViewLayout 实现的吸附居左banner图的文章就介绍到这儿,希望我们推荐的文章对编程师们有所帮助!


