本文主要是介绍prometheus 安装 node_exporter,希望对大家解决编程问题提供一定的参考价值,需要的开发者们随着小编来一起学习吧!
prometheus 安装
- 1,Ubuntu 16.04安装prometheus
- 2,测试启动
- 2.1,运行前检查配置文件
- 2.2,修改`prometheus.yml`获取监控数据
- 2.3,prometheus开机启动
- 3,node_exporter安装
- 3.1,node_exporter开机启动
- 3.1,监控多个主机
- 4,prometheus查看targets
- 5,数据可视化显示
- 5.1,Grafana导入面板
1,Ubuntu 16.04安装prometheus
prometheus-2.18.1.darwin-amd64.tar.gz
# tar -zxvf prometheus-2.18.1.linux-amd64.tar.gz
- 设置环境变量
vim /root/.bashrc
#prometheus
export PATH=$PATH:/root/prometheus-2.18.1.linux-amd64
2,测试启动
prometheus --config.file=/root/prometheus-2.18.1.linux-amd64/prometheus.yml
0.0.0.0:9090

2.1,运行前检查配置文件
# ./promtool check config prometheus.yml
Checking prometheus.ymlSUCCESS: 0 rule files found
2.2,修改prometheus.yml获取监控数据
vim prometheus.yml增加job_name
scrape_configs:# The job name is added as a label `job=<job_name>` to any timeseries scraped from this config.- job_name: 'prometheus'# metrics_path defaults to '/metrics'# scheme defaults to 'http'.static_configs:- targets: ['localhost:9090']# node_exporter- job_name: 'node'static_configs:- targets: ['127.0.0.1:9100']
2.3,prometheus开机启动
# vim /lib/systemd/system/prometheus.service
# cat /lib/systemd/system/prometheus.service
[Unit]
Description=prometheus service[Service]
User=root
ExecStart=/root/prometheus-2.18.1.linux-amd64/prometheus --config.file=/root/prometheus-2.18.1.linux-amd64/prometheus.ymlTimeoutStopSec=10
Restart=on-failure
RestartSec=5[Install]
WantedBy=multi-user.target
# systemctl daemon-reload
# systemctl enable prometheus.service
Created symlink /etc/systemd/system/multi-user.target.wants/prometheus.service → /lib/systemd/system/prometheus.service.
# systemctl start prometheus.service
# systemctl status prometheus.service
3,node_exporter安装
node_exporter-1.0.0.linux-amd64.tar.gz
# tar -zxvf node_exporter-1.0.0.linux-amd64.tar.gz
# cd node_exporter-1.0.0.linux-amd64/
# ./node_exporter
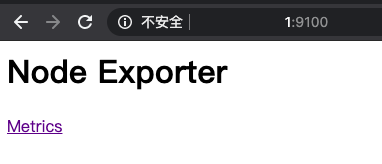
- 访问
ip:9100
- 增加配置
prometheus vim prometheus.yml
- job_name: 'node'static_configs:#- targets: ['localhost:9090']- targets: ['127.0.0.1:9100']
3.1,node_exporter开机启动
# cat /lib/systemd/system/node_exporter.service
[Unit]
Description=node_exporter service[Service]
User=root
ExecStart=/root/node_exporter-1.0.0.linux-amd64/node_exporterTimeoutStopSec=10
Restart=on-failure
RestartSec=5[Install]
WantedBy=multi-user.target
# systemctl daemon-reload
# systemctl enable node_exporter.service
# systemctl start node_exporter.service
# systemctl status node_exporter.service
3.1,监控多个主机
- 192.168.0.3 只运行
node_exporter - 192.168.0.2 运行有
prometheus - 配置
prometheus.yml targets配置多个IP地址
# cat prometheus.ymlstatic_configs:- targets: ['localhost:9090']# node_exporter- job_name: 'node'static_configs:- targets: ['127.0.0.1:9100','192.168.0.3:9100']
4,prometheus查看targets

5,数据可视化显示
5.1,Grafana导入面板

- id为
8919 - 数据源选择
prometheus


参考:
- prometheus download
- prometheus started
- Prometheus ubuntu安装使用
- prometheus+grafana 安装配置
- node_exporter
- Prometheus 实战
- Prometheus监控系统 安装与配置详细教程
- prometheus-book 使用Node Exporter采集主机数据
- Prometheus 配置
- Prometheus部署各服务的Node监控
- 使用 Grafana + Prometheus + Node-Exporter 监控机器
- 1 Node Exporter for Prometheus Dashboard CN v20200530
这篇关于prometheus 安装 node_exporter的文章就介绍到这儿,希望我们推荐的文章对编程师们有所帮助!


