本文主要是介绍Retrofit2使用(非常简洁易懂),希望对大家解决编程问题提供一定的参考价值,需要的开发者们随着小编来一起学习吧!
http://blog.csdn.net/baidu_31093133/article/details/51759452(转)
1、什么是Retrofit框架?
它是Square公司开发的现在非常流行的网络框架,所以我们在导入它的包的时候都可以看到这个公司的名字,目前的版本是2。
特点:
性能好,处理快,使用简单,Retrofit 是安卓上最流行的HTTP Client库之一
使用REST API设计风格
支持 NIO(new i/o)
默认使用OKHttp处理网络请求,我觉得可以看成是OKHttp的增强。
默认使用Gson解析
进入正题。
===================================
2、如何使用?
步骤:
1、导包
compile ‘com.squareup.retrofit2:retrofit:2.0.0-beta4’
同步以后,在External Libraries中会增加:
retrofit-2.0.0-beta4
okhttp-3.0.1
okio-1.6.0
compile ‘com.squareup.retrofit2:converter-gson:2.0.0-beta4’
同步以后,在External Libraries中会增加:
retrofit-2.0.0-beta4
okhttp-3.0.1
okio-1.6.0
gson-2.4
converter-gson-2.0.0-beta4
这些包都是Squareup公司开发的。
所以我们只用compile ‘com.squareup.retrofit2:converter-gson:2.0.0-beta4’也是可以的。
2、了解Retrofit2中的网络访问常用注解接口,其实这些接口都是在retrofit2.http这个包下面的
1、@GET GET网络请求方式
2、@POST POST网络请求方式
3、@Headers() 头信息参数
4、@Path() 路径参数,替换url地址中 { } 所括的部分
5、@Query() 查询参数,将在url地址中追加类似“page=1”的字符串,形成提交给服务端的请求参数
6、@QueryMap 查询参数集合,将在url地址中追加类似
“type=text&username=abc&password=123”的字符串
7、@FormUrlEncoded 对表单域中填写的内容进行编码处理,避免乱码
8、@Field() 指定form表单域中每个空间的额name以及相应的数值
9、@FieldMap 表单域集合
10、@Multipart Post提交分块请求,如果上传文件,必须指定Multipart
11、@Body Post提交分块请求
3、代码步骤:
1、定义一个接口(封装URL地址和数据请求)
2、实例化Retrofit
3、通过Retrofit实例创建接口服务对象
4、接口服务对象调用接口中方法,获得Call对象
5、Call对象执行请求(异步、同步请求)
测试Url:
https://api.github.com/users/basil2style
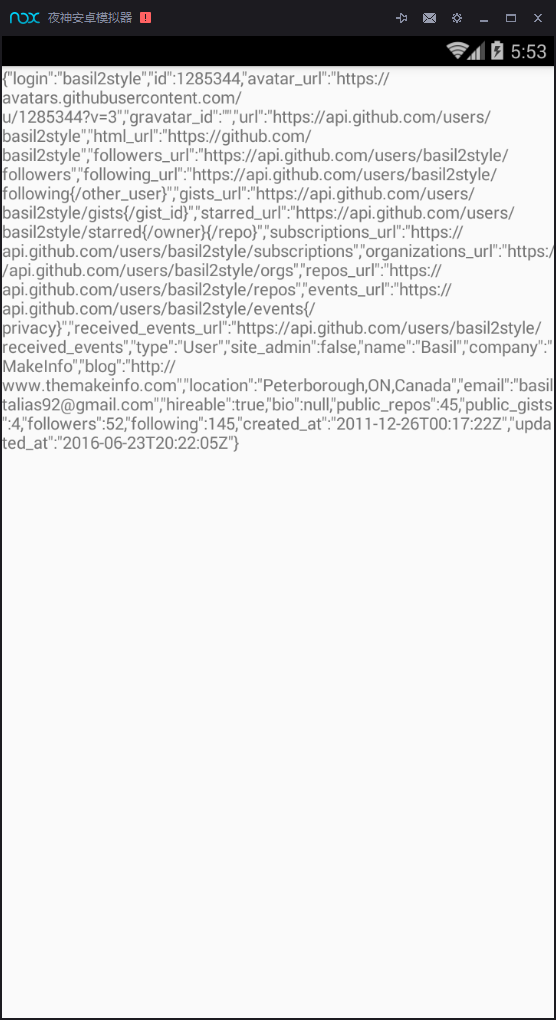
其中https://api.github.com/users/是BASE_URL,也就是基础地址,basil2style是GET的参数,如果访问成功会返回给我们一个json字符串:
{"login": "basil2style","id": 1285344,"avatar_url": "https://avatars.githubusercontent.com/u/1285344?v=3","gravatar_id": "","url": "https://api.github.com/users/basil2style","html_url": "https://github.com/basil2style","followers_url": "https://api.github.com/users/basil2style/followers","following_url": "https://api.github.com/users/basil2style/following{/other_user}","gists_url": "https://api.github.com/users/basil2style/gists{/gist_id}","starred_url": "https://api.github.com/users/basil2style/starred{/owner}{/repo}","subscriptions_url": "https://api.github.com/users/basil2style/subscriptions","organizations_url": "https://api.github.com/users/basil2style/orgs","repos_url": "https://api.github.com/users/basil2style/repos","events_url": "https://api.github.com/users/basil2style/events{/privacy}","received_events_url": "https://api.github.com/users/basil2style/received_events","type": "User","site_admin": false,"name": "Basil","company": "MakeInfo","blog": "http://www.themakeinfo.com","location": "Peterborough,ON,Canada","email": "basiltalias92@gmail.com","hireable": true,"bio": null,"public_repos": 45,"public_gists": 4,"followers": 52,"following": 145,"created_at": "2011-12-26T00:17:22Z","updated_at": "2016-06-23T20:22:05Z"
}
- 1
- 2
- 3
- 4
- 5
- 6
- 7
- 8
- 9
- 10
- 11
- 12
- 13
- 14
- 15
- 16
- 17
- 18
- 19
- 20
- 21
- 22
- 23
- 24
- 25
- 26
- 27
- 28
- 29
- 30
- 31
- 32
好,按步骤开始写代码
1、定义一个接口(封装URL地址和数据请求)
RequestServices.java
package com.example.eventbus.retrofittest;import okhttp3.ResponseBody;
import retrofit2.Call;
import retrofit2.http.GET;/*** Created by LHD on 2016/6/25.*/
public interface RequestServices {@GET("basil2style") Call<ResponseBody> getString();
}
我们通常把基础地址都放在一个类里,方便调用
Constant.java
package com.example.eventbus.retrofittest;/*** Created by LHD on 2016/6/25.*/
public class Constant {public final static String URL_BASE = "https://api.github.com/users/";
}
2、实例化Retrofit
Retrofit retrofit = new Retrofit.Builder().baseUrl(Constant.URL_BASE).build();
3、通过Retrofit实例创建接口服务对象
RequestServices requestServices = retrofit.create(RequestServices.class);
4、接口服务对象调用接口中方法,获得Call对象
Call<ResponseBody> call = requestServices.getString();
5、Call对象执行请求(异步、同步请求)
call.enqueue(new Callback<ResponseBody>() {@Overridepublic void onResponse(Call<ResponseBody> call, Response<ResponseBody> response) {if (response.isSuccess()){try {Log.i("LHD",response.body().toString());String result = response.body().string();textView.setText(result);} catch (IOException e) {e.printStackTrace();}}}@Overridepublic void onFailure(Call<ResponseBody> call, Throwable t) {Log.i("LHD","访问失败");}});
- 1
- 2
- 3
- 4
- 5
- 6
- 7
- 8
- 9
- 10
- 11
- 12
- 13
- 14
- 15
- 16
- 17
- 18
- 19
- 20
- 21
- 22
全部代码:
MainActivity.java
package com.example.eventbus.retrofittest;import android.content.Context;
import android.os.Bundle;
import android.support.v7.app.AppCompatActivity;
import android.util.Log;
import android.widget.TextView;import java.io.IOException;import okhttp3.ResponseBody;
import retrofit2.Call;
import retrofit2.Callback;
import retrofit2.Response;
import retrofit2.Retrofit;public class MainActivity extends AppCompatActivity {private Context mContext = this;private TextView textView;@Overrideprotected void onCreate(Bundle savedInstanceState) {super.onCreate(savedInstanceState);setContentView(R.layout.activity_main);initView();initRetrofit();}private void initView(){textView = (TextView) findViewById(R.id.tv_retrofit);}private void initRetrofit(){Retrofit retrofit = new Retrofit.Builder().baseUrl(Constant.URL_BASE).build();Log.i("LHD","1");RequestServices requestServices = retrofit.create(RequestServices.class);Call<ResponseBody> call = requestServices.getString();call.enqueue(new Callback<ResponseBody>() {@Overridepublic void onResponse(Call<ResponseBody> call, Response<ResponseBody> response) {if (response.isSuccess()){try {Log.i("LHD",response.body().toString());String result = response.body().string();textView.setText(result);} catch (IOException e) {e.printStackTrace();}}}@Overridepublic void onFailure(Call<ResponseBody> call, Throwable t) {Log.i("LHD","访问失败");}});}
}
- 1
- 2
- 3
- 4
- 5
- 6
- 7
- 8
- 9
- 10
- 11
- 12
- 13
- 14
- 15
- 16
- 17
- 18
- 19
- 20
- 21
- 22
- 23
- 24
- 25
- 26
- 27
- 28
- 29
- 30
- 31
- 32
- 33
- 34
- 35
- 36
- 37
- 38
- 39
- 40
- 41
- 42
- 43
- 44
- 45
- 46
- 47
- 48
- 49
- 50
- 51
- 52
- 53
- 54
- 55
- 56
- 57
- 58
- 59
- 60
- 61
- 62
- 63
- 64
我们的代码就是将请求的返回值显示在一个textview上,最后的效果如图所示:
Retrofit2中GET请求的写法
1、GET请求,方法中无参数
@GET(“article/page=1”)
Call<ResponseBody> getString();
2、GET请求,方法中指定@Path参数和@Query参数
@Path用于替换url地址中{和}所括的部分。
@Query将在url地址中追加类似“page=1”的字符串,形成提交给服务端的请求参数@GET(article/list/{type}?)
Call<QiushiModel>getList(
@Path('type')String type,
@Query('page')int page
);
3、GET请求,提交表单数据。方法中定义@QueryMap参数。
@QueryMap参数将在url地址中追加类似 “type=text&count=30&page=1”的字符串。
@GET("MyWeb/RegServlet")
Call<ResponseBody>getKey(@QueryMap Map<String,String>map);
4、GET请求,方法中无参数。但在@Url里定义完整URL路径,这种情况下BaseUrl会被忽略。
@GET("https://ss1.bdstatic.com/70cFvXSh_Q1YnxGkpoWK1HF6hhy/it/u=2299165671,2554860548&fm=116&gp=0.jpg");
Call<ResponsBody>getData();
这就是最简单的retrofit网络访问的过程啦。下一篇会更深入的讲解,POST请求,获取网络图片,使用Gson解析返回的json文件等等。
demo下载:http://dl.download.csdn.net/down11/20160625/78bee478d090a757c4677b9966d4dad2.zip?response-content-disposition=attachment%3Bfilename%3D%22RetrofitTest.zip%22&OSSAccessKeyId=9q6nvzoJGowBj
这篇关于Retrofit2使用(非常简洁易懂)的文章就介绍到这儿,希望我们推荐的文章对编程师们有所帮助!


